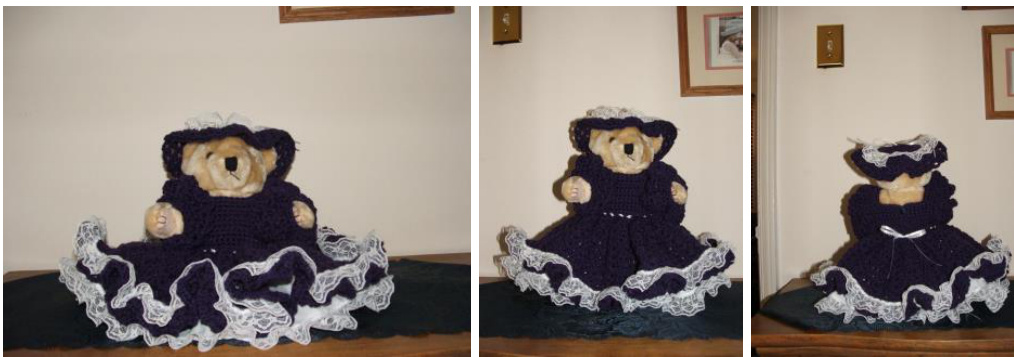
Madam Violet (Dress and Hat for12 inch Teddy with adjustable arms and legs)

Skill Level: Intermediate / Intermediaire / Intermedio Supplies: 8oz worsted wt. yarn; size H/8/5mm crochet hook, yarn needle, 3 yds of 1"' white lace, 1 small button, and about 24 inches of white satin ribbon. Optional underskirt is a 7 inch x 48 inch, white satin fabric and the waistband is 13" x 2" fabric piece, needle and thread. Gauge: 4 sc per inch Stitches Used: ch (chain), sc(single crochet), dc (double crochet), shell stitch ( 2dc, ch1, 2 dc); scdec (decrease single crochet).
Directions: Skirt
Rnd. 1: ch40, join with slip stitch to form ring. Rnd. 2: ch3 (counts as first dc in this and following rnds.), 123 dc in ring; join with slip stitch to beginning dc, ch3, do not turn. Be sure not to twist. 124dc Rnd. 3: skip next dc, shell in next dc, \*dc in next dc, skip next dc, shell in next dc, skip next dc, repeat from \*to\* 29 times, join to beginning dc, ch3, do not turn in this or following rnds. 31shells Rnd. 4: ch3, shell in next shell, \*dc in next dc, shell in next shell\*, repeat from \*to\* 29 times, join to beginning dc, ch3. 31shells Rnds. 5-10: repeat rnd. 3, join, ch1 at end of rnd. 9. 31shells Rnd. 11: sc, ch3 in same st, sc, ch3 in next 2 dc, sc, ch3 in ch-1 sp, sc, ch3 in next 2 dc, \*sc, ch3 in next dc, sc,ch3 in next 2 dc, sc, ch3 in next ch 1 sp, sc, ch3 in next 2 dc\*, repeat from \*to\* around, ending with ch1, dc in first sc for joining, ch1. .ttern may not be reprinted, republished or resold without express written permission. Rnd. 12: sc, ch3 in same loop, \*sc, ch3 in next loop\*, repeat from \* around working a ch1, dc in first sc for joining, ch1. Rnd. 13: repeat rnd 12, fasten off.
Bodice
Rnd. 1: working over rnd. 1 of Skirt, attach yarn at back, center of waistband between sc's. ch1, sc in same space, evenly work 39 more sc around waist, join to beginning sc, ch1, turn. 40sc Rnd. 2: ch1, sc in each sc; do not join, ch1, turn. 40sc Rnd 3-7: repeat rnd. 2. 40sc (right back) Rnd. 8: sc in first 7 sc, ch1, turn. 7sc Rnds. 9-11: sc in first 7 sc, ch1, turn, fasten off at end of rnd. 11. 7sc (left back) Rnd. 8: attach yarn in 7th sc from end of bodice back on rnd.7, ch1, sc in same sc, sc in next 6 sc, ch1, turn. 7sc Rnds. 9-11: repeat rnds. 9-11 of right back (front) Rnd. 8: Skip next 7 sc from right back on rnd. 7, attach yarn in next sc, ch1, sc in same stitch, sc in next 11 sc, ch1, turn. 12sc Rnds.9-12: sc in first 12 sc, ch1, turn. 12sc (firstshoulder) Rnd. 13: ch1, sc in same stitch; sc in next sc, ch1 turn. 2sc Rnds. 14-20: sc in same stitch; sc in next sc, ch1, turn, fasten off at end of rnd. 23, leaving a 10 inch tail. 2sc
(second shoulder)
Rnd. 13: skip next 8 sc on rnd. 12, attach yarn in next sc, sc in same st and in next sc, ch1, turn. 2sc Rnds. 14-20: repeat rnds. 14-20 of first shoulder. 2sc Sew front shoulder straps to corresponding sc's on back bodice to create armhole. Sleeves-Make 2 .ttern may not be reprinted, republished or resold without express written permission. Rnd. 1: right side facing, attach yarn to bottom, center of armhole, ch1, evenly work 28 sc around armhole, join to beginning sc, ch3, do not turn. 28sc Rnd. 2: skip next sc, shell in next sc, skip next sc, \*dc in next sc, skip next sc, shell in next sc\*, repeat from \*to\* 5 times, join around post of beginning dc, ch3, do not turn. 7shells Rnd. 3: shell in next shell, \*fpdc in next dc, shell in next shell\*, repeat from \*to\* 5 times, join around post of beginning dc, ch3, do not turn. 7shells Rnd. 4: repeat rnd. 3, join to beginning dc, ch1, do not turn. 7shells Rnd. 5: sc in same st, skip next 2dc, sc in next ch2 sp, skip next 2dc, \*sc in next dc, skip next 2dc, sc in next ch2 sp, skip next 2dc\*, repeat from \* 5 times, join to beginning sc, ch1, do not turn. 14sc Rnd. 6: sc in each sc around, join to beginning sc, fasten off. 14sc
Finishing
Rnd. 1: attach yarn to bottom left of back bodice, work 8 sc up the back, ch1, skip next row, 2sc in corner; 35sc around neckline; 2sc in next corner, 10sc down the back, join to beginning sc, fasten off. 57sc, 1ch-1 sp. button to right bodice, matching to ch1 loop (buttonhole) on left back bodice Weave ribbon, starting at left bodice back, through sc's at waistband. Leave about a 12 inch tail to tie bow at the back.
Sleeves-Make 2
Rnd. 1: attach yarn, right side facing, to bottom of armhole, ch 1, sc in same space, 30sc around armhole opening, join with slip stitch to first sc, do not turn. 31 sc Rnd. 2: ch1, sc in same stitch, ch 3; sc, ch3 in next sc; \*sc, ch3 in next sc\* repeat from \*to\* around, ending with ch1, dc in first sc. Do not turn. 31ch-3loops Rnds. 3-6: ch1, sc in same loop, ch 3 \*sc, ch 3 in next loop\* repeat from \*to\* around ending with ch, dc in first sc. 31ch-3loops Rnd. 7: ch1, sc in same loop; \*sc in next loop\* repeat from \*to\* around, join with slip stitch to first sc, do not turn. 31sc Rnd. 8: ch1, sc in same stitch; \*scdec over next 2 sc; sc in next sc\* repeat from \*to\* around, join with slst to first sc, do not turn. 22sc Rnd. 9: ch1, sc in same stitch; sc in next 21 sc, join with slip stitch, fasten off. 22sc .ttern may not be reprinted, republished or resold without express written permission.
Finishing
Attach yarn to bottom left of back bodice, 8sc up the back, ch1, 2sc in corner; 43sc around neckline; 2sc in corner of right, back bodice; 9sc down the back. Fasten off. 64sc; 1ch-1 space Sew small button to right bodice, matching to ch-1 loop (buttonhole) on left back bodice. Sew white lace to bottom of last shell row on bottom of skirt. Weave ribbon, starting at left bodice back, through sc's at waistband. Leave about an 8 inch tail to tie bow at the back.
Hat
Rnd. 1: ch2, 8sc in 2"d ch from hook, do not join and do not turn, mark beginning sc, do not turn, in this or following rnds. 8sc Rnd. 2: 2sc in each sc around. 16sc Rnd. 3: \*sc in first sc, 2sc in next sc\*; repeat around. 24sc Rnd. 4: sc in each sc around. 24sc Rnd. 5: \*sc in 2 sc, 2sc in next sc\*; repeat around. 32sc Rnd. 6: sc in each sc around, join with slst to first sc, do not turn. 32sc Rnd. 7: ch1, sc in back loop of same stitch, working in back loops, sc in next 31 sc, join with slst to first sc, do not turn. 32sc Rnd. 8: ch1, sc in same stitch, ch3, \*sc, ch3 in next sc\*, repeat from \* around, ending with ch1, dc in first sc, do not turn. 32ch-3loops Rnds. 9-12: ch1, sc in same loop; ch3, \*sc, ch3 in next loop\*, repeat from \* around ending with ch1, dc in first sc, fasten off on rnd. 11. 32ch-31oops
Finishing
Sew lace to rnd. 6. Attach hat to head of bear, using heavy duty thread. Insert needle through center of hat, then through top of bear's head, then back through hat. Tie off. Insert ribbon through center of hat, tie bow, leaving about a 4" tail on bow.
Underskirt-Optional
Using the larger piece, sew a %2 inch, bottom seam allowance. Sew lace to the right side of seam allowance. Fold in half, width wise and with right sides facing, sew together. .ttern may not be reprinted, republished or resold without express written permission. At top, sew to gather the top to create a 9" waistband. Using the smaller fabric piece, fold in half, width wise, with right sides facing, sew together with 1/8 inch seam allowance. Then with right sides of skirt and waistband facing, sew waist band to skirt. Fold waistband over to the back of the underskirt and sewtobackside. Attach underskirt to crochet skirt at waistband. .ttern may not be reprinted, republished or resold without express written permission.


