MIN VADER HAT
by linden Lea Peters www.Etsy.com/Shop/LindenLeasCrochet Suggested Skill Level: Intermediate
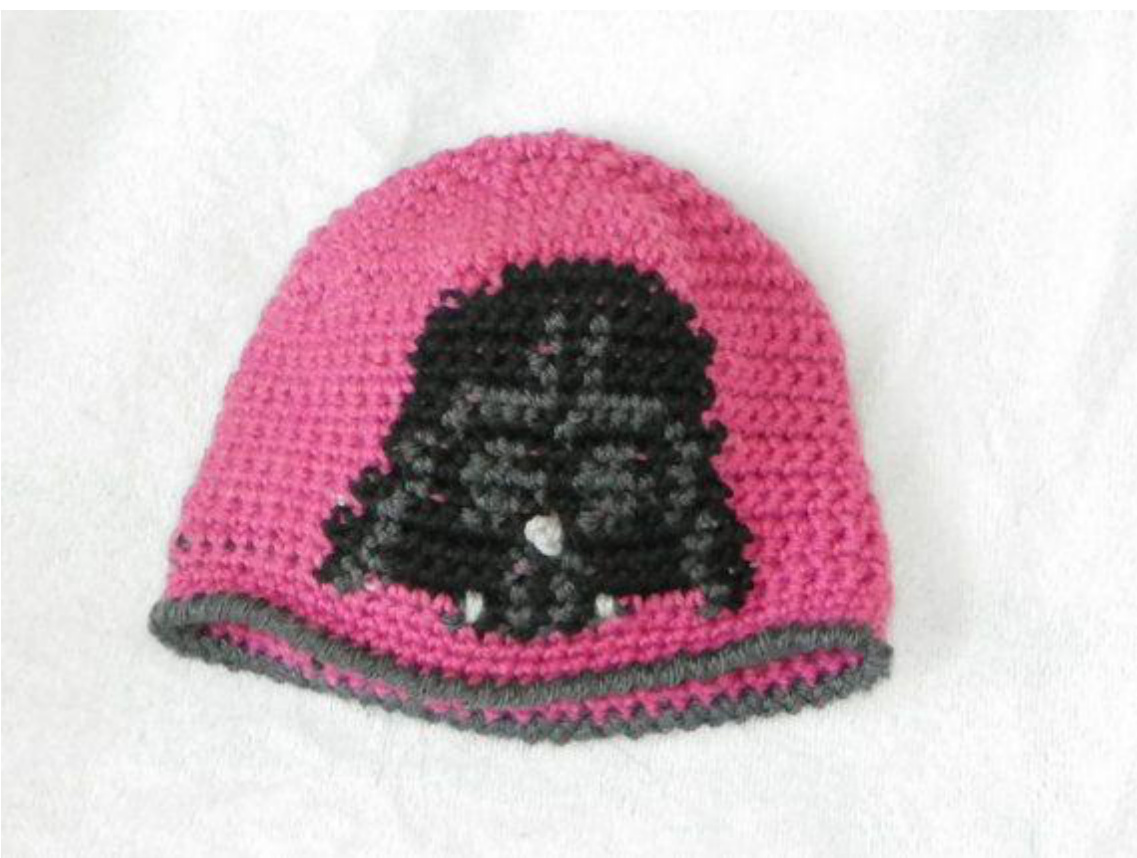
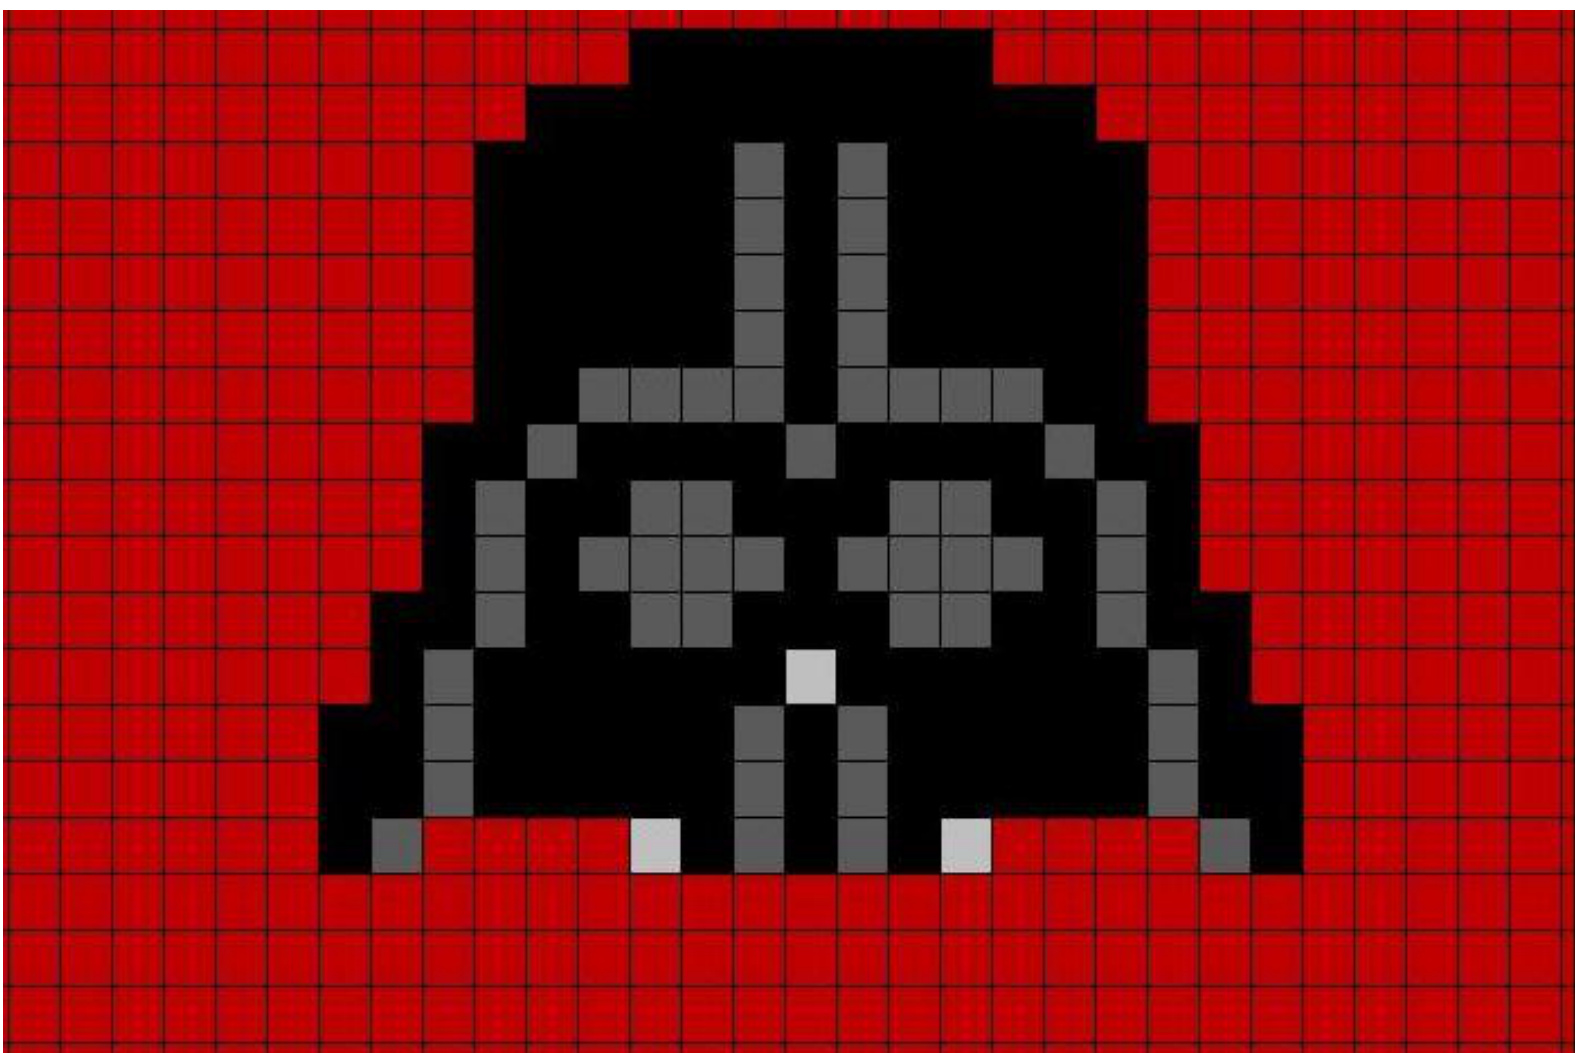
Materials used: - Worsted weight yarn in black, dark gray, light gray, and pink (or whatever you want for the main color) - Stitch markers - Size I hook (I think. Might have been an H) - Size G hook - Tapestry needle and scissors, for finishing. Measurements: for children aged 6-10 (Assumed) Head Circumference: 21" - if you are not sure, measure head around the crown Top: About 6 /" Height, when laid flat: About 8" \*\*NOTES: Size pictured is 6-12 months, so the hat for your daughter will look a bit different. inc = 1sc, 1hdc in same st Helpful intarsia/Fair Isle tips: + When working intarsia in rounds, always sl st to first st made, ch1, and turn. If you really, really want all the stitches to face right side out, then it's time to start learning to crochet with your other hand—it's possible! \* Make the "seam" at the end of each round less noticeable by pulling your sl sts tight, and the beginning ch1 tight on each row. \* When switching yarn colors, work last st of old color up to the last yarn-over. Yarn-over using the new color and complete the stitch, and continue working in new color, carrying along old color. \* Be sure to hold the yarn you are carrying towards the wrong side of the hat \* If you have long floats (yarn not being used) on the wrong side, anchor them by stitching around them every 4-5 sts + Prevent tangling for easier work--Keep one yarn to your left and the other to your right. Instructions Top: Make a magic circle, or ch4 and sl st to beg ch. Rnd 1: sc 7 into the circle, pull tail to tighten. Rnd 2: inc(=1sc, 1hdc) in each st Rnd 3: (1sc in next st, inc in next st), repeat around, insert stitch marker to keep track of the end of each row, move it up every few rows or every row, whatever helps you. Rnd 4: (1sc in next 2 sts, inc in next st), repeat around Rnd 5 onwards: continue pattern until top of hat measures about 6 '/" wide (or whatever number you get when you measure head circumference, subtract 1", and divide by 3.14). in next st when the top of hat is finished. DO NOT Body: \*\*Every round from now on will be: sc around, s st in beginning st, ch I and turn. Determine where to start the intarsia pattern: Remove hook from work. Fold hat in half, with sl st at one end. Place a stitch marker in stitch closest to the center of the other end. This will be the center of the front of the hat. Unfold the hat and hold it like you will when you work on it. Count 3 sts to the right of the center marker, and that's where you will begin the intarsia pattern. Place another marker here, and remove the center marker if you wish. Work 15 rounds as directed above, beginning the top row of the intarsia pattern at the marked stitch. Add each row of pattern into each row of hat. \*\*If it helps, turn the chart upside down, ince that's how i wilook as you wor it into the hat. \*\*The pale gray stitches wil be embroidered on at the end, either with your tapestry needle or with sl sts. For now, work these sts in dark gray. If you don't want to embroider, just work these sts in pale gray. After the 15th round, the Mini Darth Vader image should be complete! Band:
Hold work right side out.
Rnd 1: Using smaller hook and main color, sC around, sl st in beg sC, ch1, DO NOT TURN. Rnd 2: sc around, sl st in beg ch, ch 1. Rnd 3: sc around, sl st in beg ch. Fasten off. Trim: Using black, dark gray, or pale gray, draw up a loop in last st made, ch1, reverse sc around. Fasten off. Finishing: Using sl sts or tapestry needle, embroider pale gray over sts marked in chart. Weave in all ends. Be creative, have fun, and enjoy! Special thanks to Chris Van Meggelen, whose Darth Vader Chart I adapted for this project! Questions? Comments? Contact me on Etsy, Facebook, or Ravelry!