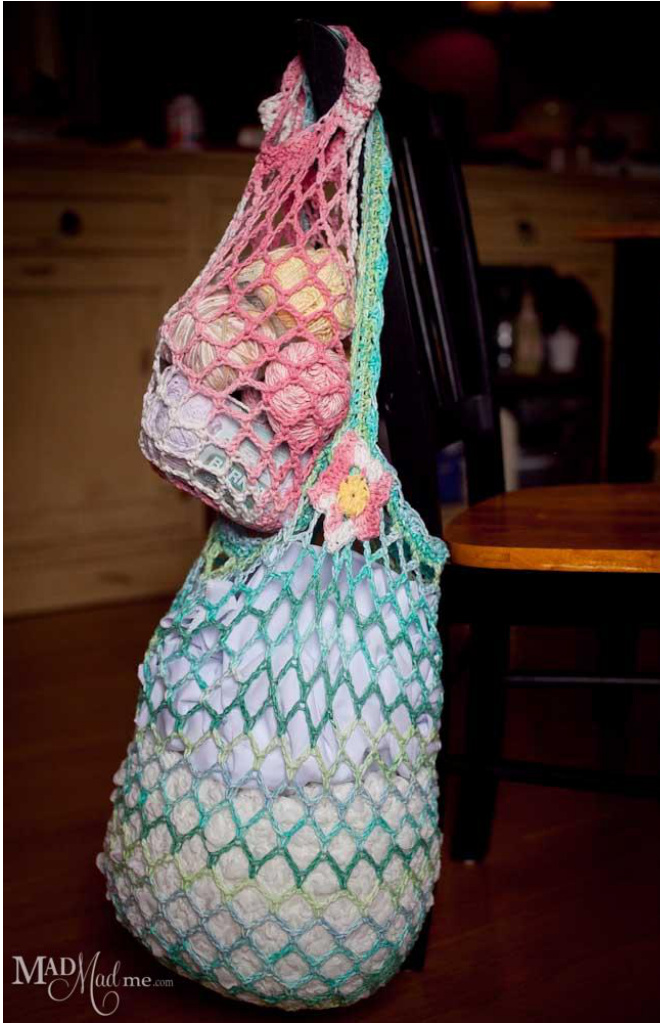
Bags, purses, duffels, wallets, backpacks and baskets. I love containers. It's a strange obsession and I cannot properly explain it, but one of the best reasons to learn to crochet, knit or sew is to create bags, and bags and bags. This is a simple bag, it works up quickly and it stretches to accommodate a lot of stuff. You can use it as a beach tote, market bag or stuff sack for blankets and jackets. Enjoy the pattern below!
\*\*This pattern, all photos and PDF are the copyright of Charissa Ragsdale 2012, and www.MadMadme.com. Do not duplicate this or resell it without express permission of CharissaRagsdale.
Mad Market Bag
Notes: Use appropriate gauge hook for your chosen yarn. In this example, I am using Sugar n Cream Cotton yarn with a 5mm hook. NOTE\*- To add durability to the bag, I am inserting hook under TWO strands of each chain when making the sc sts. Needed: Approximately 6oz of cotton yarn, OR 4 oz of worsted weight, medium(4), yarn. The cotton yarn is much heavier at the same thickness as the acrylic yarns. Use a hook gauged to your yarn specs, or one slightly larger for a good drape on the fabric.
Body:
1-Slip knot ring, ch1, 8 hdc in ring, jn to ch1 (8 sts) 2-ch1, 2hdc in ea hdc of previous row, jn to ch1 (16 sts) 3- ch1, \*2hdc in nxt st, 1hdc in nxt st. Repeat from \* around, jn to ch1, (24 sts) (skip row 3 to createsmallerbag) 4- \*ch5, sc in nxt st. Repeat from \* around (24 ch5 loops)(16 ch5 loops for smaller bag) 5-sl st 2 times into first ch5 loop sp, sc into 3rd ch of same loop, \*ch5, sc into 3rd ch of next ch: loop. Repeat from \* until end of round ONLY CHAIN 3 ON LAST ONE, sc into 3rd ch of the first ch5 loop of that row. 6 -(or row 5 for smaller bag) to end-from here out, you will ch5, sc into 3rd chain of next ch5 loop. The body of my bag now totals 23 rows.(the smaller bag has 17 rows) \*\*This pattern, all photos and PDF are the copyright of Charissa Ragsdale 2012, and www.MadMadme.com. Do not duplicate this or resell it without express permission of CharissaRagsdale.
Edging: For Larger Bag
1-I will begin the edging by doing 3rd sc in each ch5 loop. 2-sc into each sc, around. 3- Now for the small shells: \*sl st in next st, skip next st, 3hdc in next st, skip next st- Repeat from \*
Edging and Handles: For Smaller Bag
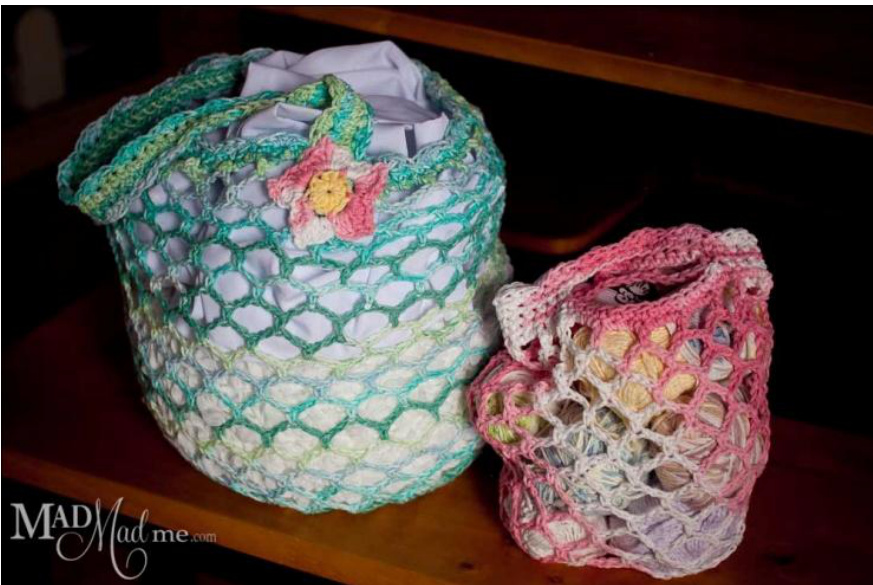
1-I will begin the edging by doing 3sc in each ch5 loop. 3-ch15, skip 15 stitches and sc into next st (this is the first handle!). Sc in the next 10 stitches, ch15, skip 15 stitches and sc into next stitch (second handle made). Continue to sc around until round completed. 4- Now for the small shells: \*sl st in next st, skip next st, 3hdc in next st, skip next st- Repeat from \* (You are working these into the chain stitches too, the shells decorate the handles too). Strap: (for large bag) Make a chain of desired length, hdc in each st all the way around (you will make stitches in the top and bottom of your original chain). Then I used the same scallop edging to finish. Sew strap onto bag, weave in ends. Done! To create SMALLER bag, follow directions above but you will skip the row 3 instructions and jump straight to row 4. Please follow the bolded italicized instructions for the smaller bag. They stretch out quite nicely and I know we will use a slew of these while camping and shopping this summer.
\*\*This pattern, all photos and PDF are the copyright of Charissa Ragsdale 2012, and www.MadMadme.com. Do not duplicate this or resell it without express permission of CharissaRagsdale.
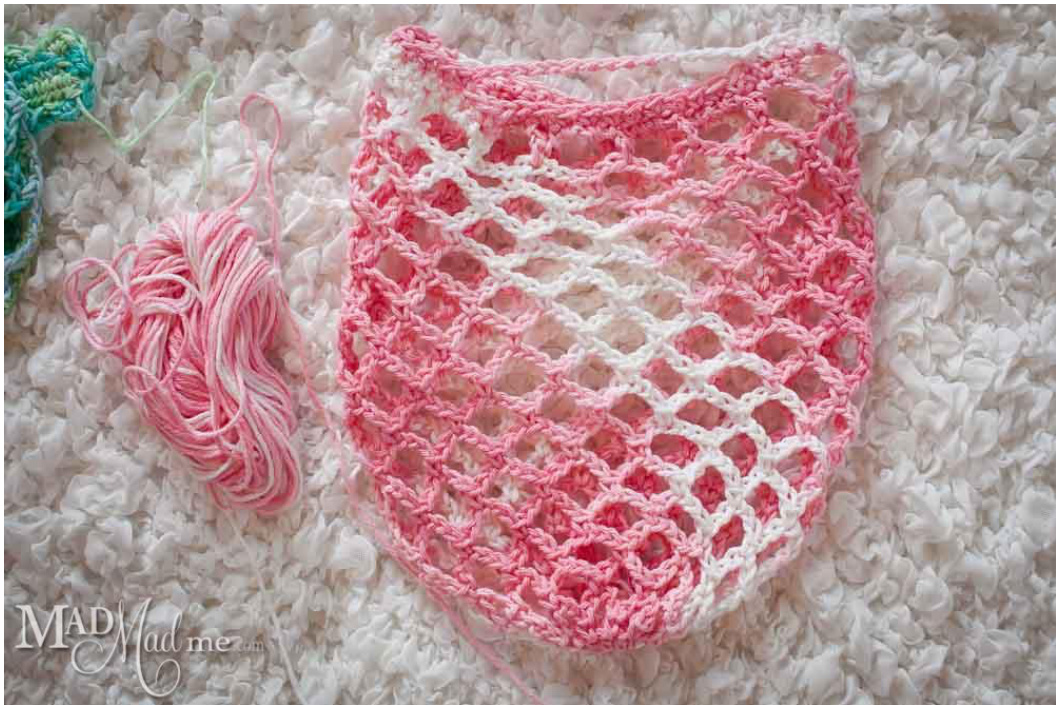
rhis picture of the small bag shows the long chain that will turn into the handl.
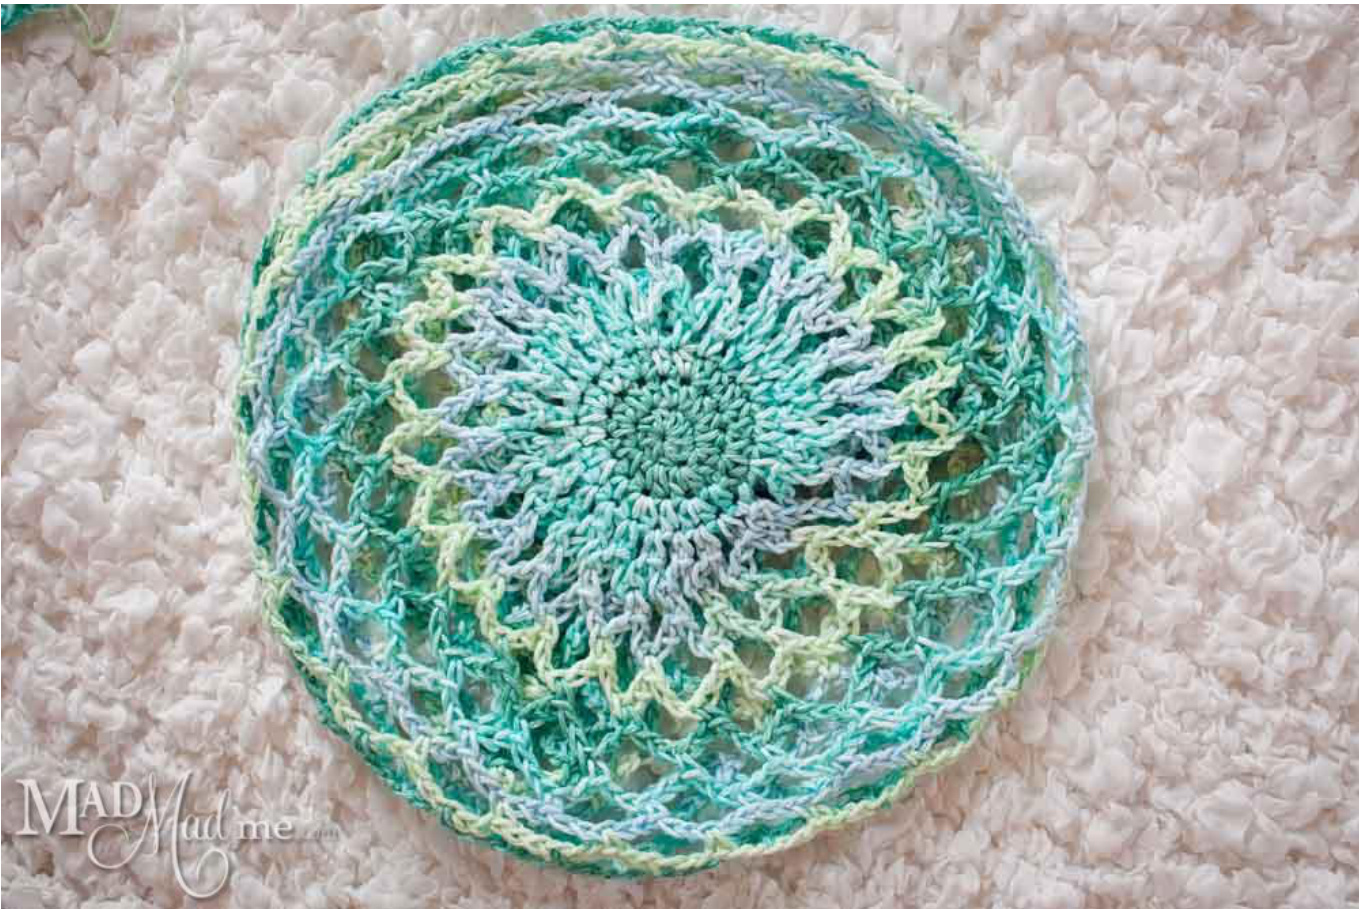
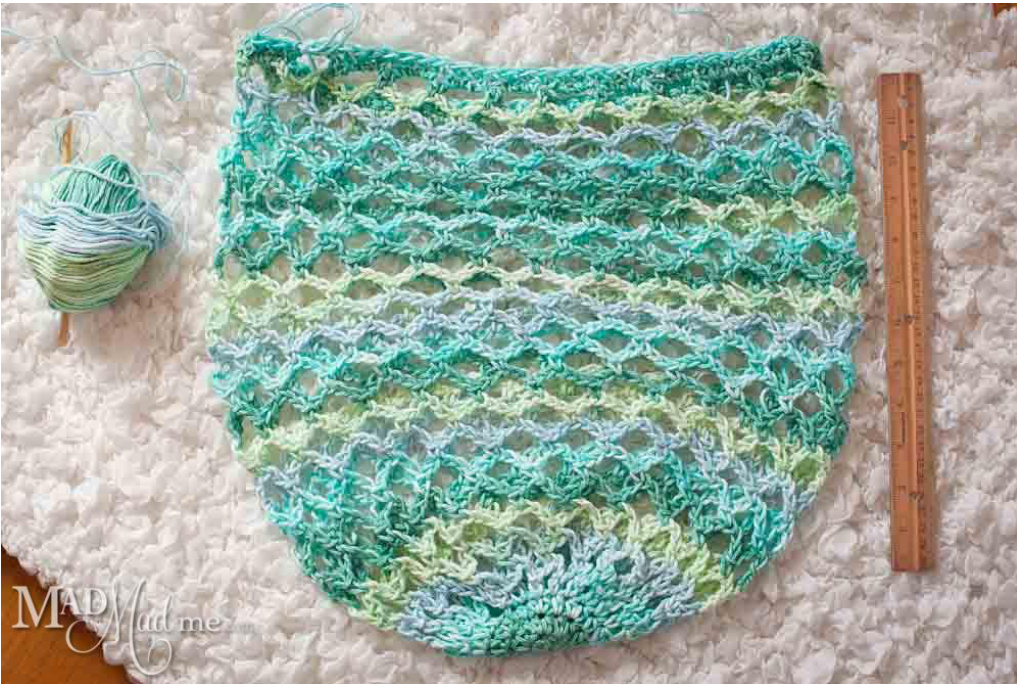
The bottom of the large bag is shown here to give you an idea of building out the loops from the center solid piece. This solid bit adds stability to the bag and helps it hold it's shape when full. \*\*This pattern, allphotos and PDF are the copyright of Charissa Ragsdale 2012, and www.MadMadme.com. Do not duplicate this or resell it without express permission of CharissaRagsdale.
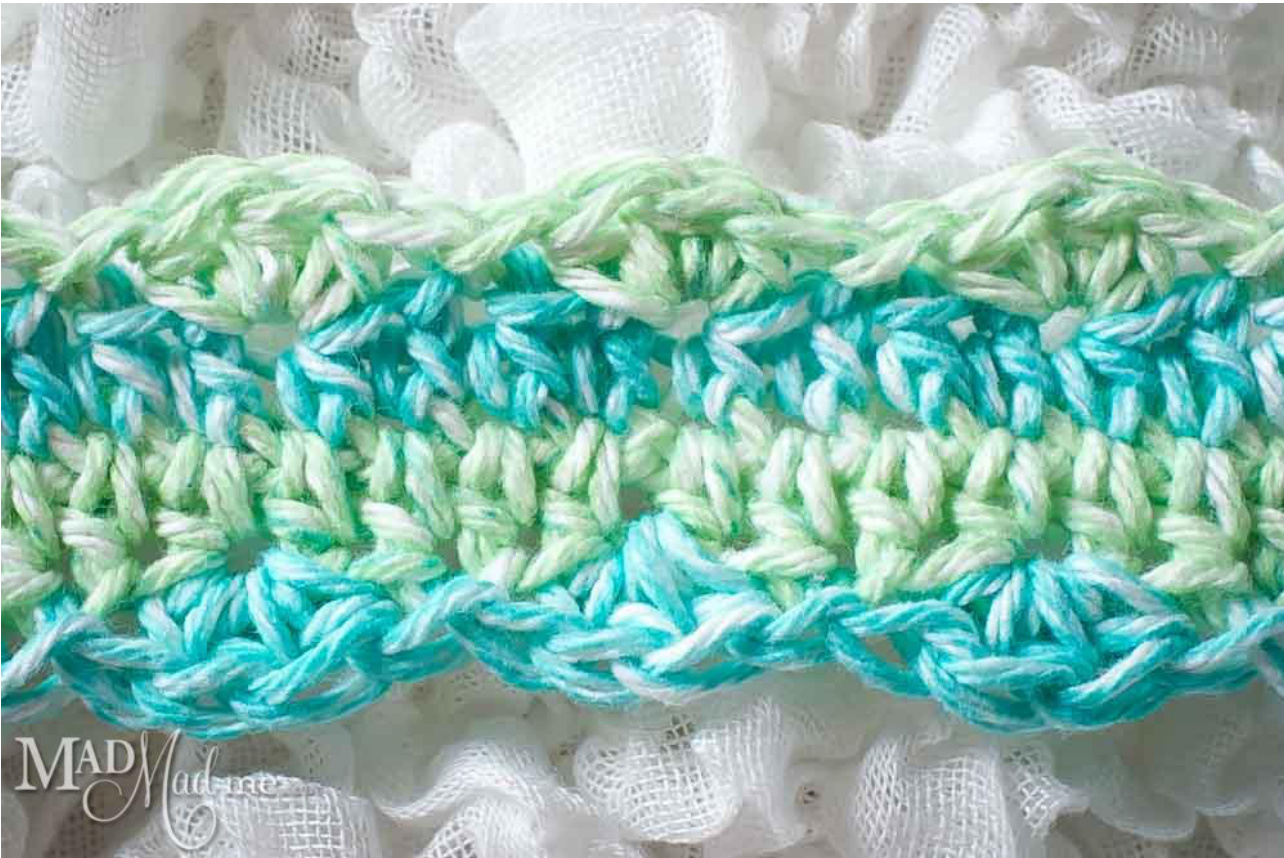
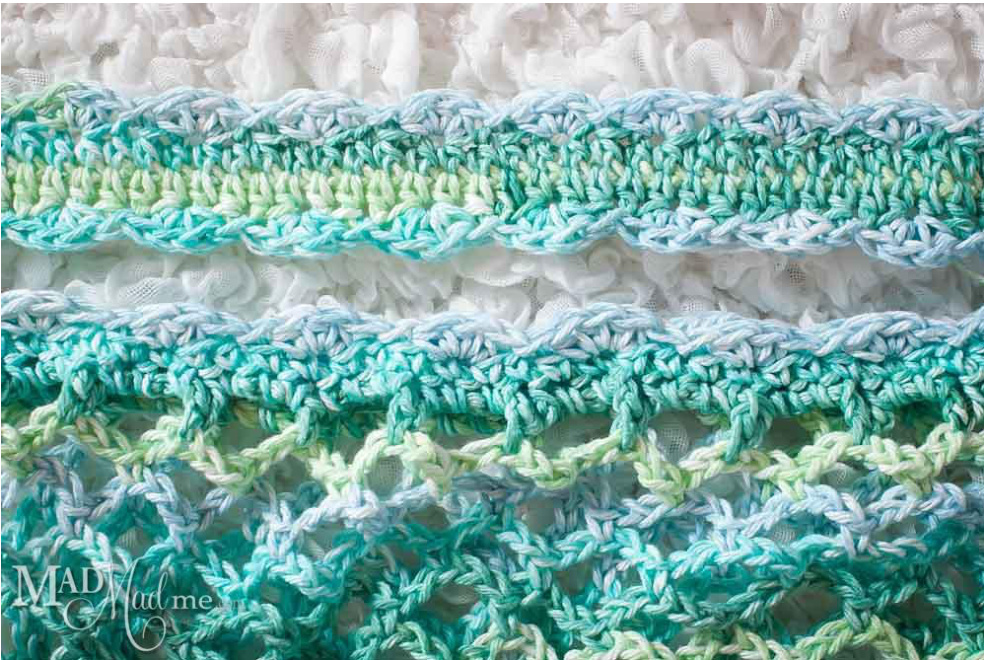
Here is a close up of the scalloping for the large bag. This is done as the last row of the bag and then again around the handle. I like these little finishing touches.

\*\*This pattern, all photos and PDF are the copyright of Charissa Ragsdale 2012, and www.MadMadme.com. Do not duplicate this or resell it without express permission of CharissaRagsdale.


