Contents
About Karma Fairies Materials Skills Abbreviations Techniques Dorothy scarecrow Tin Man Witch Finishing Copyright Information
About Karma Fairies
Karma Fairies are not angels. First of all, no halo. And they have boobs. when was the last time you've seen an angel with boobs? Not being angelic, a Karma Fairy doesn't care who you are or what you believe, her only purpose is to make you smile at her friendly goofiness. Or be a small, goofy gift for someone who really needs a smile. That's some good karma right there. All Karma Fairy patterns are "themed", each featuring four fairy designs with some special details. But each set includes one basic fairy that could be whatever you want it to be. In this set it's Dorothy. Make her in your favorite yarns, let her wear the colors of someone's favorite sports team or school, put a hat on her. Have fun. The following Karma Fairy anatomy is meant to illustrate the elements of each knitted fairy (and also why I knit, not draw).
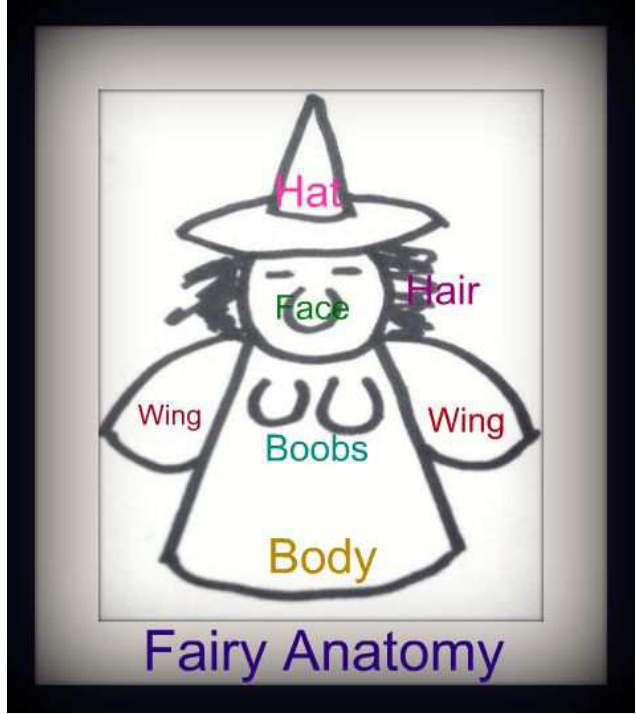
While the face and body of the Karma Fairies remain pretty much the same, except for some color changes, the hair, hat and wings are design elements that can be used to change the character and theme of the fairy.
Materials
Fingering weight, DK or sport weight about 50 m/55 yards per fairy, various colors Straw-colored fun fur Yarns used here: Debbie Bliss Cashmerino (gray) Rowan Handknit Cotton (brown) Elann Sonata (green, orange, cream) Red Heart Sport (black) Berroco Comfort DK (periwinkle) Handspun (witch-face green) Lion Brand Fun Fur (straw) 4 double-pointed needles (dpns), 2.5 mm (US 1). Darning needle Fiberfill, plastic pellets or other stuffing
Skills
To make Karma Fairies, you should be able to: Knit/purl/cast on/cast off Increase/decrease Work in the round with dpns (or 2 circular needles) I don't like categorizing patterns by skill level. There is no reason why these fairies shouldn't be fine for beginners. Just try them.
Gauge
Gauge doesn't matter for the Karma Fairies, except that the gauge of all the yarns you use should be fairly similar (see: Materials). But for people like me, who get nervous if they don't have gauge information, here it is: $24\;\mathsf{s}\dagger\times30\;\mathsf{r o w s}=4\mathsf{x}4$ inches $(10\times10c m)$ in stockinette stitch on 2.5 mm needles.
Abbreviations
$K=k\mathsf{n i t}$ $K2\dagger0\boldsymbol{\Theta}=$ knit two stitches together $\mathsf{M}\rceil=\mathsf{m a k e}\mid$ $\mathsf{P}=\mathsf{P}\mathsf{U}\mathsf{r}|$ Psso = pass slipped stitch over $\mathsf{R}=\mathsf{r o w}$ $\mathsf{R S}=$ right side ${\mathsf{S}}{\mathsf{I}}={\mathsf{\Omega}}$ slip $\mathsf{S S K}=$ slip 2 st, knit them together ${\mathsf{S}}{\mathsf{f}}=$ stitch/stitches Tbl $=$ through back loop $\mathsf{W S=}$ wrong side Yobf $=$ yarn over back to front
Techniques
The booble:
The booble is an anchored bobble. It sits more tightly in its place and doesn't gape when the fairy is stuffed. RS: ml, (k 1, yobf, kl, yobf, kl) in same stitch, turn. Ws: p 6, turn. RS: sl 1 purlwise, \*k 2tog, replace st on left needle\* repeat 3 times from \* to\*, lift bar between booble and next st, k st and bar together tbl, knit rest of round.
For nose:
RS: ml, (k 1, yobf, k1) in same stitch, turn. WS: p 4, turn. RS: sl 1 purlwise, \*k 2tog, replace st on left needle\* repeat once from \* to\*, lift bar between booble and next st, k st and bar together tbl, knit rest of round. Next round (both versions): K to slipped st before booble, k this st and booble st together. Instructions for this round are given.
Techniques (cont.)
Make 1 (M1):
Lift the bar between two st, place on left needle, knit through the back.
Yarn over back to front (Yobf):
Wrap yarn around right needle once, making sure that the yarn is at the back of the needle, being wrapped round to the front.
I-Cord:
RS: when you come to the end of the row, do not turn. Instead, push the stitches to the other end of the needle, pull the working yarn tight in the back and knit the next row.
Picot cast-off:
Cast on 2 (cable cast on) cast off 4 st, slip last st back on left needle, repeat.
Cable cast-on
Knit into the first stitch, do not slip the stitch off the left needle, but place the new loop on the left needle. Poke the right needle through the gap between the stitch and the new stitch, pull yarn through, place this new loop on the left needle, repeat as needed, always using the gap between the first two stitches on the left needle.
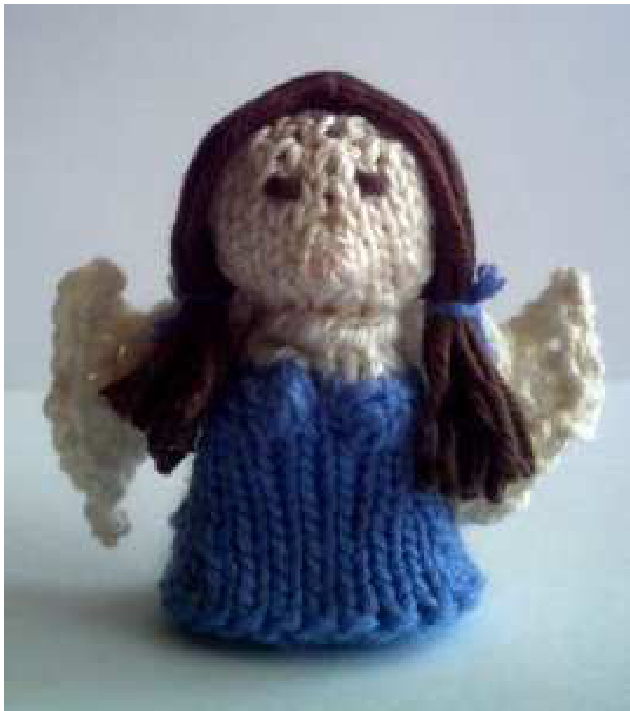
Dorothy
Dorothy is the “basic fairy", easy to modify and the prototype for all fairy bodies and heads of this set. Her wings were inspired by the sleeves of movie Dorothy's blouse.
Yarn colors:
Blue, white, cream/nude/skin, brown
Body:
Cast on 6 st in blue, divide on 3 dpns, join Round 1: k Round 2: kfb in all stitches Round 3: k Round 4: kfb in all stitches Round 5-7: k Round 8: p Round 9-11: k Round 12: k 6, ssk, repeat twice Round $13+14:k$ Round 15: k2tog, k 5, repeat twice Round 16-20: k Round 21: k 4, ssk, Round 22: k 5, kl, m booble, kl, m booble, kl, k 5
Dorothy (cont.)
Note: Make the second booble before completing the last booble round, so that you anchor both by knitting them together with the slipped stitch in the same round—see Round 23) Change to contrasting colour (white) Round 23: k5, k1, k2 tog, kl, k2tog, ki, k5 Round 24: k2tog, k 3, repeat twice Cast off all st
Head:
Cast on 6 st in nude/cream, divide on 3 dpns, join Round 1: k Round 2: kfb in all stitches Round 3: k Round 4: kfb in all stitches Round 5-8: k Round 9: k 8, k 4, m booble, k 3, k 8 Round 10: k2tog, k 4, ssk, k2tog, k 2, k2tog, kl, ssk, k2tog, k 4, ssk Round 1l: k Round 12: k2tog, k 2, ssk, repeat twice Cast off all st Wings (make 2): The wings are worked back and forth Cast on 3 st in white Rl: kl, pl, kl R2: kl, ml, kl, ml, kl R3: kl, p3, kl R4: k R5: kl, p3, kl R6: k2, ml, kl, ml, k2 R7: kl, p5, kl R8: k R9: p R10: kl, ssk, kl, k2tog, k1 Rll: kl, sll, p2tog, psso, kl R12: kfb, m1, kfb, m1, kfb R13: kl, p6, kl R14: Loosely cast off all stitches.
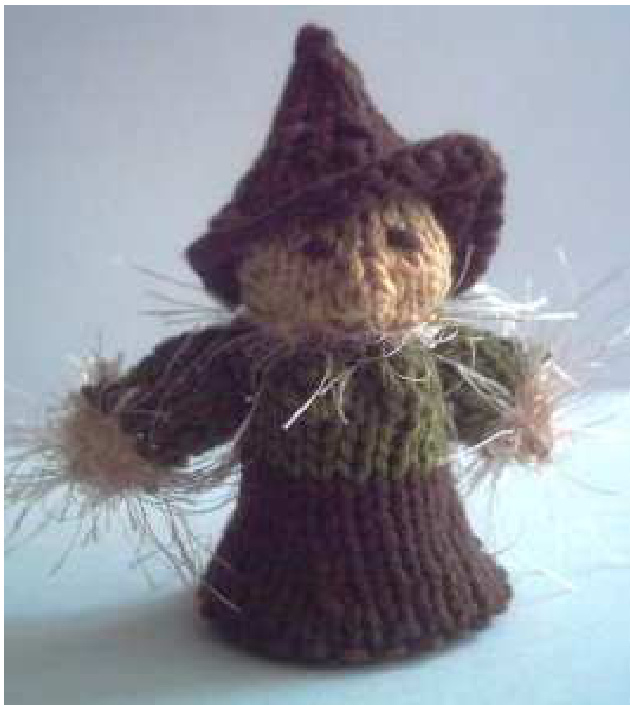
Scarecrow
Yarn colors:
Brown, green, light yellow/straw/beige Fun fur in beige/gold/straw Body: Make body as for Dorothy - in brown - and change to green in round 20. Head: Make head as for Dorothy in beige/straw.
Hat:
Cast on 36 st in brown, divide on 3 dpns, join Round 1: k Round 2: k2tog, k 3, k2tog, k 3, ssk, twice Round 3: k Round 4: k2tog, k to last 2 st, ssk, repeat twice Round 5: k Round 6: kl, ssk, kl, k2tog, kl, repeat twice Round 7: k Round 8: k2tog, k1, ssk, repeat twice Round 9-11: k Round 12: Slip 1 purlwise, k2tog, psso Break yarn, pull through 3 remaining stitches, pull tight.
Scarecrow (cont.)
Wings (make 2): The wings are worked back and forth. Cast on 3 st in green R l: kl, p, kl R 2: kl.ml. kl, ml, kl R 3: kl,p,kl R 4:k R 5: p R 6:kl, kl, ml, kl, ml, kl, kl R 7: p R 8: kl, k2tog, kl, ssk, kl R 9: kl, p, kl Change to light fun fur R 10:k R 1l: kl, p, kl R: 12: ssk, k1, k2tog R 13: slip 1 purlwise, p2tog, psso Break yarn, pull through last st, pull tight.
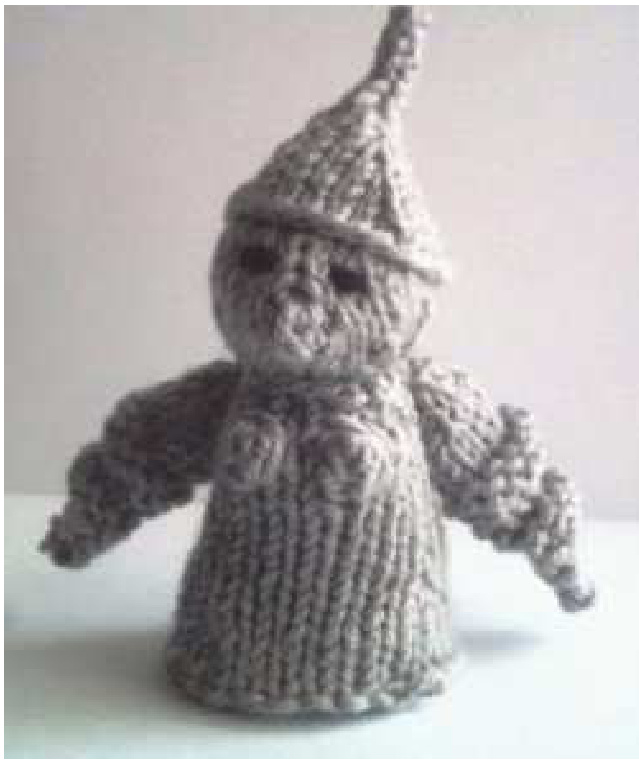
Yarn colors: Well, gray. And black for the eyes. Body: Make body as for Dorothy, in gray Head: Make head as for Dorothy. In ... you've guessed it, gray
Cast on 24 st in youknowwhat, divide
on 3 dpns R 1:k R 2: k2tog , k4 ssk, repeat twice R 3: k R 4: k2tog, k2, ssk, repeat twice R 5: k R 6: k2tog, ssk R 7: k R 8: k2tog 3 times, pass all st on 1 needle for i-cord Work about 1/3 inch of i-cord To finish: sll k2tog, psso Break yarn, pull through last st, pul tight.
Tinman (cont.)
Wings (make 2) The wings are worked back and forth Cast on 3 st in any color you want, as long as it's gray R 1: kfb, kl, kfb, R 2: p R 3:kl, ml, k3, ml, kl R 4: p R 5: kl, ml, k5,ml, kl R 6: p R 7:k R 8-9: p R 10:k R 11: ssk, k5, k2tog R 12-13: P R 14:k R 15: ssk, k3,k2tog R 16: p R 17: ssk, k1, k2tog R 18: p R 19: sll, k2toa, psso Break yarn, pull through last stitch, pul tight.
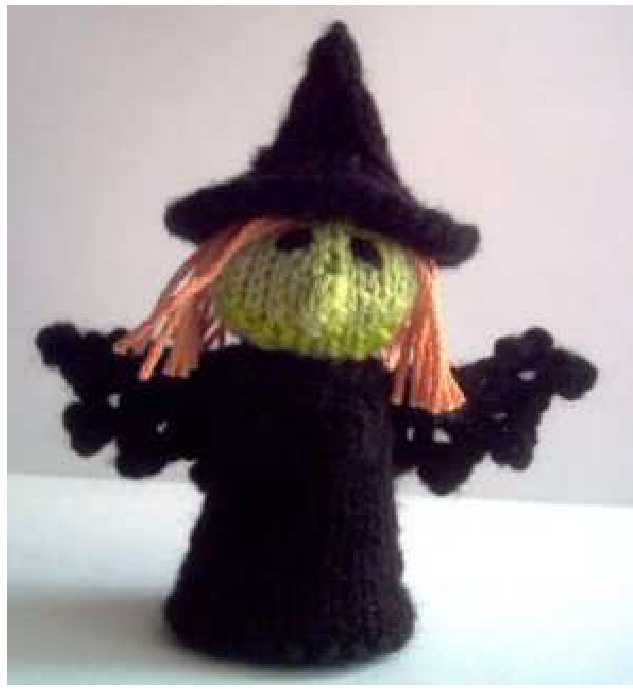
Witch
(Wicked? I'm thinking ... assertive.) Yarn colors: Black, witch-face green, brown or orange Body: Work body as for Dorothy, in black. Head: Work head as for Dorothy, in green
Hat:
Cast on 48 st in black, divide on 3 dpns Round l: k Round 2: k2tog all around (24 st) Round 3: k Round 4: k2 tog all around (12 st) Round 5-6: k Round 7: k2tog, k2, repeat twice Round 8: k Round 9. k2tog, kl, repeat twice Round 10: k Round 1l:k Round 12: sll,k2tog, psso, repeat twice, pass all st on one needle Round 13: Sll1, k2tog psso
Witch (cont.)
Break yarn, pull through last stitch, pull tight.
Wings (make 1):
Wings are worked back and forth Cast on 20 st in black R 1: k R 2: kl, ml, k 7, ssk, k2tog, k7, ml, kl R 3: kl, p, k last st R 4: kl, m1, k7, ssk, k2tog, k7, ml, kl R 5: kl, purl, k last st R 6: work picot cast off
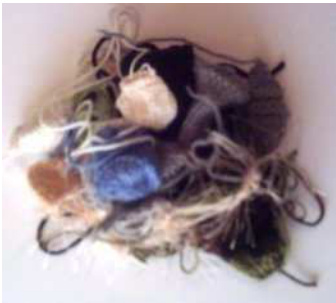
Finishing is essentially the same for all fairies, just attach hair and hats as needed. Stuff the body with pellets/stuffing of your choice. The fairy will stand up better, if you use pellets (or small leftover glass beads) in the bottom of the body or for the entire body. while I'm not a big fan of plastic products in general, I don't recommend using rice or beans, but organic toy stuffing products are fine, of course. You can shape the body the way you like. I like my fairies short and plump, but if you prefer them a little more slender, you can just use the pellets in the bottom and minimal stuffing for the rest. Attach wings to the back, using the tail you left on the wings. You might want to place the wings roughly opposite the boobs, but anything goes, really. Tuck the leftover tail into the fairy body, it's not going anywhere once everything is sewn up. With black yarn, stitch the eyes by making two horizontal stitches to the left and right of the nose. Begin by putting the needle through from the inside, so that your tail will be on the inside of the head. End the same way. Note that you can change the fairy's expression with the eye placement. Straight, horizontal stitches give α serene look. Slanted stitches with the lower end pointing toward the nose look slightly evil (but of course in a good karma way), while slanted stitches with the higher end pointing toward the nose lookäαbit woebegone. Pull the thread tight, but you don't have to secure it, just stuff all tails into the head. Fill the head with stuffing, it will secure the tails at the same time. Shape head. It helps if you roll it between your palms a few times, You can always plump up the nose a bit when you're done. Attach head to body, using the tail you left affter casting off the body. Attach hair and/or hat to head, using the tail you left on the hat. Smoosh into shape.
Hair (Dorothy and Witch):
You need: Yarn Box or other small square object Darning needle
Finishing (cont.)
Copyright Information
Choose the hair color. All kinds of yarn will work, but it's best to use yarn that is not plied too tightly. Find a box, building block, piece of sturdy cardboard or anything square with a circumference of approx. 6 inches $(12.5\;\mathsf{c m})$ . It can be bigger, but I wouldn't recommend using a much smaller one. Wrap the yarn tightly around the box, but make sure that you will be able to slide the wraps off when you are done. Wrap for about 1.5 inches (4 cm). Thread the darning needle with the same color yarn (leave a long tail) and push the needle through the strands of yarn, one by one. Pull the thread on the needle through all the strands.
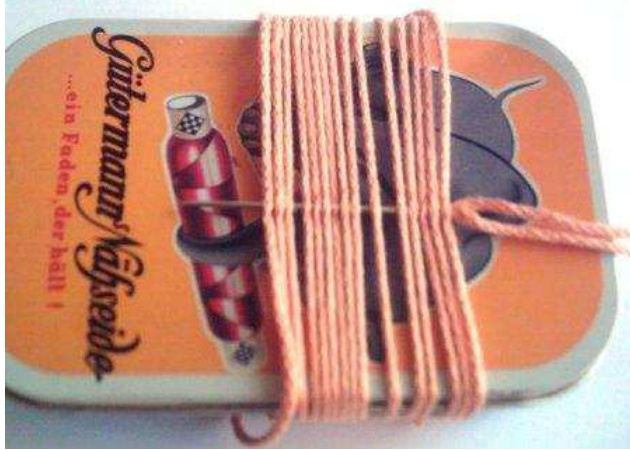
When all strands are secured, slide them off the box. You now have a row of loops hanging from a thread. Cut the loops on the opposite side of the thread. Think of the thread as the middle part of your fairy's 'do. Sew hair to top of the head with the tail of the thread, neatly catching a few strands with each stitch. Cut hair to desired length. For Dorothy, tie the hair into pigtails with two snippets of the yarn you used for her body. This pattern is for personal use only. Reproduction and/or distribution of this pattern is prohibited unless specific written authorization has been obtained from the author. This includes, but is not limited to reproduction in print or other media and distribution via the Internet. The pattern is published exclusively as a PDF document. Printed copies of this document are for personal use only and may not be sold or otherwise distributed. Since the Karma Fairies are fairly quick to make, they might be suitable for fundraisers or other kinds of sales. If you intend to use this pattern to make products for any commercial Or charitable use, please contact me first at thomsen.katja@googlemail.com or send a message to Storyteller on Ravelry. Pattern support: thomsen.katja@googlemail.com or send a message to Storyteller on Ravelry.


