AMIGURUMI SHRIMP DELIGHT
AMIGURUMI SHRIMPDELIGHT
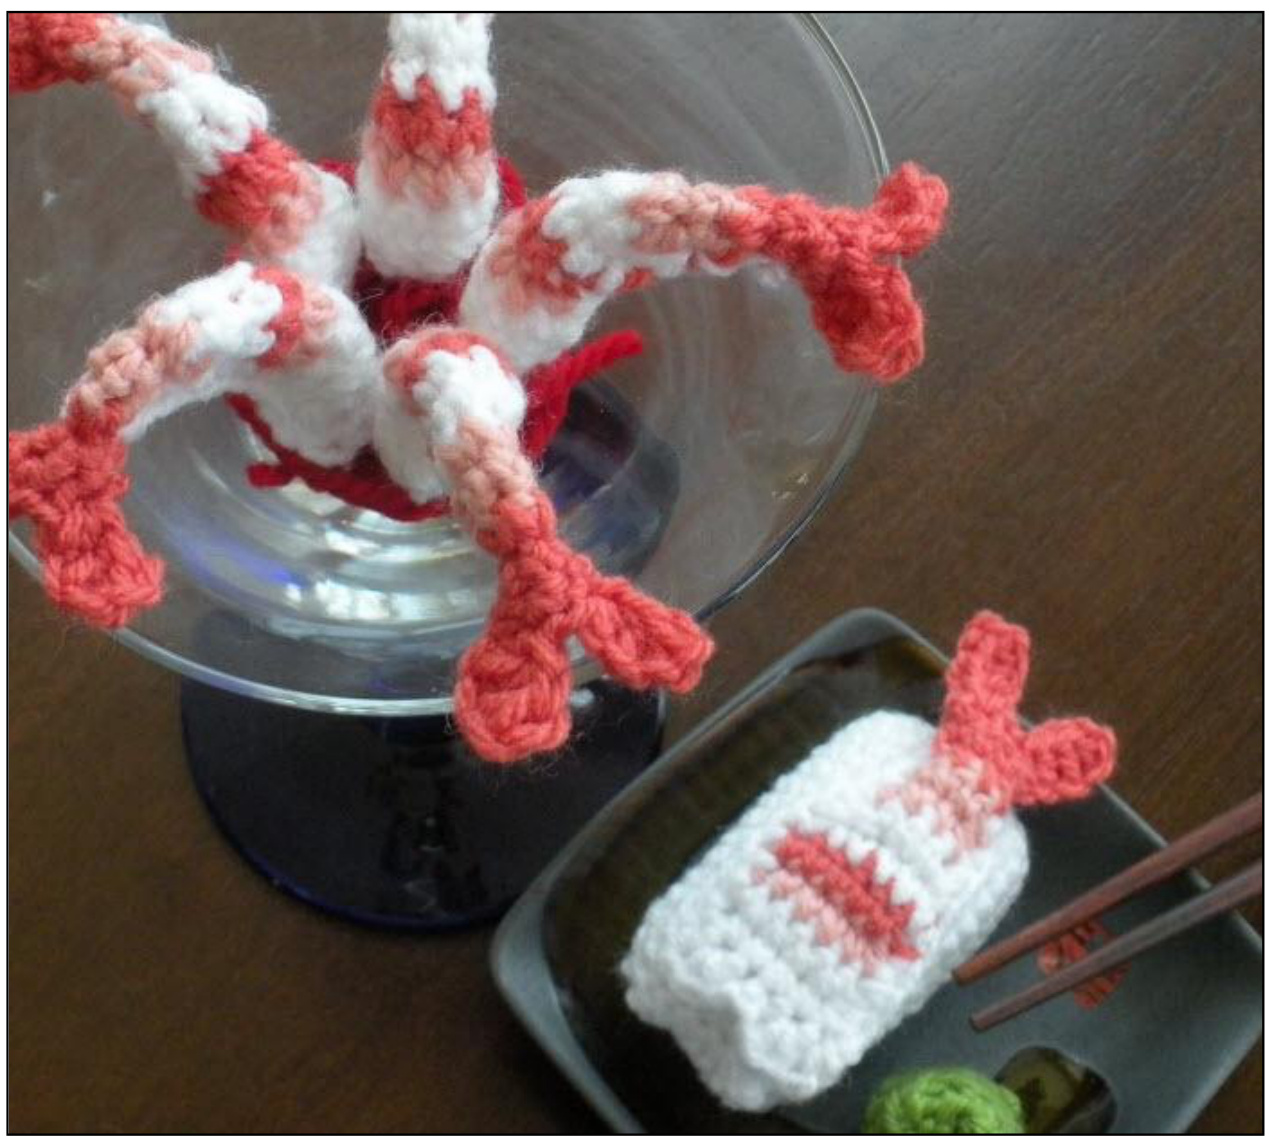
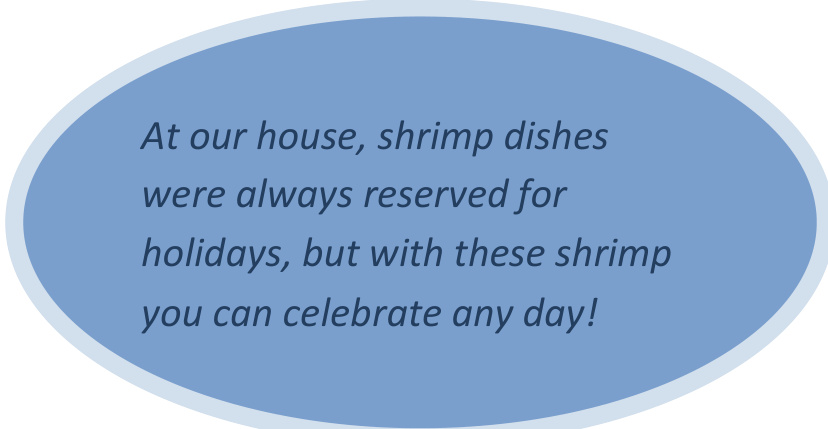
At our house, shrimp dishes were reserved for holidays, but with these shrimp you can celebrate any day!
MATERIALS
· Small amounts of sport weight yarn in white, pink and salmon pink (see pattern notes for specific yarns used) Fiber fill · Size E crochet hook (or ize needed to obtain gauge) · Yarnneedle · Stitch marker
PATTERN NOTES
Stitches and abbreviations used in this pattern: CH chain stitch SC single crochet HDC half-double crochet DC double crochet DECR decrease SL slip stitch ST stitch STS stitches MM move marker FO finish off For the project shown in the photographs, Iused Red Heart Designer Sport yarn in Terra-cotta and Iivory, and Patons Classic Woolin Petal Pink.
PART 1: SHRIMP BASE
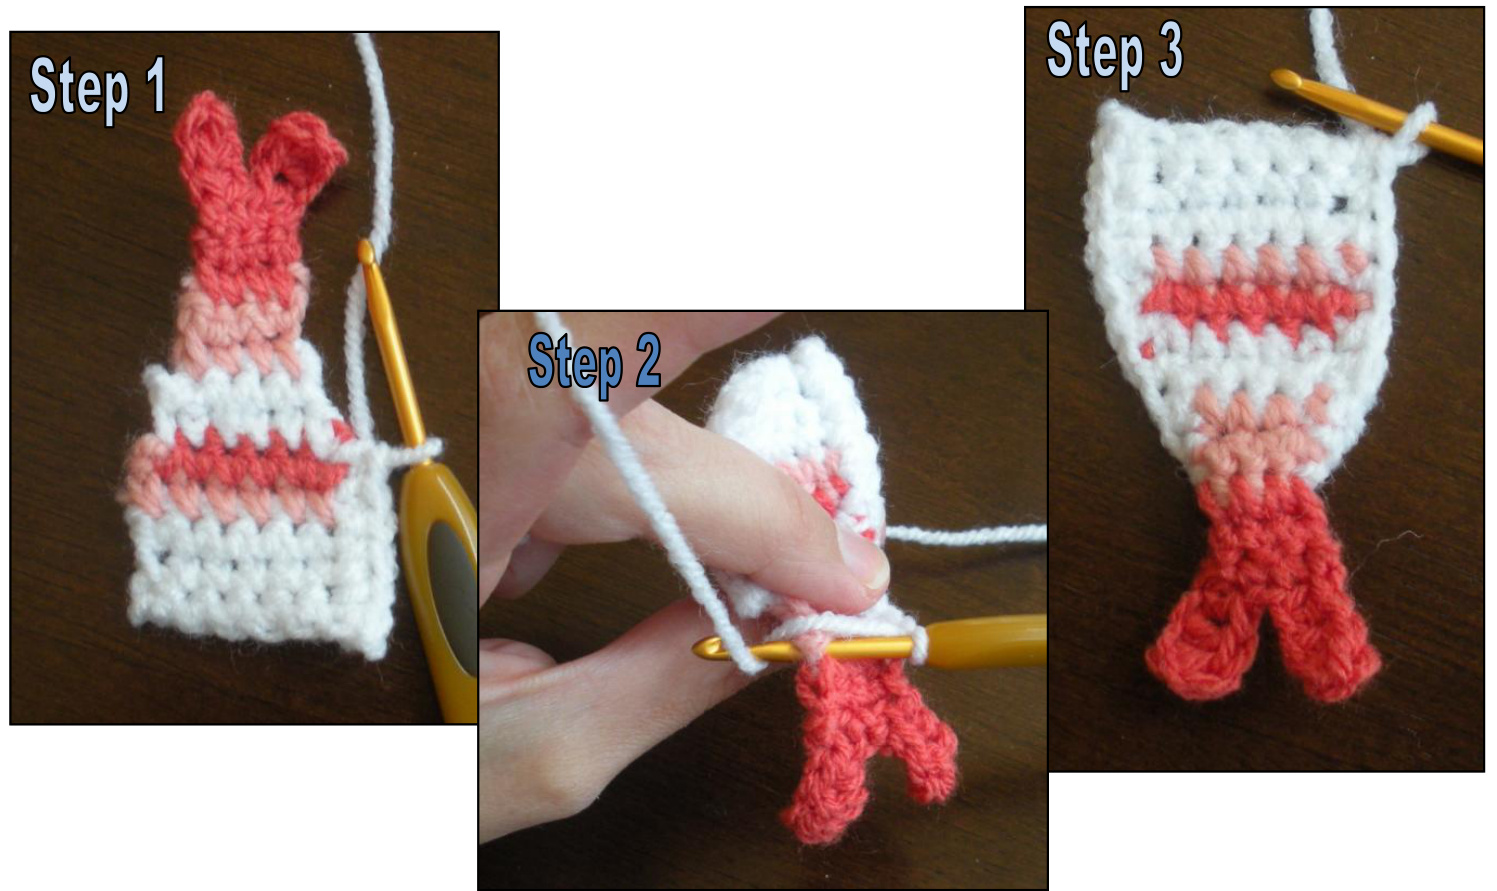
The cocktail shrimp and the filleted (sushi) shrimp both use the same base. The difference between the two pieces is in how the final row or round is attached. These instructions will allow you to make the striped base with two tail flippers. In the next section, you will choose to finish your shrimp using either the cocktail finishing or the fillet finishing. Note: The shrimp base is worked in rows. Weave in ends as you go. SHRIMP BASE Row 1: With white, CH 7.SC in second CH from hook and in 5 remaining CH STS (6 SC). CH 1 and turn. Row 2: SC in each of the 6 STS (6 SC). CH 1 and turn. Row 3: SC in each of the 6 STS (6 SC). Break off white and change to pink working yarn. Turn.
Row 4: SC in each of the 6 STS (6 SC). Break off pink and change to salmon pink working yarn. Turn. Row 5: SC in each of the 6 STS (6 SC). Break off salmon pink and change to white working yarn. Turn. Row 6: SL in first SC. SC in each of the next 4 STS. Leave last SC unworked (4 SC). Break off white and change to pink working yarn. Turn.
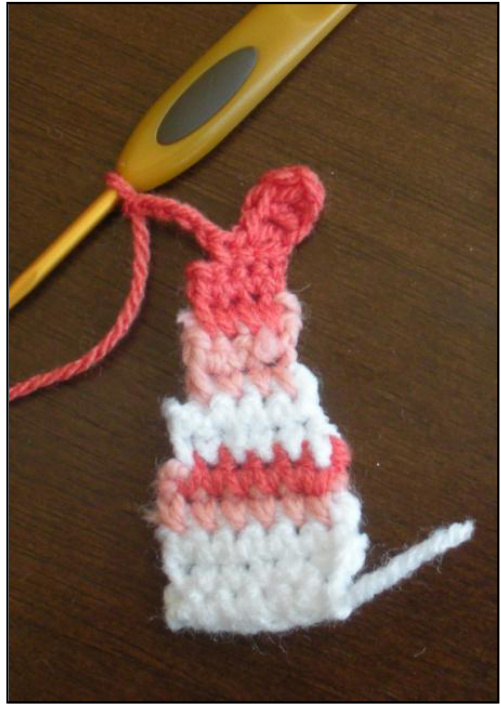
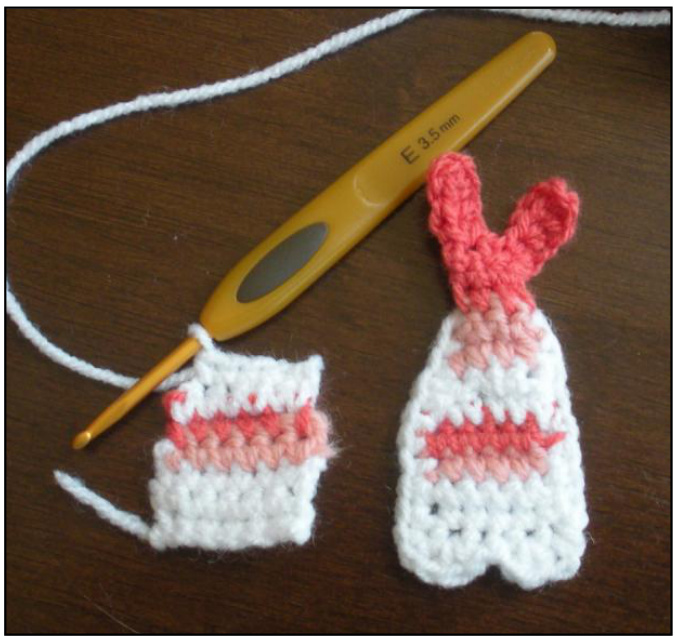
Figure 2: Shrimp base after completing 1 flipper. Row 7: SC in each of the next 4 STS (4 SC). CH 1 and turn. Row 8: SC in each of the next 4 STS (4 SC). Break off pink and change to salmon pink working yarn. Turn. Row 9: SC in each of the next 4 STS (4 SC). CH 1 and turn. Row 10: SC in each of the next 4 STS (4 SC). Turn. Row 11: CH 4. In second CH from hook, work 1 HDC. Work 1 DC in next CH and 1 HDC in following CH. Attach with SL to the next SC from Row 10. SL in next SC. CH 4. In second CH from hook, work 1 HDC. Work 1 DC in next CH and 1 HDC in following CH. Attach with SL to the next SC from Row 10. FO
PART 2: FiNISHInG - FIlLETEd (SUSHI) SHRiMP
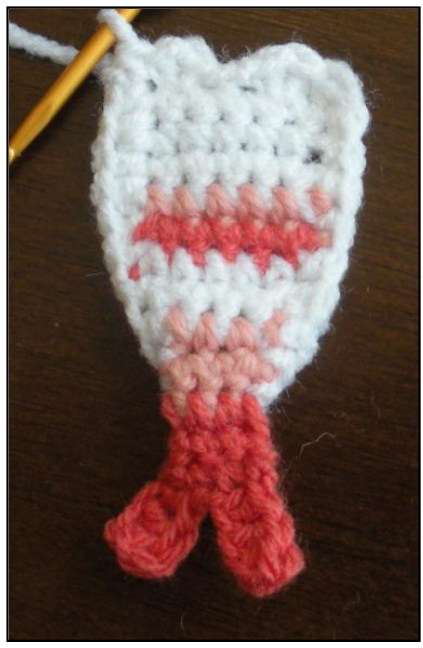
To finish the flleted (sushi) shrimp, we will work a single crochet border along the left and right sides of the piece. We'll then add a scallop edge to the top of the piece to finish off. When you're done with this part, see part 4 for instructions to make the rice. Step 1: Join white with SL to side of first SC from row 1. SC evenly along right side of the piece. Step 2: Cary the working yarn across the back of the shrimp (under the tail flippers) and join to left side with 1 SC Step 3: SC evenly along the opposite side.
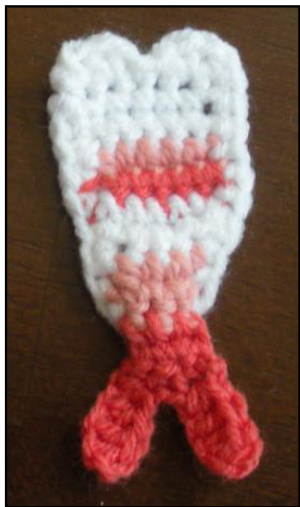
Step 4: Turn the piece so that the free loops from the foundation chain are at the top. SC in the first free loop. 2 DC in the second free loop. SL in the next two loops. 2 DC in the following loop and finish the last loop with a SC. FO and weave in ends. Your finished filleted shrimp willok like this:
PART 3: FINISHING - COCKTAIL SHRIMP
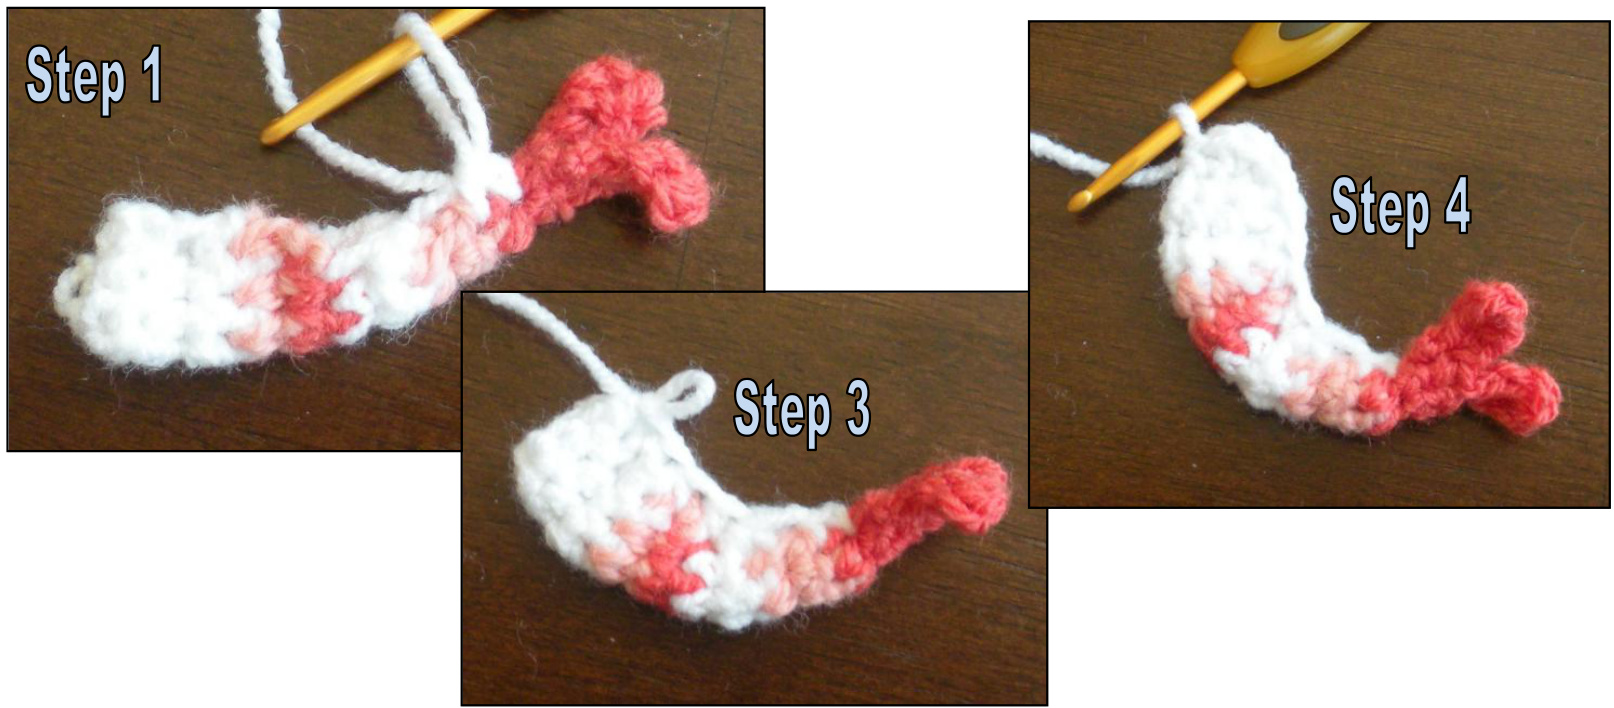
Tofinish thecocktail shrimp, wewillfold thefinished shrimpbase in half and single crochet the two sidestogether.To give the shrimp its characteristic curl, we'lluse single crochet decreases. Step 1: Fold the shrimp base in half. Attach white at the base of the tail flippers. Step 2: Working in the sides of the rows, make 3 SC DECR. Space your stitches so that your last DECR ends after the second pink stripe. Step 3: Make 2 SC in the remaining white section. Step 4: Turn the piece so that the free loops from the foundation chain are at the top. Holding both sides together, make 1 SC in the first space, 2 DC in the second space, and 1 SC in the third space. FO and weave in ends.
PART 4: RICE (FOR THE SUSHI)
The rice is worked more like a traditional amigurumi with a spiral. Tohelp you keep track, make sure you have a stitch marker. Round 1: CH 7. 2 SC in second CH from hook. SC in each of next 4 STS. 4 SC in. Turn and continue working in the free loops: SC in each of the next 4 loops, 2 SC in last loop. Place your stitch marker in the last SC. 16 SC in round. Rounds 2-3: 1 SC in each ST around (16 SC). MM. Round 4: 1SC in each of the first 2 SC.2 SC in next. 1 SC in next. 2 SC in next. SC around to last ST (18 SC). MM. Rounds 5-6: 1 SC in each ST around (18 SC). MM. Round 7: 1 SC in each of the first 3 SC. 2 SC in next. 1 SC in each of the next 2. 2 SC in next. SC around to last ST (20 SC). MM. Rounds 8-9: 1 SC in each ST around (20 SC). MM. Round 10: 1 SC in each of the first 3 SC. DECR over next 2 SC. 1 SC in each of the next 2 SC. DECR over next 2 SC. SC around to last ST (18SC). MM. Rounds 11-12: 1 SC in each ST around (18 SC). MM. Round 13: 1 SC in each of the first 2 SC. DECR over next 2 SC. 1 SC in each of the next. DECR over next 2 SC. SC around to last ST (16 SC).MM. Round 14: 1 SC in each ST around (16 SC). Turn. Row 15: Make 1 SC in each of the next 7 SC. FO, leaving a long end to sew. Stuff your rice pillow and fold row 15 over to close up the end. You can lay the filleted shrimp on the rice pillow or use white yarn to tack the shrimp on more securely.


