Twitter: @crochetmonkeys Ravelry: @crochetmonkeys
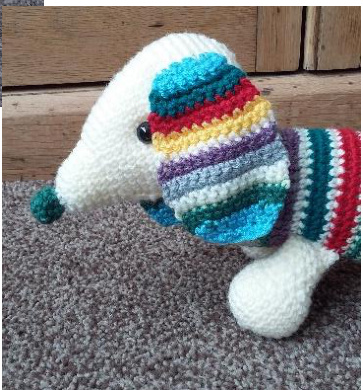
Henry
This cute sausage dog makes a lovely baby shower gift, and you can use up all your odds and ends of yarn at the same time. I've included the colour scheme I used to make Henry, however don't be afraid to use the yarn you have available to experiment and make up your own - he will look just as cheerful in any colourway. Supplies Yarn: Any DK yarn - I've used odds and ends for Henry (in cream, red, dark green, light green, bottle green, blue, purple and grey) Small bag of polyester toy stuffing. Two buttons for eyes. Hook: 3mm - I've gone down a size from that usually recommended for dk weight yarn in order to achieve a slightly tighter stitch so that the dog holds its shape better once stuffed.
Tension
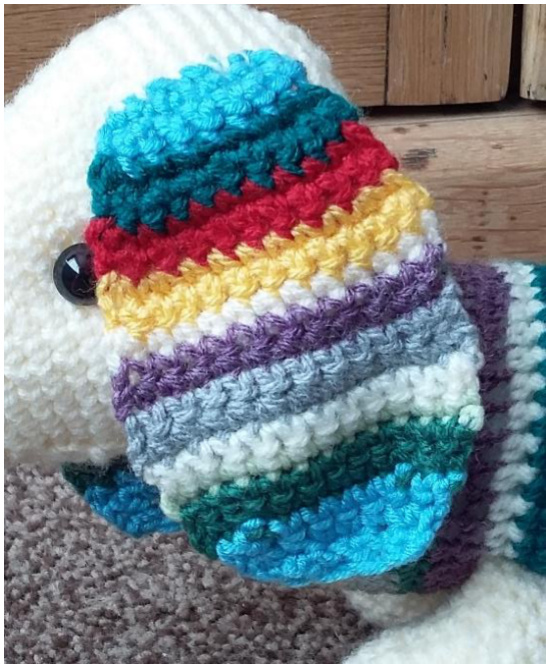
The tension is not critical, and depending on how tightly you stuff Henry, you'lljust end up with a slightly different sized sausage dog. Abbreviations (UK crochet terminology) ch chain mc magic circle slst slip stitch dc double crochet dc2tog double crochet two stitches together dc flo double crochet in the front loop only of the stitch below Body Notes: The body is worked as one piece and does not have any seams. The body is worked in rounds, starting each round with 1ch (which does not count as a stitch) and ending each round with a slst into the 1st chain. The work is not turned at the end of each round, and you will need to make sure that you always have the work with the right side facing you. There are a lot of 'ends' due to the number of colour changes. You can choose to knot these and leave small tails on the inside. This avoids the laborious task of sewing them all in, as they cannot be seen once you've added stuffing. Foundation: 6dc into a mc. Join with a slst (6) Round 1: ch1, 2dc into each dc. slst into first ch (12) Round 2: ch1, (1dc, 2dc into next dc) six times, slst into first ch (18) Round 3: ch1, (1dc into next 2 dc, 2dc into next dc) six times, slst into first ch (24) Round 4: ch1, (1dc into next 3 dc, 2dc into next dc) six times, slst into first ch (30) Round 5: ch1, (1dc into next 4 dc, 2dc into next dc) six times, slst into first ch (36) Rounds 6-46: ch1, 1dc into next 36dc, slst into first ch (36) Round 47: ch1, (1dc into next 4 dc, dc2tog) six times, slst into first ch (30) Round 48: ch1, (1dc into next 3 dc, dc2tog) six times, slst into first ch (24) Round 49: ch1, (1dc into next 2 dc, dc2tog) six times, slst into first ch (18) Note: At this point,stuff the body. Round 50. ch1, (1dc into next dc, dc2tog) six times, slst into first ch (12) Round 51: ch1, dc2tog six times, slst into first ch, break yarn, leaving a long enough tail to sew the body closed (6) The colour changes are detailed below should you wish to reproduce them exactly:
| FoundationtoRound2 | dark green | Rounds 25-26 | cream |
| Rounds 3-4 | blue | Round 27 | grey |
| Rounds 5-6 | yellow | Rounds 28-30 | purple |
| Rounds 7-8 | grey | Rounds 31-32 | dark green |
| Round 9 | dark green | Rounds 33-34 | bottle green |
| Rounds 10-11 | purple | Rounds 35-36 | red |
| Round 12 | cream | Rounds 37-38 | pale green |
| Rounds 13-14 | bottle green | Round 39 | yellow |
| Round 15 | cream | Rounds 40-41 | cream |
| Rounds 16-17 | red | Round 42 | yellow |
| Round 18 | light green | Rounds 43-45 | blue |
| Round 19 | dark green | Rounds 46-47 | purple |
| Round 20 | light green | Rounds 48-49 | grey |
| Rounds 21-22 | blue | Rounds 50-51 | dark green |
| Rounds 23-24 | yellow |
Head Notes: The whole head and nose is worked as one continuous piece, with no seams. The body is worked in rounds, starting each round with 1ch (which does not count as a stitch) and ending each round with a slst into the 1st chain. The work is not turned at the end of each round, and you will need to make sure that you always have the work with the right side facing you. Even if you are doing the head in one yarn, it willook best if you use an alternative colour for the nose - details of when to change colour are noted in the pattern (\*). End of the nose Foundation: 6dc into a mc. Join with a slst (6) Row 1-4: 1ch, 1dc in each dc. slst into 1st ch (6) Break yarn, leaving a long tail which is accessible from the right side of the nose (\*).
Rest of the nose
Rejoin into the same st with the yarn that you wish to use for the rest of the nose and head.
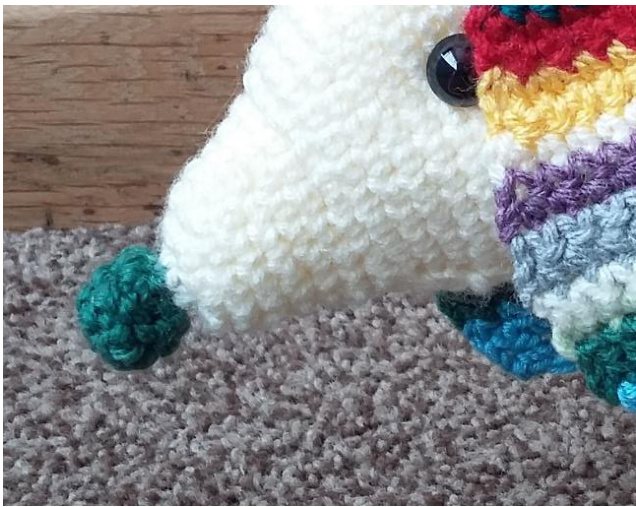
Round 5: 1ch, 1dc in each dc. slst into 1st ch (6) Round 6: 1ch, (2dc in each dc) six times. slst into 1st ch (12) Round 7-11: 1ch, 1dc in each dc round. slst into 1st ch (12) Round 12: 1ch, (1dc in next 3 dc, 2dc in next dc) three times. slst into 1st ch (15) Rounds 13-14: 1ch, 1dc in each dc round. slst into 1st ch (15) Round 15.: 1ch, (1dc in next 4 dc, 2dc in next dc) three times. slst into 1st ch (18) Rounds 16-20: 1ch, 1dc in each dc round. slst into 1st ch (18) Note: At this point, stuff the very end of the nose. Then, using the long tail (see \*), sew a running stitch through the six stitches that made up round 4 and pull tight (this makes the end of the nose into a 'bobble' shape). Secure and sew in the remainder of the tail of yarn.
Head
Although you continue without breaking the yarn, this is the point at which the head takes shape away from the nose. Round 27: 1ch, (1dcflo in next dc, 2dcflo into the following dc) nine times. slst into 1st ch (27) Rounds 22-23: 1ch, 1dc in each dc. slst into 1st ch (27) Round 24: 1ch, (1dc into next 2 dc, 2dc into following dc) nine times. slst into 1st ch (36) Rounds 25-29: 1ch, 1dc in each dc. slst into 1st ch (36) Round 30: 1ch, (1dc into next 5 dc, 2dc into following dc) six times. slst into 1st ch (42) Round 31: 1ch, 1dc in each dc. slst into 1st ch (42) Round 32: 1ch, (1dc into next 6 dc, 2dc into following dc) six times. slst into 1st ch (48) Round 33: 1ch, 1dc into each dc. slst into 1st ch (48) Round 34: 1ch, (1dc into next 6dc, dc2tog) six times. slst into 1st ch (42) Round 35: 1ch, 1dc into each dc. slst into 1st ch (42) Round 36: 1ch, (1dc into next 5 dc, dc2tog) six times. slst into 1st ch (36) Round 37: 1ch, 1dc into each dc. slst into 1st ch (36) Round 36: 1ch, (1dc into next 4 dc, dc2tog) six times. slst into 1st ch (30) Round 37:1ch, (1dc into next 3 dc, dc2tog) six times. slst into 1st ch (24) Round 38: 1ch, (1dc into next 2dc, dc2tog) six times. slst into 1st ch (18) Note: At this point, stuff the rest of the nose and head. Round 39: 1ch, (1dc into next dc, dc2tog) six times. slst into 1st ch (12) Round 40: 1ch, dc2tog six times. slst into first ch, break yarn, leaving a long enough tail to sew the head closed (6) Ears (make two) Note:1ch at the start of each row does not count as a stitch.
Foundation: ch 7, 1dc into 2nd ch from hook. 1dc in each ch to end. Turn (6) Row 1: 1ch, 1dc into each dc to end. Turn (6) Row 2: 1ch, \*1dc, 2dc into next dc, 1dc\*. Repeat from \* to \* once more. Turn (8) Row 3: 1ch, 1dc in each dc to end. Turn (8) Row 4: 1ch, 1dc, 2dc into next dc, 1dc into next 4 dc, 2dc into next dc, 1dc. Turn (10) Row 5-6: 1ch, 1dc into each dc to end. Turn (10) Row 7: 1ch, 1dc, 2dc into next dc, 1dc into next 6 dc, 2dc into next dc, 1dc. Turn (12) Row 8-15: 1ch, 1dc into each dc to end. Turn (12) Row 16: 1ch, 1dc, dc2tog, 1dc into next 6 dc, dc2tog, 1dc. Turn (10) Row 17: 1ch, 1dc, dc2tog, 1dc into next 4dc, dc2tog, 1dc. Turn (8) Row 18: 1ch, 1dc, dc2tog, 1dc into next 2dc, dc2tog, 1dc. Turn (6) Row 19: 1ch, 1dc, dc2tog twice, 1dc. Pullthrough and break yarn (4) The colour changes are detailed below should you wish to reproduce them exactly: Foundation to Row 2 blue Rows 3-4 bottle green Rows 5-6 red Rows 7-8 yellow Row 9 cream Rows 10-11 purple Rows 12-13 grey Row 14 cream Row 15 pale green Row 16 dark green Rows 17-19 blue Tail Notes: The tail is worked as one flat piece, then folded in half and sewn together The 1ch at the start of each row does not count as a stitch : is worked in one yarn, in this case cream, to match the head and Foundation: ch 14, 1dc in 2nd ch from hook, 1dc in each ch to end. Turn (13) Rows 7-3: 1ch, 1dc in each dc to end. Turn (13) Row 4. 1ch, 1dc, dc2tog, 1dc in the following 7 dc, dc2tog, 1dc. Turn (11) Rows 5-7: 1ch, 1dc in each dc to end. Turn (11) Row 8. 1ch, 1dc, dc2tog, 1dc in the following 5 dc, dc2tog, 1dc. Turn (9) Rows 9-10. 1ch, 1dc in each dc to end. Turn (9) Row 17. 1ch, 1dc, dc2tog, 1dc in the following 3 dc, dc2tog, 1dc. Turn (7) Row 12. 1ch, 1dc in each dc to end. Turn (7) Row 13: 1ch, 1dc, dc2tog, 1dc, dc2tog, 1dc. Turn (5) Row 14. 1ch, 1dc, dc2tog twice. Turn (3) Row 15: 1ch, 1dc, dc2tog. Turn (2) Row 16: 1ch, dc2tog. Break yarn leaving a long tail (1)
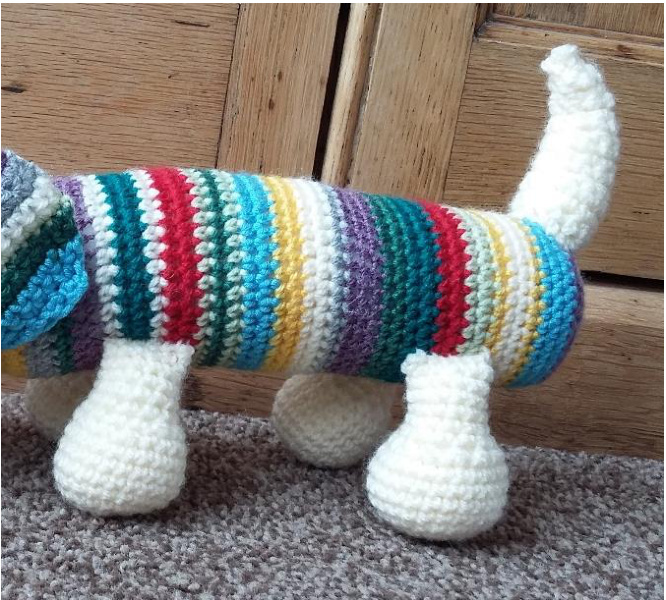
Fold tail (long sides together) and sew together. Stuff and, with the seam facing upover +, stitch to the body. Note: To 'bend' the tail towards the dog's head, you can attach a piece of yarn to the tip of the tail, and sew a running stitch down the seam towards the body. Pulling the yarn tight will then 'bend' the tail. Secure the yarn to keep the tail in the desired position. +If you have sewn your tail to the body with the seam facing downover, your tail will bend in towards the floor. Legs (make four) Notes: I made these in the same colour as the head and tail (cream). These are worked as a continuous spiral, without turning and with no ss or ch between 'rounds'. Foundation: Work 6dc into a mc (6) Round 1: 2dc into each dc (12) Round 2: 2dc into each dc (24) Rounds 3-7: 1dc into each dc round (24) Round 8: dc2tog 12 times (12) Rounds 9-14: 1dc into each dc round (12) slst into next dc and break yarn. Stufflegs and attach to body. This is the first time I've attempted to write a pattern for a stuffed toy for anyone other than myself to follow. If you have any questions or comments I would welcome your feedback. Please feel free to drop me an email at hazeybeeandiris@gmail.com or send me a message via Ravelry.


