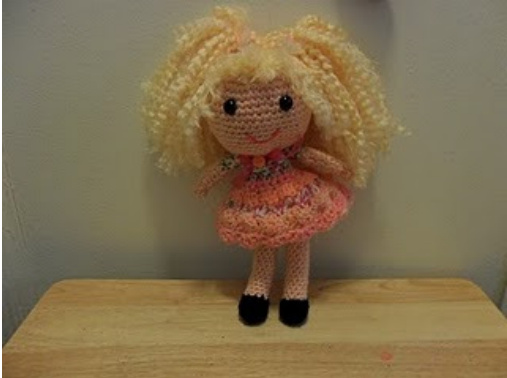
Little Pigtail Girl
Supplies: Simply Soft from Caron in Light Country Peach (1- 6 oz./170 gm Caron Simply Soft will make almost 2 dolls.) 1- 3.5 mm/E hook 1 piece of different colored string or marker 1 pr of 12mm or even 15mm solid black eyes (or black embroidery thread and needle to sew on eyes if this project is made for a child < 3 yrs of age. 100% Polyfill for stuffing
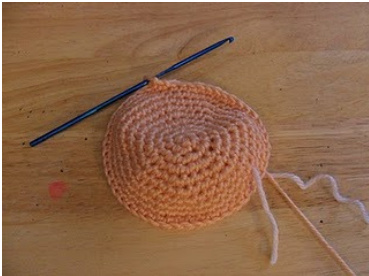
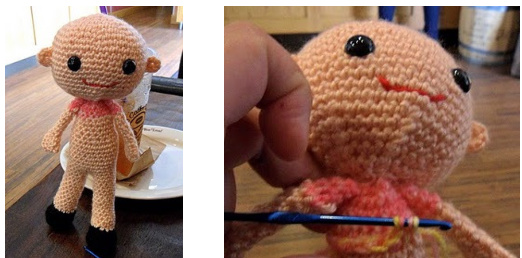
HEAD 1. Single crochet (sc) 7 into 2nd chain stitch (st) from the hook .[7] 2. 2 sc in each 7st. . [14] (beginning to increase) 3. (Sc 1, sc 2 in next st)\*, now repeat \* 6 more times. [21] 4. (Sc 2, sc 2 in next st)\*, now repeat \* 6 more times. [28] 5. (Sc 3, sc 2 in next st)\*, now repeat \* 6 more times. [35] 6. (Sc 4, sc 2 in next st)\*, now repeat \* 6 more times. [42] 7-17. Sc 42 sts around for 10 rows. Use your marker or your piece of yarn to designate the first st. (11 rows X 42 = 462 sc)
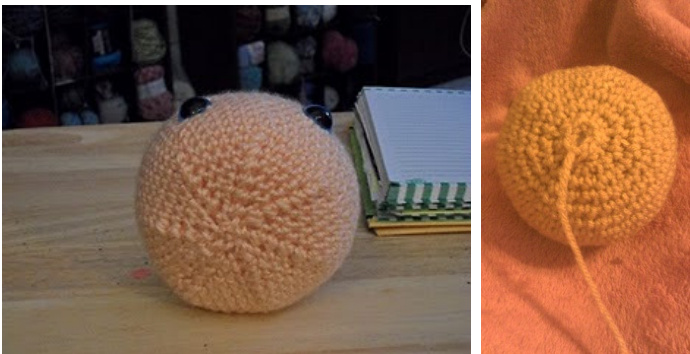
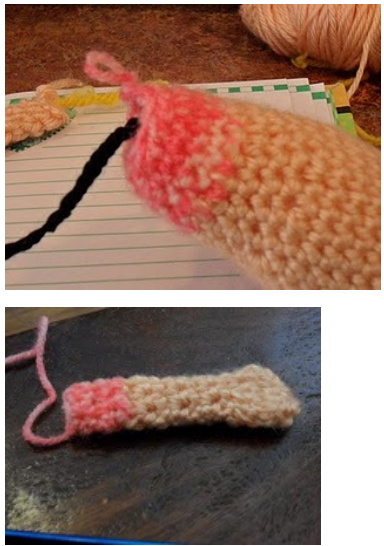
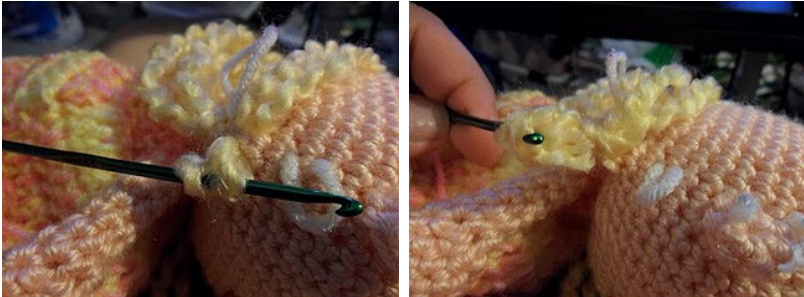
If you don't use an invisible sc decrease, you will get lines as in the picture on the left. My suggestion is to do some decreasing sc rounds and then start to fill as well as look at how the eye placement appears. (This goes for embroidery or even placing black felt pieces and embroidering around) 18. (Sc 4, decrease (dec) 1)\*, repeat 6 more times. [35] 19. (Sc 3, dec 1)\*, repeat 6 more times. [28] 20. (Sc 2, dec 1)\*, repeat 6 more times. [21] Using a contrasting piece of yarn, or the safety eyes (don't snap them as yet), check placement of eyes. Usually about 6 stitches apart 21. (Sc 1, dec 1)\*, repeat 6 more times. [14] Once the eyes are in place to your satisfaction, snap them and stuff the head 22. dec 7 [7] and slip stitch (sl) into the last st and pull through the loop to complete the round. 23. Weave in ends. The torso will have a weaving tail to attach to the head.

Closer look at eye placement.
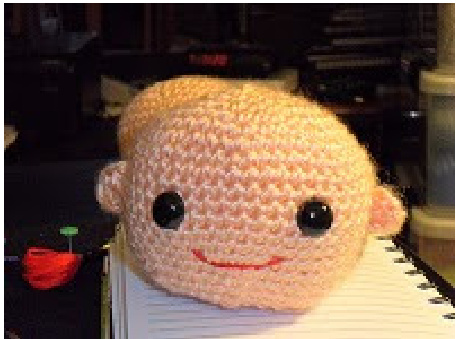
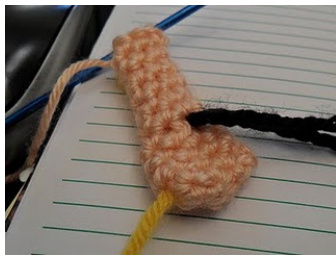
nouth with a simple stitch across adding little diagonal up lines for a smile EARS: Make 2 using your skin tone yarn. 1. Ch 2. 6 sc in the 2nd ch. Sl st to beginning st and bind off. [6] in the 2 ears to each side of the head. Make sure they are symmetrical then sew them on. SHOES and LEGS Make 2 in black yarn or whatever color you want. 1. Ch 2. 6 sc in the 2nd ch. [6] 2. 2 sc in all 6 sc. (inc) [12] 3. 1 sc in the next st, 2 sc in the next sc\*, repeat 5 more times. [18] 4. 1 sc in the next 18 sc. [18] 5. 1 sc in the next 18 sc. [18] 6. 1 sc in the next sc, dec in the next sc\*, repeat 5 more times. [12] 7. 1 sc in the next 12 sc. Sl st to beginning st and bind off. [12]
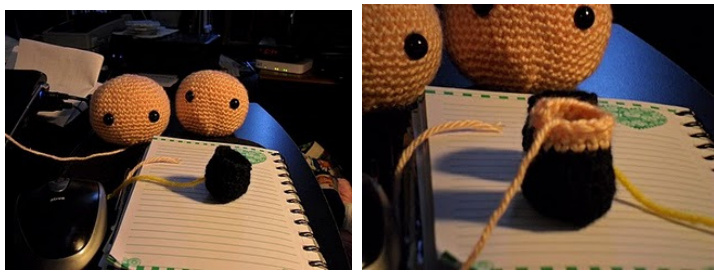
Shoe made. Adding the leg to the shoe. Add stuffing as you go. First leg: Do 15 rows of 12 sc even (15 x 12 = 180 sc) Cut tail short to weave in later. Set aside.
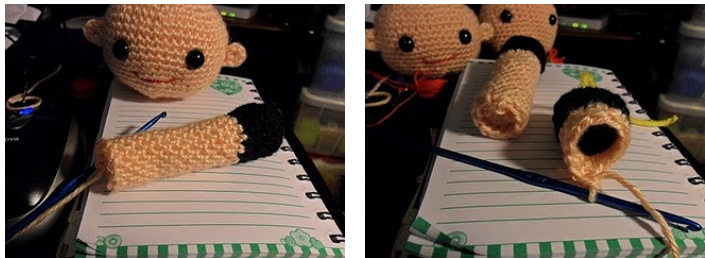
Make second leg same as first, but do not fasten off unless you wish to create bloomers/ chemisette. If you do, fasten off. Hold the legs together. If making bloomers, do your sc's around the legs in the BACK LOOP ONLY for this row. 1 sc in the next 12 sc around of one leg and then continue to crochet the 1 sc in the 2nd leg's 12 sc around. If not then go through both loops with flesh color. [24]
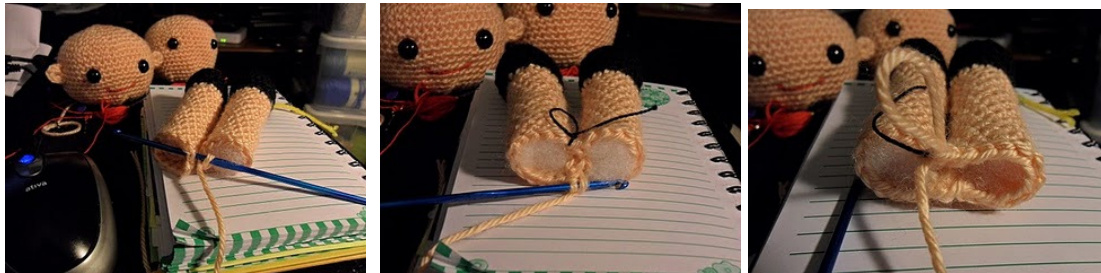
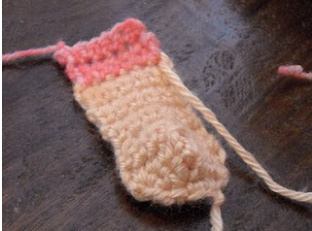
This holds the lower part of the torso and we will crochet up to the beginning of the chest and add the colored yarn for the chest as the top of the dress. I decided to incorporate the dress on the body when I first made them. For those that are advanced or adventurous may continue all the way up and add a dress later. I've done that , too. Work a total of 5 rows after attaching legs together. (5 x 24 = 120 sc) After the 5 rows done, \*1sc in the next st and dec in the next st\* repeat 5 times around. [18] Do 3 more even rows of sc. (3 rows x 18 = 54 sc)
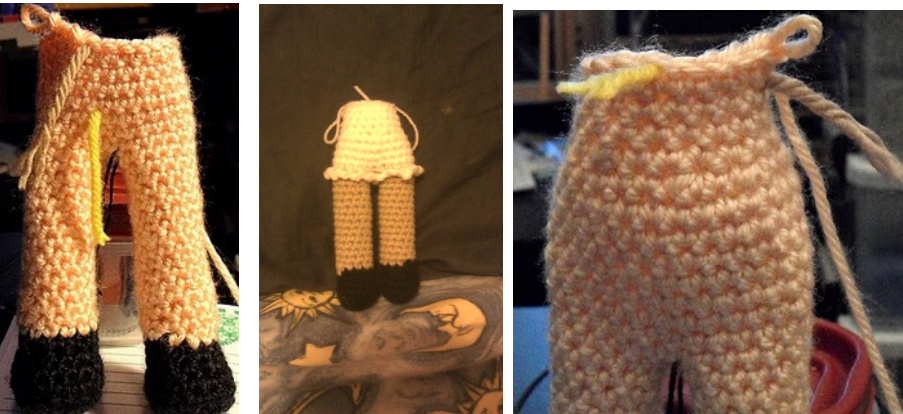
Now, this is something I do in order to work the rest of this area a little easier. Do approximately 4 more sc in order to bring you to the center back of the doll. 1. Starting with your different colored yarn for the dress (or flesh tone if making separate dress), 1 sc in the next 18 st. If attaching dress do this row in BACK LOOP ONLY, otherwise go through both loops with flesh tone. [18] 2. Work 4 more rows even, fasten off leaving a long tail to attach the head. (4 rows x 18 = 72scC) If you added bloomers, attach yarn to the un-worked front loop at the joining of the two legs with a slip stitch. Chain 2 and slip stitch into the next free loop around one leg and then the next. Fasten off. Torso complete. ARMS-Method 1 (in the round) Make 2.

1. Ch 2. 2. Add 4 sc in the 2nd ch. [4] 3. \*2 sc (inc) in the next 1 sc\* and repeat in the next 3 sc. [8] 4. Sc in the next 3 sc and \* 1 triple crochet (tc) in the 4th sc (to make a thumb) and 1sc in the last 4 scs. [8] 5. Dec in the first st and 1 sc in the next 4 st and dec in the last 2 st. [6] 6-10. 1 sc in the next 6 st for 5 rows, changing to dress color if attaching dress (5 rows x 6
= 30 sc) 11-13. sc even around (3 rows x 6 = 18 sc)
ARMS-Method 2 Make two (Flat)
1. Ch 5 and turn. 2. 1 sc in the next 4 ch. Ch1 and turn. [4]. 3. \*2 sc (inc) in the next sc\* and repeat in the next 3 sc.Ch1 and turn. [8] 4. 1 sc in the next 3 st, tc in the 4th st, and 1 sc the last 4 sc. Ch 1 and turn. [8] 5. Dec in the 1st sc, 1 sc in the next 4 sts, dec in the last 2 sc. Ch1 and turn. [6] 6. 1 sc in the next 6 st for 5 rows [6] 7. Adding the new colored dress yarn, if desired, 1 sc in the next 6 sts for a total of 3 rows. Sewarm upside.
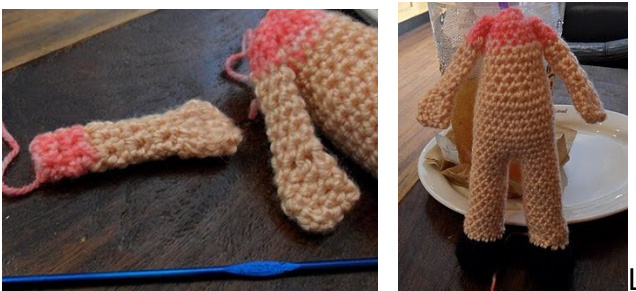
Sew arms to body. Sew head to body.
1. Attach with single crochet to the un-worked loop on torso at the center back. Sc around for a total of 18 stitches around. Slip stitch to end row. 2. Chain 1. 2 sc in each of the 18 sts. Slip stitch to end row. [36] 3. Chain 3. 1 double crochet in the next 36 sc around. Slip Stitch to end row. 4-5.Repeat row 3. 6. My last row was just a simple decorative border of shells every other st. You may use yourown.
HAIR
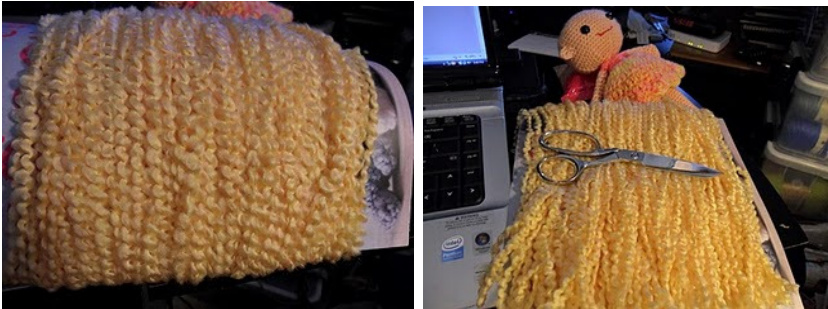
Figure out how long you wish to make hair and find a book to wrap around. Using Lionbrand Homespun for hair. Wrap around book or magazine for as much of the hair you want on the doll. Cut one side.
I add a thick contrast yarn and map out the hair line around the head.
I use at least 2 strands of yarn at a time which covers and gives a great hair line with a hook. Using a latch hook type of attachment (fold in half, insert hook in head stitch, pull loop though stitch, pull tails through loop, pull tails snug), add the yarn to head. Pull through loop slowly as to not fray the yarn.
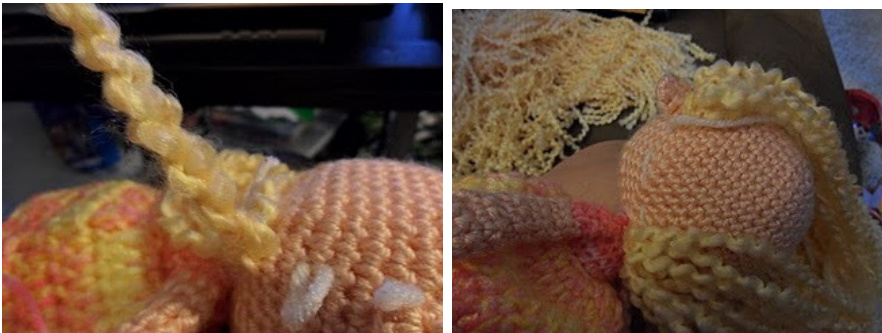
I usually start with the back then work around to the front and finally, around to the back. With this thickness, you may not have to fill the whole head as I did here. With regular yarn, I use 3 strands and work around.
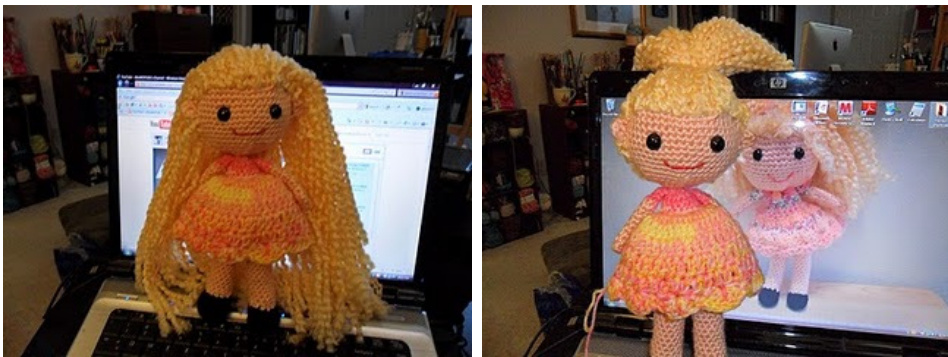
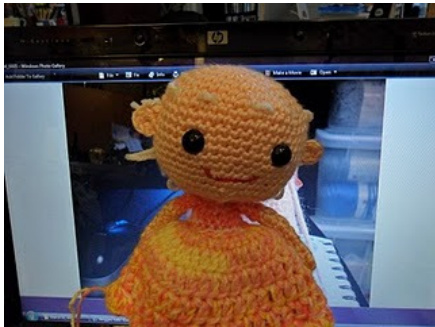
Pull hair up and using same hair yarn tie it up like a ponytail on top of head. I separated the hair and made sure there are no gaps around the hair line and tied with yarn and added ribbon. She gets a trim at this time or shape the bangs here. You may embellish with ribbon or gems as you go at this point.
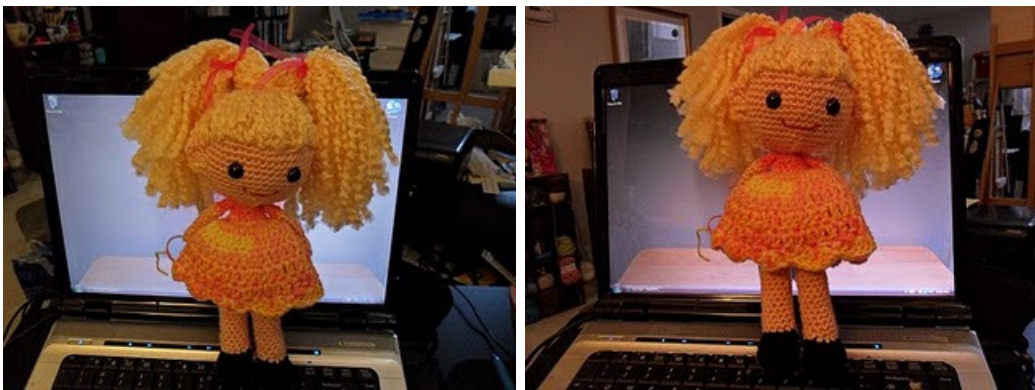
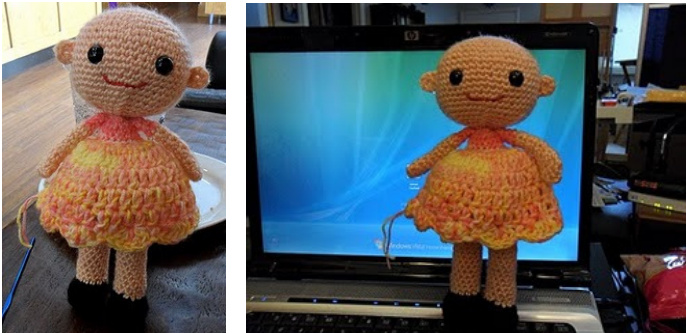
This is how she looks when completed. I made sleeveless dresses.. Make sure when you do the first row that the dress will fit over your girls hips. you may have to go up a hook size. Chain 25, slip stitch to form ring. R1- Sc in each chain till you have 24 sc. Ch 1 turn R2- Sc in each sc. Ch 1 turn. R3- Sc in next 4 sc. Chain 4, skip 4 sc. Sc in next 8 sc. Chain 4, skip 4. Sc in last 4 sc. Ch 1 turn. R4- Sc in next 4 sc. 2 sc in chain 4. Sc in next 8 sc. 2 sc in chain 4. Sc in last 4 sc. Chain 25. Fasten off. Attach yarn to other side and chain 25 for a tie. Fasten off. Attach yarn to the unused part of original chain in the back with a sc. Alternate increase and sc around. Slip stitch to first sc. This will create a total of 36 stitches. R5-whatever length you want. You can do just dc's for each row if you want. You can alternate dc rows and sc rows. With the one dress I did a cluster stitch, chain 1 skip one around. (cluster= YO, insert hook, yo pull up a loop, yo pull through two. YO insert hook in same stitch, yo pull up a loop, yo pull through two, yo pull through all three-the chain one locks the stitch.) I did a shell stitch on the bottom. Slip stitch, skip a stitch, 5 dc in one stitch, skip a stitch, slip stitch, repeat around.


