manualidades y artesanias
Eine Ferulita-Handarbeitsanleitung
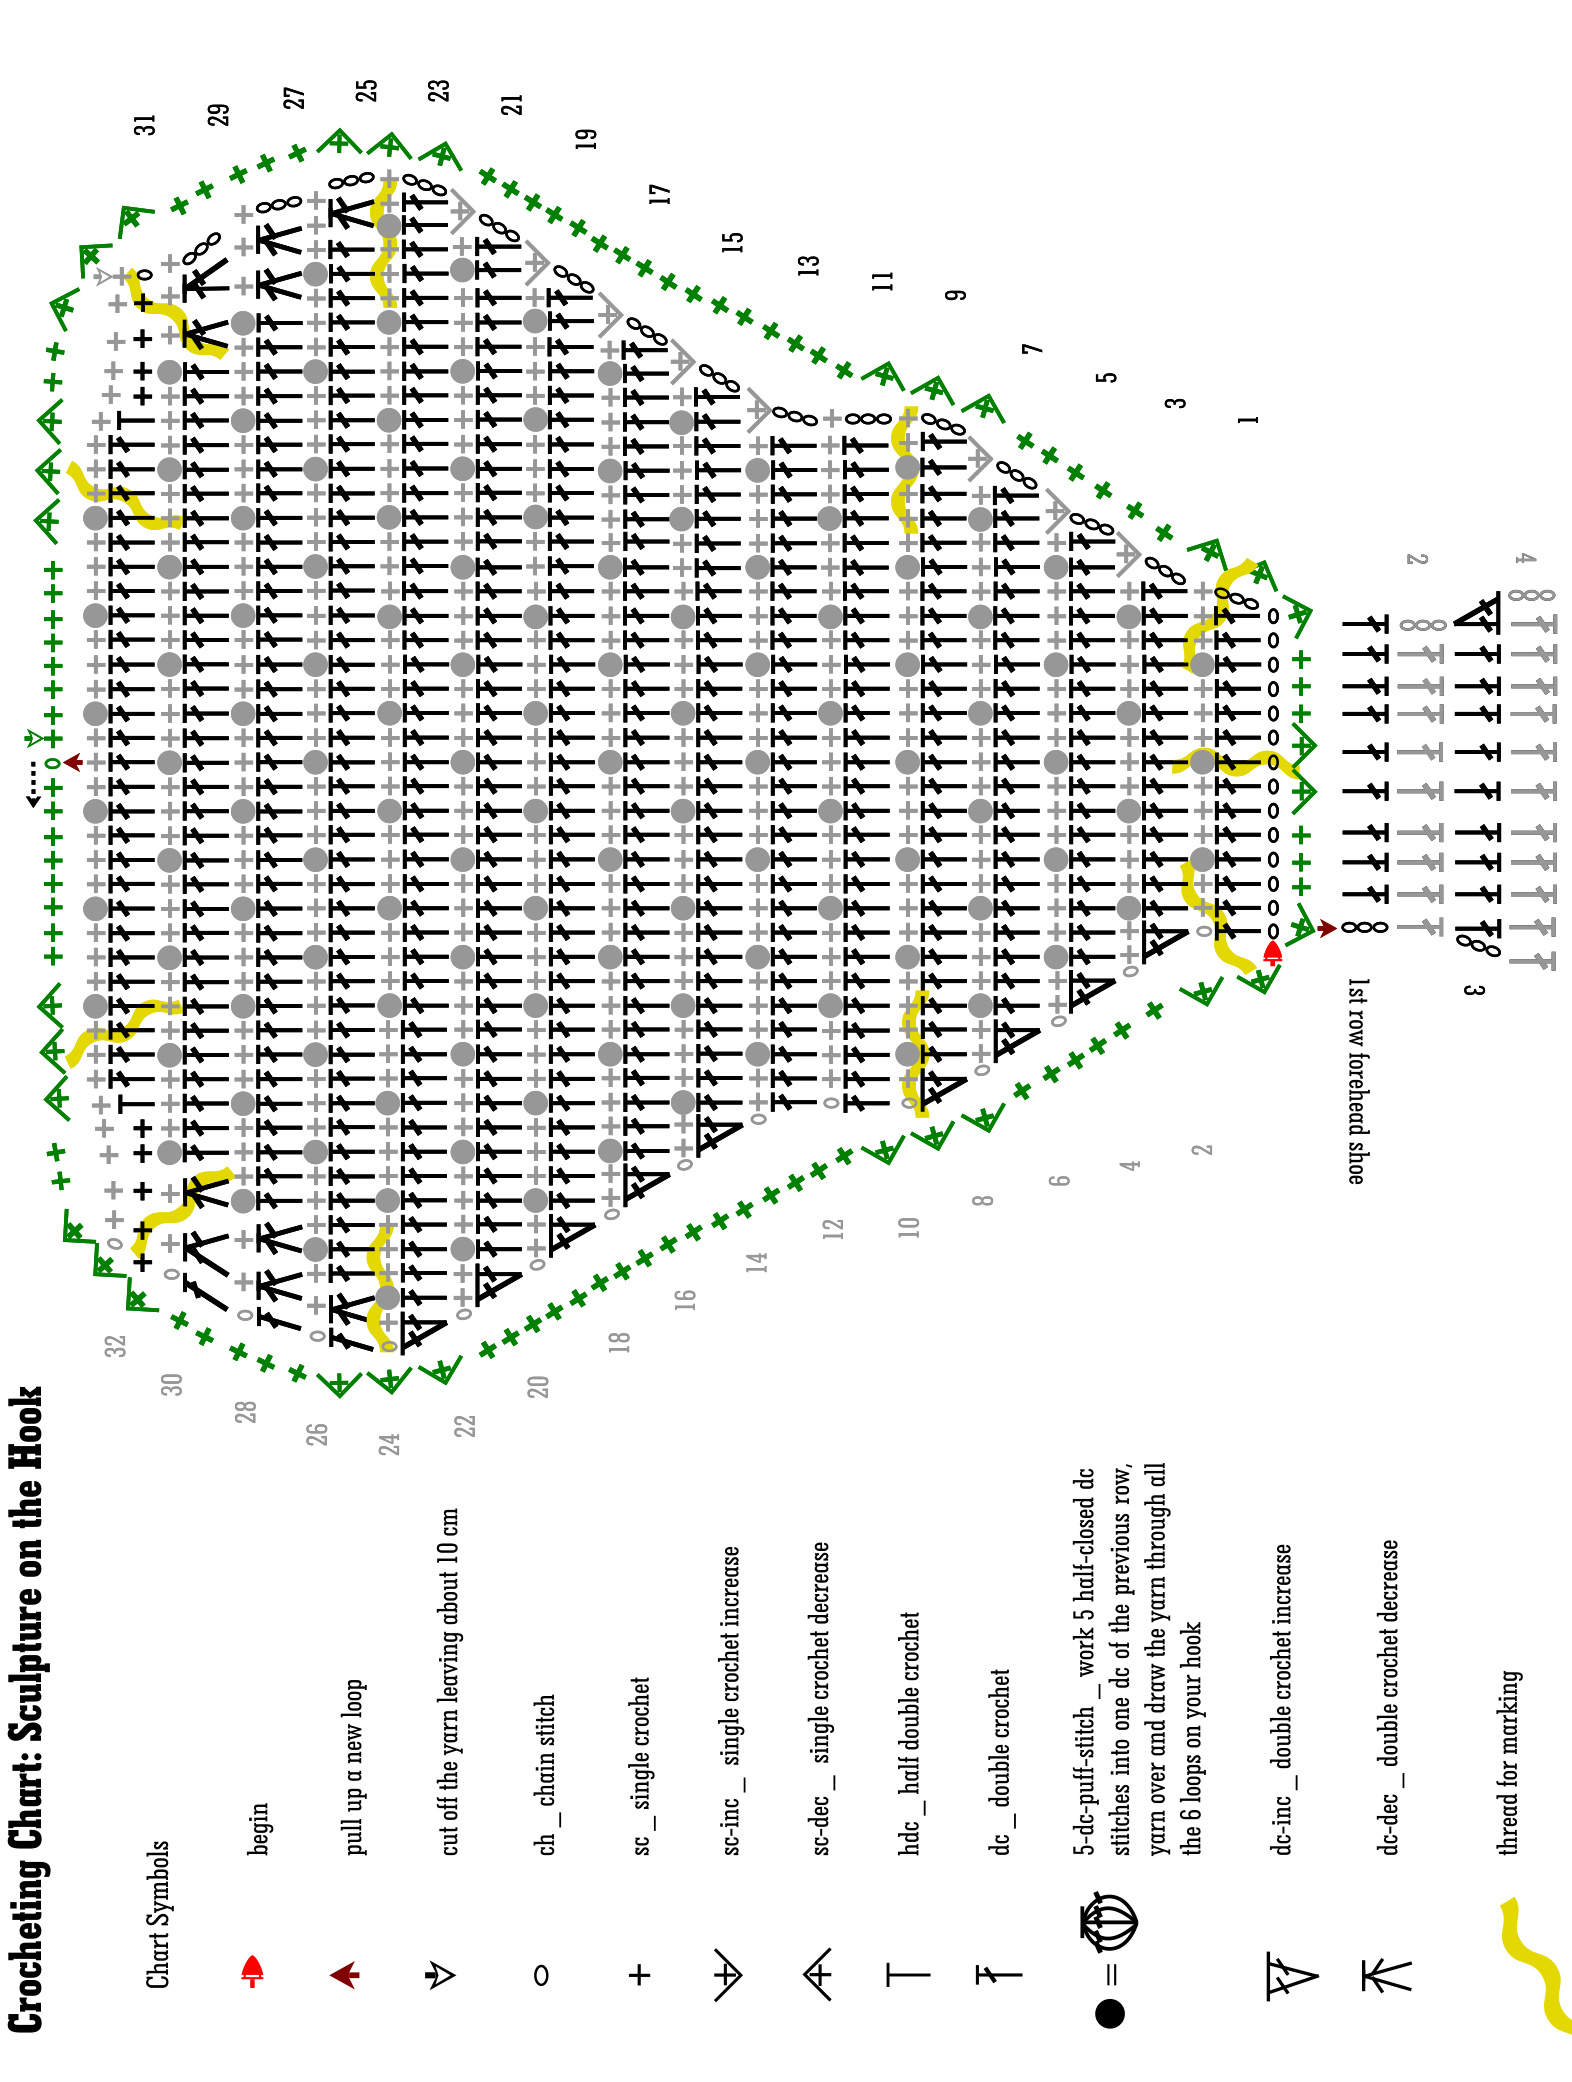
Sculpture on the Hook
crocheting knubby bicycle saddle cover
Avoid cold bum when cycling
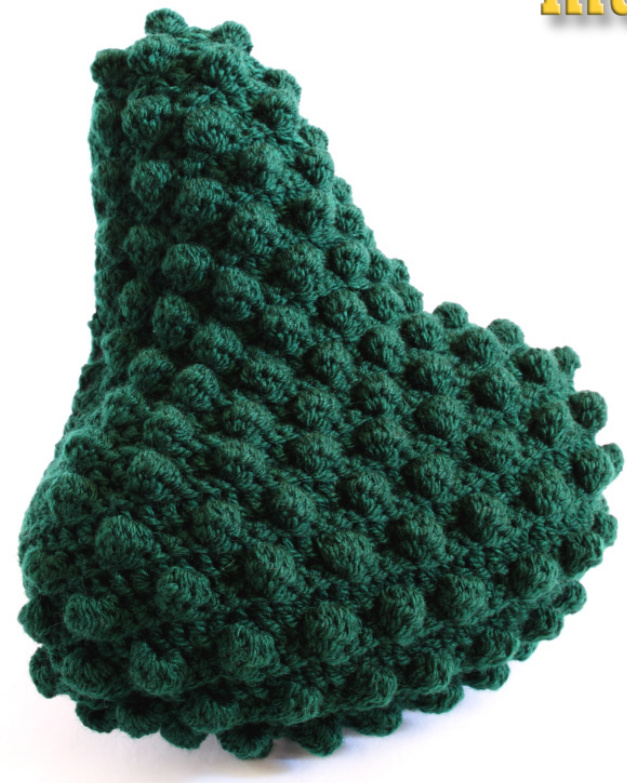
No, this is not a Marcel Duchamp sculpture. This is α convenient accessory with stylishly protruding puff-stitch bobbles. Even on cold days in Spring you now may ride your bike. Protect your bum from cold saddles. Well tested and gone down. Mum got one and says: Superb bicycle saddle cloth! Ferulita wishes fun while crocheting this extraordinary and artistic saddle-cloth.
What is needed:
100 gramms of robust wool blend 50:50 (yardage 80 m per 50 g). crocheting hook size 5 mm test gauge, should have 15 stitches across 10 cm contrast coloured threads for marking elastic band, between 4 and 7 mm strong. αppr. 50 cm
Overview:
1. Make the saddle cover's top surface in rows 2. Surround it with sc, decreases make the saddle cover domed 3. Make the saddle cover's shoe 4. Make the bearing for the elastic band which will hold the saddle cover in its place 5.Weaving in all threads left and thread in the elastic band
1. The sitting surface
The podgy surface of the bicycle saddle cover will be made in rows back-and-forth. Have you found the crocheting churt enclosed in this manual? It shows the entire surface of the saddle cover graphically: When crocheting back we do dc, forth we will make sc and puff-stitches. Starting with 14 ch sts, add 3 for turning. 14 dc will follow for the Ist row. We insert sc and puff-stitches now into the back-stitches. To make α 5-dc-puff-stitch: Work 5 halfclosed dc stitches into one dc of the previous row, then yarn over and draw your yarn through all the 6 loops on your hook. The puff-stitch bobbles will protrude to the top-side of the saddle cover. The typical form of the saddle cover can be achieved with increases and decreases. Refer to the crocheting churt enclosed. We have to work 32 rows in total to complete the saddle cover's top surface. Cut off the yarn leaving about 10 cm for finishing process.
2. Bordering and forming the suddle covers top surface
Surround the work made with sc. The crocheting churt shows them as green coloured. Distributed sc-decreases will make the saddle cover's top surface domed. It is very useful to mark all decrease points with contrast coloured threads. To start pull up α loop at the edge of the saddle cover's top where the crocheting churt indicates. Make α ch and then surround with sc stitches as follows: 8 sc |3 sc-dec |2sc |3 sc-dec |5 sc |3 sc-dec |16 sc 3 sc-dec|6 sc |3 sc-dec |3 sc |2 sc-dec |3 sc|3 sc-dec |6sc |3 sc-dec |16 sc|3 sc-dec |5sc|3 sc-dec |2sc | 3 sc-dec | 8 sc. Finish the round into the Ist stitch. Cut offthe yarn leaving about 10 cm for finishing process.
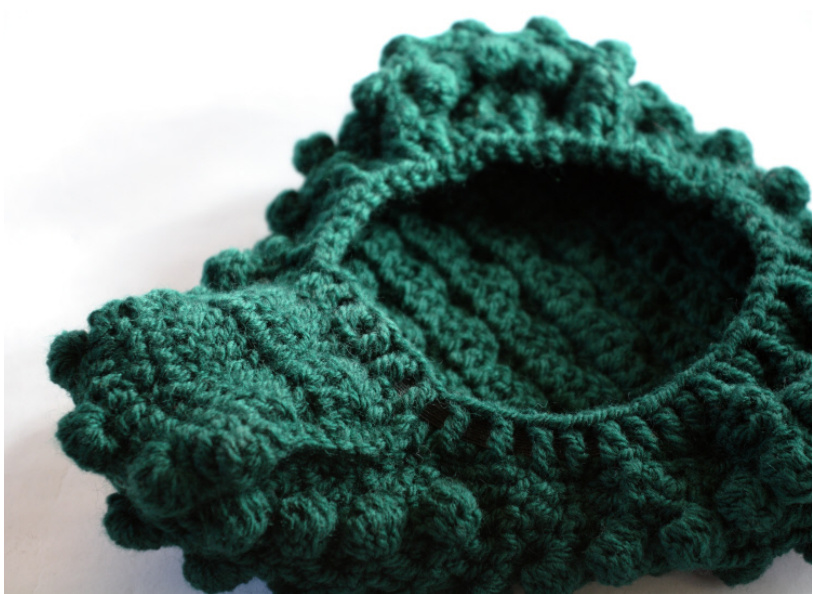
3. The forehead shoe
On the foremost edge of the saddle cover the sole of the shoe for the bike saddle's nose will be attached. Pull up another loop at the point the crocheting churt indicates to do. Make 3 ch stitches and 9 dc will follow for the Ist row. Work another 3 rows as shown in the crocheting churt. Join the shoe with sc stitches.
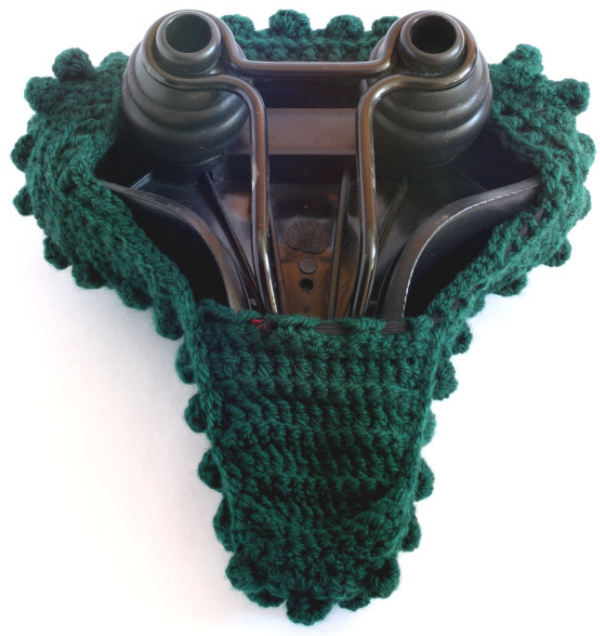
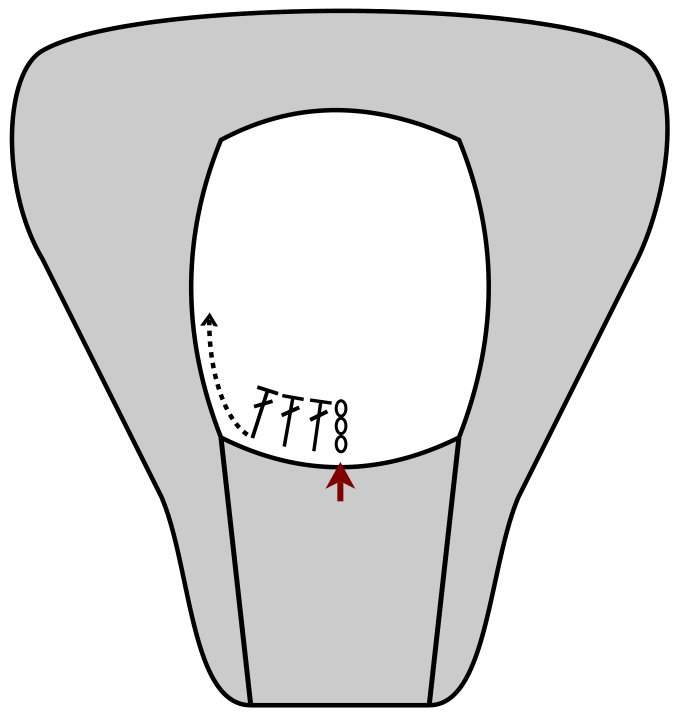
4. Beuring for the elustic band
The opening at the bottom of the saddle cover will take the bearing for the elastic band made of dc. Pull up α loop where the grufic below indicates then chain 3 (replacing the Ist dc). Work one round dc stitches and close it. Cut off the yarn leaving about 10 cm for finishing process.
5. Finishing
Weave in all the threads left. Then thread in the elastic band of approx. 50 cm passing the dc one under one over across the round. Close the elastic band.
Legal Notice Ferulita-Handarbeitsanleitung ,Sclupture on the Hook. Crocheting knubby bicycle saddle cover" Design and tutorial by Ferula Pénola (manualidades y artesanias http://ferulitablog.pedropenola.eu) ⊙ 6|2012: text, layout, photography, graphics, translations: federArgumentEuropa contact:an@federargumenteuropa.eu


