Homespun Hubbie Hat
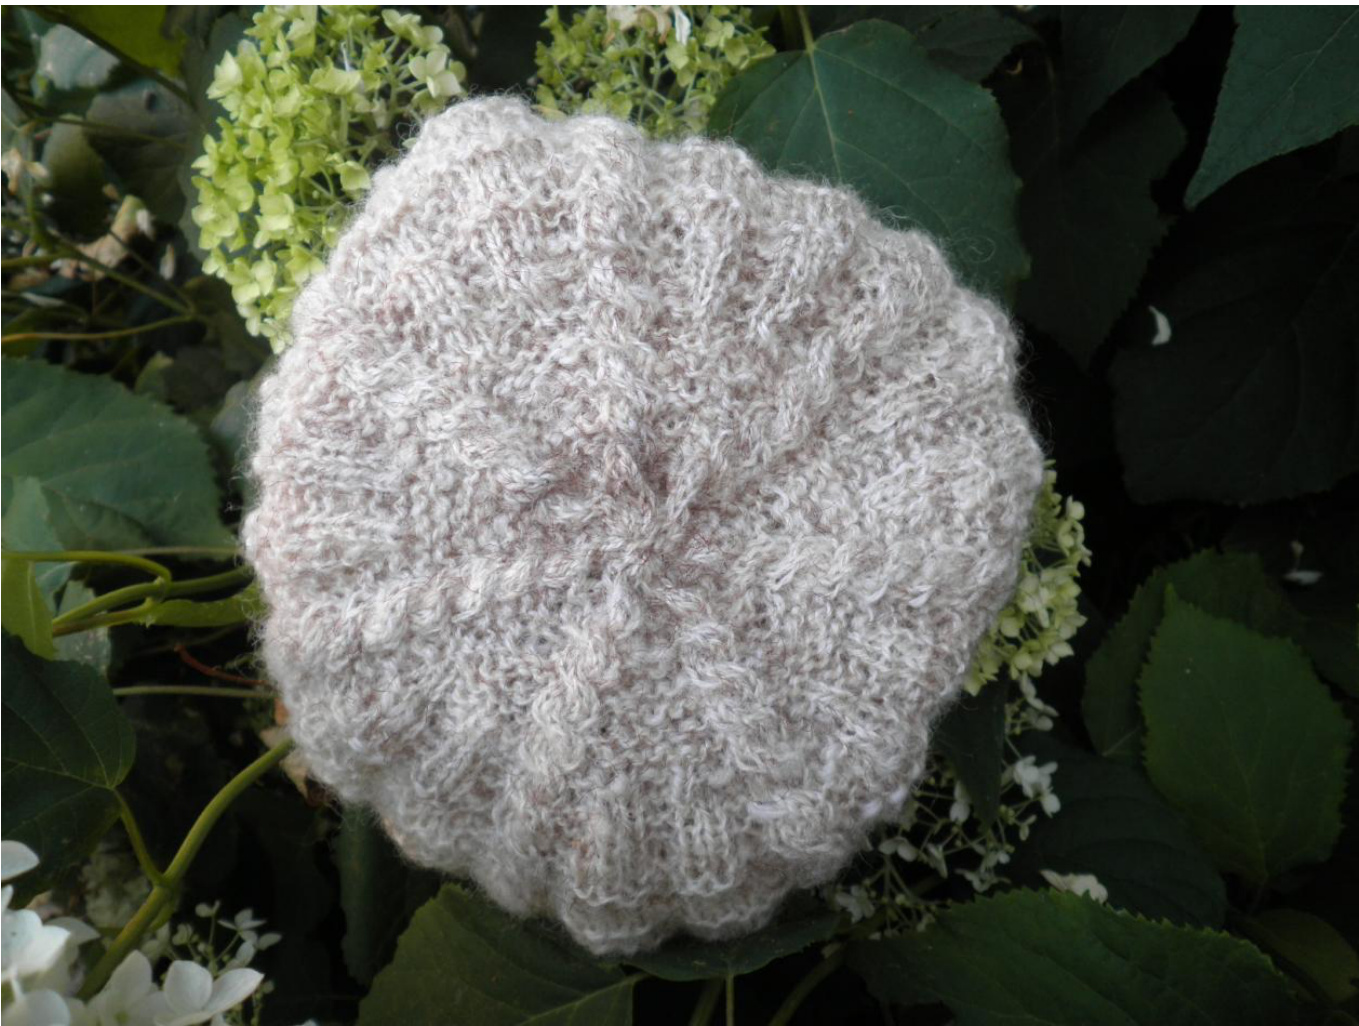
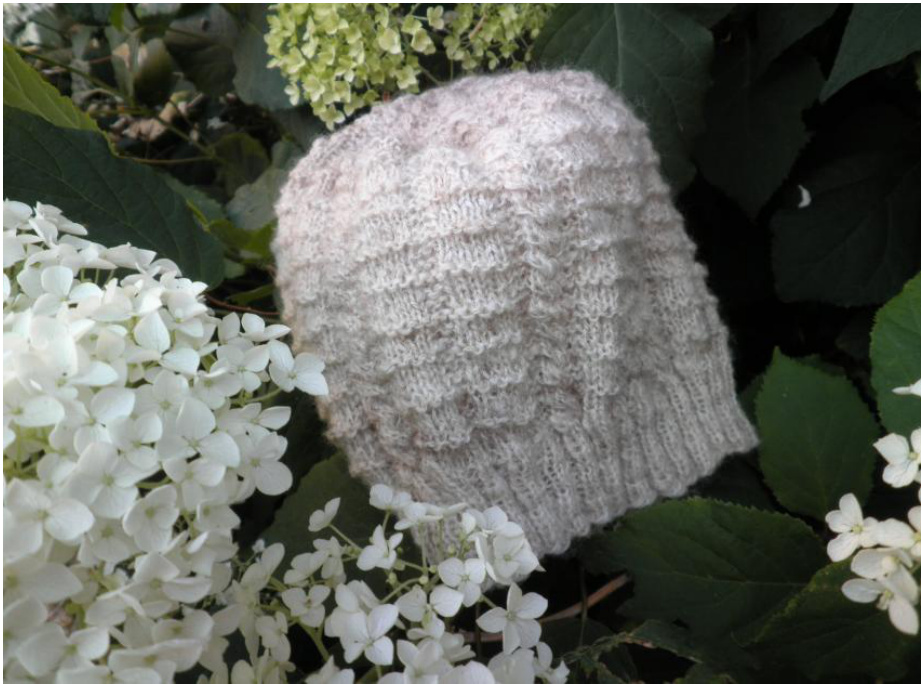
A free pattern by JolandaKnitsSocks This hat was made for my darling husband. The stitch pattern is inspired by Dutch fishermen's sweaters of old. It is simple and rugged enough for a guy and interesting enough for me to knit. I tried out a multiple of 7 pattern repeats rather than the more common 6, asIfelt that a multiple of 7 decreases would make the top a bit less pointy than most hats. Works well.
To prevent disappointment:
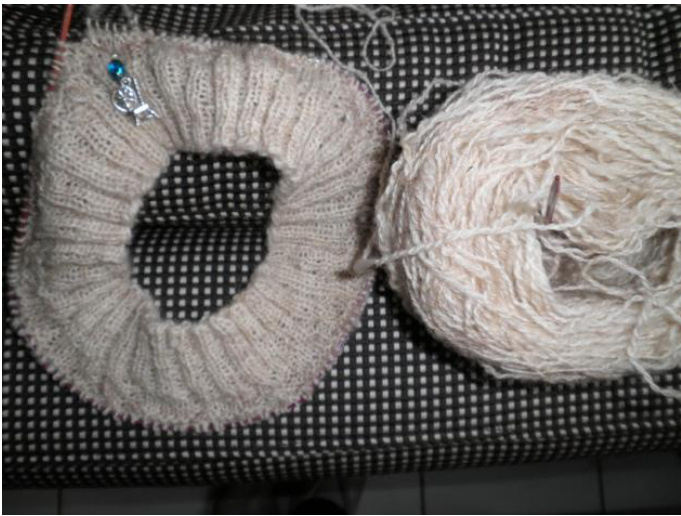
Always SWATCH! Knit the first 10 centimeters of the hat and try it on the intended recipient. Rip back and start over if it fails to please, adapt the pattern until YoUR recipient is happy. Size: 49 centimeters around unstretched. This will easily fit a guy with a 56 centimeter head. It won't pinch his ears and it will stay put in a gale. Gauge: 26 stitches to 10 centimeters measured over the stitch pattern, unstretched. Each repeat of 20 stitches is 7 centimeters wide. Four repeats (24 rounds) measure 5 centimeters in height. Yarn: I used my own handspun Coburger Fuchs yarn. I would say it's on the heavy side of fingering. It worked well with the 2.5 mm pins, but it's a bit thicker than regular 4-ply sock yarn. The hat took just under 56 grams of yarn. Knitting needles: 2.5 mm, both a circular needle and at least one set of dpn's for when the amount of stitches decreases. Use a spare dpn for the cables, or use a cable needle. Skills: you need to be able to knit and purl, cable and decrease. Cables: put two stitches on a separate needle (you can use a spare needle of 2.5 or 2 mm, or a dedicated cable needle) hold them either in front of or in back of the knitting (pick one and make all cables in the same direction). Knit the next two stitches, then put the two stitches from the holding needle back on the left needle without twisting and knit. [Optional Cable fun: make a cable that snakes back and forth over the underlying stitches by holding the two stitches in front on the first cable row, then in back on the next cable row, alternately. I may try this on another hat in the future.]
Cast on:
Using the longtail method, cast on 140 stitches on the circular needle and close the round being careful not to twist. Knit 2, purl 2 all around for the ribbing. My hat has 15 rounds of ribbing, or about 4 cm. For a brim that can be turned over, at least 30 rounds of ribbing is advisable.
After the ribbing, switch to the stitch pattern. No increases. The pattern consists of 7 sets of 20 stitches. Use a marker to keep track of the beginning of the rounds. Every other round is all knit, every 4th round is a cable round, every 6th round is all purled except for the cable stitches (a PURL round). Stitch pattern:
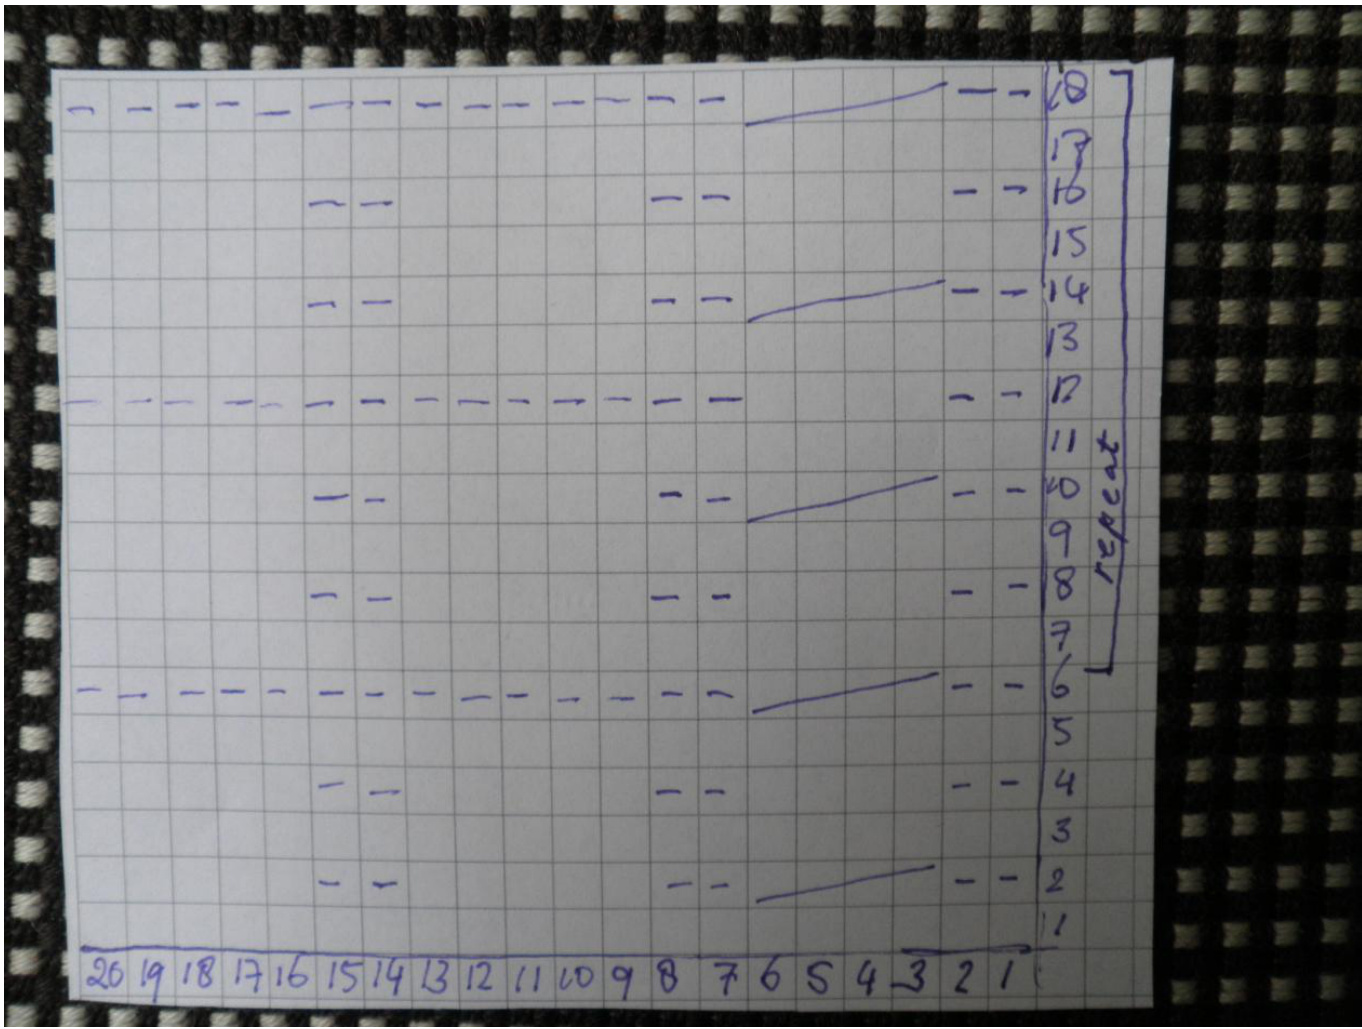
An empty square is a knit stitch A dash is a purl stitch. A PURL round is round 6, 12, or 18, when only the cable stitches are knit A long line crossing four stitches indicates a cable To adapt the pattern to your needs: Add or subtract any multiple of seven stitches by adding or reducing one stitch in every repeat. You could take out one stitch between the two blocks; add two stitches by making the blocks one knit stitch wider; or do both (which will add one stitch per repeat). When the hat including the ribbing is about 12.5 centimeters long, it's time to start the decreases!
Decreases:
Note: When the amount of stitches on your circular gets too small for comfortable knitting, switch to dpn's. 1t decrease round, in a PURL round (no. 6, 12 or 18 on the chart): after the cable stitches, purl one, purl two together, follow the rest of the chart as given, 7 times all around. You have "eaten" up one of the knit stitches from the first block, so it will only have four stitches from now on. 2"d decrease round, in the next PURL round: mirror the first decrease round, but this time take the last stitch of the second block of each repeat, and purl it together with the one following it, then purl one, knit the cable stitches, and purl the rest of the stitches of that repeat. This "eats" the last knit stitch of the second block, which will now also only have four stitches left. 3"d and 4"h decrease rounds, in the next PURL rounds, same as 1 and 2 respectively. Both blocks have three knit stitches left. 5th decrease round, next PURL round: decrease two stitches in each repeat on either side of the cable stitches: purl two together, purl one, cable, purl one, purl two together, continue remaining stitches according to the stitch pattern. The blocks now have only two knit stitches left. N.B. If this PURL round is also a cable round, knit three rounds (in stitch pattern) and decrease in the fourth, which is another cable round. Decrease in all cable rounds from now on. If the 5th decrease round is not a cable round, then knit five rounds in stitch pattern, and decrease in the 6th, which will be a cable round, and from then on decrease in every cable round. In every cable round, decrease two stitches on either side of each cable as described in the 5th decrease round. This will first eat up the stitches of the blocks and then the stitches in between. Continue decreasing in every cable round until you have 42 stitches left. Round 1: knit 42 stitches Round 2: knit the 4 cable stitches, purl the two stitches in between the cable stitches, 7 times Round 3: knit an "in between" stitch together with the first cable stitch, knit 2, slip-slip knit two together, 7 times. Only the 28 cable stitches are left now. Round 4: Make 7 cables Round 5: Knit 1, knit 2 together, knit 1, 7 times (make sure you knit the middle two stitches of each cable together): 21 stitches Break the yarn, leaving a 15 cm tail, thread it through a needle, then through the stitches, pull tight to close the gap and fasten on the inside of the hat. Fasten off the tail at the cast-on side. ALL DONE By decreasing on either side of the cables, the cables travel straight up the hat and come together in the center: