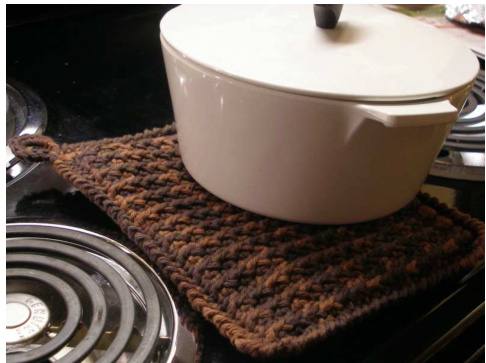
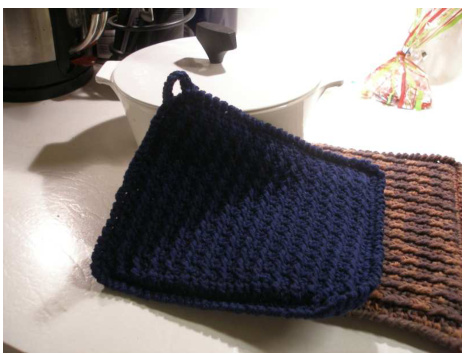
Ribs for Dinner Potholder
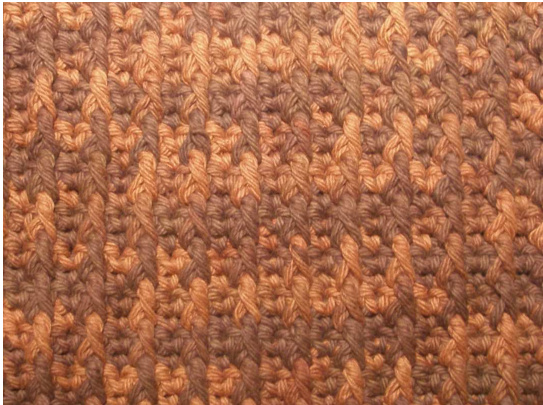
Designed by Lisa Gonzalez Skill Level: Easy+ The basic construction of this potholder is incredibly simple - two rectangles crocheted together - and creates a very sturdy, very thick potholder that can also be used as a trivit. The stitch pattern you use, a front post double crochet, creates nice texture integrating form and function. The piece is edged in a reverse single crochet and, like any potholder worth its salt, it has a handy loop for hanging near your stove.
Materials:
Two balls Lily Sugar 'n; Cream, or other 100% cotton yarn (approx. 2 oz./ 95 yds per ball) Size G crochet hook Yarn needle
Gauge:
18 rows and 14 sts in pattern st = 4 in. x 4 in.
Stitches used: Ch, sc, dc, frpdc, rev sc. Finished measurements: Approx. 7 % in. x 9 in. Potholder Panel (Make 2): Ch 31 Row 1: Dc in 4th ch from hook, 1 dc in ea ch to end. Turn. (29 dc). Row 2: Ch 1, skip first dc, 1 sc in ea dc, ending with 1 sc in 3rd ch of foundation ch. Turn. Row 3: Ch 2, skip first sc, \*1 fpdc around dc in row 1 (below next sc and skipping this sc), 1 sc in next sc.\* Rep from \* to \* across, ending with 1 sc in 1" ch of turning ch. Row. 4: Ch 1, skip first sc, \*1 sc in fpdc, 1 sc in sc.\* Rep from \* to \* across, ending with 1 sc in last fpdc, 1 sc in 2nd ch of turning ch. Turn. Row 5: Ch 2, skip first sc, \*1 fpdc around fpdc below next sc (skipping this sc), 1 sc in next sc.\* Rep from \* to \* across, ending with 1 sc in turning ch. Turn Rep rows 4 and 5 for a total of 30 rows, or until piece measures 7 in. from beg. Finish Off.
Assembly:
Row 1: With wrong sides together, crochet the two pieces together, beginning at the upper left corner and working 29 sc across to end. 3 sc in corner st and continue down the sides of the piece with 21 sc evenly spaced to corner. 3 sc in corner st and continue across bottom to corner with 29 sc evenly spaced and 3 sc in corner st. Work 21 sc evenly along last edge of piece and 3 sc in last corner st. Join w sl st to beg sc. Row 2: Ch 2. Work rev sc along edges around piece to beg, join w sl st. Ch 10 and join W sl st to first sc, creating a loop. Work 10 sc in loop and join to first ch. Finish off and weave in all loose ends. Now get cookin'! f


