
CROCHETPATTERNCHRISTMASSTOCKING
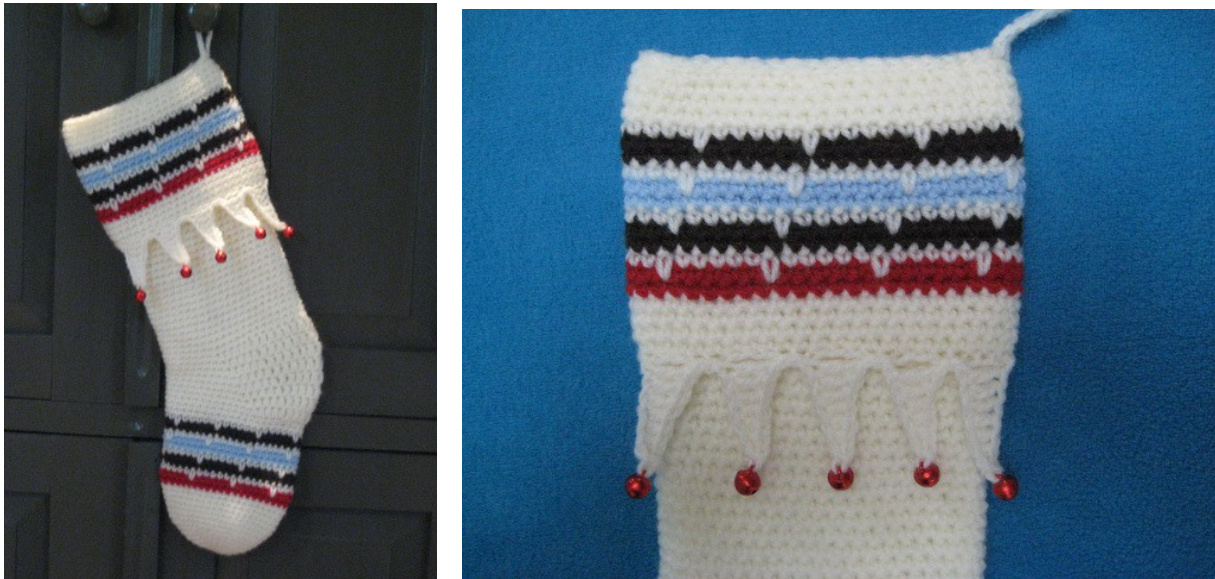
This pattern will guide you to crochet a Christmas stocking as shown in picture, made from soft acrylic yarn (wool or cotton) and crochethook G (4 mm). The stocking is made of 2 separate pieces, being jointed together while crocheting, there wilbe no sewing left to be done, which means this stocking will work up fast. @ This pattern is very suitable for using up your scraps of yarn, by making all stripes in different colours if you wish. Finished size will be approx. 15 x 5,50 inch (38 x 14 cm), depending on your tension and materials used. This pattern is mostly worked in continious rounds, do not join or turn unless otherwise instructed. You can add the bells while crocheting the tips along the border, instead of sewing them on, which will be a huge time saver. Gauge : 5 single crochet = 1 inch (2,5 cm) If you need help for making stitches you can always contact me or find the right instructions on the internet.
Materials :
- crochethook size G (4 mm), stitchmarker, tapestryneedle, pins - acrylic yarn in creme (approx. 85 gram) - small amounts of red, blue, brown yarn (approx. 4 gram of each colour) - 5 small bells or beads, diameter approx. 0.60 inch (1,5 cm)
Used stitches and abbreviations :
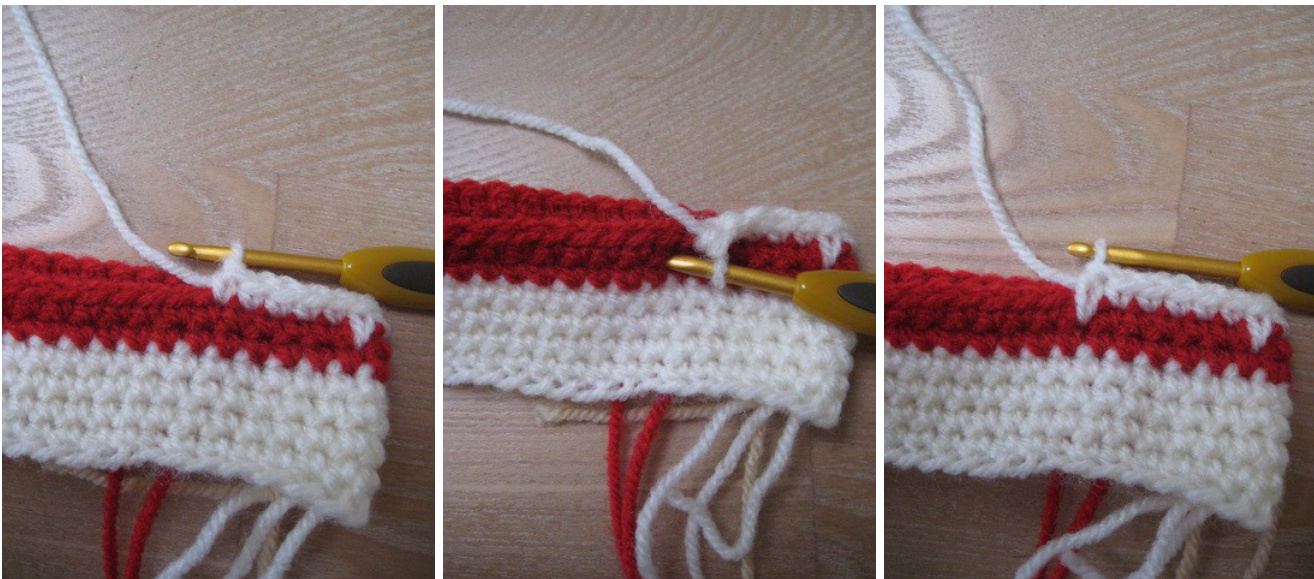
Ch = chain Tch = turning chain Sl st = slip stitch Sc = single crochet Lsc = long single crochet (see pictures on next page) Hdc = half double crochet Dc = double crochet St = stitch(es) Incr = increase; work 2 st in 1 st Decr = decrease; work 2 st together Have fun crocheting ! Stocking, from creme, brown, blue and red yarn. The stocking is worked in continlous rounds. Between the colourchanges is 1 round in creme yarn worked, making 1 Isc each 6 th st. See pictures. For making these Isc, you will insert your crochet hook 1 row / round lower than you would normally do and finish the stitch off as a regular sc.
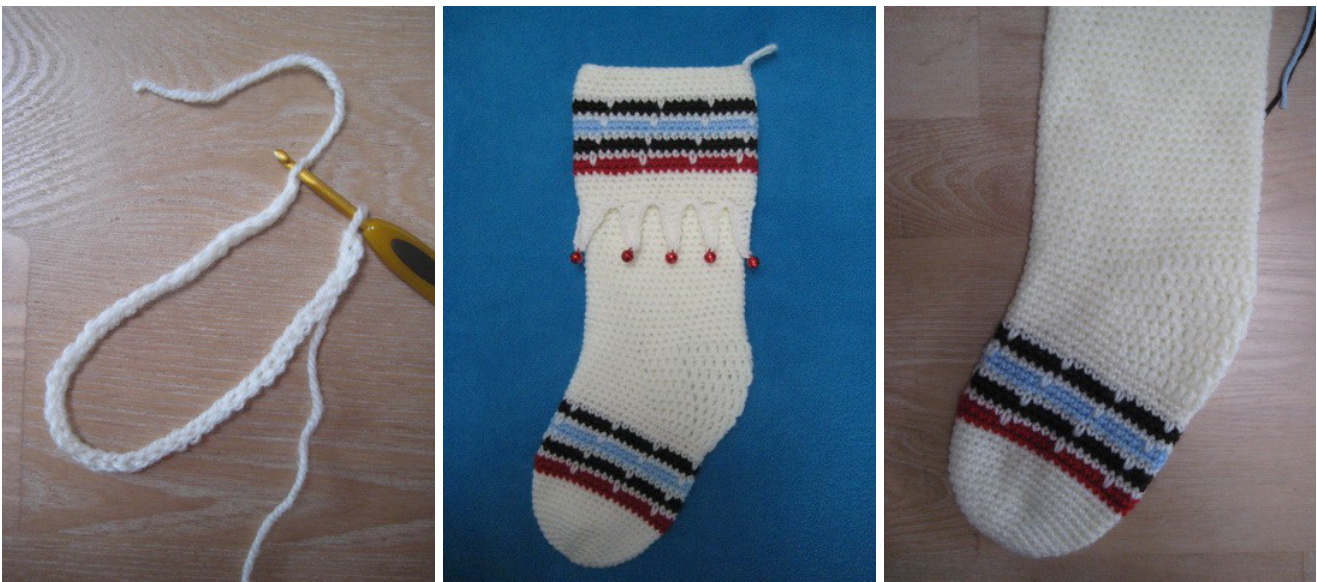
1) Start with creme yarn, 2 ch, 6 sc in 1st ch 2) 6 incr(12 st) 3) 1 sc, 1 incr (18 st) 4)2 sc, 1 incr(24 st) 5) 3 sc, 1 incr (30 st) 6) SC 7)4 sc, 1 incr(36 st) 8) 5 sc, 1 incr (42 st) 9-14) sC 15) change to red yarn, sc 16) SC 17) change to creme yarn, sc, work each 6th st as a lsc 18) change to brown yarn, sc 19) SC 20) repeat round 17 21) change to blue yarn, sc 22) sC 23) repeat round 17 24) change to brown yarn, sc 25) SC 26) repeat round 17 27, 28) continue with creme yarn, sc 29) 5 sc, 5 hdc, 11 dc, 5 hdc, 16 sc 30) 6 sc, 5 hdc, 11 dc, 5 hdc, 15 sc 31) 7 sc,5 hdc, 11 dc, 5 hdc, 14 sc 32) 8 sc,5 hdc, 11 dc, 5 hdc, 13 sc 33) 9 sc, 5 hdc, 11 dc, 5 hdc, 12 sc 34) 10 sc, 5 hdc, 11 dc, 5 hdc, 11 sc 35) 11 sc, 5 hdc, 11 dc, 5 hdc, 10 sc 36) 12 sc, 5 hdc, 11 dc, 5 hdc, 9 sc 37-76) SC 77) work 29 sc and fasten off. The endtail is now at the back of the stocking. Border, from creme, brown, blue and red yarn. The border is a separate piece which will be joined later to the top of the stocking. 1) Start with creme yarn, 48 ch (loosly) , close with 1 sl st to form a ring. Make sure your chain will not be twisted before joining. See picture below. 2 -5) SC 6) Repeat rounds 15 - 26 from the stocking. Keep in mind you will now work 48 st instead of 42 st each round. 7 - 9) sc 10) 6 sc,1 decr (42 st) Fasten off.
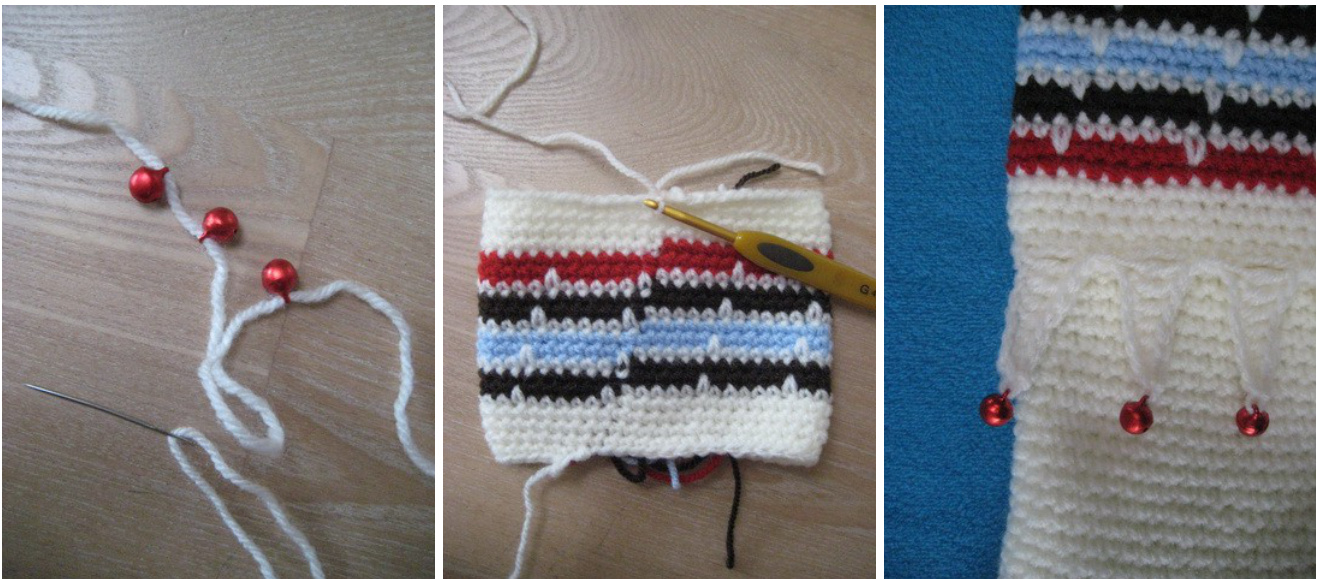
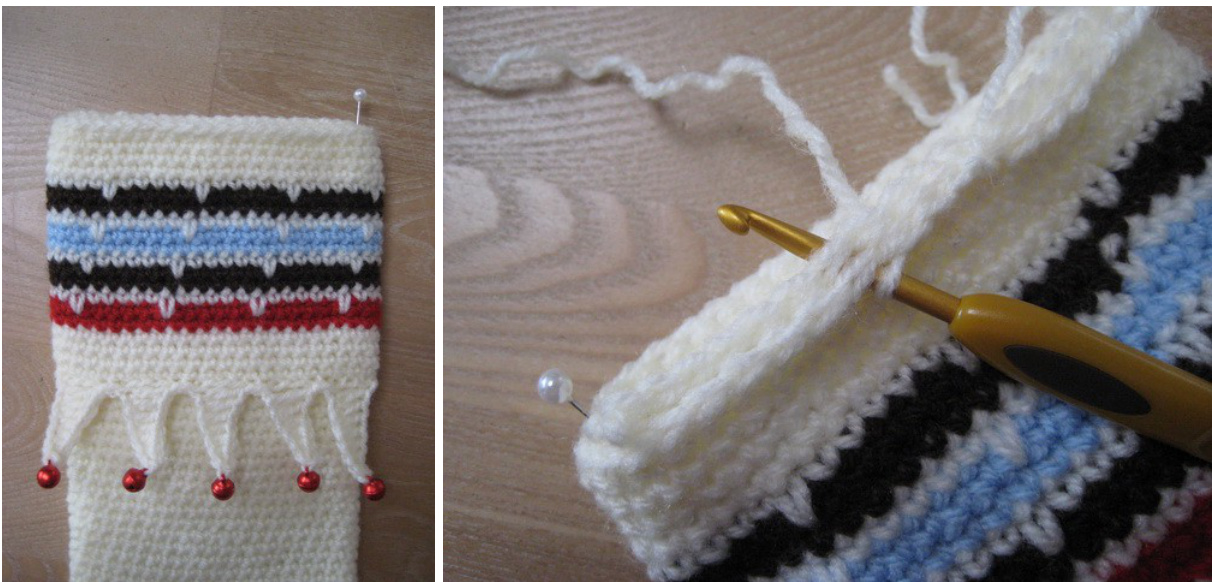
Tipped edging, from creme yarn and 5 bells or beads. Before you start, thread 5 bells on your yarn. Work / hold each bell below your crochet hook when crocheting them on. Lay the border you just made upside down, facing the back side in front of you. Attach creme yarn at the 1st ch you made at the start of the border. See picture on next page. Work 12 sl st, [7 ch, 1 bell, 1 ch, 1 sc in 2nd ch from hook, 1 sc, 2 hdc, 3 dc, attach the tip with 1 sl st in 4th st along the edge from the border, 1 sl st in next st] Repeat between [] 4 x, and work sl st untill the end of this round. Fasten off.
Finishing. Start finishing by weaving in all ends. Then place the border over the top of your stocking, mind the right positon of the tips. Also make sure you place the side with the tips on the front side of the stocking. (colourchanges at the backside) Lay it flat in front of you (facing right side, foot facing to the left) and place a pin or stitchmarker at the top corner on the right. This is where the hanging loop will be worked.
Attach yarn in the middle at the backside, at the top of the stocking / border, and work 1 sl st in each st through both layers of your work, untill stitchmarker. Work 14 ch, 1 sl st in the same st as the 14 ch (loop made), and continue sl st untill the end of this round. Fasten off, weave in all remaining ends and you're done ! This pattern is my own original design and is for personal use only, please do not use it for commercial or retail purpose. Resale / redistribution of the pattern is strictly prohibited. Do not translate or share this pattern. All Millionbells patterns are protected by international copyright law. Thank you very much. @ Marjan Schepers, Millionbells millionbells1972@gmail.com


