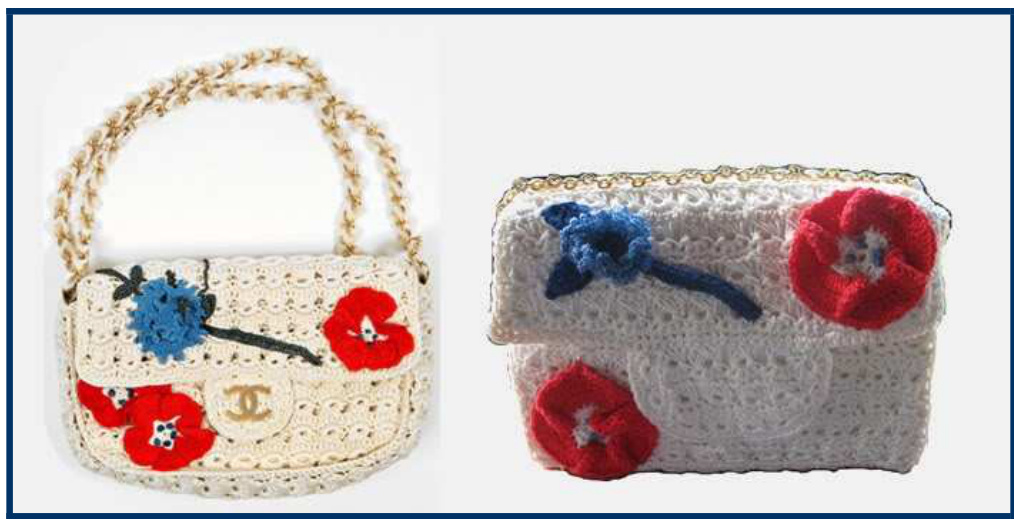
CROCH...ANEL FLOWER BAG-pattern
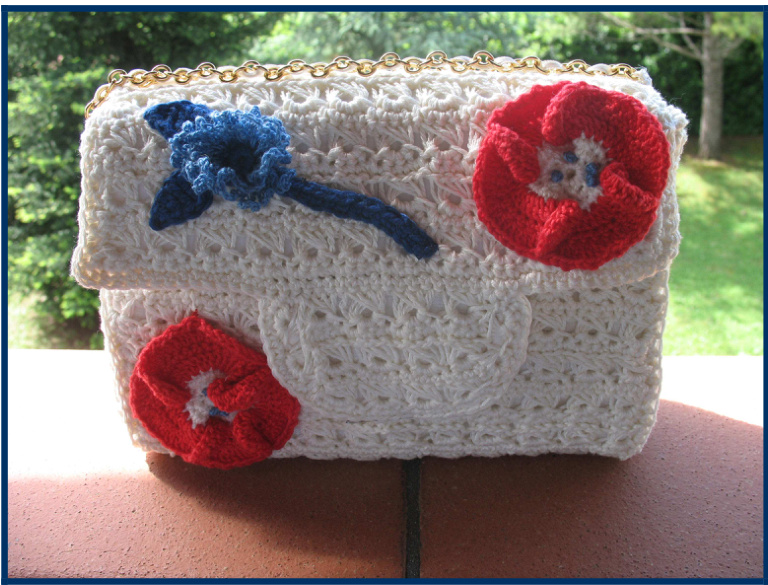
I've used a $\mathbf{4}\,\mathbf{mm}$ (6 USA; 8 UK) standard hook and a $9\ \mathrm{mm}$ needle (it should be 13 USA) I've worked on multiples of 4 stitches. How to make the bag: Chain $48+1$ turning ch ROW 1: dc in each ch across. Chain 1. Turn. ROW 2: insert hook through the stitch of the previous round, yarn through stitch, yarn over and through initial loop, keep the yarn on the needle. Do this for each stitch of this round; turn. NOTICE!: I kept all the loops on the needle and then I worked them on it, because I've found it easier! ROW 3: put the hook through the first 4 loops, make a first dc, than 4 dc. Take the next set of 4 loops and work them in the same way, till the end of the row. Chain 1. Turn. ROW 4: dc all the row long. Chain 1. Turn. Repeat from ROW 2 to ROW 4 other 24 times. For the “semicircle" in front of the bag: workfrom $17^{\circ}$ to $32^{\circ}$ stitch in the same way above for 3 times. Then, work each side at time. Put the hook through the stitches you find in the side you are working (even in the circle if necessary) for 8 times, keep all the 8 loops on the needle and work as described for ROw 3 for once. Work the other side in the same way. At the end you will have two circle per side (as you can see in the picture above).
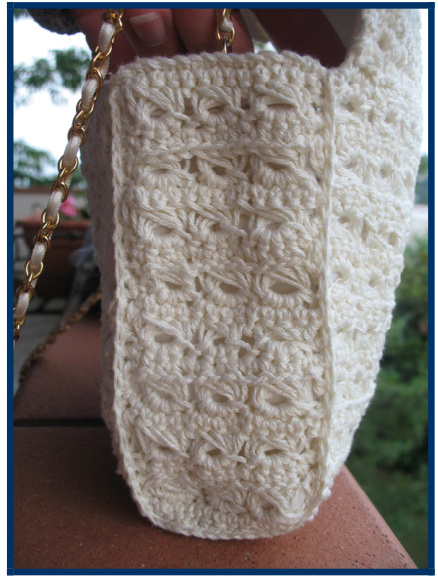
For the “side panels": chain $12+1$ turning ch. Work from \*ROW 1 to ROW $3^{*}$ for 8 times. Make 2.
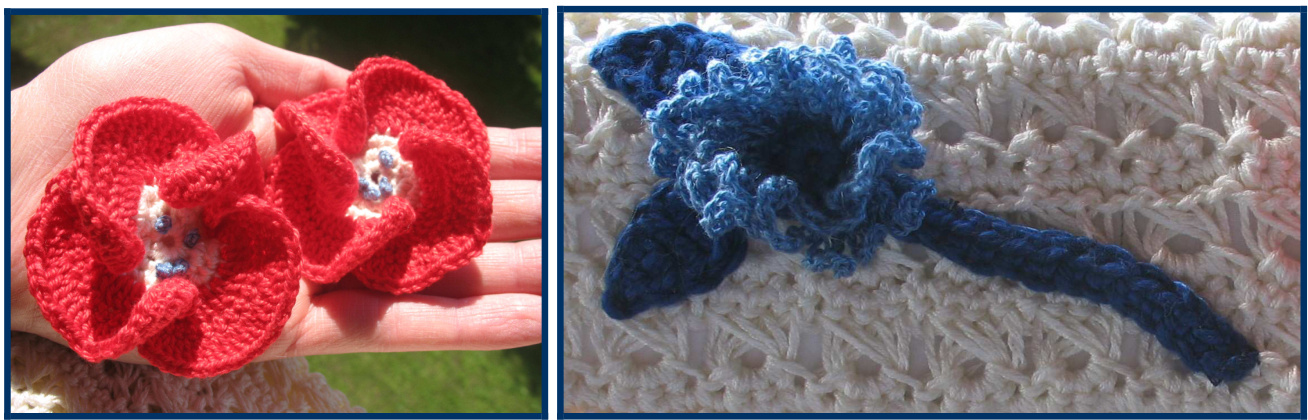
For the flowers, I've used two patterns you can find here: -puppies: http://arteshandwerk.blogspot.com/2010/03/para-fazer-esta-flor-dde-crocheyoce.html (this is written in Portuguese but it's understandable!) - the blue flower: http://www.allcrafts.net/f.php?url=web.archive.0rg/web/20070813210902/http://ww W.cm-crafts.com/FlowerFridgiepocky.htm . I totally made up the leaves and the stem, so, you can do them as you prefer! At the end, sewing all the pieces together.
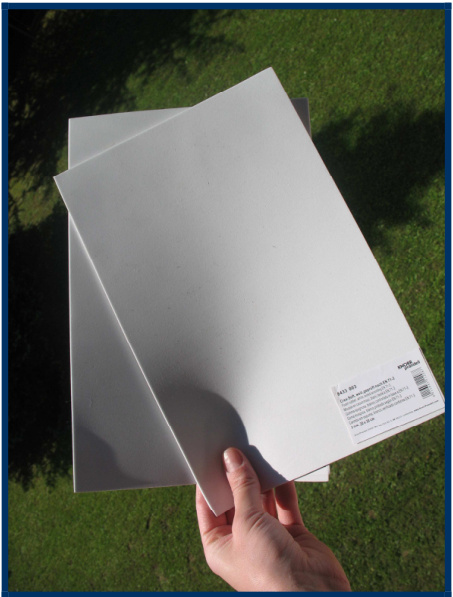
8433 003
Crea-Soft,weiB,gepruft nach 713 Foamrubber,white,tested according EN71-3, Mousse en caoutchouc,blanc,teste EN713 Gommapugnoaiancoontrolatoinbasea Gomamusgosa,blancoprobado segunEN713 Carimbo em espumabrancoverificado conformeN73 2mm,20x30cm
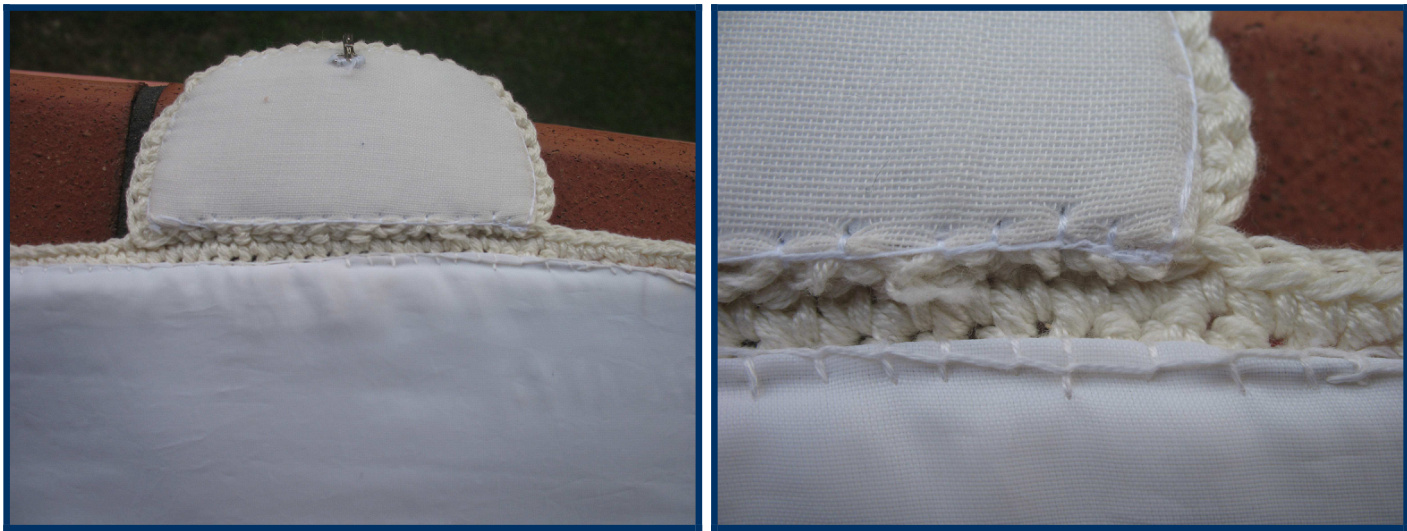
To give shape to the bag, I've used a foam rubber sheet. I've sewed the lining around the sheet and then I've sewed all to the bag.
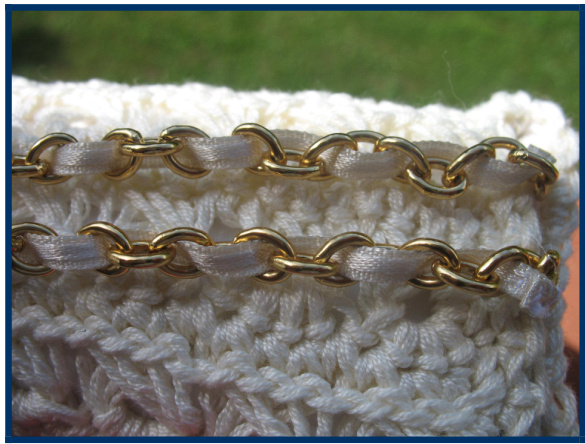
· I've used a chain from an old bag and a silk white ribbon which pass through it.
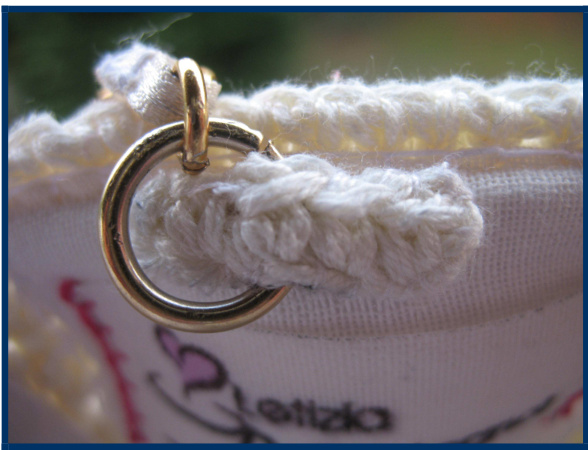
I've fixed it on the two sides of the bag making two kind of buttonhole (ch 6; 1 turning chain; ROW 1: dc. Cut. Make 2. Sew them to each side of the bag, at the top). Tada....!
NB: you can find a really good tutorial about how to work in broomstick lace here: http://littlegreen.typepad.com/romansock/step-by-step-broomstick-1.html Enjoy!


