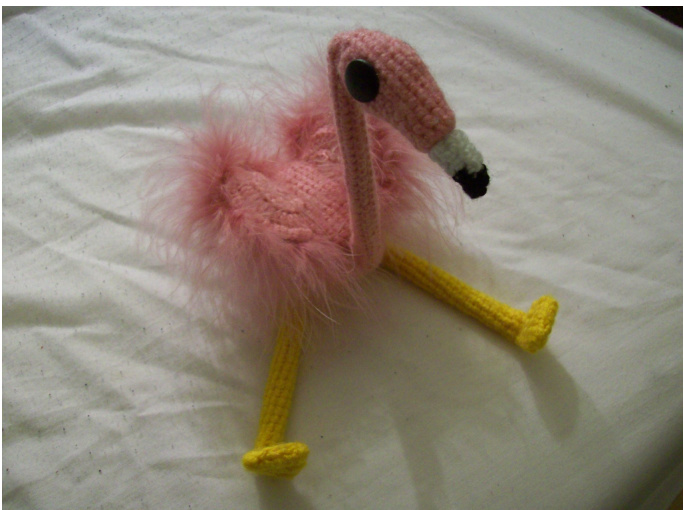
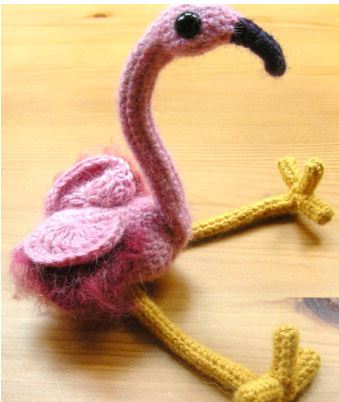
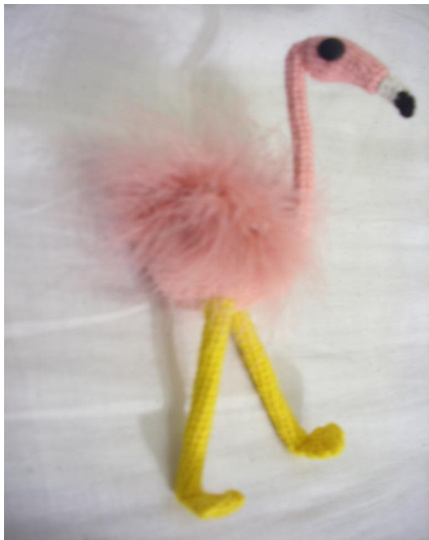
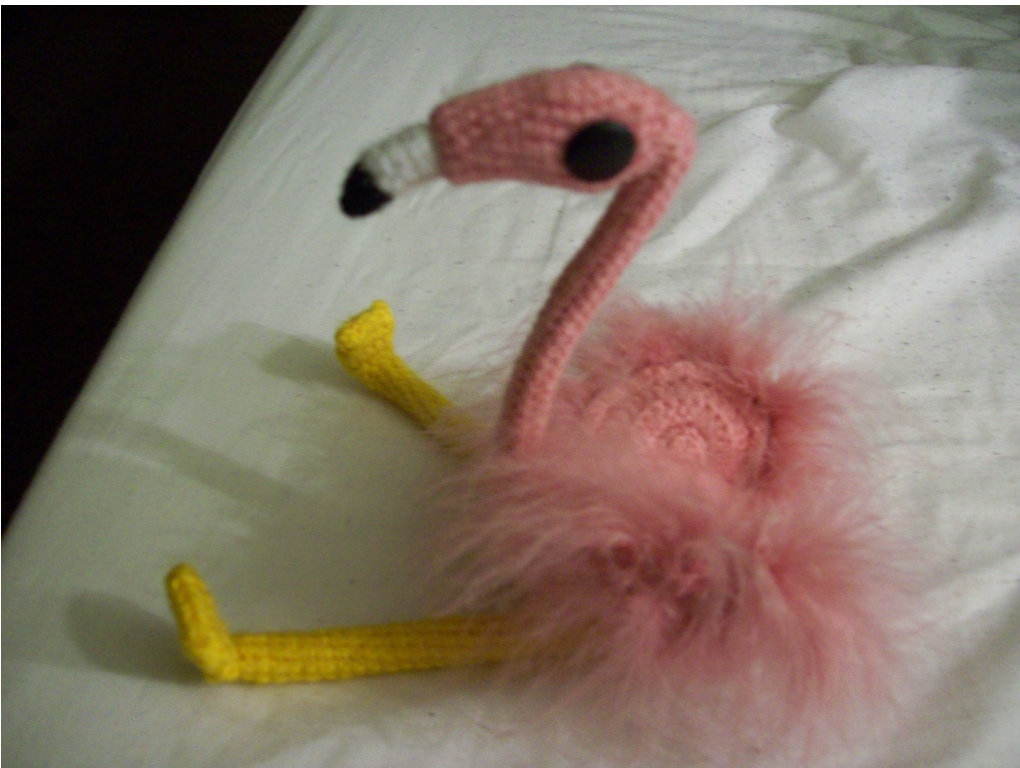
Flora, the Australian flamingo by Antoniya Petkova
Materials:
I have no recollection of the yarn used, but it's a double-knitting weight yarn - you need very little black and white; dark yellow and light pink. 2.5mm hook 2 pieces of pink fluffy material 2 black buttons (or custom toy eyes) Sewing needle (l sewed it together with pink thread, found it easier and more invisible than using yarn)
Abbreviations:
ch - chain st - stitch SS - slip stitch sc - single crochet dc - double crochet sc2tog - single crochet two together NOTE: When I did this in December 2011, only a month after Ilearned to crochet, I used this picture as a guide (from this very creative website: http://littlegreen.typepad.com/romansock/2008/08/is-this-too-muc.html;
Given my very little experience with crochet, I had no idea of what would turn out, so I didn't take not of what I was doing. I have tried to write down the pattern as close as possible, but I can't promise it's absolutely correct, as I only tested it partially :) If there are any mistakes along the way, let me know and I'll see what I can do. The flamingo is worked in rounds, so a stitch marker is useful, though for the smaller circles I prefer counting. I also tend to only crochet in the back loops of stitches in the smaller rounds, as I find it much easier with the same result. The head and body are worked continuously, while the beak, wings and legs are separate pieces, sewntogether after.
BEAK:
With white Row 1: ch7, ss in first ch (7 st) Row 2-3: sc in each st across (7 st) Change to black Row 4: sc in each st across (7 st) Row 5: sc1, sc2tog, sc1, sc2tog, sc1 (5 st) Row 6: sc1, sc2tog, sc2tog (3 st) Row 7: sc1, sc2tog (2 st) Row 8: sc2tog (1 st) Fasten off HEAD (I think I made the head a bit longer than necessary, so you can get rid of the first 2-3 rows and make the beak a little longer, so it looks more like the original): With pink Row 1: ch12, ss in first ch (12 st) Row 2: sc in each st across (12 st) Row 3: \*sc5, 2sc in next st\* twice (14 st) Row 4: sc in each st across (14 st) Row 5: \*sc6, 2sc in next st\* twice (16 st) Row 6: \*sc7, 2sc in next st\* twice (18 st) Row 7: \*sc8, 2sc in next st\* twice (20 st) Row 8: \*sc9, 2sc in next st\* twice (22 st) Row 9: \*sc10, 2sc in next st\* twice (24 st) Row 10: \*sc10, sc2tog\* twice (22 st) Row 11: \*sc9, sc2tog\* twice (20 st) Row 12: \*sc3, sc2tog\* 4 times (16 st) Row 13: \*sc2, sc2tog\* 4 times (12 st) Row 14: \*sc1, sc2tog\* 4 times (8 st) Rows 15-16: ch1, turn, sc4 (working only the top side of the tube) Row 17: ch1, turn, sc4; continue the round by sc4 in the remaining 4 st on the bottom Row 18: sc in each st across (8 st) - now you have the head of the flamingo and a nice angle, which is the start of the neck; stuff the head at this point (I did it with cotton)
NECK:
Rows 19-45 (27 rows): sc in each st across (8 st) - this forms the long neck of the flamingo (stuff the neck tightly with cotton or use a thin straw or rolled piece of cardboard to make it sturdier) Row 46: \*sc3, 2sc in next st\* (10 st) Row 47: ch1, sc5 (work the bottom 5 stitches of the tube) Row 48: ch1, turn, sc5 (5 st) Row 49: ch1, turn, \*sc1, 2sc in next st\* twice, sc1 (7 st); continue the sound by sc5 in the remaining 5 st on the top (12 st) - now you should have the neck and an angle, which is the beginning of the body
BODY:
Row 50: \*2sc in next st, sc1\* 6 times (18 st) Row 51: \*2 sc in next st, sc2\* 6 times (24 st) Row 52: \*2sc in next st, sc3\* 6 times (30 st) Row 53-56: sc in each st across (30 st) Row 57: \*2sc in next st, sc4\* 6 times (36 st) Row 58: \*2sc in next st, sc5\* 6 times (42 st) Row 59: \*2sc in next st, sc6\* 6 times (48 st) Row 60: \*2sc in next st, sc7\* 6 times (54 st) Rows 61-65: sc in each st across (54 st) Row 66: \*sc2tog, sc7\* 6 times (48 st) Row 67: \*sc2tog, sc6\* 6 times (42 st)
Row 68: \*sc2tog, sc5\* 6 times (36 st) Row 69: \*sc2tog, sc4\* 6 times (30 st) - at this point you should stuff the body and continue to do so until you close it up Row 70: \*sc2tog, sc3\* 6 times (24 st) Row 71: \*sc2tog, sc2\* 6 times (18 st) Row 72: \*sc2tog, sc1\* 6 times (12 st) Row 73: \*sc2tog\* 6 times (6 st) Row 74: \*sc2tog\* 3 times (3 st) Row 75: sc2tog, sc1 (2 st) Row 76: sc2tog (1 st) Fasten off
WINGS (make 2): With pink
(back in the day I used to work with a magic ring, but the same effect can be achieved by ch2 and sc6 in the second ch from hook - it will leave a small hole, but that can always be masked when sewing them to the body) Work in front loops only Row 1: magic ring with 6 sc (6 st) Row 2: ch1, turn, 2sc in each st across (12 st) Row 3: ch1, turn, \*2dc in next st, dc1\* 6 times (18 st) Row 4: ch1, turn, \*2dc in next st, dc1 in next 2 st\* 6 times (24 st) Row 5: ch1, turn, \*2sc in next st, sc1 in next 3 st\* 6 times (30 st) Fasten off
LEGS (make 2):
With dark yellow Row 1: ch10, ss in first ch (10 st) Rows 2-26 (next 25 rows): sc in each st across (10 st) Row 27: ch1, sc4 (4 st) - work the top 4 stitches of the tube (you'll be making the foot) Row 28: ch1, turn, sc4 (4st) Row 29: ch1, turn, sc1, 2sc in next 2 st, sc1 (6 st) Row 30: ch1, turn, sc in each st across (6 st) Row 31: ch1, turn, sc2, 2sc in next 2 st, sc2 (8 st) Row 32: ch1, turn, sc in each st across (8 st) Row 33: ch1, turn, sc in front loops only (now you'll be working the bottom of the foot) Row 34: ch1, turn, sc in each st across, ss in one of the edge stitches of the top of the foot (8 st) Row 35: ch1, turn, sc2, sc2tog twice, sc2, ss in one of the edge stitches of the top of the foot (6 st) Row 36: ch1, turn, sc in each st across, ss in an edge st (6 st) Row 37: ch1, turn, sc1, sc2tog twice, sc1, ss in an edge st (4 st) Row 38: ss through both the 4 st of the bottom of the foot and the corresponding 4 st left on the tube (there are 6 st remaining on the tube, so leave 1 st on each side); this will complete the top and bottom of the foot and it willattach it to the leg Fasten off Sew 2 pieces of pink fluffy material on the edges of the wings. Then sew the insides to the body. Sew the beak and the legs and 2 buttons as eyes (you can also use custom made eyes for toys, but I couldn't find anything appropriate, so just used black buttons). You can adjust the shape slightly and form the flamingo properly once it's stuffed, as it will keep the shape. Your little flamingo is ready. Mine is able to stand up, as well, but I prefer it sitting down, looks more impressive. Happy crocheting! :)
@Antoniya Petkova


