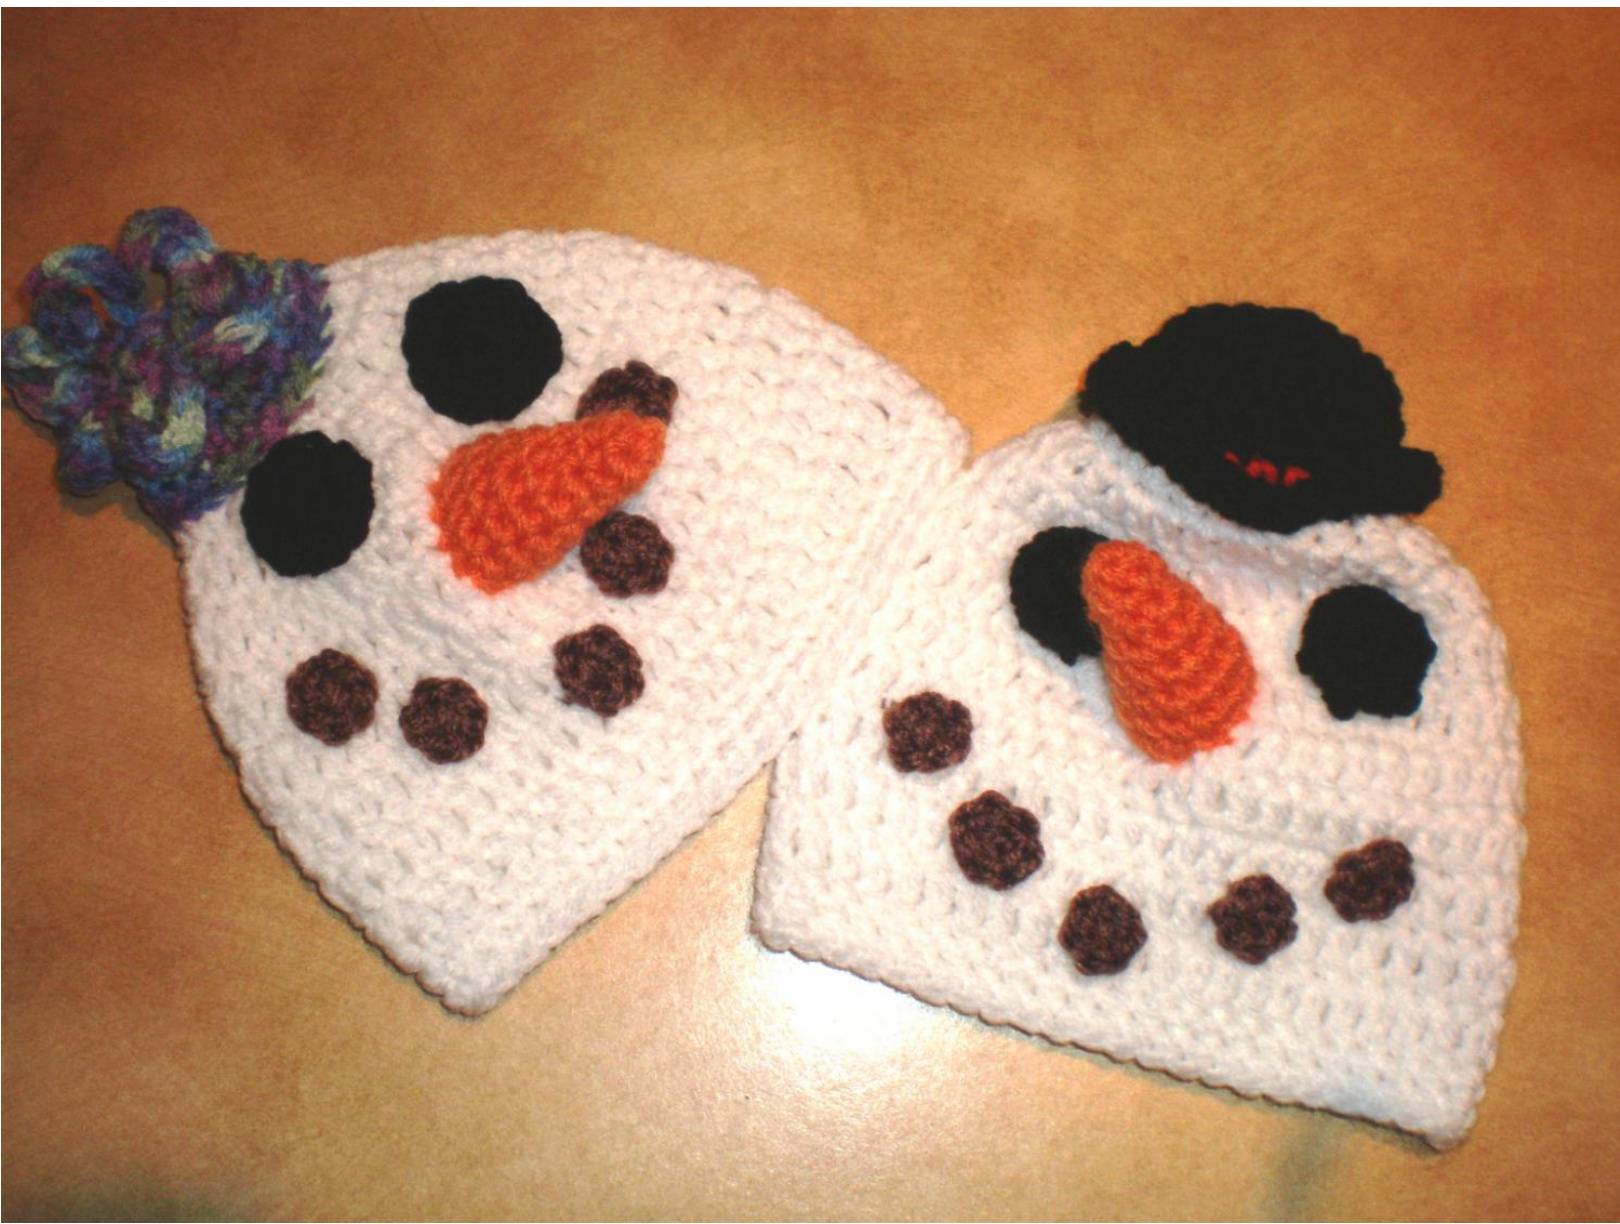
NO PEOPLE LIKE SNOWPEOPLE Beanie
I used machine washable acrylic, but if you prefer wool... Materials: Double knitting yarn/8 ply 1 skein of white yarn and small amounts of black, orange, brown, red and variegated yarn. 1 size 4.5mm hook wool needle for embroidery and finishing off. Polyfil for stuffing. Stitches Used: US terminology CH - chain, DC - double crochet, HDC - half double crochet, SC - single crochet, SL ST - slip stitch, st - stitch/stitches SC dec - single crochet decrease, {insert yarn into top of next st pull up loop) twice, yarn over hook and pull through all 3 loops} st — stitch/stitches (English Equivalents: CH - chain, DC - treble crochet, HDC - half treble, SC - double crochet, SL ST -single crochet)
Sizes:
B/ Toddler -12 months to 3 years C/ Child - 3 years to 8 years D/ Youth - 8 years to 12 years E/ Adult All sizes are based on average head sizes All instructions are for size A. Changes for the various sizes are given in brackets.
Starting at the top of the Beanie:
I use a magic circle to start with which gives a nice tight result on the finished item. There are several good instruction videos available on the net, here is the address on just one of them. http://www.youtube.com/watch?v=WLuSVyKvoUg Once you have used this technique, you will find that you will replace the old CH circle method in other patterns as well. Throughout the beanie you will be asked to leave a tail of yarn at the end of different parts, this is used for stitching pieces in place, avoiding joining in another piece of yarn.
BEANIE: Using White
Starting with a magic circle Round 1: 1SC 1CH (counts as first DC), 7 DC in ring (8DC, 9DC, 10DC, 11DC), Join with SL ST into top of CH at beginning - 8st (9st, 10st, 11st, 12st) Round 2: 2CH (does not count as a ST) 2 DC in every st around. Join with SLST into top of 1st DC (use this method throughout) - 16st (18st, 20st, 22st, 24st) Round 3: 2CH, 2DC in next st, \*DC in next st, 2 DC in next st \* Repeat \* to \* end of round. Join - 24st (27st, 30st, 33st, 36st) Round 4: 2CH, 2DC in next st,\*DC in next 2 st, 2 DC in next st\* Repeat \* to \* end of round. Join - 32st (36st,40st, 44st, 48st) Round 5: 2CH, 2 DC in next st, \*DC in next 3 st, 2 DC in next st\* Repeat \* to \* end of round. Join - 40st (48st,50st, 55st, 60st) Round 6: 2CH, 2 DC in next st,\*DC in next 4 st, 2 DC in next st\* Repeat \* to \* end of round. Join - 48st (54st,60st, 66st,72st) Round 7-11: 2CH, DC in each DC to end of round. Join (Round 7-13, Round 7-15, Round 7-16, Round 7-17) If you want your beanie longer, simply add extra rounds here. Round 12 (14, 16, 17, 18): 1 SC in each DC around. Repeat this round once more. Fasten off and weave in end. NOSE CARROT: Using orange, make 1 Jtui uiy wiel u iiuyie llcie Round 1: 1CH, 4SC into circle. Join with SL ST into top of 1st SC - 4st Round 2: 1CH, (2SC in next st, 1SC in next st) twice. Join - 6st Round 3: 1CH, 1SC in each st around. Join - 6st Round 4: 1CH, \*2SC in next st, 1SC in next 1st\* Repeat from \* to \* to end of round. Join - 9st Round 5: 1CH, 1SC in each st around. Join - 9st Round 6: 1CH, \*2SC in next st, 1SC in next 2st\* Repeat from \* to \* to end of round. Join - 12st Round 7: 1CH, 1SC in each st around. Join - 12st Round 8: 1CH, \*2SC in next st, 1SC in next 3st\* Repeat from \* to \* to end of round. Join - 15st Round 9: 1CH, 1SC in each st around. Join - 15st Round 10: 1CH, \*2SC in next st, 1SC in next 4st\* Repeat from \* to \* to end of round. Join - 18st Round 11: 1CH, 1SC in each st around. Join - 18st Round 12: 1CH, \*2SC in next st, 1SC in next 5st\* Repeat from \* to \* to end of round. Join - 21st Round 13: 1CH, 1SC in each st around. Join - 21st Fasten off leaving a tail long enough to sew on nose. At this point lightly stuff the nose and using the tail, sew nose to the centre front of the beanie. Fasten off and weave in ends.
EYES: Using Black, make 2
Starting with a magic circle Round 1: 1SC 1CH (counts as first DC), 11 DC in ring. Join with SL ST into top of first CH - 12st Fasten off leaving a tail long enough to stitch eye to Beanie, sew eyes either side of nose with the nose sitting just below. Weave in ends. MOUTH PEBBLES: Using Brown, make at least 5 (I used 5 on the baby size but really you make as many as suits what you have in mind) Starting with a magic circle und 1: 1CH, 6 SC in ring. Join with SL ST into top of CH at beginning. Fasten off leaving a tail to sew it on with. Using photo as a guide, stitch pebbles into a smile underneath the nose. Weave in ends.
BOWLER HAT: Using Black, make 1
Starting with a magic circle 1CH, 8SC in ring Join with SL ST into top of 1st SC at beginning - 8st 1CH, 2 SC in every st around. Join with SLST into top of 1st SC - 16st Round 3: 1CH, 2SC in next st, \*SC in next st, 2 SC in next st \* Repeat \* to \* end of round. Join - 24st Round 4: 1CH, SC in each SC to end of round. Join - 24st 5: 1CH, SC in each SC to end of round. Fasten off black and join in re Round 6: 1CH, SC in each SC to end of round. Round 7: 1CH, SC in each SC to end of round. Fasten off red and join in black. Round 3: 1CH, 2SC in next st, \*SC in next st, 2 SC in next st \* Repeat \* to \* end of round. Join - 32st Round 3: 1CH, 2SC in next st, \*SC in next 2st, 2 SC in next st \* Repeat \* to \* end of round. Join - 40st Fasten off and weave in ends. LADIES HAT: Using variegated yarn (Colour of your choice), make Starting with a magic circle Round 1: 1CH, 8SC in ring Join with SL ST into top of 1st SC at beginning - 8st Round 2: 1CH, 2 SC in every st around. Join with SLST into top of 1st SC - 16st Round 3: 1CH, 2SC in next st, \*SC in next st, 2 SC in next st \* Repeat \* to \* end of round. Join - 24st Round 4: 1CH, SC in each SC to end of round. Join - 24st Round 5: 1CH, SC in each SC to end of round. Join - 24st Round 6: 1CH, SC in each SC to end of round. Join - 24st Fasten off and leaving a tail long enough to sew to top of beanie. FLOWER: Using variegated yarn, make 1 Starting with a magic circle Round 1: 1CH, 7SC in ring Join with SL ST into top of 1st SC at beginning - 7st Round 2: 1CH, 1SC in 1st st (5CH 1SC in next st) Repeat to end of round, but instead of last SC join to 1st of round with SLST Round 3: Working into CH loops only, work 10SC into each loop. Join with SLST to 1st SC Fasten off and weave in ends. Stitch flower to top of ladies hat.
FINISHING:
Using the photo as a guide, and a length of matching yarn, stitch hat to top of beanie at a slight angle. Lightly stuff before closing. Fasten off and weave in ends. Enjoy your Beanie. All enquiries can be directed to jezebeardesigns@gmail.com , I am only too happy to help where ever I can. I would also love to see photos of YOUR beanies! Please do not copy this or any of my patterns or upload to the internet.\* If you make your beanies for sale, please do not sell them on the internet, and I would appreciate if you give credit for the design to JezebearDesigns, out of courtesy.\* Other than that.
HAPPYCROCHETING!!!!!!!!!!
\*Copyright protocol applies to this item: This work is copyright. Apart from any use permitted under the Copyright Act 1968, no part may be reproduced by any process, nor may any other exclusive right be exercised, without the permission of JezeBearDesigns the copyright owner.


