A DesigningVashti Brochet Project
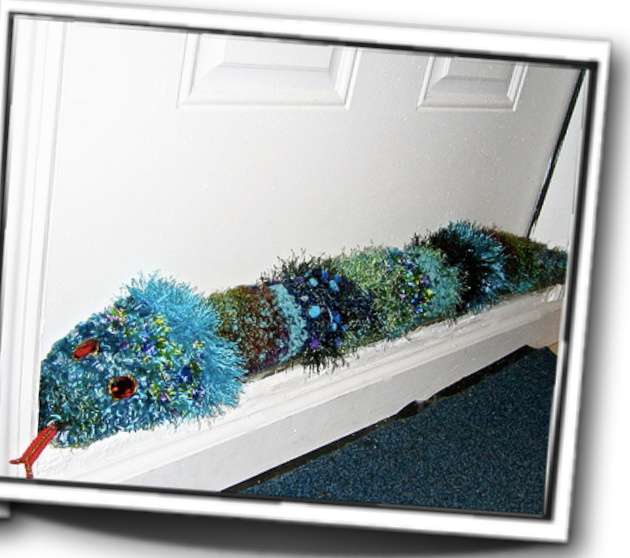
The Original Scrappy Draft Snake
Pattern #3456-H1305R The earlier edition of this pattern can still be viewed on my blog bere:bttp:l designingvasbti.blogspot.com/2009/01/free-pattern-draft-snake.btml.It wasfeatured in an article about energy-saving DIYDoor draft guards bere: bttp://www.thbedailygreen.coml green-bomes/latest/door-draft-stoppers-0raft-snakes-460109.
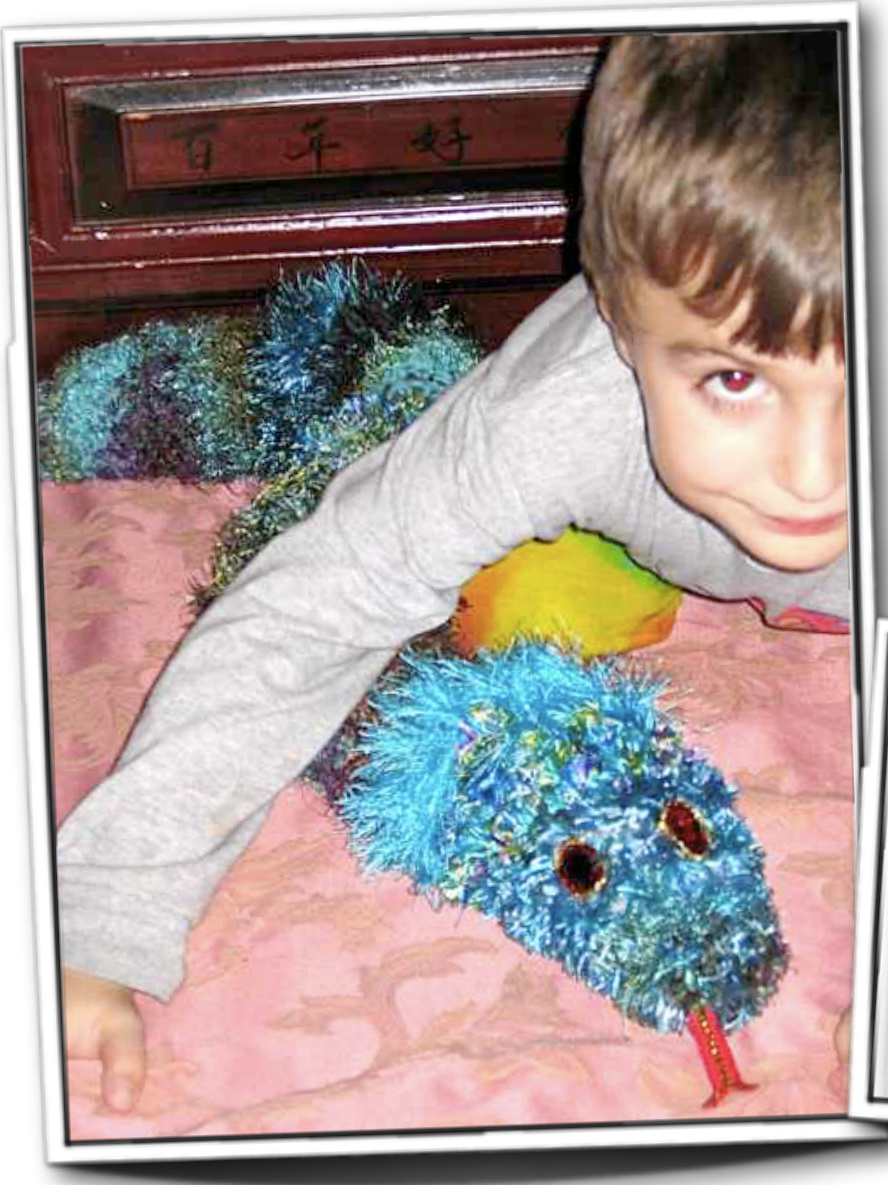

If you're wondering what to do with leftover crochet yarns or single skeins of pretties, this is your lucky day. This free $\mathbf{\omega}_{\mathbf{n}}^{1}$ easy pattern uses basic crochet stitches, yarns you already own, and is sure to lower your heating bills! Make anotherfora child to hug.
To get started, round up the yarns you'd like to use. (Yarn scraps should be at least 36 inches/ 92cm long.) If a yarn is thin, use it along with one or two other yarns. Furry, lumpy, fleecy, and feathery yarns are fantastic for draft snakes because the extra texture blocks drafts under the door the best. If you use highly textured yarns like I did, crochet them along with a coordinating color of a standard smooth worsted weight yarn. The smooth yarn will make it easier for you to see where to place your stitches. If you use all smooth yarns--for example, 3 worsted weight strands of Red Heart or Simply Soft acrylic held together--the snake will have a cool woven basket look instead. It will also be more stiff.
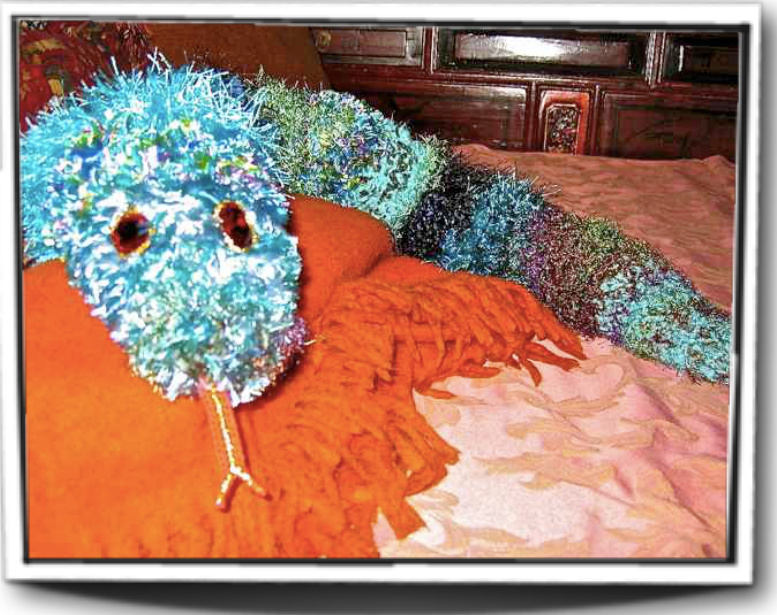
I glued big flat-backed acrylic gems for the eyes, and with thin red crochet thread I crocheted a forked tongue, which required heavy stiffener. In this downloadable pattern edition, instructions for crocheting the tongue are available for the first time. In place of a crocheted tongue, I suggested in the blogged version of this pattern, "cut a piece of red felt into a long snake tongue shape and callit a day. In keeping with the snake's stylin' bling I edged the snake eyes with glittery gold 3-D fabric paint, and drew a gold vein on the tongue." I hope you enjoy crocheting this draft snake as much as I did! --Vashti Braha International English equivalents to American measurements, yarn weights, and stitch terms are provided in brackets.
Skill Level: Easy.
After using this pattern you will know (if you didn't already): How to crochet in the round as a spiral (without joining each round) An easy way to crochet a forked tongue A fun $\&$ quick use for scrap.yarns
Finished Dimensions
Approximately 4 inches $(10\,\mathrm{cm})$ at widest and 35 inches $\left(89\,\mathrm{cm}\right)$ long. Pattern includes instructions for changing both width and length of snake.
Supplies Needed
$\circleddash$ Crochet Hook: Size M/US13/9mm crochet hook was used $\circleddash$ Yarn: Your own special stash of yarns, some with high texture for EDP (enhanced draft protection)
$\circledcirc$ Stitch marker
$\circledcirc$ Stuffing
$\circledcirc$ For crocheted tongue:
· small amount size #10 cotton crochet thread · size #7 steel hook, or comfortable size for crocheting this thread size fairly tightly ·Stiffener, optional $\circleddash$ For non-crocheted tongue: scrap of red felt cut into snake tongue shape Yarn needle that is sharp enough to sew through tongue Flat-backed gems or googly eyes, and fabric glue for them (if children in the home are under 3, securely sewn-on eyes instead of glued are safer.) Glittery gold 3-D fabric paint, optional (to rim eyes and accent tongue)
Stitches & Abbreviations Used
US terms are followed by UK equivalents in brackets. $\mathbf{ch}=$ Chain Stitch $\mathbf{sc}=$ Single Crochet {UK: Double Crochet} sl st $=$ Slip Stitch st, sts $=$ stitch, stitches rep $=$ repeat rnd $=$ round Gauge io not important for this pattern. The goal is a comfortably tight gauge; as long as the stuffing won't show, you're using the right hook for you and your yarns.
Begin Pattern
Make a slip knot with three strands held together of worsted weight [UK: Aran] yarns, leaving $6^{\circ}$ $\left(15\thinspace\mathrm{cm}\right)$ yarn ends. Note: If your yarns are thinner, try adding a Ath strand; if thicker, you may only need to hold 2 strands together. Place loop on crochet hook. Note to less experienced crocbeters: you'll start off seeing the stitches clearly if you use smoother-textured yarns for the first 9 rounds. Begin Snake at its tail end: Ch 2. Rnd 1: work 6 sc into 2nd ch from hook (or use the method of your choice for crocheting in the rnd with a closed center hole). Place st marker in 6th sc. Rnds will be worked in a spiral without joining rnds and without turning after each rnd. Move st marker to the last st of each rnd so that you can count your rnds. The backs of the sts form the right side (show on the outside) of the snake because high texture falls to the backs of crochet sts. Rnd 2: (2 sc in the next sc, sc in the next sc) around, move marker: 9 sc. Rnd 3: Sc in each sc around, move marker: 9 sc. Rnd 4: (2 sc in next sc, sc in each of next $2\;\mathrm{sc})$ ) around, move marker: 12 sc. Rnd 5: Rep rnd 3. Rnd 6: (2 sc in next sc, sc in each of next $\operatorname{\mathsf{S}}\operatorname{sc},$ ) around, move marker: 15 sc. Rnd 7: Rep rnd 3. Rnd 8: (2 sc in next sc, sc in each of next 4 sc) around, move marker: 18 sc. Rnd 9: Rep rnd 3. Snake tail is complete. Snake Body and Head: Change one or more yarns at whim as you go. Rep rnd 8 once more if you'd like your snake more plump, then rnd 3 until snake is as long as desired; I made mine to fit a 35-inch $\left(89\,\mathrm{cm}\right)$ doorway snugly. Fasten off with a yarn tail about 12 inches $(30\;\mathrm{cm})$ long. Snake opening is the mouth. Snake Tongue: To crochet a forked tongue, chain 22. Row 1: Sc in 2nd ch from hook and in each ch across, ch 1, turn. Row 2: Sc in first sc and in each of next 15 sc, ch 6, turn, leaving rest of row unworked. Row 3: Sc in 2nd ch from hook and in each ch and sc across. Fasten off leaving a long enough thread end to sew tongue into snake mouth. Stiffen tongue with starch or thickener of your choice if tongue curls too much.
Finishing:
Stuff snake. Sew mouth closed: with yarn needle and yarn tail, sew snake mouth tightly closed around tongue so that seam creates a rounded snake's mouth. Glue (or sew) eyes securely. With gold fabric paint, draw a line down the center of the tongue and along each forked part of tongue tip.
I would love to hear from you and see your projects! Please upload pictures of your project to the Designing Vashti Flickr Group or create a project page in Ravelry and link it to this pattern so that I can see them
\* Email me anytime to request that additional helpful information be added to this pattern or to its online image bank (such as symbol diagrams, stitch tutorials, min-videos, etc.) VashtiBraha@gmail.com


