Dancing Grannies Red Hat By Denise Layman
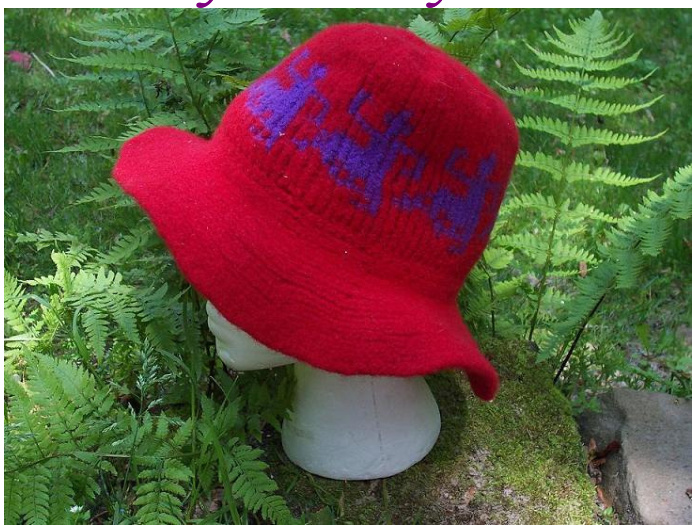
This fun hat is a must for any Red Hat Lady out there! This is a pattern that fits the Red Hat Ladies feisty personality! Worked on an adjustable knitting loom/board it uses both knitting loom and double sided knitting board methods to make the two separate pieces of the hat! Then felt it up and have fun showing it off! For all you who are not Red Hat Ladies.. well. get yer own hat! (or you can just make this one in colour of wool just skip the chart!) It may seem complicated at first glance but it is really not that hard and is actually a rather fast knit!
Materials:
30" Fine Gauge Adjustable loom 200 yards main colour $100\%$ worsted weight wool yarn\*\* (red or colour of your own choice) this yarn will be referred to as MC, throughout the pattern.(if making a one colour hat then you will need at least 220-275 yards of MC) 75 yard contrasting colour $100\%$ worsted weight wool yarn\* (purple, or colour of your choice) this yarn will be referred to as CC, throughout the pattern. Knitting tool Crochet hook Optional for felting: Styrofoam head form or hat form, tea towels, small rubber ball, a box of large piece of cardboard, rubber gloves, lingerie bag or pillow case, straight pins. Size: One size fits most pattern will yield a hat that fits a 22" head.
Pattern notes:
Pattern level: Intermediate/Advanced Skills needed: Knit stitch on round loom stockinet stitch on knitting board decreasing on an adjustable round loom working with two colours reading a chart cast on and off of a round loom and a knitting board
Pattern:
Crown of hat:
Arrange the loom as follows: place the two three peg end pieces at 39 pegs apart so that there are 39 pegs on each long side, and 3 pegs on each end. Cast on the 84 stitches with MC Knit 5 rows in MC. At this point you will begin to follow the dancing grannies chart as given below. The white squares are the MC, and the dark squares are the CC. Each square stands for one peg on the loom.
Tips:
Wrap each colour individually in each row. In other words wrap all the MC pegs, then go back with your CC and wrap those pegs. Keep the tension as even as possible when carrying the yarns across the back. At some points there will be large spaces between the avoid pulling this too tight, or leaving too much slack. When you carry the yarn around the bend at the end of the loom, be sure to leave some slack. You should follow the curve of the loom with the working yarn so that it is not pulled tight across the loom.(these sections will hang loose don't worry) Use a post it note or a book marker under the row you are on so you do not loose your place. Don't worry so much about what the inside is looking like. Remember this will be felted so it will all blend together or be trimmed out! Go slow! Take you time and double check and it will turn out fine! When you are done with the chart, cut the CC and leave about a 3" tail. Continue to knit in the round for 5 more rows, or until your hat brim is at least 6 inches tall.
Decrease for crown of hat:
At this point you will begin to decrease on every row to shape the crown of the hat. To decrease move the end pieces in one peg space on each row. In this way you will decrease 4 stitches on each end per row, for a total of 8 stitches decreased per row. Continue in this manner until there are only 12 stitches remaining. Then cut your yarn leaving an 18 inch tail. Use that tail to remove the remaining stitches using the gather method.
Brim of Hat:
To make the brim of your hat, you will need to put your loom into double sided knitting board mode. Or simply use another small or fine gauge knitting board that has at least 12 sets of pegs. To make the hat brim cast on 12 sets of pegs. Knit 1 row in the stockinet method:
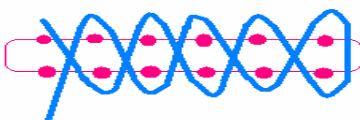
Proceed (in that same stockinet stitch) as follows: Row 1: wrap and knit 2 sets of pegs Row 2: Wrap and knit 4 sets of pegs Row 3: Wrap and knit 6 sets of pegs Row 4: Wrap and knit 8 sets of pegs Row 5: Wrap and knit 10 sets of pegs Row 6: Wrap and knit 12 sets of pegs. Rows 7-11 Wrap and knit all pegs in the stockinet stitch Repeat these 11 rows until the left edge (the inside of the curve) is at least 24 inches long preferably ending with row 11. Cast off from the knitting board loosely.
Finishing:
Seaming Seam the cast on and cast off ends of the hat brim together. Make this as smooth as possible. Turn the body of the hat inside out and using a whip stitch attach the brim to the body of the hat.
Felting
To felt the hat, you willplace it in a lingeriebag or a pillow case and secure it by zipping the bag or tying the pillow case shut. Throw it in the washer with a heavy pair or two of jeans, (nothing fuzzy like towels!!) set the water temperature to the hottest setting, put in about a table spoon of dish soap, and run it on high agitation. You will want to check on it every 3-5 minutes to check the felting process. (this is where the rubber gloves come in handy!) This is a tight weave so it should not shrink up that much but you want to Watch it! When the hat has sufficiently felted (some stitch definition will be lost, and it should measure 10- 11 inches across at point where the body and brim meet) Remove it and rinse in hot water. Place it inside a towel and pat most of the water out. To shape the hat pin it to a foam hat form, if you have one, and let it dry. If not use tea towels wadded up into a ball and stuff them into the hat push and stretch it tillit is in the shape you want. Then place the hat on a flat surface covered with a towel and pin out the brim to the dimensions you desire. Also pin around the point that the body and brim meet. Allow it to dry thoroughly! Then wear it and enjoy!!!

The dark squares represent the CC, the white squares represent the MC Start at the bottom of the chart. Follow the chart from right to left all the way up. Written instructions for chart: $\mathrm{W}{=}$ wrap $\scriptstyle\mathbf{S}=$ skip MC $\mathbf{\mu}=$ main Colour $\mathrm{CC}{=}$ contrast colour Row1 W3 MC, S 3 \* W 9 MC, S 3 repeat from \* across row, Wlast 6 stitches, Wall skipped with C,knit off. Row2 W 3 MC, S 1 \* W 1 MC, S 1 repeat from \* across row, W last 8 stitches, W all skipped with CC, knit off. Row3 W 3 MC, S 6 \* W 6 MC, S 6 repeat from \* across row, W last 3 stitches, W all skipped with CC, knit off. Row4.t $^{*}\mathbf{S}$ 2, W 1 MC, S2, W 1 MC, S 1, W 1 MC, S2, W2 MC, S2, W1 MC , repeat from \* across row, W all skipped with CC, knit off. Row5 $^{*}\!\mathbf{S\textsubscript{1}}$ W 2 MC, \*S 5, W 1 MC, S 4, W 2 MC, S2, repeat from \* across row, W all skipped with CC, knit off. Row 6 \*W 3 MC, S 7, W 1 MC, S 1, repeat from \* across row, W last 3 stitches, W allskipped with CC, knit off. Row 7 W 3 MC, S 8, \* W 4 MC, S 8 repeat from \* across row, Wlast 3stitches, Wal skipped with C, knit off. Row 8 \* S 2, W 1 MC, S 7, W 2 MC, repeat from \* across row, W last 3 stitches, W allskipped with CC, knit off. Row9 \* 1, W 2 MC, S3 W6 MC, rpeat from \* across row, Wlast 3stitches, Wallskipped with CC, knit off. Row 10 \*S 1, W 2 MC, S 3 W 6 MC, repeat from \* across row, W last 3 stitches, W allskipped with CC, knit off. Row 11 S10, W 2 MC Repeat across row Row 12 W4 MC,\* S1 W4 MC, S1, W6 MC\*, repeat between\* across row, Wlast 3 stitches, Wal skipped with CC, kit off. Row 13 W 3 MC,\*S 3 W 3 MC, S 1, W5 MC\*, repeat between\* \* across row, W last 3 stitches, W allskipped with C, knit off Row 14 W 3 MC,\* S 3 W 2 MC, S 2, W5 MC\*, repeat between\* \* across row, W last 3 stitches, W all skipped with CC, knit off. Row 15 W4 MC, S 1 \* W 11 MC, S 1 repeat from \* across row, W all skipped with CC, knit off.


