RITTER PARK LACE SCARF
BY STEVEN HICKS When the calendar slips closer to colder months, nature starts to reveal its bones and structure. What was hidden with lush greenery just months earlier now shows ofits rhythmic beauty and lingering blossoms and leaves add a touch of faded glory. Cables and twists in the Ritter Park Lace Scarf form the structure f or the lace and texture that are reminiscent of the remaining blooms in a garden. Gauge is not critical to this project but will affect the finished size of the scarf. The length of the scarf can be adjusted by knitting more repeats of the chart.

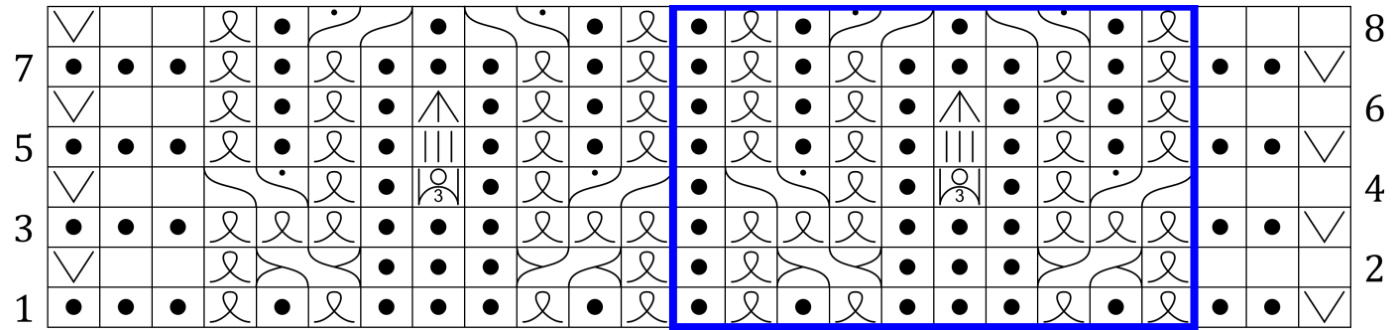
14" x 77" (35.5 cm x 195.5 cm) blocked MATERIALSAND TOOLS 800 yards (732 m) fingering weight yarn GAUGE 24 stitches and 25 rows = 4" (10 cm) in Stockinette stitch There are three main features of Ritter Park Lace Scarf—-garter border with slip stitch selvedge, a frame of cables and twisted stitches, and a very formal lace ground. Embedded in the cabled frame is a three-row texture stitch. In the first row, of the texture stitch, one stitch is increased to three and then decreased back to the original number in the third row. This is all shown as one column of symbols in the chart, so don't be surprised when the stitch count increases for two rows. The charts are marked with blue borders to show the stitch repeat across the row. Chart B is marked with a red border to show the last row to knit after all repeats have been worked.
| 11 | |
| k | Knit. |
| kyok-b | In stitch three rows below next stitch, k, yo, k and slip next stitch |
| k-tbl | Knit through the back loop. |
| k2tog | Knit 2 stitches together. |
| p-tbl | Purl through the back loop. |
| P3 | Purl three stitches. |
| p | Purl. |
| ssk | Slip 2 stitches knitwise, then knit slipped stitches together. |
| s1 | With the working yarn in back, insert the right needle into the next stitch as |
| s1 wyif | if to purl and transfer the stitch from the left needle to the right. With the working yarn in front, insert the right needle into the next stitch as if to purl and transfer the stitch from the left needle to the right. |
| s2tog-k1-p2ss0 | |
| yo | Wrap the working yarn over the right needle, from front to back (counter- |
| yocl | clockwise). Slip 3rd stitch on left needle over first two stitches, k1, yo, k1. |
| 1/1 LC | |
| 1/1 LPC | Slip 1 stitch to cable needle and hold in front; k-tbl; k-tbl from cable needle. |
| 1/1 RC | Slip 1 stitch to cable needle and hold in front; p1; k-tbl from cable needle. |
| 1/1 RPC | Slip 1 stitch to cable needle and hold in back; k-tbl; k-tbl from cable needle. Slip 1 stitch to cable needle and hold in back; k-tbl; p1 from cable needle |
Cast on 85 stitches. Set-up rows 1 - 4: knit to last stich, sl1 wyif Work charts beginning Error! Bookmark not defined. as follows: Wrong side (odd rows): Follow the chart from left to right. Right side (even rows): Follow the chart from right to left Work Chart A once. Work Chart B rows 1 - 48 8 times, then rows 1 - 28 once more Work Chart C once. Repeat Set-up rows 1-4, then bind off on wrong side.
CHARTS
CHART A
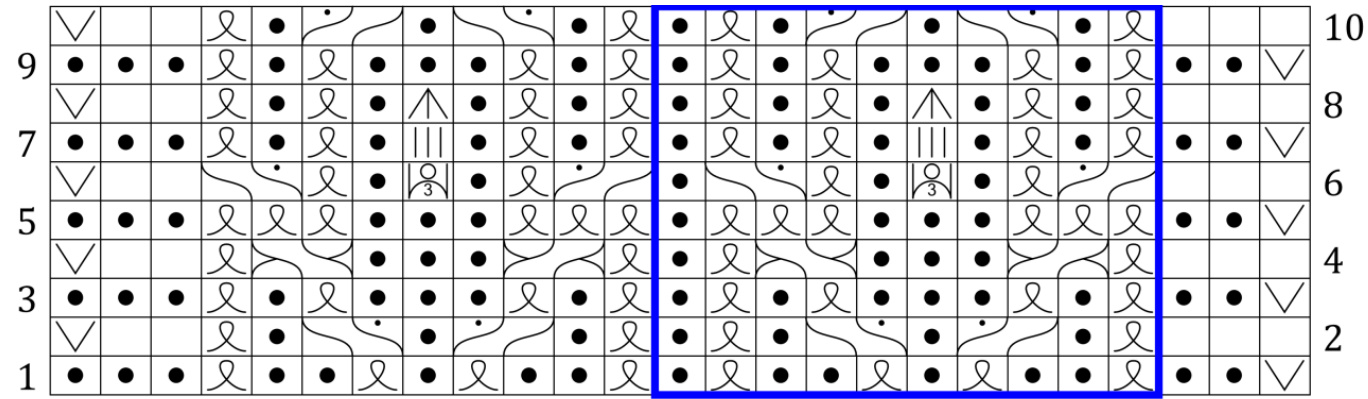
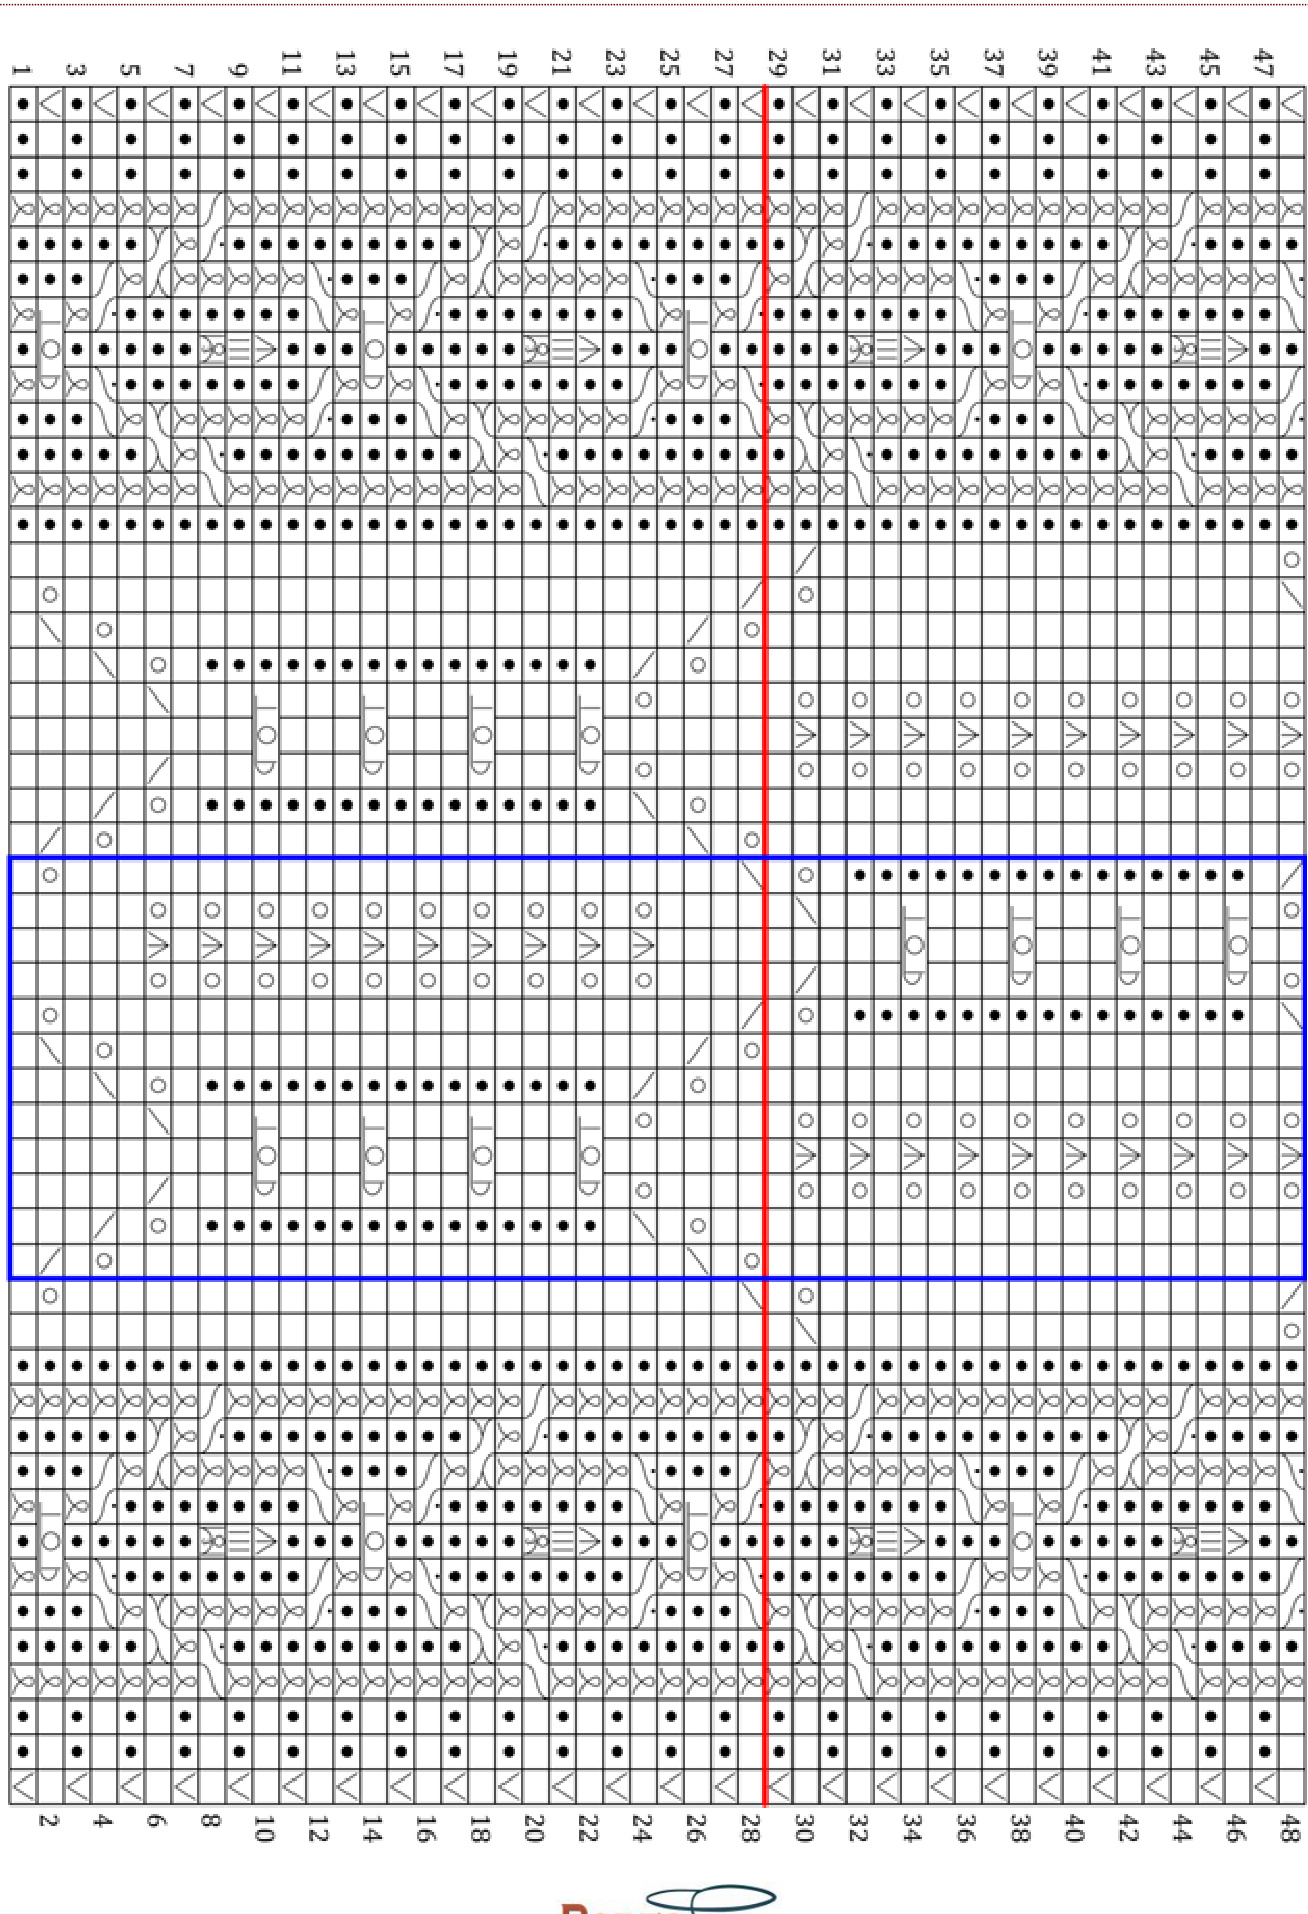
CHART C