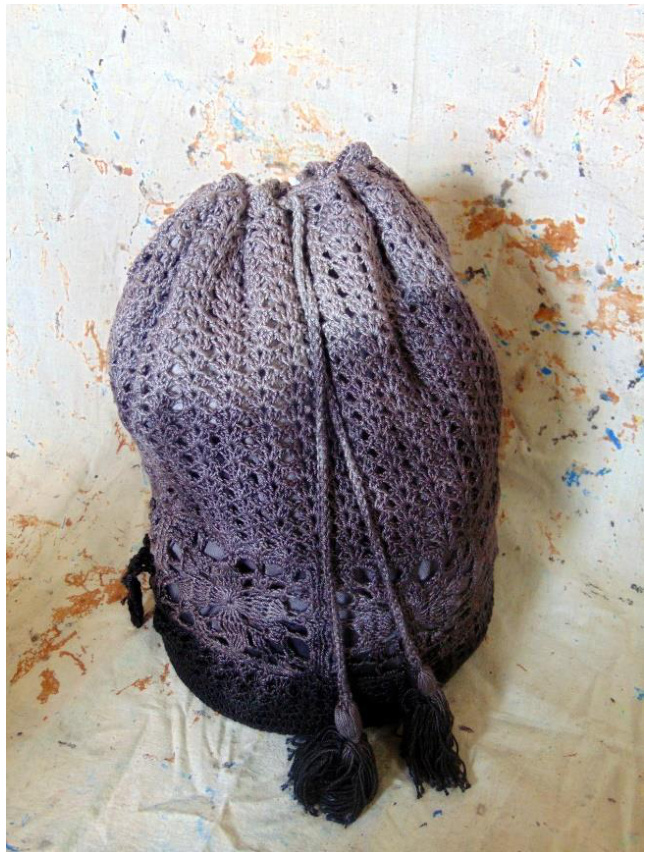
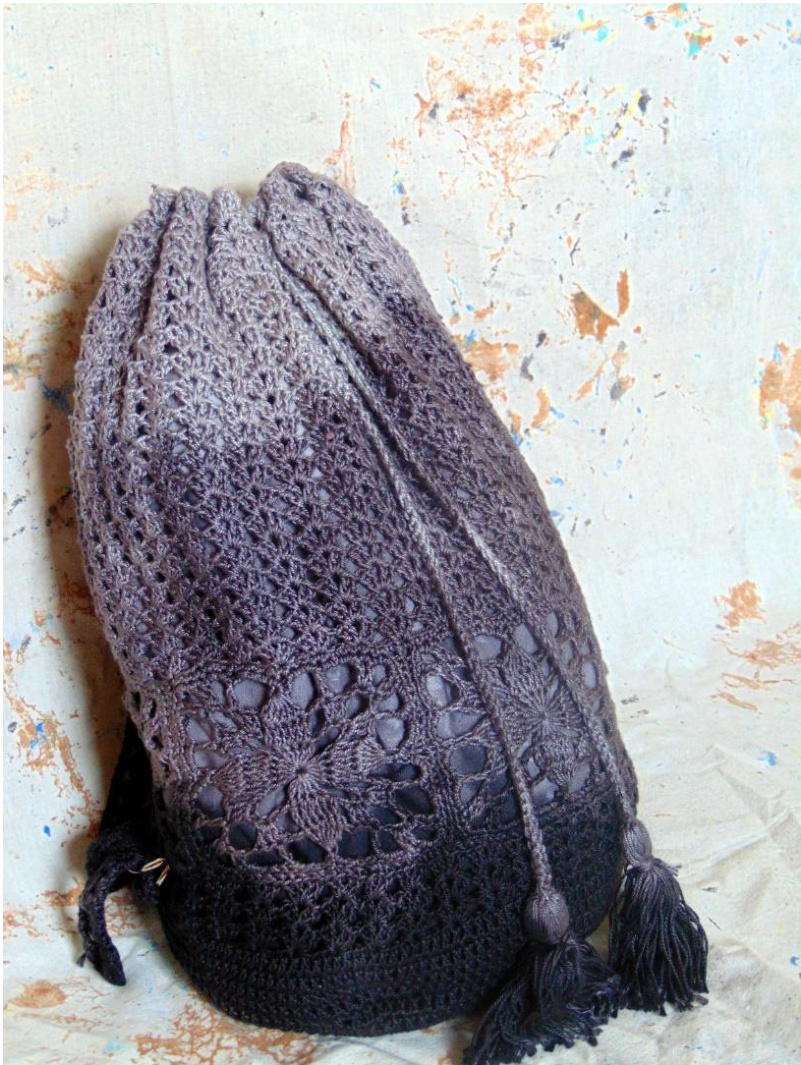
Crochet Ombre Backpack
Materials Size 5 Cotton thread 3,5mm crochet hook 4 D Rings Darning Needle % yard cotton fabric 1 package Fabric dye Gloves Abbreviations Sc - single crochet Dc - double crochet Ch - Chain
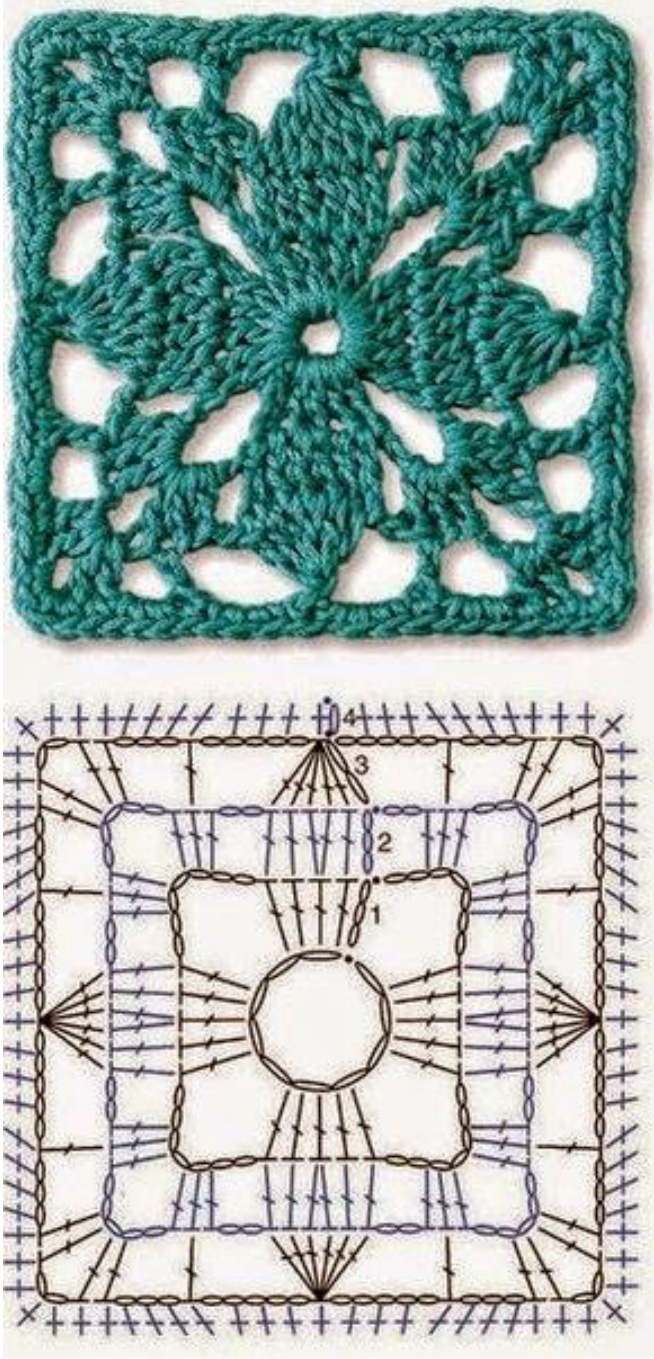
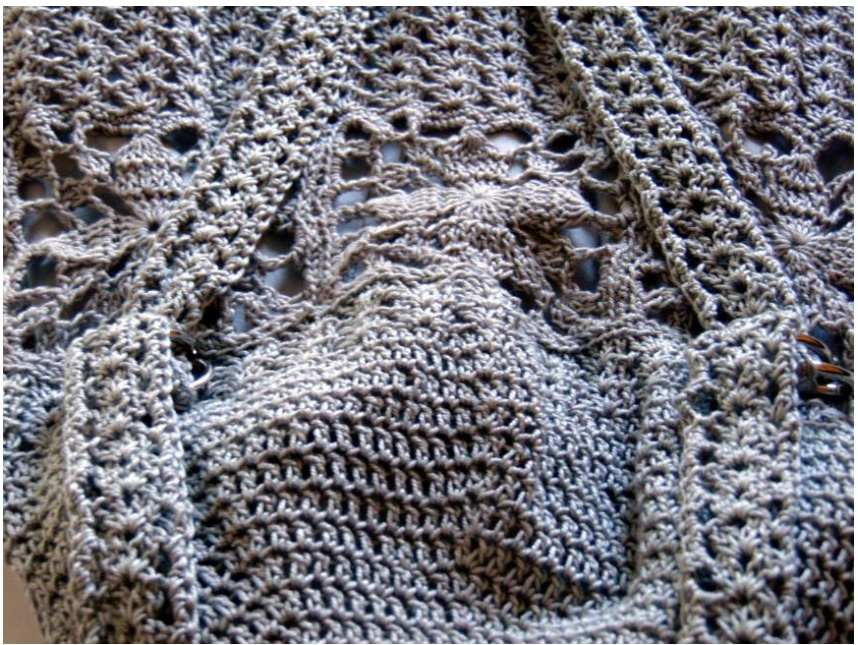
Motifs (make 6)
Use the following diagram to make the motifs.
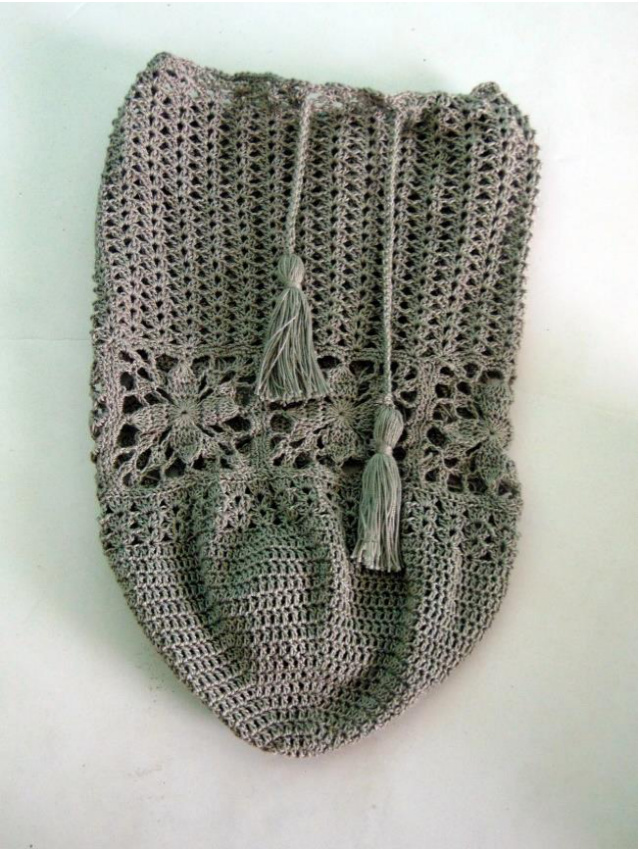
Top body
Join motifs together. Sc across together for a total of 144 sc. Round 1: Ch3 dc, ch1, 2dc in same stich, \*skip 3 dc, 2dc ch1 2dc in next sc\* repeat from \*to \* to end. Join with a slip stitch. Round 2-20: Slip stitch to ch 1 space. 2dc ch1 2dc in each ch1 space to end. Sc around and weave in ends.
Bottom
Magic ring Round 1: Ch3 7 dc in ring Round 2: Ch 3 and dc in same stitch, 2 dc in each dc around, join with a slip stitch Round 3: Ch 3 and dc in same stitch, dc in next dc, \*2 dc in next dc, dc in next dc\* repeat from \* to \* to end. Join with slip stitch. Round 4: Ch 3 and dc in same stitch, dc in next 2 dc, \*2 dc in next dc, dc in next 2dc\* repeat from \* to \* to end. Join with slip stitch. Round 5: Ch 3 and dc in same stitch, dc in next 3 dc, \*2 dc in next dc, dc in next 3dc\* repeat from \* to \* to end. Join with slip stitch. Round 6: Ch 3 and dc in same stitch, dc in next 4dc, \*2 dc in next dc, dc in next 4dc\* repeat from \* to \* to end. Join with slip stitch. Round 7: Ch 3 and dc in same stitch, dc in next 5dc, \*2 dc in next dc, dc in next 5dc\* repeat from \* t0 \* to end. Join with slip stitch. Round 8: Ch 3 and dc in same stitch, dc in next 6dc, \*2 dc in next dc, dc in next 6dc\* repeat from \* to \* to end. Join with slip stitch. Round 9: Ch 3 and dc in same stitch, dc in next 7dc, \*2 dc in next dc, dc in next 7dc\* repeat from \* to \* to end. Join with slip stitch. Round 10: Ch 3 and dc in same stitch, dc in next 8dc, \*2 dc in next dc, dc in next 8dc\* repeat from \* to \* to end. Join with slip stitch. Round 11: Ch 3 and dc in same stitch, dc in next 9dc, \*2 dc in next dc, dc in next 9dc\* repeat from \* to \* to end. Join with slip stitch. Round 12: Ch 3 and dc in same stitch, dc in next 10dc, \*2 dc in next dc, dc in next 10dc\* repeat from \* to \* to end. Join with slip stitch. Round 13: Ch 3 and dc in same stitch, dc in next 11dc, \*2 dc in next dc, dc in next 11dc\* repeat from \* to \* to end. Join with slip stitch. Round 14: Ch 3 and dc in same stitch, dc in next 12dc, \*2 dc in next dc, dc in next 12dc\* repeat from \* to \* to end. Join with slip stitch. Round 15: Ch 3 and dc in same stitch, dc in next 13dc, \*2 dc in next dc, dc in next 13dc\* repeat from \* to \* to end. Join with slip stitch. This pattern is for non-commercial use only. For any questions or comments please contact me at info@princesstafadzwa.com. PrincessTafadzwa 2016 Round 16: Ch 3 and dc in same stitch, dc in next 14dc, \*2 dc in next dc, dc in next 14dc\* repeat from \* to \* to end. Join with slip stitch. Round 17: Ch 3 and dc in same stitch, dc in next 15dc, \*2 dc in next dc, dc in next 15dc\* repeat from \* to \* to end. Join with slip stitch. Round 18: Ch 3 and dc in same stitch, dc in next 16dc, \*2 dc in next dc, dc in next 16dc\* repeat from \* to \* to end. Join with slip stitch. Round 19: Ch3 dc, ch1, 2dc in same stich, \*skip 3 dc, 2dc ch1 2dc in next dc\* repeat from \*to \* to end. Join with a slip stitch. Round 20-21: Slip stitch to ch 1 space. 2dc ch1 2dc in each ch1 space to end. Join to motifs with sc around or by sewing together.
Handles
Ch 8 Row 1: 2 dc ch 1 2 dc in 6th chain from hook. Dc in last ch. Row 2: Ch 3 2 dc ch1 2dc in ch 1 space, dc on top of ch3. Repeat Row 2 until it measure 20 inches. Border: Ch 1 2 sc in each ch3 space, 3 sc in each corner
Cord and tassels
I made a Romanian cord (15 inches) and tassel using this tutorial on http://www.outstandingcrochetblog.com/2016/01/free-crochet-tutorial-romanian-cord.html. Do not attach the tassels before stringing the cord on to the bag, it is easier to attach them afterwards.
How to put bag together
Pull the cord through the top and the attach the tassels by sewing them on.
To make the lining
Cut 1 rectangle measuring 12" by 33" and a circle with a 10" diameter of cotton fabric. Right sides facing, sew the shorter sides of the rectangle together. Press the seam flat.
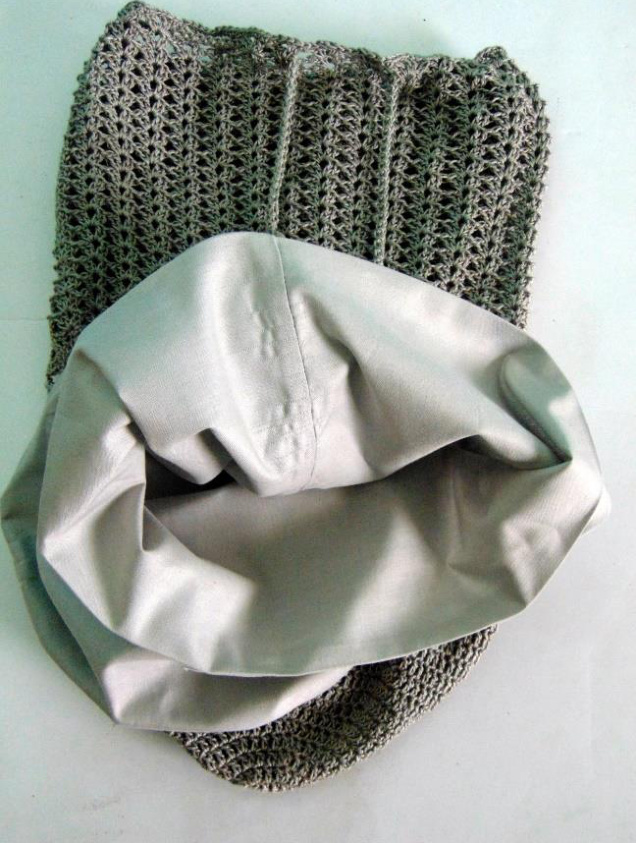
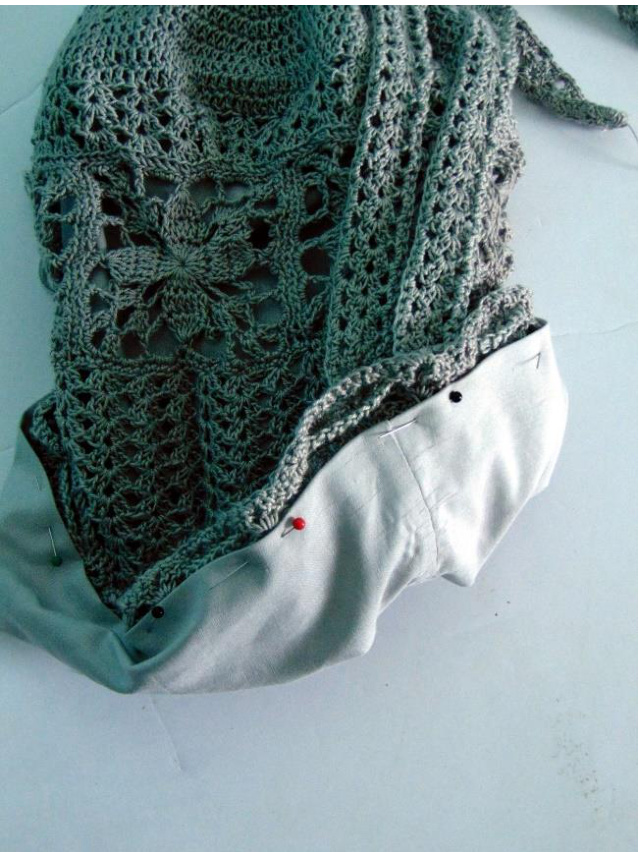
This pattern is for non-commercial use only. For any questions or comments please contact me at info@princesstafadzwa.com. PrincessTafadzwa 2016 Pin and sew the circle. On the open end, fold over % inch and press flat. Place the lining on the inside and pin. Hand sew the lining on the bag.
Attach 2 D rings at the bottom of the motifs
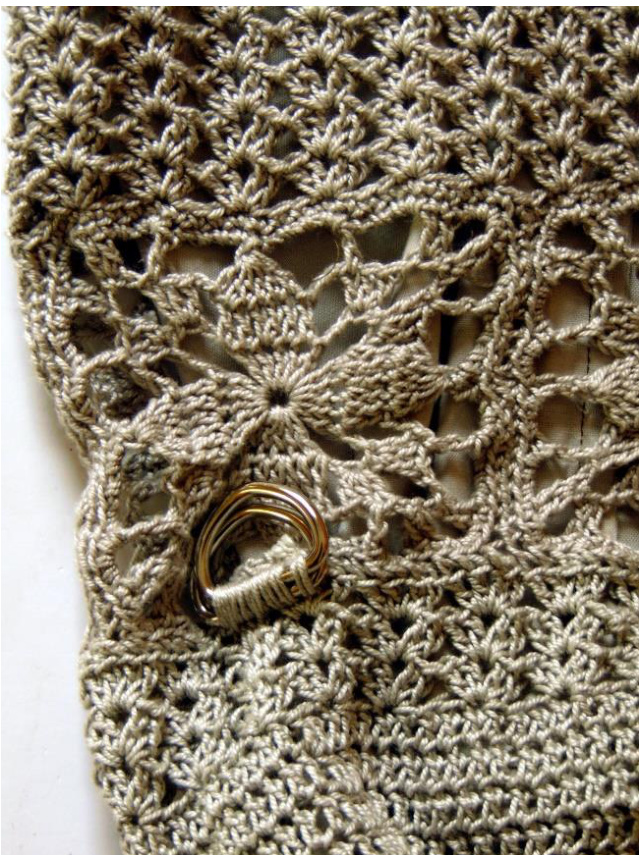
Pull the handles through the D rings.
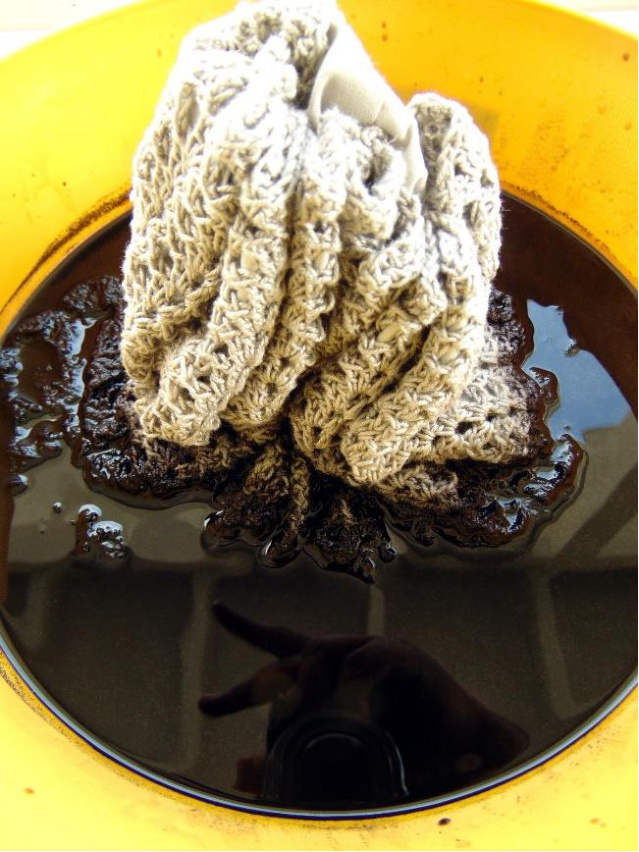
You can use your bag now if you choose. To ombre dye the bag, dip dye the bag. I did this in three stages. The bottom sat in the dye the longest about 20 minutes then the middle about 10 minutes and the top about 30 seconds. I washed it according to the dye instructions and let it dry.
The finished bag