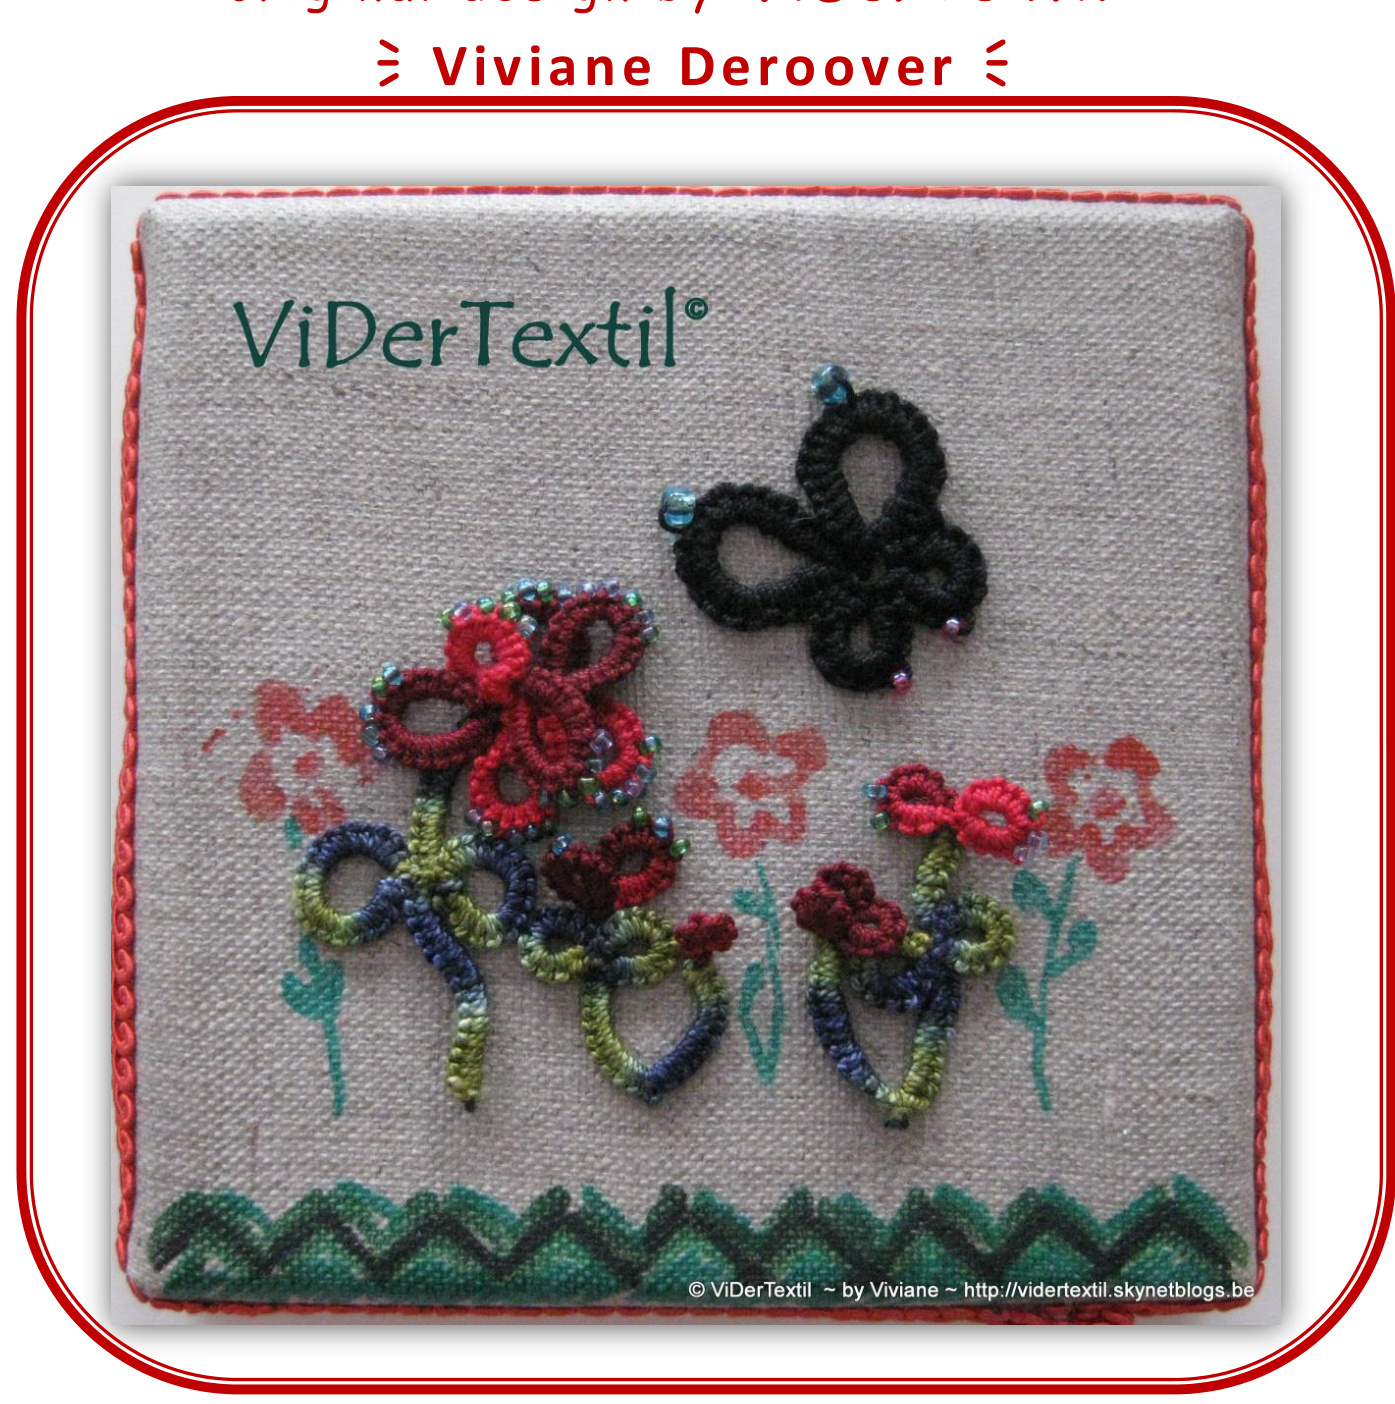
crotat summerscape
original design by ViDerTextil@
SIZE &MATERIALS
DIMENSION&FOURNITURES
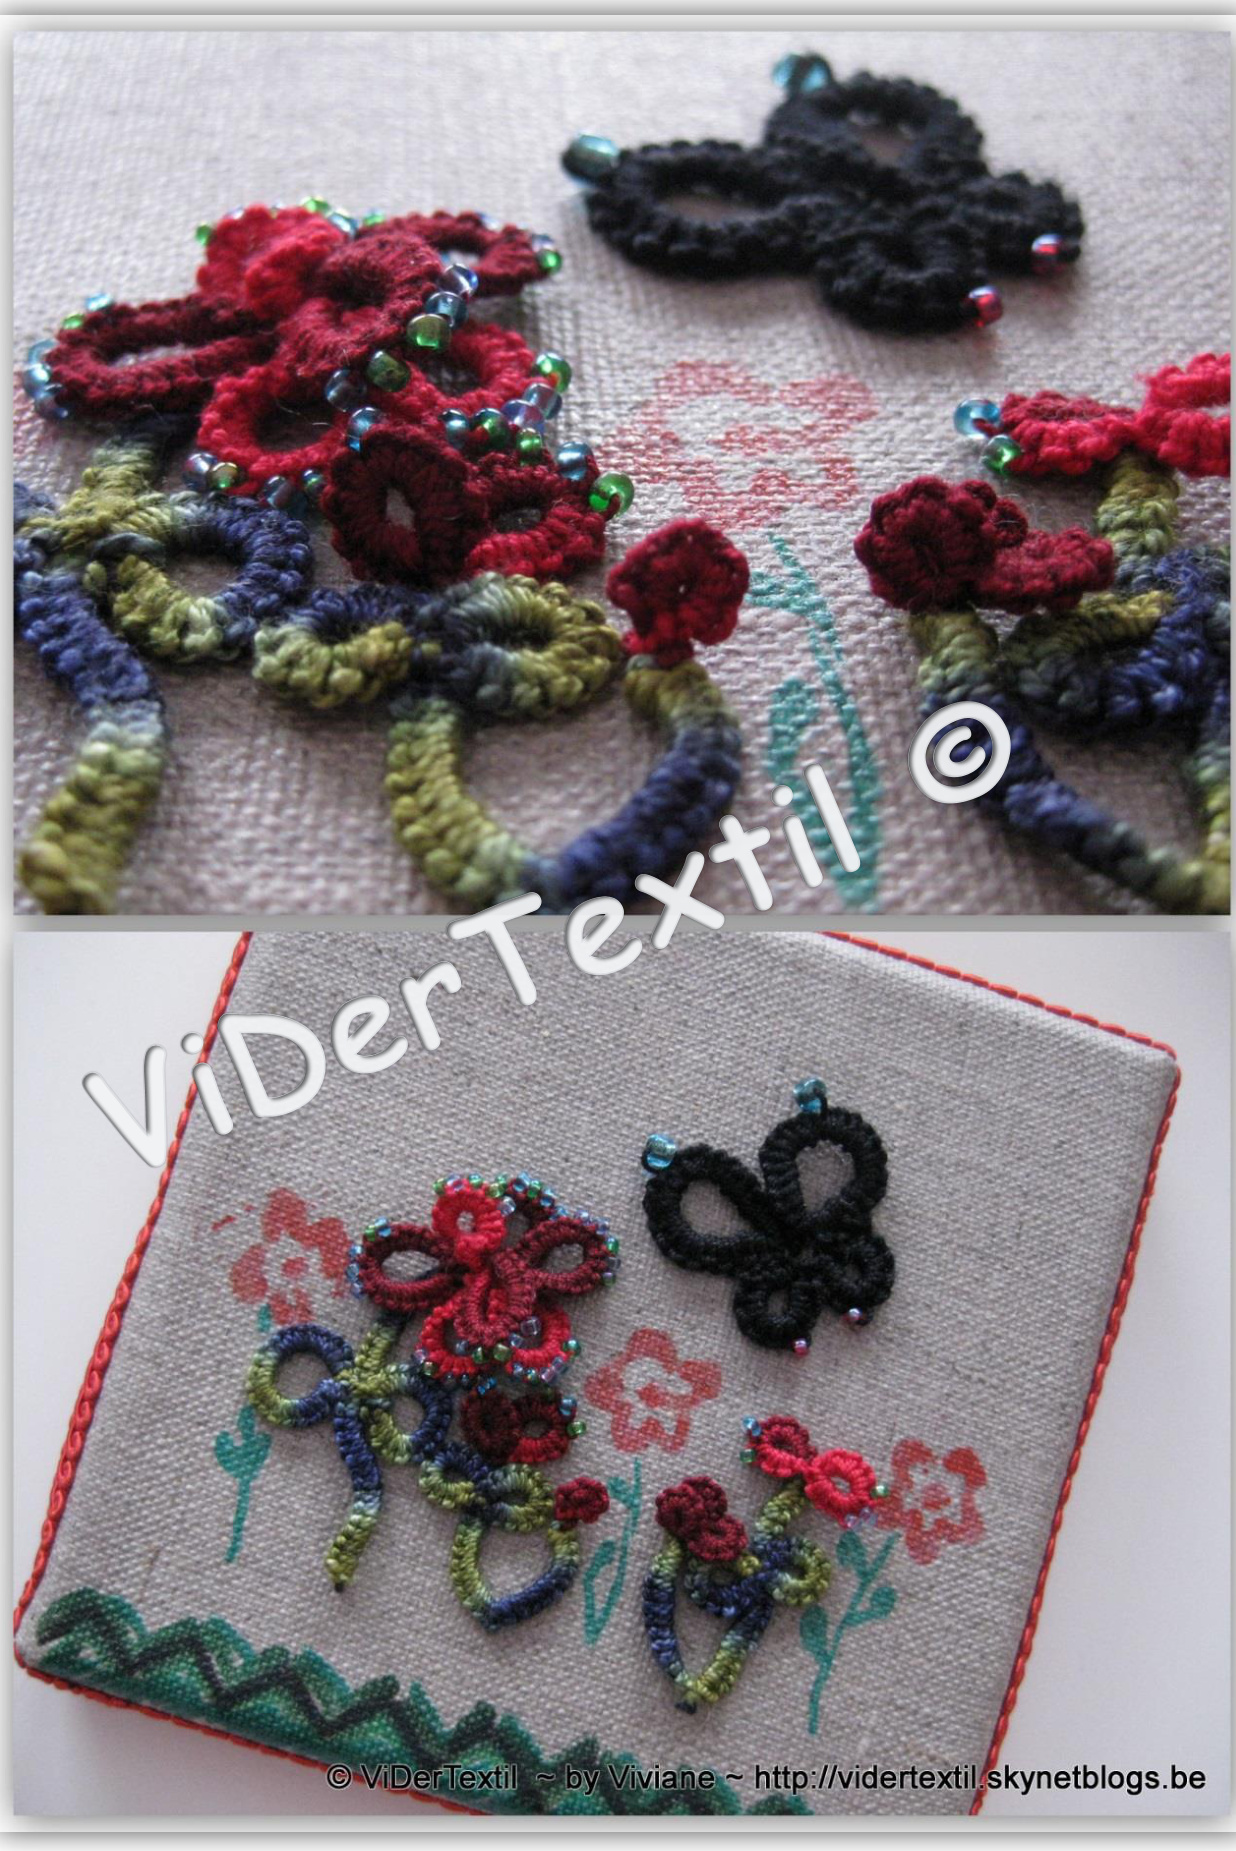
Framed canvas of 12cm/12cm sides Little remnants of cotton perlé 8 (here= black for the butterfly; red variegated for the flowers, blue-green for the stems and leaves) Crotat hook n°1 Little beads in different colors Braid of 50cm to fix round the frame, so not larger than the border of your frame (mine = 1cm) Cadre entoilé de 12cm/12cm petits bouts de fils perlé 8.(ici= noir pour le papillon, rouge varié pour les fleurs, bleu-vert pour les tiges et feuilles) Crotat crochet de frivolité n° 1 Petites perles type rocaille Un galon de 50 cm a fixer tout autour de votre cadre, donc pas plus large que celui-ci (mien=1cm) Colletextile Textile glue Needle with point Color crayons or textile paint Other threads and corresponding crotat hook sizes: Perlé 3 → crotat hook n° 2 DMC Cébélia/Babylo 10 & Perlé 5 → crotat hook n° 1,5 Cébélia/Babylo 20ou30 & Perlé 8 ou 12 → crotat hook n°1 Take always a smooth thread, not one like the 6stranded embroidery skeins and a crotat hook less thinner than you would normally use for crochet that thread. Aiguille a pointe Feutres colorés pour textile Autres types de fils & crochets frivolite correspondants : Perlé 3→ crochet n° 2 DMC Cébélia/Babylo 10 & Perlé 5 → crochet n° 1,5 Cébélia/Babylo 20ou30 & Perlé 8 ou 12 → crochet n°1 Prenez toujours un fil lisse - pas le mouliné (6fils) et un crochet crotat un peu plus fin que celui que vous utiliserez pour du crochet normal.
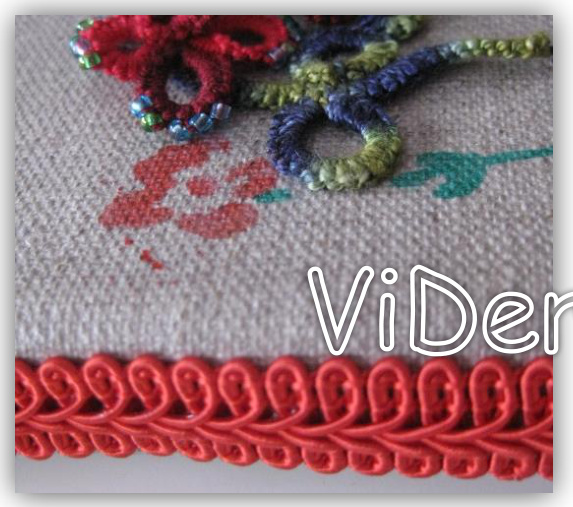
→ This is a view with the braid I took for surrounding one side of the frame Voici la vue d'un bord du cadre avec le gallon collé que j'ai choisi.
INSTRUCTIONS
REALISATION
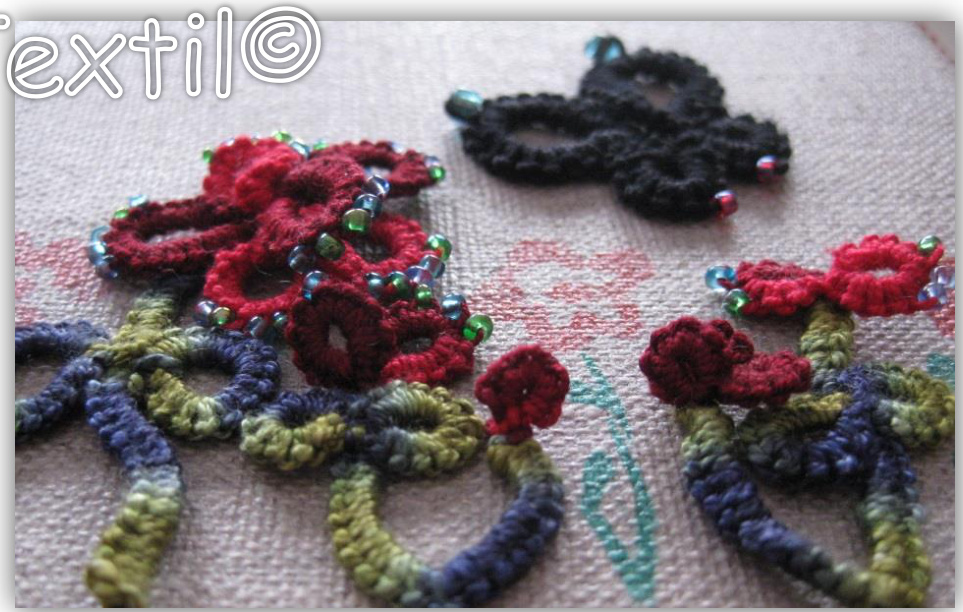
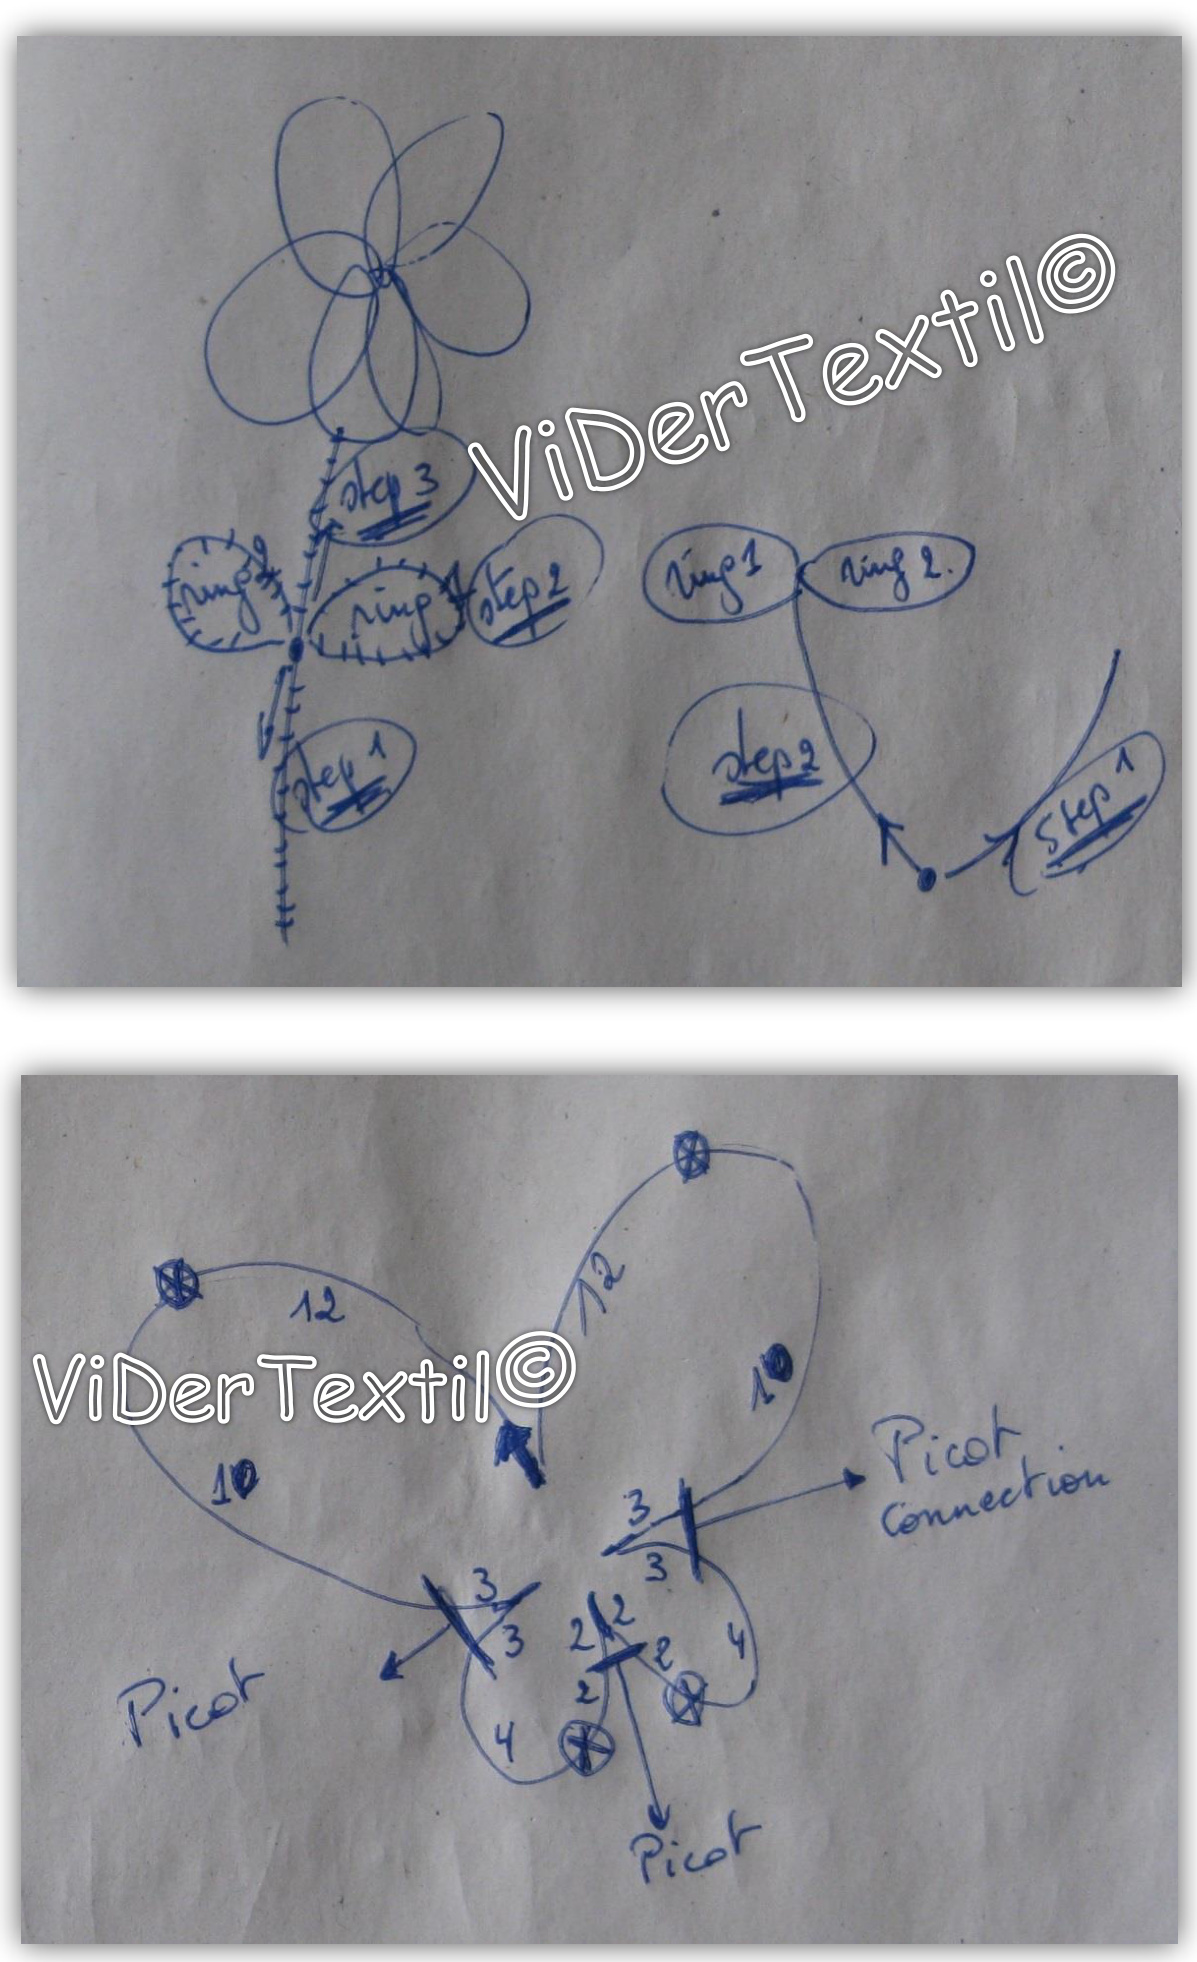
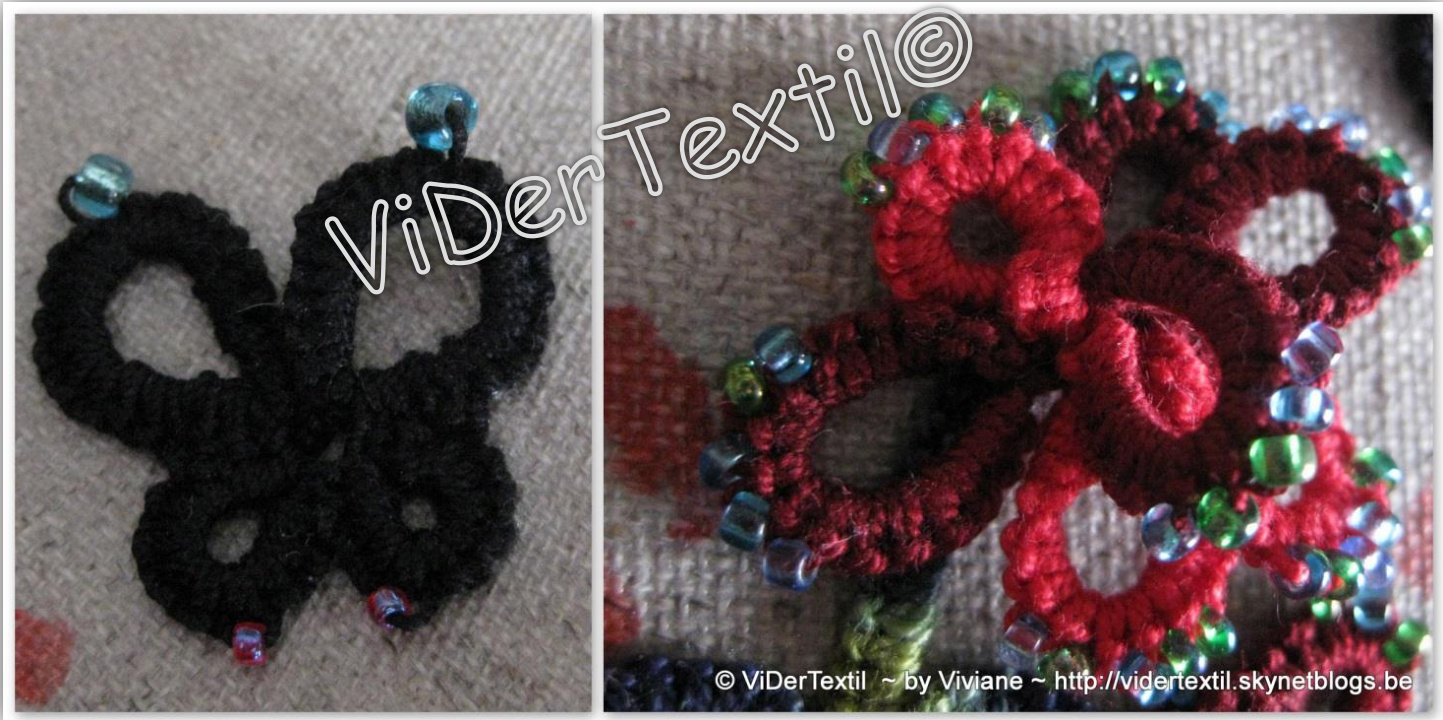
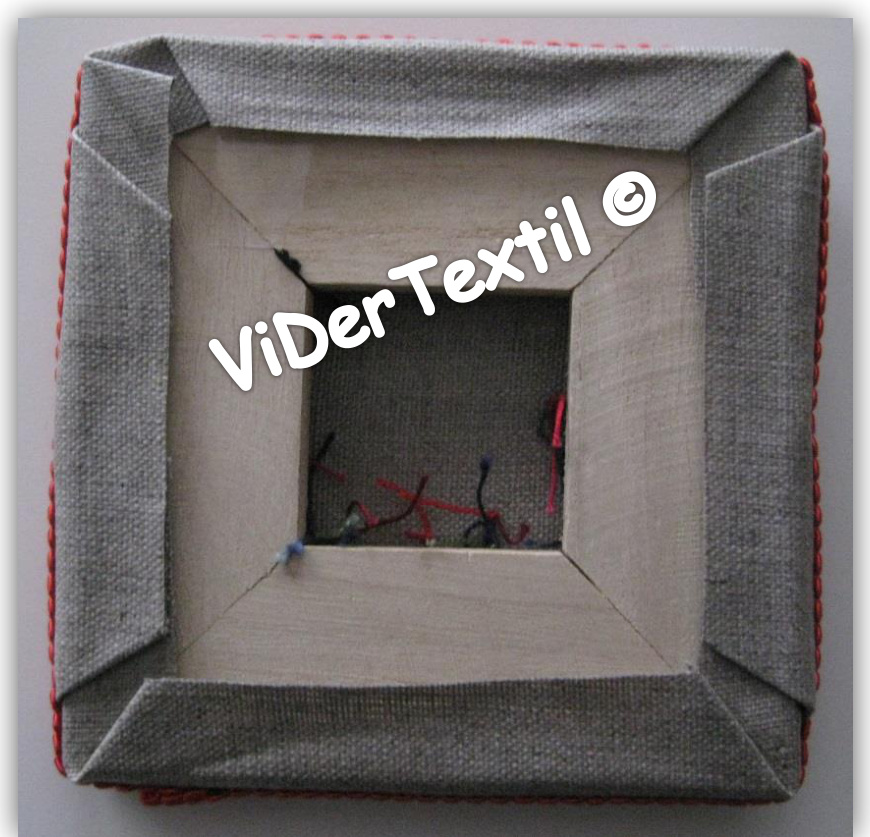
Depending on the width of the wooden strips that are used for your frame, you'll have a big or small opening in the back side (see pic below of mine). Keep in mind that if you put your flowers & butterfly outside of this opening, you cannot sew them for fixing, and you'll have to glue them to the frame. As the flowers are 3D, try to place them over this opening. Start by drawing/painting some flowers and grass on the canvas. Maybe you want to add a sun, some other details .. If it's destined for a child's room; you could add his/her name. Flowers: make rings of double knots, the more knots in a ring, the bigger the petal of the flower. Add some beads Dépendant de I'ouverture que vous aurez a I'arriere de votre cadre, vous pourrez facilement coudre vos fleurs et papillon, sinon il vous faudra les coller. Mais tenez compte que les fleurs sont en 3-D, donc essayez de placer ceux-ci au-dessus de I'ouverture. Voyez photo cidessous de mon cadre. Commencez par dessiner/peindre quelques fleurs et I'herbe sur le canevas. Peut-etre que vous aimerez ajouter un soleil ou d'autres details comme par ex. le nom de l'enfant si vous le destineza étre accroché a la porte de sa chambre... Fleurs : Faites une suite d'anneaux de double nceuds between the knots. Make some flowers of two rings, three or even six rings. Just one ring after another. At the end, you'll knot the end tread to the beginning thread to keep the basics of the rings together. Stems and leaves: one stem: you'll start with 17 knots; don't close the ring, just pull the yarn through the knots without closing the ring. Then you're back on your starting point. Make two rings (leaves) as big or as small as you want... and then make again about 10 knots which you don't close in a ring. This will give you the base of the left flower on the drawing hereunder two stems: start with one stem of about 10 knots (=ring not closed), then make a second one. Then separately you'll have to make two leaves to fix on top of one or morestems. Butterfly: Start with ring of (12-bead-10-picot-3) knots, followed by a ring of (3-joined picot-4-bead-2-picot-2) knots, then a ring of (2-joined picot-2-bead-4-picot-3) knots and at last a ring of (3-joined picot-10-bead-12) knots. Note that the beads I used in top of wings are bigger than the ones used in lower part. avec ou sans perles de rocailles insérées. Faites quelques fleurs de deux anneaux, trois ou meme six anneaux en suite. Nouez au final vos deux bouts de fils ensemble Feuilles et tiges : une tige : commencez avec 17 nceuds mais ne fermez pas I'anneau, tirez simplement le fil au travers des noeuds sur le crochet. Vous etes a nouveau au point de départ, faites deux anneaux pour les feuilles, aussi grandes que vous désirez ... et refaites une tige en continuant avec le meme fil d'une dizaine de nceuds. Ceci vous donnera la base pour la fleur de gauche. Deux tiges : commencez par une tige de 10 noeuds (=anneau non fermé) et faites en une seconde. Puis séparément, faites deux anneaux pour les feuilles. Papillon : commencez par un anneau de (12-perle-10- picot-3) nceuds suivi d'un anneau de (3-picot connecté- 4- perle -2-picot-2) nceuds suivi d'un anneau de (2- picot connecté -2- perle -4-picot-3) nceuds suivi d'un dernier anneau de (3- picot connecté -10- perle -12). Notez que les perles en tete des ailes supérieures sont plus grosses que celles du dessous.
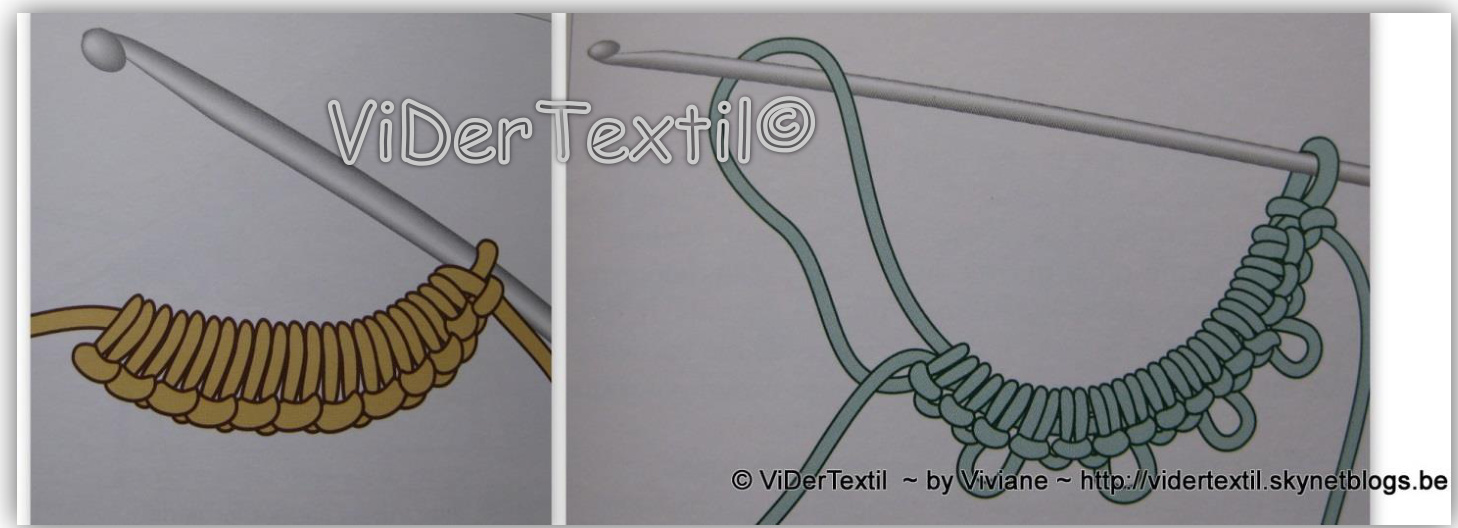
Left the ring is not closed because you didn't pick up the loop on the left like on the right picture where the ring will be closed because you pick up that left loop A gauche lanneau n'est pas ferme parce que la boucle de gauche na pas éte mise sur le crochet mais elle est tirée dans les noeuds. Ainsi vous avez un arceau qui forme la tige de la fleur.
FINISHING
FINITION
Use the little bits of starting and finishing yarn of your crotat to fix the items through the canvas and make little knot underneath. Glue a little bit of textile glue on it to be sure that it's fixed. Glue the braid round the sides of the frame. So, that's it! Utilisez les brins de fils du début et de la fin pour fixer vos éléments sur le canevas et faites un petit nceud pardessous. Mettez-y une pointe de colle textile pour étre certaine que tout tient bien. Collez maintenant le ruban tout autour sur les cotés du cadre.
til vof. Tous droits reservés - All rights reserved - [http://vidertextil.skynetblogs.be