Sweet Transitions Mitts
Deborah Tomasello
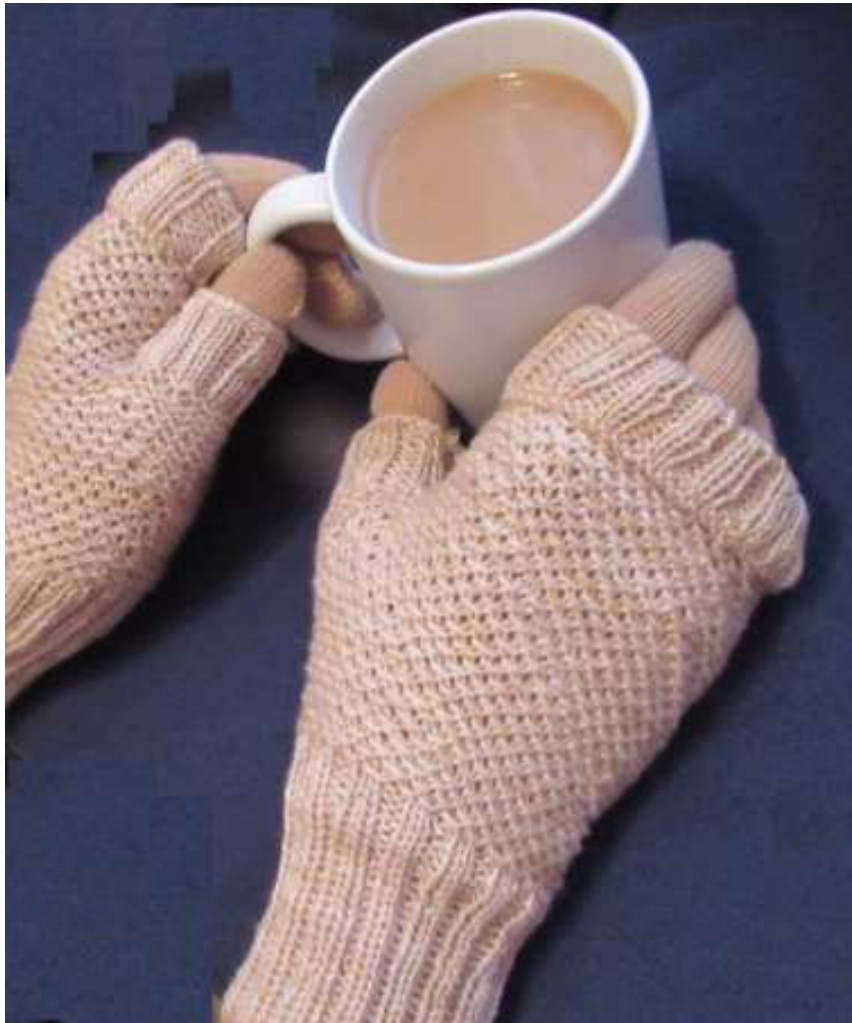
Sweet transitions is the perfect name for this mitt pattern because it is not as heavy as a winter mitt. It is created using a simple slip-stitch pattern that is airy and perfect for the seasonal transition from winter to spring. Also Transitions is an apt name because these mitts can change from a fingerless glove to a mitten by using my convertible mitt option included below. The pattern includes instructions for the fingerless mitt with a now-you-see-it, now-you-don't secret pocket, convertible mitts, and mittens. Knitter's choice! Use any fine fingering- weight yarn you choose, but these are pure luxury when made with Artyarns Merino Cloud. For those chilly days, layer over glove liners for extra warmth and a great look. One Size: Woman and Teen Medium Materials: One 436-yd. skein of Artyarns Merino Cloud (H12 Natural Tan) 80% Fine Merino 20% Cashmere five#2DPNs tapestryneedle Gauge: 30 stitches = 4" using #2 needles. Abbreviations: M1: This is not "the" M1 stitch. It is the Bumpless m1. It is a modification of KFB. See my video tutorial here: https://www.youtube.com/watch?v=syFeOy1B9ok
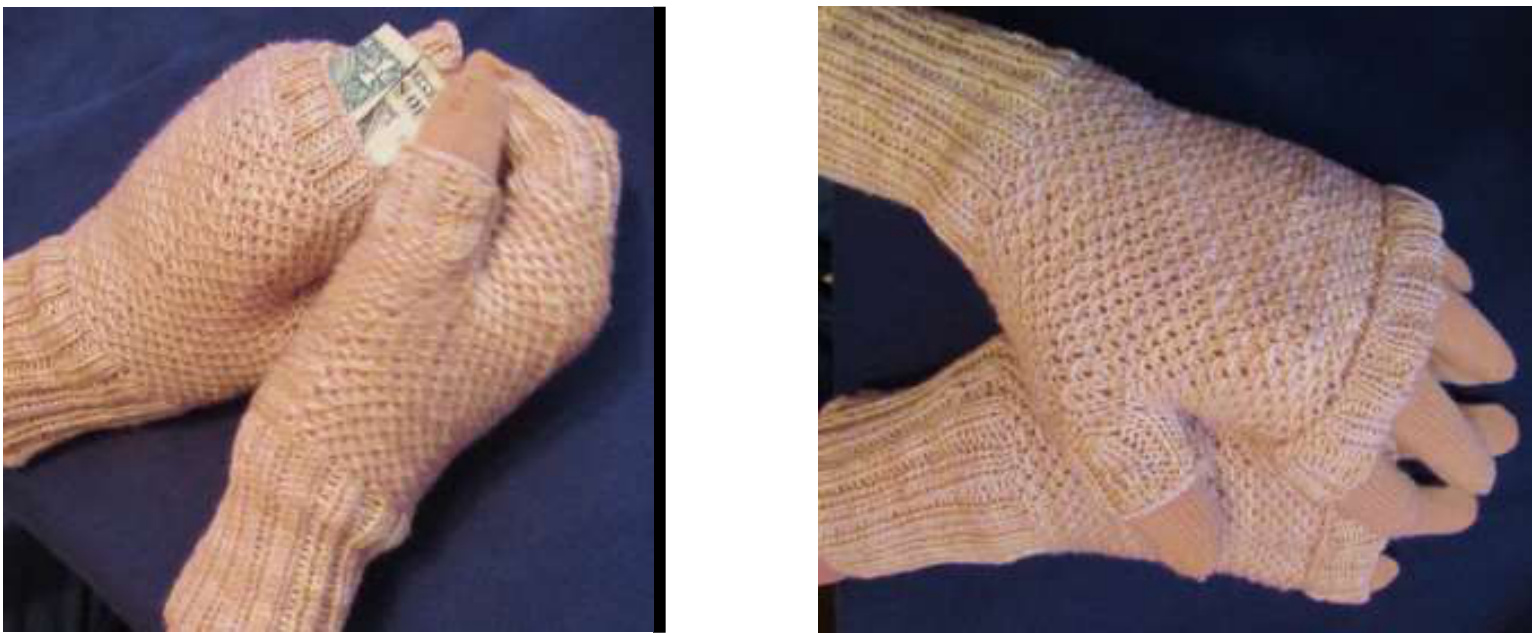
Now You see It...Now You don't!
These wonderful mitts feature a secret pocket that is hidden to protect your valuables while you use your hands. The pocket is large enough to hold cash, credit card, metro card, keys, tissue, hand warmers, toys, or even treats for when you walk Fido! Top can be unfolded to cover fingers, or folded down to cover pocket and expose those texting fingers.
Instructions:
Pocket (Optional): Using two spare needles, CO 20 stitches. Knit, back and forth in stockinette, about 30 rows or3.5 inches. End with a purl row. DO NOT Bind off. Steam block.Setaside.
MITTS (MAKE TWO):
NOTE: To avoid laddering, stagger sts, ending each needle with a slip stitch and beginning the next with a purl. This will help eliminate a column of overly long slip-stitches. Mitt: With DPNs, CO 60 sts (12 sts on first DPN, and 16 sts on each of last 3 DPNs) Join to work in the round taking care not to twist sts(if using circular needle). Knit 2x2 rib for 30 rounds, or to desired cuff length. CHART : round 1: K1, place marker between fist two stitches. You are merely placing a marker after the veryfirst stitch. This first stitch will eventually become the thumb. So, you will be working the pattern on 60 stsstill. Follow chart for 18 rounds. The first, and every odd-numbered round, are knit only. The even-numbered rounds are alternating purl sts and slip stitches (with yarn in front). See chart. Continue to follow chart, and inc for thumb as follows: To increase thumb: Round 19: m1, k1, m1 in first st (3 sts now in first st). Continue to k sts as shown around Round 19 Round 20: purl1, slip 1, purl 1, move marker, slip 1, purl 1 around Round 21 and all odd-numbered rounds: knit all stitches, increasing the first st of the round as well as the stitch before your marker per chart Round 22: slip 1, purl 1, slip 1, purl 1, slip 1, move marker, purl 1, slip 1 around. Continue following established pattern per chart through round 38. Move 21 thumb sts to fifth DPN (or waste yarn) to be worked as thumb later. M1\* st in next st so you will be working the chart's 60 sts. Follow chart around with 60 stitches on needles. \*See tutorial here:https://www.youtube.com/watch?v=syFeOy1B90k Knit chart in established pattern for an additional 1.5 inches. If adding a pocket, do so here: Pocket: Knit 6 stitches. Move next 20 sts to stitch holder. Retrieve needle with pocket stitches, and with pocket front (stockinette side) facing you, continue to knit chart with these stitches.
Fingerless Glove option:
Knit 8 more rounds in established pattern. Knit 2x2 rib twice as long as you want the cuff length (approx. 20 rounds). Bind off loosely. Fold cuff back over itself. If you added a pocket, Move 20 stitches from stitch holder to needle. Knit 2x2 rib for8 rows. Rather than knit the 2x2 ribbing on 20 sts, work it on 18sts by knitting together the first two stitches and the last two sts in the first row. This will allow you to begin and end the 1st, 3rd ,5th and 7th rows in knit sts and the 2nd, 4th , 6th and 8th rows in purl. The ribbing will be symmetrical, and it will make the top of the pocket slightly more snug and secure. Bind off. Sew rib sides to mitt, creating the pocket top. When the mitt cuff is folded back, it will hide the pocket opening.
Convertible Glove/Mitt option:
Knit 14 more rounds in established pattern. Knit 2x2 rib long enough that it reaches just past the top of your fingers. BO loosely. Now, either knit a 3-stitch i-cord or crochet a chain long enough to fit top circumference of mitt rib. Leave tails long enough to attach and tie. With tapestry needle, weave chain, loosely, through each rib at the top of mitt. Tie chain ends SECURLY in the back, weave in and trim ends. Now, when chain loop is gently tugged from other side, the mitt top will close up, creating a warm mitten. When it is relaxed, the cuff will fold down over itself, forming the fingerless glove.
Mittens option:
After moving thumb stitches, keep knitting established pattern for about 4 inches. Begin decreasing as follows: Place sts on 4 DPNs, evenly---15 sts per needle. Then: Needle 1: K1, K2TOG knit to last 3 sts of Needle 2: SSK, K1 Needle 3: K1, K2TOG knit to last 3 sts of Needle 4: SSK, K1. Repeat this until there are 7 sts left on each needle. Place sts from needles 1 and 2 onto one needle: 14 sts. Place sts from needles 3 and 4 onto another needle: 14 sts. Cut 3 of the 4 strands and, using the remaining strand, graft the remaining stitches together using Kitchener st, and weave in all ends.
Thumb (For fingerless mitts and Convertible mitts options only
Pick up 7 sts from body of mitt and add them to the 21sts from 5th DPN or waste yarn (split so you're working on 3 needles) for a total of 28 thumb sts. Join. Knit 2x2 rib for 16 rounds or desired length. Bind off.
Thumb (For mittens option)
Pick up 7 sts from body of mitt, working pattern as established, knit those 7 sts plus the 21sts from 5th DPN or waste yarn (split so you're working in-the-round on 3 needles) for a total of 28 thumb sts. Keeping true to the established pattern, work 14-18 rounds of design, then knit 2 together around, (14 sts). Repeat last round (7 sts.) Move last 7 sts to tapestry needle and pull yarn through to close. Secure, Tightly.
Finishing:
Fingerless Mitts:
Pocket: Sew 3 sides of pocket to the inside of the mitt. Tie and trim all yarn ends. Wear layered over gloves for extra warmth or as-is for easy texting!
Convertible Mitts:
Pocket: Sew 3 sides of pocket to the inside of the mitt. Knit a 3-st icord or crochet a short chain and work through top of thumb ribbing as you did for the mitt. Pull closed or leave open and fold ribbing down. Tie and trim all yarn ends. Wear layered over gloves for extra warmth or as-is for easy texting!
Mittens:
Pocket: Sew 3 sides of pocket to the inside of the mitt. Tnsiae of the mitt. I yarn ends. Wear layered over gloves for extra warmth or as-is for ( texting!
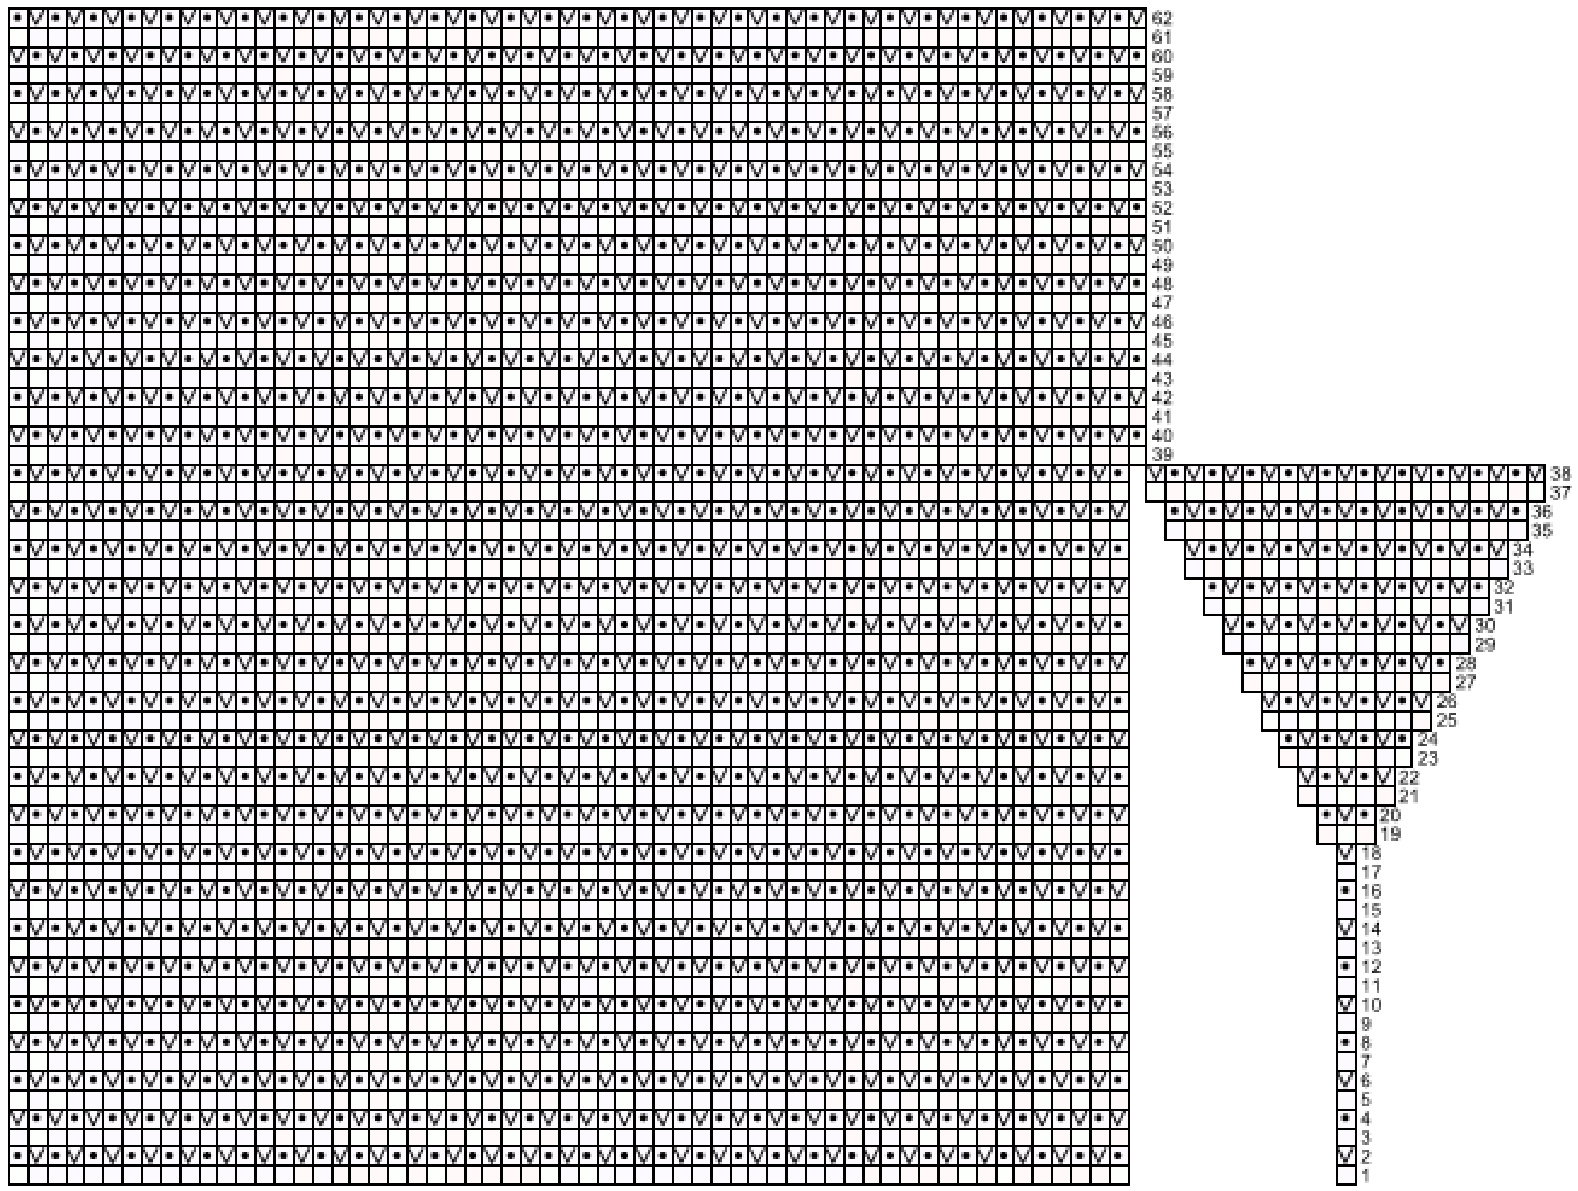
CHART (Only shows through round 62, but you will be knitting more than 62 rounds)
slip stitch with yarn in front
purl stitch
Copyright ? 2015 by Deborah Tomasello All rights reserved. This pattern or any portion thereof may not be reproduced or used in any manner whatsoever without the express written permission of the publisher. WARNING: Giving or accepting a free copy of this pattern, without permission of the designer, is stealing.


