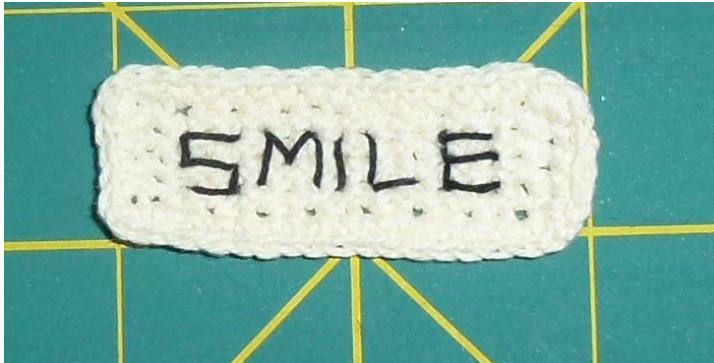
Name Label for Hats, Sweaters, Toys, Etc. I don't know why, I haven't thought of this before. I use to buy the “Made by Grandma" labels. Well, I decided to make my own. These labels can make a crocheted gift more personal. ...Or any gift for that matter. Enjoy!
Materials:
#10 Crochet Thread:
Light Color for the main color Darker color to embroider the name 1.50mm hook Needle to embroider Gauge is not critical. Size: Height = \~ 3%4 inch (\~2 cm) Length depends on length of name Abbreviations: Ch = Chain FO=Fasten Off Sc = Single Crochet St(s) - Stitch(es)
Uses US Terminology
Regarding copyright: This is a free pattern for your personal use. You are welcome to sell any items that you make. But please, do not sell the pattern or reproduce the text without permission.
Pattern Notes:

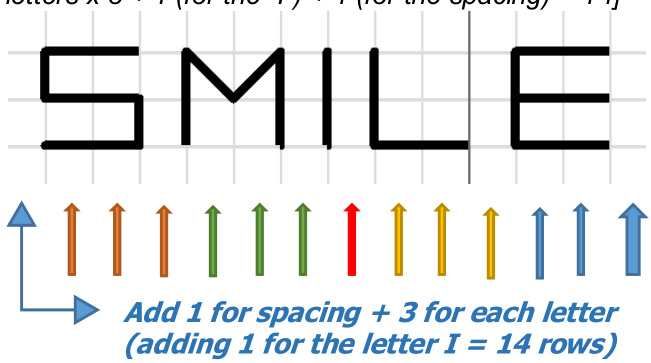
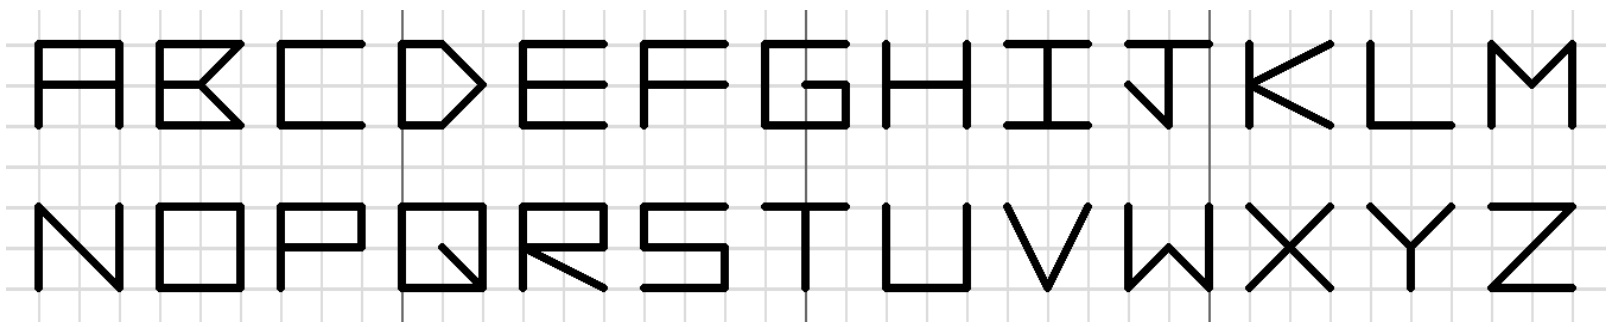
I usedcrochet threadbecause it rendered a nicesize. If you want a smaller label, maybe try 2 strands of sewing thread and a smaller hook If you wanted larger labels, I suppose you could use just about any type of yarn or hook. djusted by adding stitches or rows to accommodate a short or long name (or even a message) I start the first row with single crochets in the back ridge bumps of the chains. I find it allows for an easier (two loop) edging without any gaps. I attached an alphabet chart. To determine the number of rows you will need: 1. Count the number of letters in the name or word. 2.Multiply the number of letters by 3. (Note: Each letter takes 2 rows plus 1 space between.) 3. Add 1 (or an odd #) for spacing at the front and back of word. (Note: If you just add one, the last letter space will equal a uniform spacing on both sides of the name. If you add 3, there will be 2 spaces in front and 2 spaces behind the name.) [Example: SMILE= 5 letters x 3 rows + 1 =16 If you prefer to make your "I"as just a straight line, only count it as 1. So, 4 letters x 3 + 1 (for the “I") + 1 (for the spacing) = 14]
Label:
Row 1: Ch 6, Sc in the back ridge-bump of 2nd ch from the hook, and each across. Turn. (5) Row 2: Ch 1, Sc across. Turn. (5) Row 3: Repeat Row 2 to desired length. (See above for rows needed). DO NOT fasten off. Remove the hook and place a safety-pin through the loop to secure it while you back-stitch the name. If you embroider the name first (before you do the edging), you can add or frog a row, if needed. When you have stitched the name, remove the safety-pin and continue to the edging. Note: If you want to make the edging in a different color, fasten off, weave in and join new color.
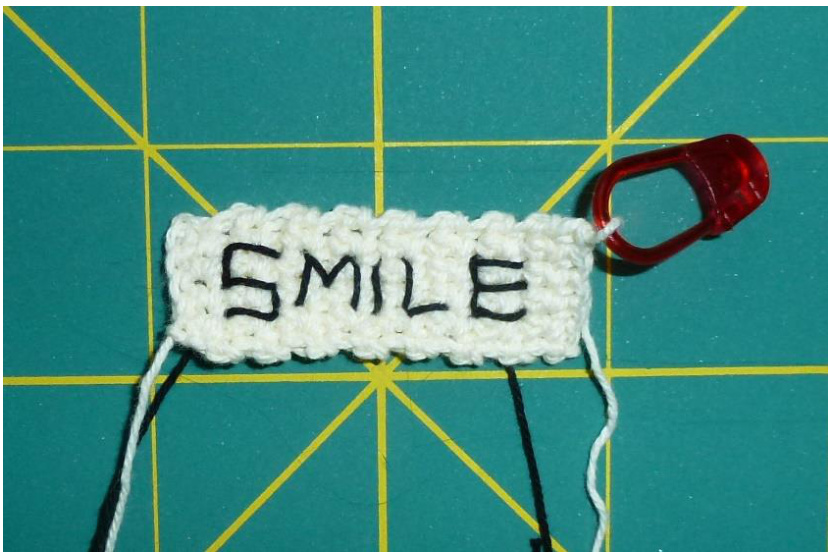
Edging: Ch 1, Sc completely around allfour sides with 3 sc's in each cormer st. Join to the first sc, fasten off and weave in.
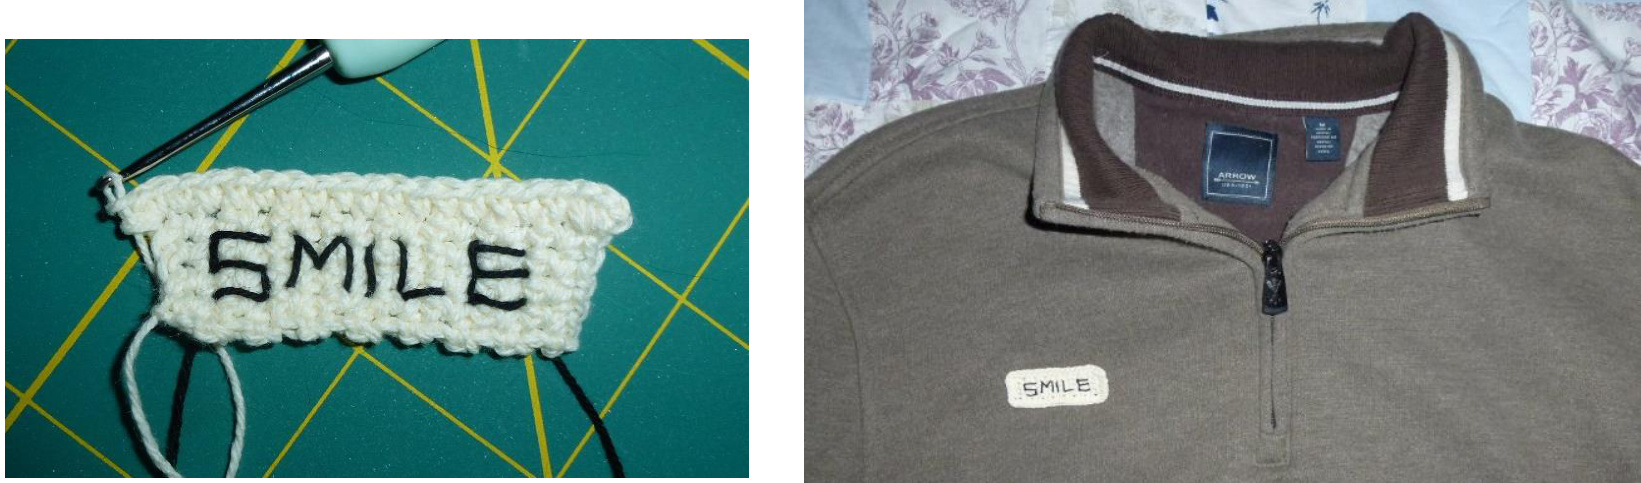
You can sew the label on with regular sewing thread or invisible thread.


