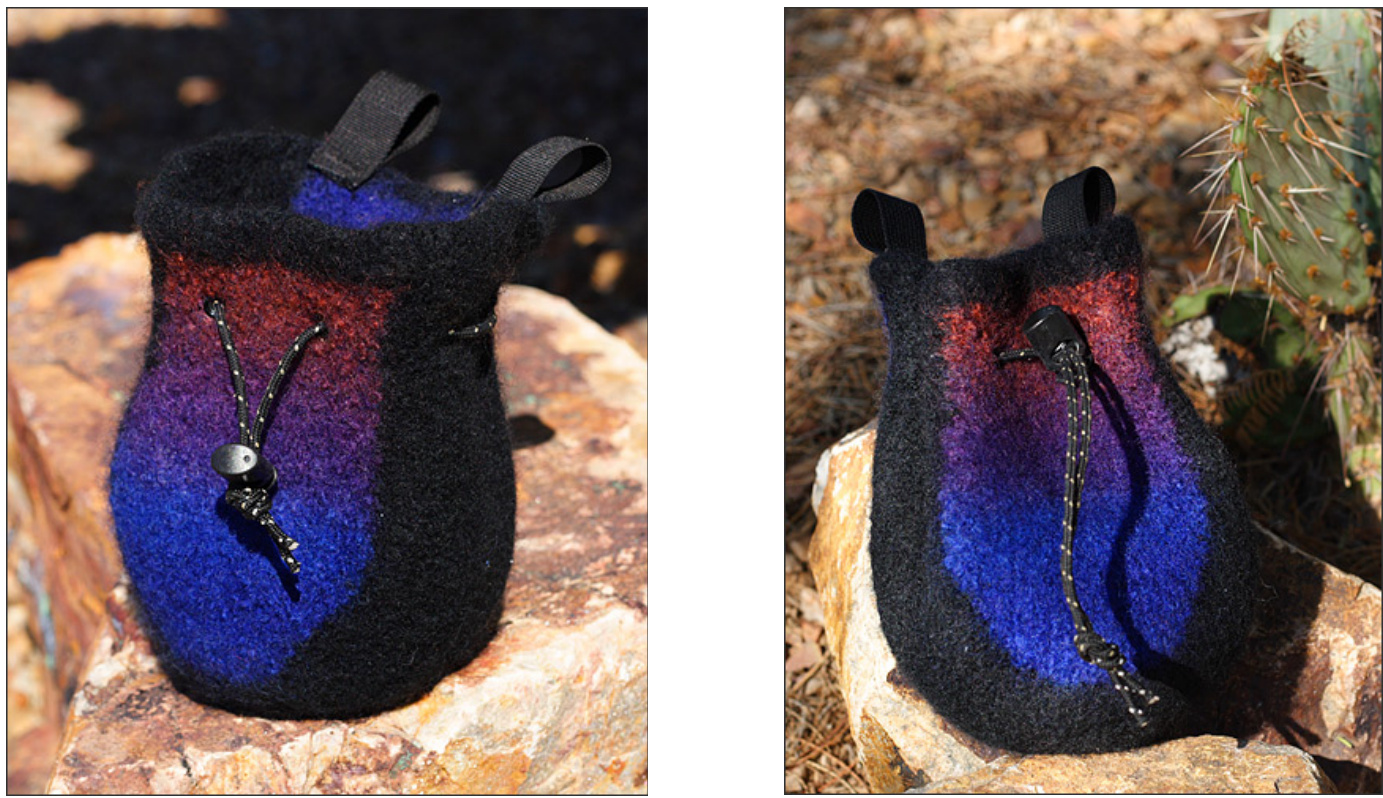
EWEPHORiA (HALKBAG Designed by Stacy Egan
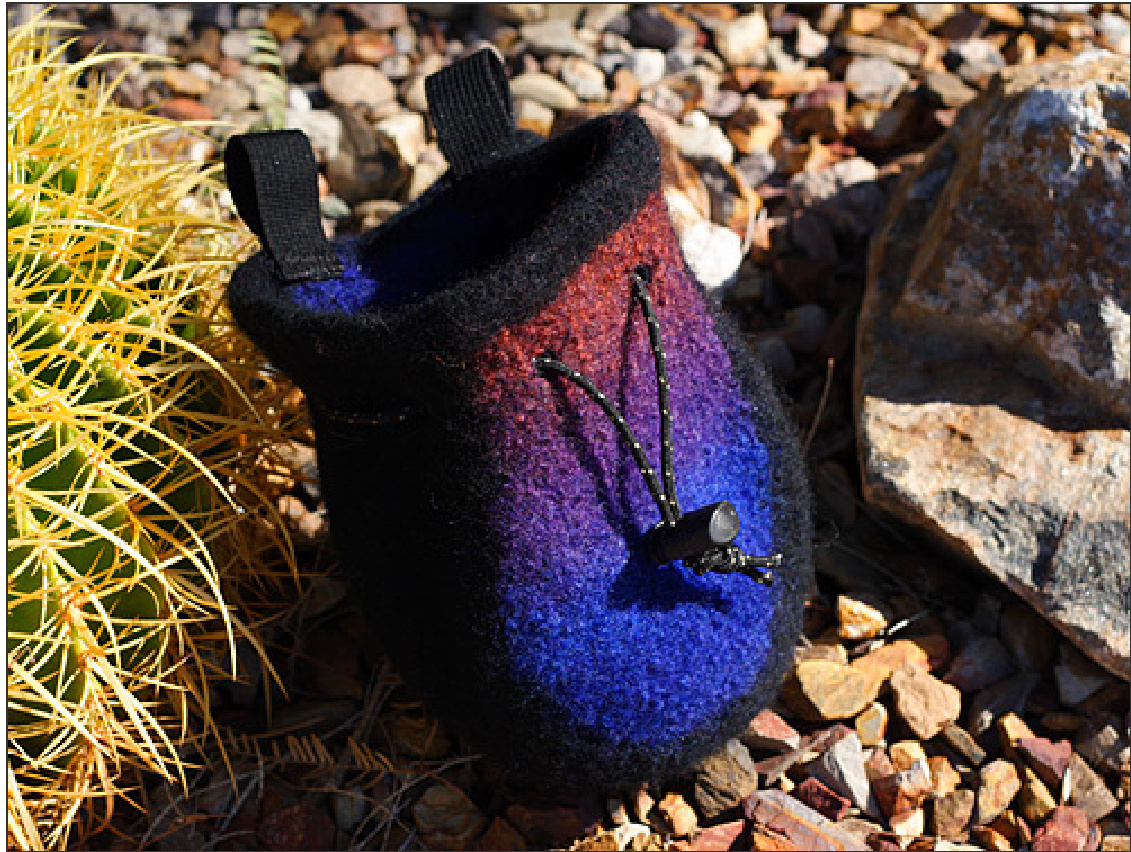
Ewephoria is a popular 5.7 rock climbing route in the Sheepshead formation in one of our local climbing areas of Southern Arizona called Cochise Stronghold. Sheepshead... Ewephoria...felted wool chalkbag...get it? This fun and unique chalkbag is thickly felted, so it requires no liner to hold your chalk (though a chalk ball is recommended as the bag does not close as tightly as a fleece bag will). The bag requires no sewing as pieces are joined as they are worked.
SIZE
One size, about 16" circumference, 6" high after felting
MATERIALS
50g worsted weight feltable wool in solid color [MC] (for example Patons Classic Merino or Cascade 220) 25g worsted weight feltable wool in shaded colors [CC] (for example Wisdom Poems or Noro Kureyon) non-feltable worsted weight yarn pillowcase for felting process 2 pieces flat nylon webbing (1/2"-3/4" x 4" each) 3mm nylon cord, 3' long 1 cord lock 8 metal eyelets (recommend Dritz 2-part eyelets)
NEEDLES
One circular needle size 6mm (Us size 10 ) needles, or pair straight needles Tapestry needle
GAUGE
18 sts = 4" stockinette stitch
PATTERN NOTES
The side/bottom panel is worked first as a strip, 4" wide x 25" long. Stitches are then picked up from the edges of the panel (starting at the bottom of the bag and working your way up) as the front and back of the bag are worked. Attach right (att rt): With left needle stick through both yarns of next chain stitch on edge of size/bottom panel (front to back). Knit together both the first front/back panel stitch with the chain stitch from the size/bottom panel. Attach left (att If): After knitting front/back panel row until 1 stitch remains, slip last stitch onto right needle, pick up both yarns of next chain stitch with left needle (front to back), slip the last stitch back onto left needle. Knit together both the chain stitch from the size/bottom panel with the last stitch of the front/back panel.
ABBREVIATIONS
mlr = make one stitch right mll = make one stitch left ssk = slip slip knit k2tog = knit two stitches together
PATTERN
SIDE/BOTTOM PANEL CO 18 sts with mC. work 4 rows as follows: Rows 1 & 3 [RS]: slip first stitch, purl to end of row. Rows 2 & 4 [wS]: slip first stitch, knit to end of row. Work 8 rows stockinette stitch, slipping first stitch of each row. Eyelet row [RS]: slip first stitch, k2, k2tog, yo, k7, k2tog, yo, k4. Continue working in stockinette stitch, slipping first stitch of each row, until piece measures 22". Eyelet row [RS]: slip first stitch, k2, k2tog, yo, k7, k2tog, yo, k4. Work 8 rows stockenette stitch. Work next 4 rows as for first 4 rows, with purls on Rs. Bind off. FRONT/BACK PANELS (Do for both front and back panels) Place a safety pin as a marker along each long edge of the side/bottom panel, at the mid-point of the panel. One way to do this is to count the total number of chain stitches along the edge and put the marker at half that number down. This willbe your reference as to where to pick up your first stitches for the front/back panel along what will be the bottom edge of your bag. Switch to CC yarn and pick up 5 stitches before marker and 5 stitches affter marker (10 sts on needle). Purl next row [ws]. Increase portion: Repeat the following 2 rows 8 times (see pattern notes for "att rt" and att If" procedure): Row I [RS]: att rt, mlr, knit row until I st remains, mll, att If. Row 2 [wS]: purl There should be 26 stitches on needle after the above 16 rows. Knit even portion: Repeat the following 2 rows 5 times (no increases or decreases) : Row I [RS]: att rt, knit row until I st remains, att If. Row 2 [wS]: purl Decrease portion: Repeat the following 2 rows 4 times, until there are 18 sts on needle: Row 1 [RS]: att rt, ssk, knit row until 3 st remain, k2tog, att If. Row 2 [wS]: purl By now your work should be even with the eyelet row of the side/bottom panel. Eyelet row [RS]: att rt, k2, k2tog, yo, k7, k2tog, yo, k3, att If. Next row [ws]: purl Knit even portion: Repeat the following 2 rows 3 times (no increases or decreases): Row I [RS]: att rt, knit row until I st remains, att If. Row 2 [wS]: purl Front/back panel lip: Switch to MC yarn. Next row [RS]: att rt, knit row until 1 st remains, att If. Work the next 4 rows as follows: Rows 1 & 3 [WS]: knit Rows 2 & 4 [RS]: att rt, purl until 1 st remains, att If. Bind off. Repeat above for the back panel. Feed loose ends through your work with a tapestry needle.
FELTING PROCESS
Feed non-feltable worsted weight yarn or string through the eyelet holes and tie ends together in a knot. This ensures the eyelet holes stay open during the felting process. Put chalkbag into a pillowcase and machine wash in hot water with a small amount of dish soap, along with items like tennis shoes, towels, jeans, etc. that will help to increase agitation. Check every 10 minutes (or more often) to see that your bag is shrinking to the size desired. when your bag is the desired size, remove from machine, rinse by hand and lay out to dry. You could let it lay flat or use a jar to shape it as it dries.
ATTACHING NOTIONS
Sew on flat webbing pieces to back of bag for attaching a waist belt or carabiner to your bag. Install metal eyelets into eyelet holes as per package directions. Feed nylon cord through the eyelets. Install cord lock onto your cord, and tie ends of cord together in a knot (if too long, cut to shorten and melt ends to prevent fraying). Climb on!