Crochet hook case
and start over.
Pattern and description
Needed : 5 colors of acryllic yarn, 1 skein and 4 leftovers Crochet hook 3 mm Blunt needle and scissors Piece of velcro The case mesures approximately 10 x 15 cm (4x6 inches), or a bit more when completely finished. For some brands of crochethooks, this is too small, and you need to adjust the width. After two rows of single crochets, you can measure if your needles fit. If not, adjust the with with the required amount of stitches Chain 30 (or more, if your crochethooks are much longer - measure this after row 3!) Continue working 1 sc in echt st for 23 rows. Row 24 : sc in backloop only (this will be the folding'-strip) Row 25 : 1 sc in each sc, both loops. Row 26 : sc in backloop only (end of folding strip to give depth to the bag) Continue with normal sc for 24 rows. For the second folding strip', work the 25th row in backloops only again. Row 26 1 sc in each sc - both loops Row 27 : sc in back loops only. If you did this right, you should now have a piece that you can easily fold on the folding strips'with a nice sharp fold. De lower part should be just a little bit shorter than the upper part, so they will nicely fit on top of eachother after working the edges. For the flap we now work 14 more rows of sc. Voor In the next 5 rows, decrease 1 stitch on both ends by working the 2nd and 3rd and the 2 stitches befor the last together- 28 / 26 / 24 / 22 / 20 sc. In the next two rows, decrease 2 stitches on each end by working the 1st and 2nd, 3rd and 4th , the 17th and 18th and finally the last two stitches- 16 / 12 sc
The “inserting-mechanism'.
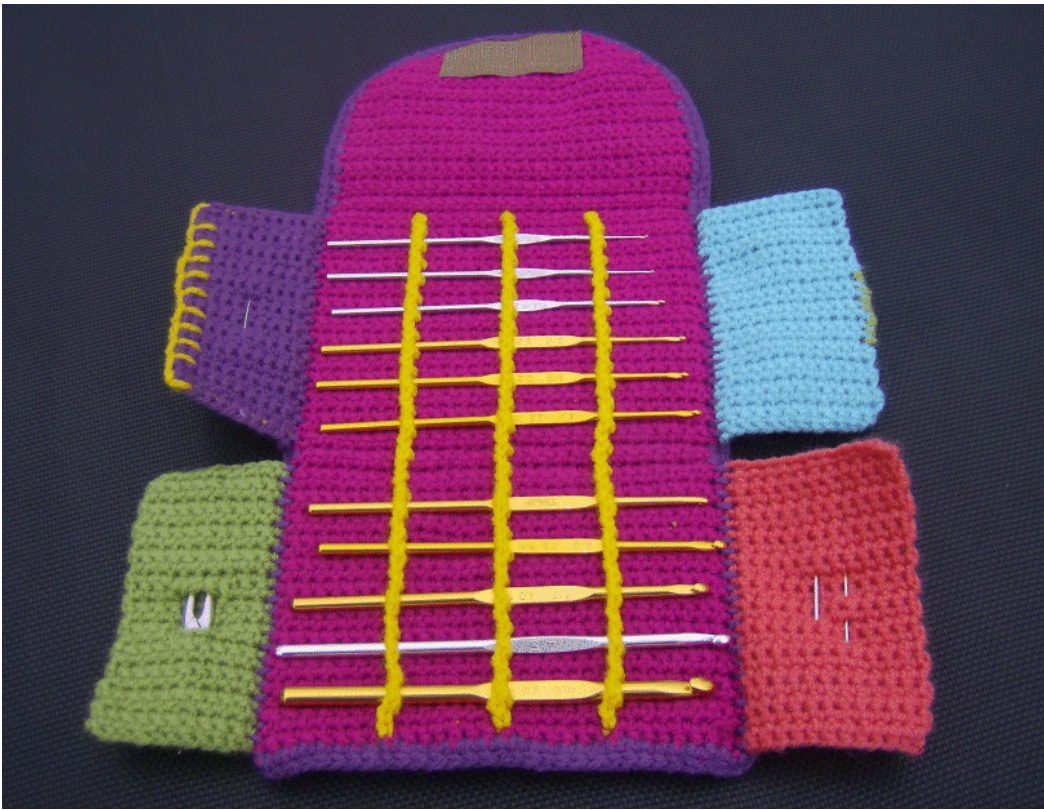
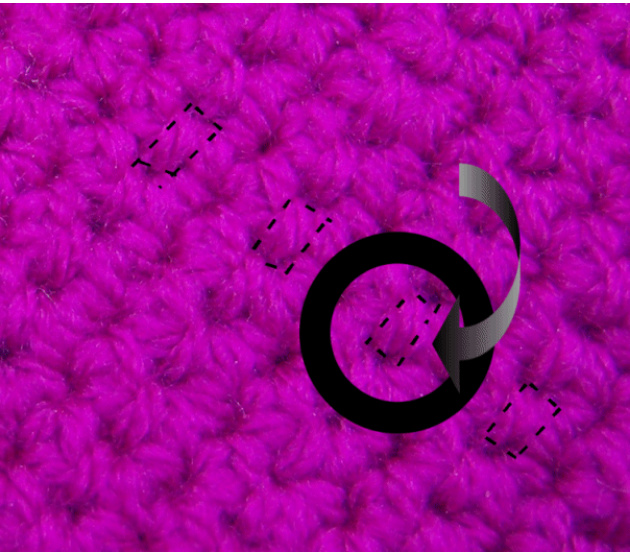
When you look at your work very closely, you will see that the sc have formed a sort of 'stripes'. Stripes of 2 rows, woth small holes in the middle. Between two holes you see a horizontal loop. This is the loop we are going to work in for the “insertingmechanism'.
The 'Scissor-flap'. Insert your hook carefully under the 8th loop from the side,and attach with aslipstitch.Work2 chainstitches, and insert hook in the next loop right above the former. Work 1 sc and 1 chainstitch, and insert in the next loop. Continue working under these loops untill you reached the last loop befor the fold under the flap, end with a slipstitch and cut yarn and pull through the loop. Do the same in the row of the 15th and the 22nd stitch from the edge. You now have three rows of attached chains, where you can easily insert crochethook of up to 6 mm. If you want to store even thicker hooks than that, you can chain 2 instead of one in a few loops Fasten off the beginning- and endingpieces of yarn very carefully and firmly, weaving them through the fabric of the base so that you cannot see them anymore from either side.
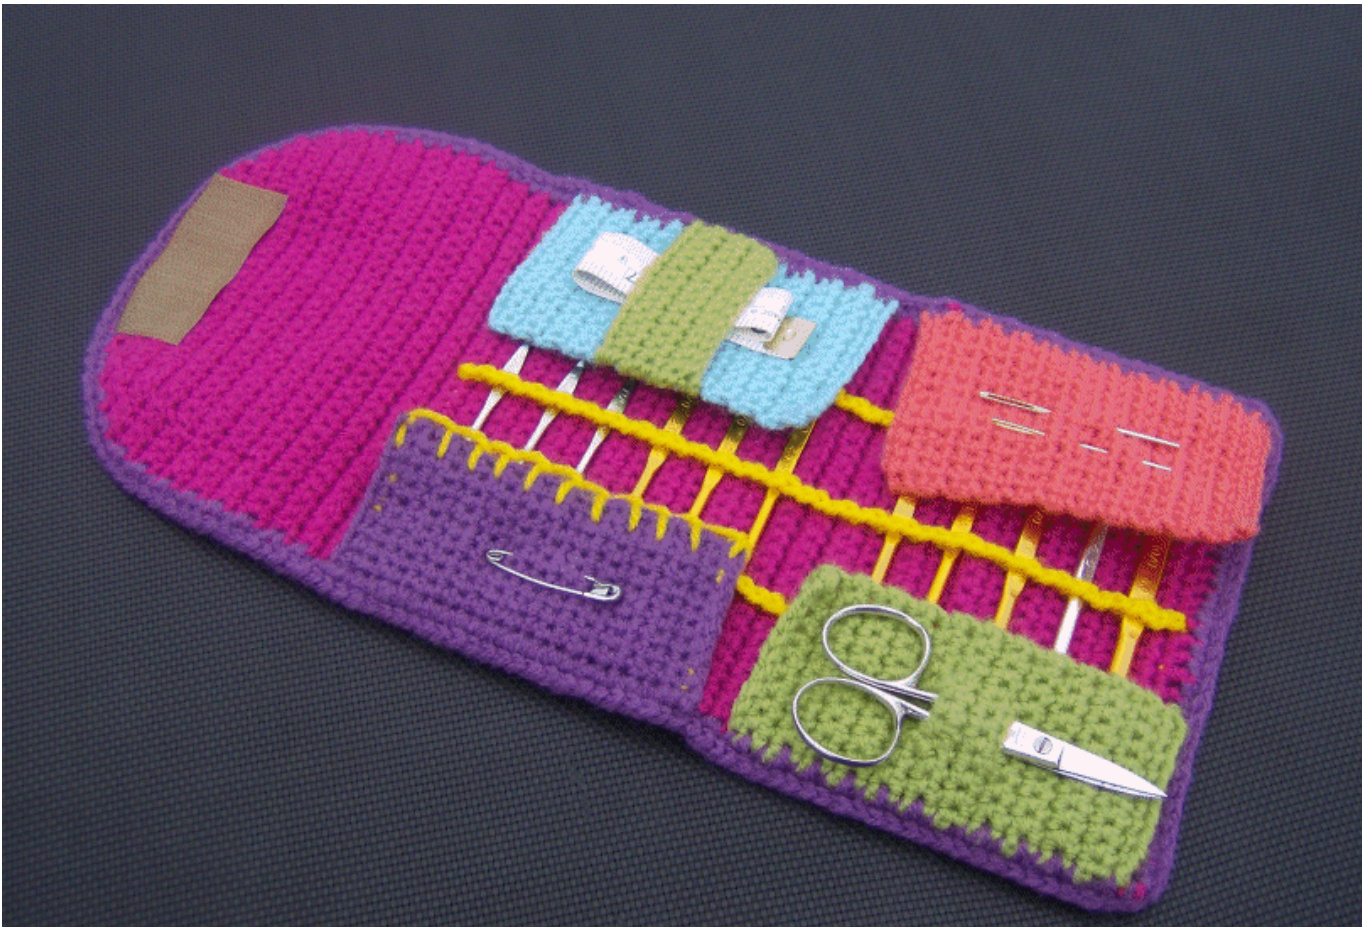
On the inside of the case, we are gonna make four flaps' that you need to prevent your hooks from sliding out of the case. But you can, ofcourse, use them to store some small accessoirees needed for crochet. Work these flaps over about 1/3 of the amount of stitches, or a bit wider if you prefer. In the first ^ flap' me make two buttonholes to store a small pair of scissors. To achieve this, skip 3 sc when you've reached about 1/3th of the height, chain 3, and continue in sc. In the next rows, work only sc again, untill about 2/3 , and make another buttonhole again in the same manner. (So if your flap is 10 sc wide, work 4 sc, 3 chains, 4 sc for the buttonholes). Through this double buttonhole, you vcaqn insert a small pair of scissors.
The 'measuring-flap'
Although I added a piece of measuring tape later, I did like the idea of giving one flap a measuringembroidery. If youre lucky, your stripes are exactly 1 cm high, if not, you may have to smuggle a litle. The flap is very straightforward (10 sc over the desired height), and I embroidered a crude measuring strip with Feston-stitches in a contrasting color. And if your stripes are exactly 1 cm, you can also work this flap in rows of alternating colours.
The 'mesuring-tape-flap' .
In the next color, work a plain piece of 10 or 15 sc wide untillit's long enough to fit the inside of the case (10 cm). In a second color, work a small band of 5 rows over the same amount of sc, and attach on the flap as indicated in the picure. Unde this band you can insert a piece of (small) measuringtape, preferably with inches on one side and cm on the other. You can also use a paper measuring tape, but keep it thin !
The needle-flap
For neeldes you don;t need any tricks they will always be easy to insert. So therefor, just work a small piece of 10 of 15 stitched wide and 10 cm long. Voor je stopnaalden hoef je geen trucjes uit te halen, die steek je natuurlijk overal doorheen. Dit laatste flapje in de laatste kleur wordt dus gewoon 10 of 15 steken breed en ca 10 cm lang.
The border

Pick the color that best matches the base of the case, and work a row of single crochets all around it. Keep the outside of the case facing you, so the edge becomes the best on that side. During this row, you attach the flaps you made as carefully as possible. Since you are working with a contrasting color, it is very important that you look very well where you insert the hook. When you;ve gone all the way round, turn the work and work 1 row of slipstitches in the row of sc you just made, so that the edge becomes a bit thicker but not higher, and prettier on the inside.
Decoration
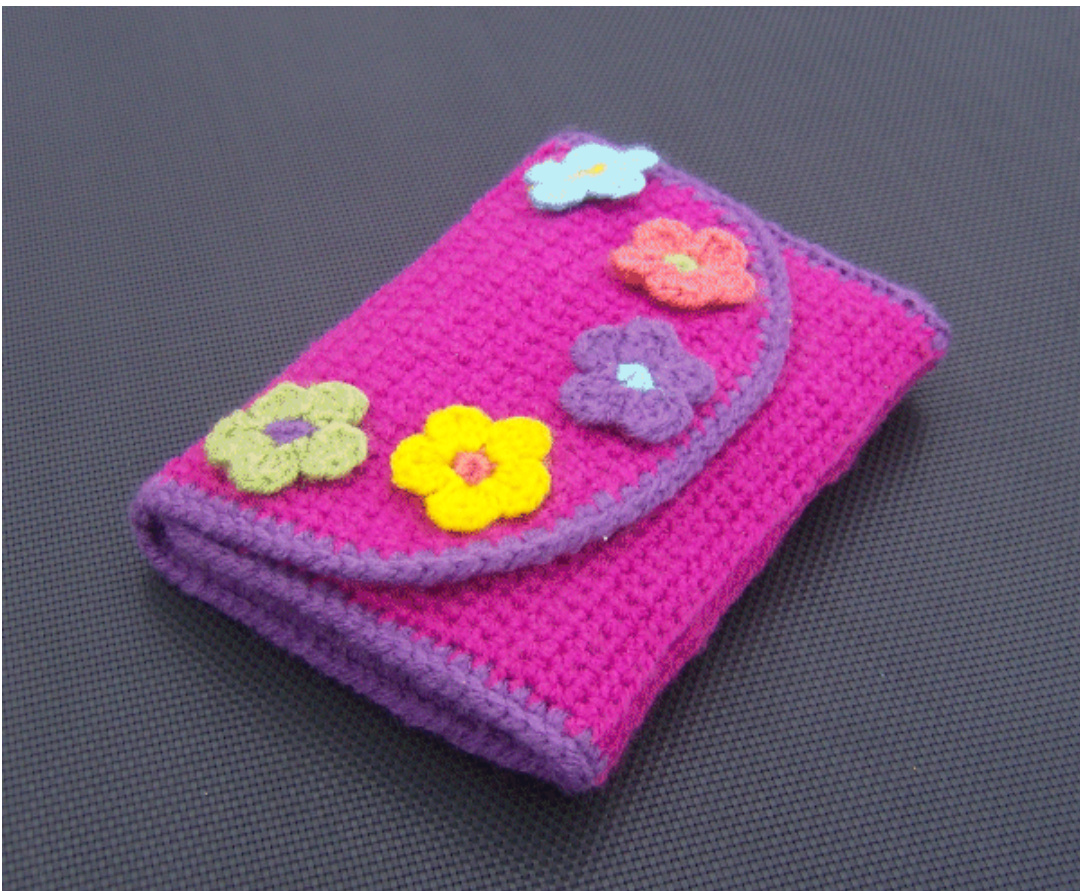
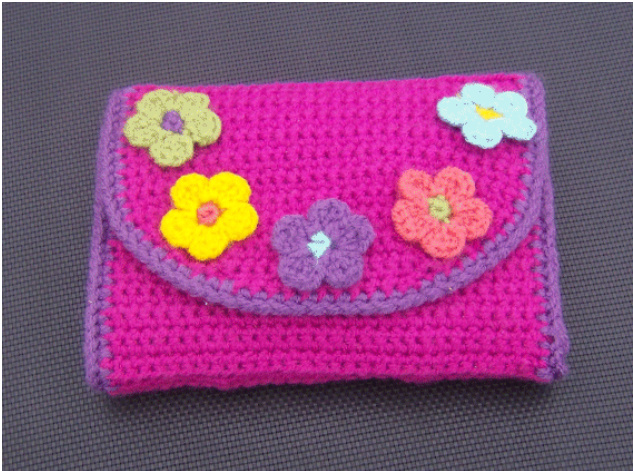
The (optional) decoration is ofcourse entirely your choice, but I chose to make a few easy basic flowers using all the colors I used inside the case. For thse flowers, work 5 sc around an adjustable ring and close the round with a slipstich. (lf you cannot work the adjustable ring, just chain 2 and work 5 sc in the first ch, then close with a slipstitch.) For the petals, attach a second color to one of the 5 sc, chain 2, 2 double corchet in the same stitch, chain 2, 1 slipstitch in the same stitch. For the next petal, 1 slipstitch in the next sc, chain 2, 2 double crochet, chain 2 and another slipstitch in the same stitch. Continue untill you have 5 petals. Firmly cast off loose ends, and stick or sew the flowers on the closingflap of your crochet hook case.
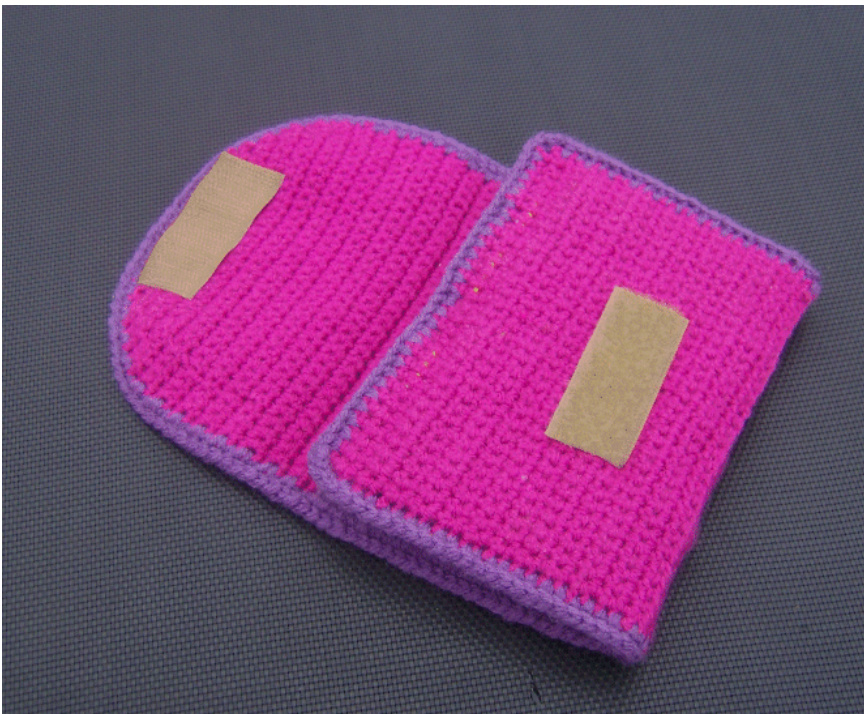
Cut a piece of (stick-on) velcro in the right size, and attach it under the flap to close the case. You may have to sew it on more firmly with thin yarn. You can, ofcourse, also choose to use a snap-on button, a normal button, a string, a ribbon, a magnet, whichever you prefer of have at hand, of leave out the closing-mechanism altogether.