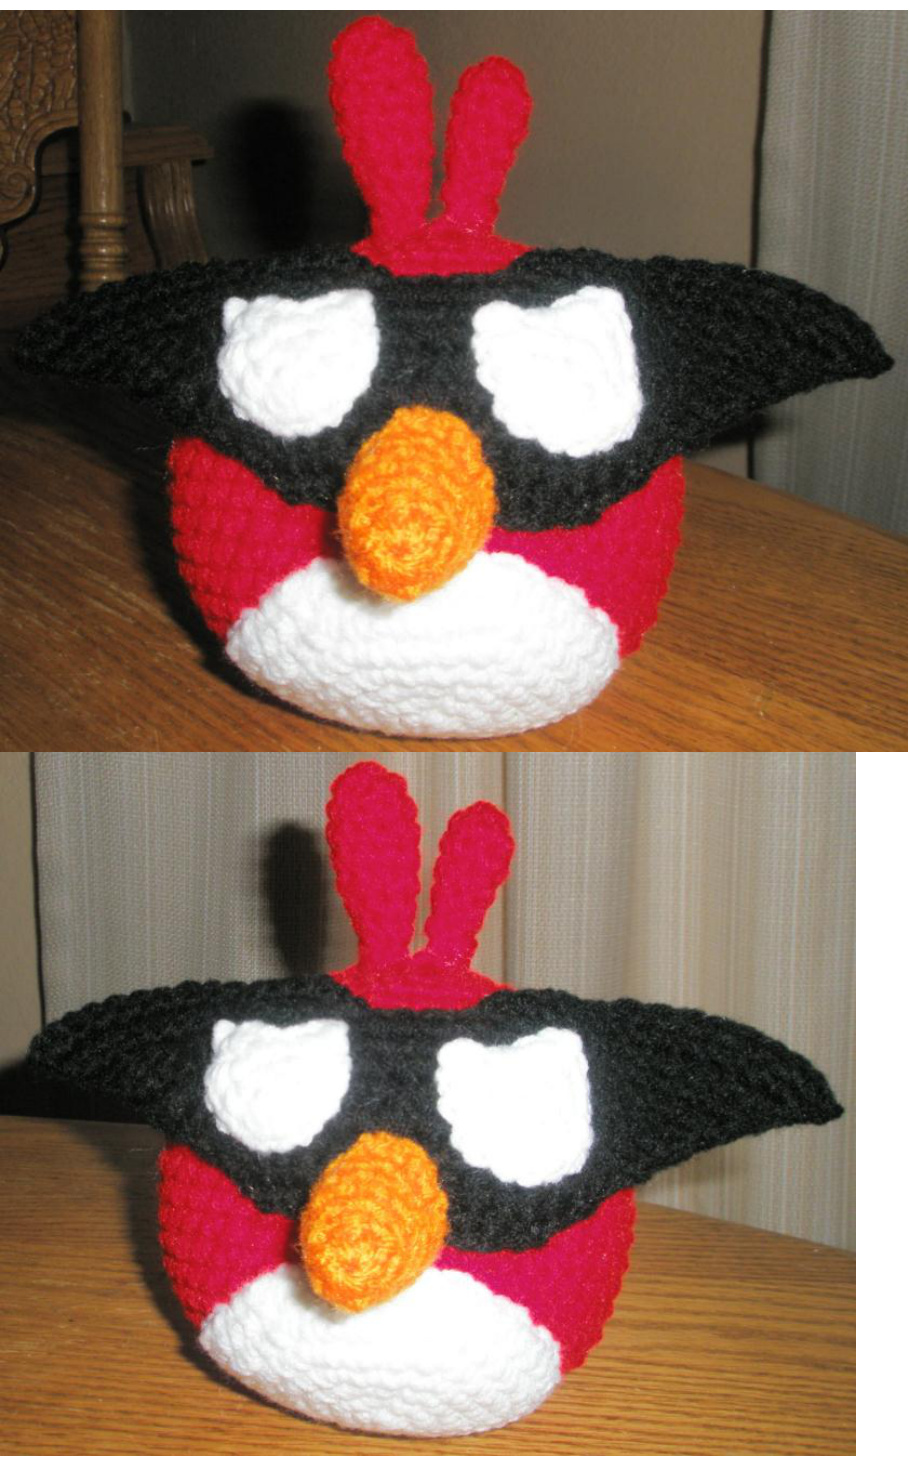
Angry Bird in Space Red Super Bird
Supplies: 4 ply yarn (I used Red Heart Super Saver) Red Hot (body) Pumkin Orange ( beak) White ( eyes) Black ( mask) Polyfill Size E (3.50mm) crochet hook Yarn needle Stitch marker or contrast piece of yarn Stitches used in this pattern: Ch—chain stitch Sc—single crochet DEC-decrease ST—stitch F/O—finish off Magic Ring instructions on bottom of pattern
round 1
round 2
sc across
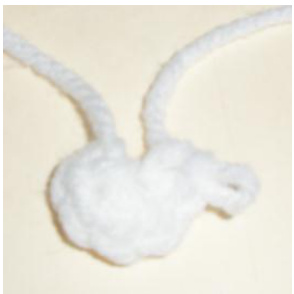
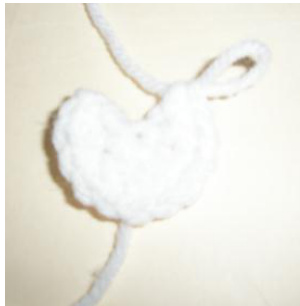
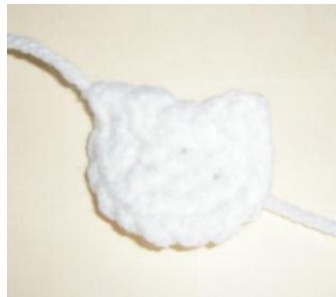
Eyes ( make 2)
With white Round 1: 6 sc in magic ring, do not join, ch 1 turn ( 6 sc) Round 2: 2 sc in each sc around. Rotate piece 180 degrees so that the flat side is facing Up and sc 5 sts evenly across. F/0 ( 12sc , 5 sc) Leave a tail to sew on.
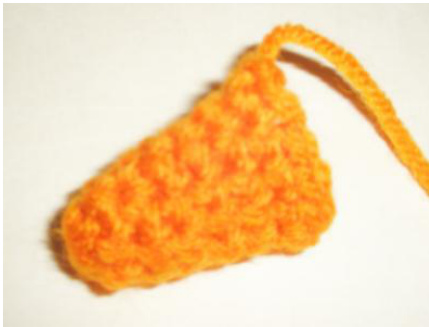
Beak
With pumkin orange Round 1: 6 sc in magic ring ( 6 sc) Round 2: sc around ( 6 sc) Round 3: \*2 sc in first st, 1 sc in next 2 st\* repeat once more (8 sc) Round 4: \*2 sc in first st, 1 sc in the next 3 st\* repeat once more ( 10 sc) Round 5: sc around ( 10 sc) Round 6: \* 2 sc in first st, 1 sc in next 4 st\* repeat once more ( 12 sc) Round 7: \* 2 sc in first st, 1 sc in next 5 st\* repeat once more ( 14sc) F/0 leave tail for sewing on
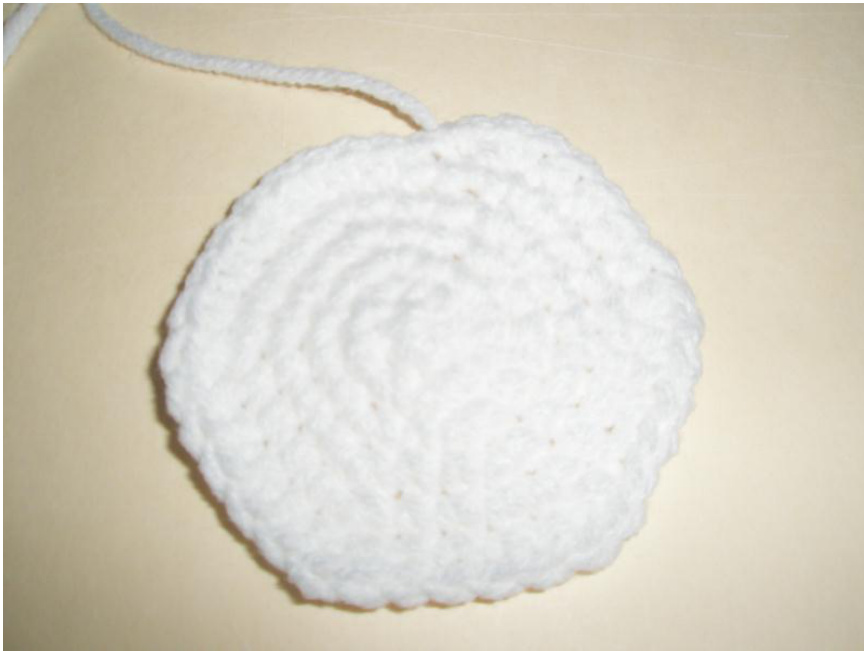
Belly Patch
White yarn Round 1: 6 sc in magic circle ( 6 sc) Round 2: 2 sc in each st ( 12 sc) Round 3: \*2 sc in first st, 1 sc in next st\* repeat around ( 18 sc) Round 4: \* 2 sc in first st, 1 sc in next 2 st\* repeat around ( 24 sc) Round 5: \* 2 sc in first st, 1 sc in next 3 st\* repeat around ( 30 sc) Round 6: \* 2 sc in first, 1 sc in next 4 st\* repeat around ( 36 sc) nd 7: \* 2sc in first st, 1sc in next 5 st\* repeat around ( 42) F/0 leave tail on for sewil
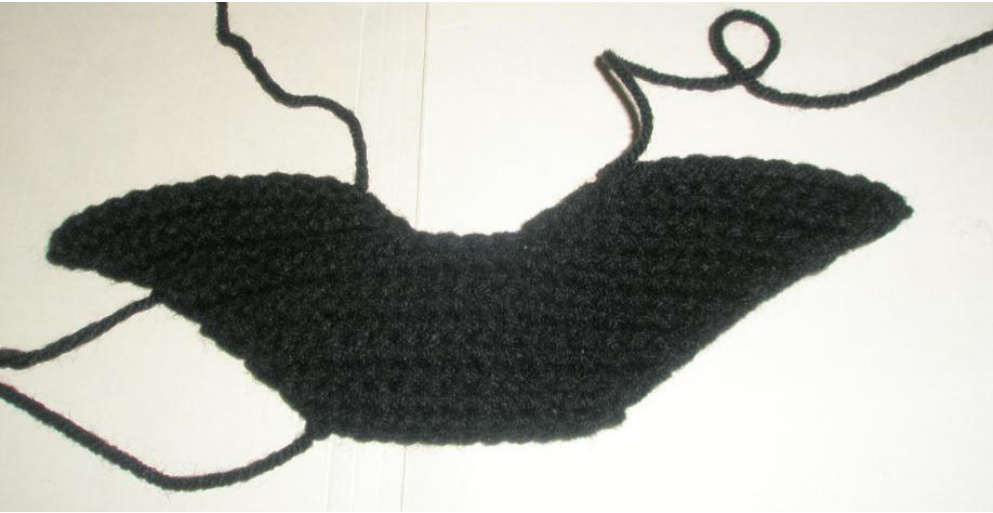
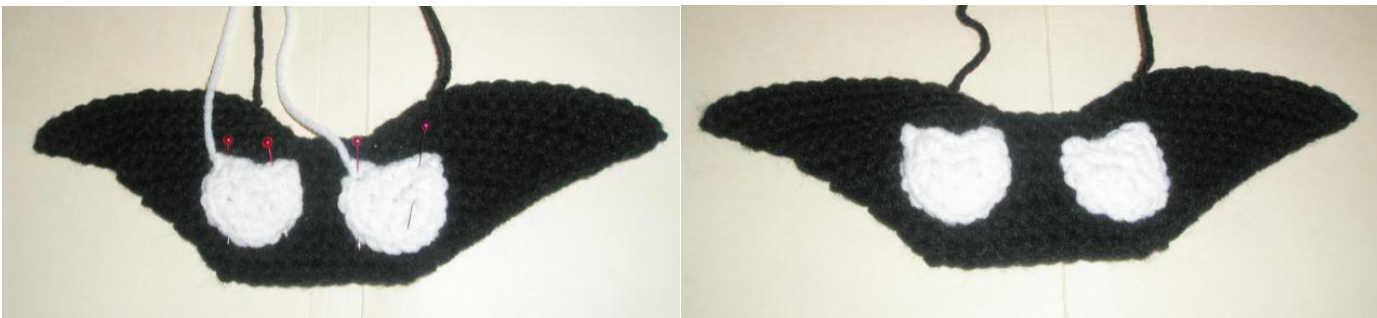
Mask
Withblack Row 1: ch 13, turn and in second from hook sc, sc in next 11 st, turn ch 1 Row 2: 2 sc in first st, 1 sc in next 10 st, 2 sc in last st, turn ch 1 Row 3: 2 sc in first st, 1 sc in next 12 st, 2 sc in last st, turn ch 1 Row 4: 2 sc in first st, 1 sc in next 14 st, 2 sc in last st, turn ch 1 Row 5: 2 sc in first st, 1 sc in next 16 st, 2 sc in last st, turn ch 1 Row 6: 2 sc in first st, 1 sc in next 18 st, 2 sc in last st, turn ch 1 Row 7: 2 sc in first st, 1 sc in next 20 st, 2 sc in last st, turn ch 1 Row 8: 2 sc in first st, 1 sc in next 22 st, 2 sc in last st, turn ch 1 Row 9: 2 sc in first st, 1 sc in next 24 st, 2 sc in last st, turn ch 1 Row 10: 2 sc in first st, 1 sc in next 10 st, sl st in last st, turn ch 1 Row 11: skip sl st, 1 sc to last st, 2 sc in last st, turn ch 1 Row 12: 2 sc in first st, 1 sc to last st, sl st in last st, turn ch 1 Row 13: skip sl st, 1 sc to last st, 2sc in last st, F/O you should be back in the middle of the mask. Leave tail for sewing Join black on the opposite side Row 14: 2 sc in first st, 1 sc in next 10 st, sl st in next st, turn ch 1 Row 15: skip sl st, 1 sc to last st, 2sc in last st, turn ch 1 Row 16: 2 sc in first st, 1 sc to last st, sl st in next st, turn ch 1 Row 17: skip sl st, 1 sc to last st, 2sc in last st, F/O you should be back in the middle of the mask. Leave tail for sewing
Small Feather
Round 1: 6 sc in magic ring Round 2- 4: sc around ( 6sc) Round 5: \* dec in first 2 st, sc in the next st\* repeat around (4sc) Round 6: sc around (4sc) F/O leave tail for sewing on
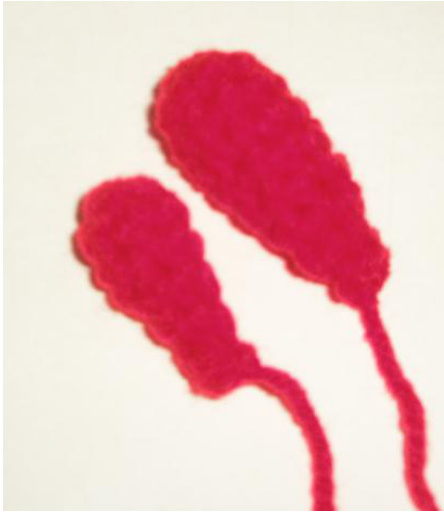
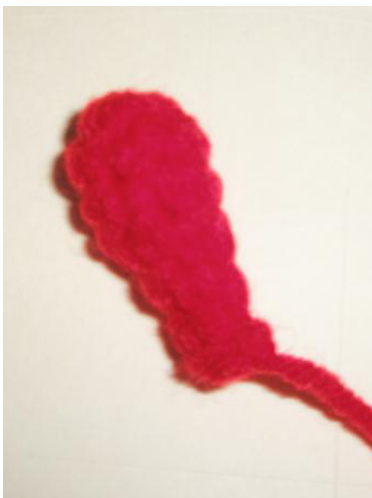
Large Feather
Round 1: 8 sc in magic ring Round 2- 5: sc around ( 8sc) Round 6: \* dec in first 2 st, sc in the next 2 st\* repeat around (6sc) Round 7: sc around (6sc) Round 8: \* dec in first 2 st, sc in the next st\* repeat around (4sc) Round 9: sc around (4sc) F/O leave tail for sewing on
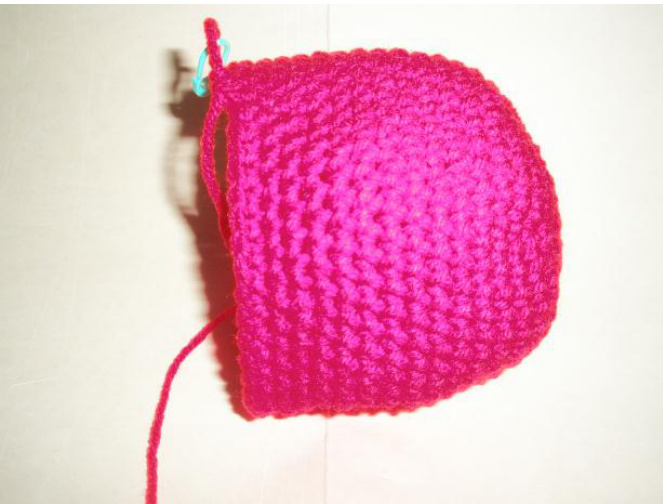
Super Red Body
With Hot Red Round 1: 6 sc in magic circle ( 6 sc) Round 2: 2 sc in each st ( 12 sc) Round 3: \*2 sc in first st, 1 sc in next st\* repeat around ( 18 sc) Round 4: \* 2 sc in first st, 1 sc in next 2 st\* repeat around ( 24 sc) Round 5: \* 2 sc in first st, 1 sc in next 3 st\* repeat around ( 30 sc) Round 6: \* 2 sc in first sc, 1 sc in next 4 st\* repeat around ( 36 sc) Round 7: \* 2 sc in first st, 1 sc in next 5 st\* repeat around ( 42 sc) Round 8: \* 2 sc in first sc, 1 sc in next 6 st\* repeat around ( 48 sc) Round 9 -18: sc around ( 48sc) Round 19: \*dec first 2 st, 1 sc in next 6 st\*repeat around ( 42sc) Round 20 - 21: sc around ( 42sc) Round 22: \* dec in first 2 st, 1 sc in next 5\* repeat around ( 36 sc) Round 23: sc around ( 36sc) stuff and add more as you g0 and need it Round 24: \* dec in first 2 st, sc in the next 4 st\* repeat around ( 30 sc) Round 25: \* dec in first 2 st, sc in the next 3 st\* repeat around ( 24 sc) Round 26: \* dec in first 2 st, sc in the next 2 st\* repeat around ( 18 sc) Round 27: \* dec in first 2 st, sc in the next st\* repeat around ( 12 sc) Round 28: \* dec around\* ( 6 sc) F/O leave tail and sew hole closed. Assembly:
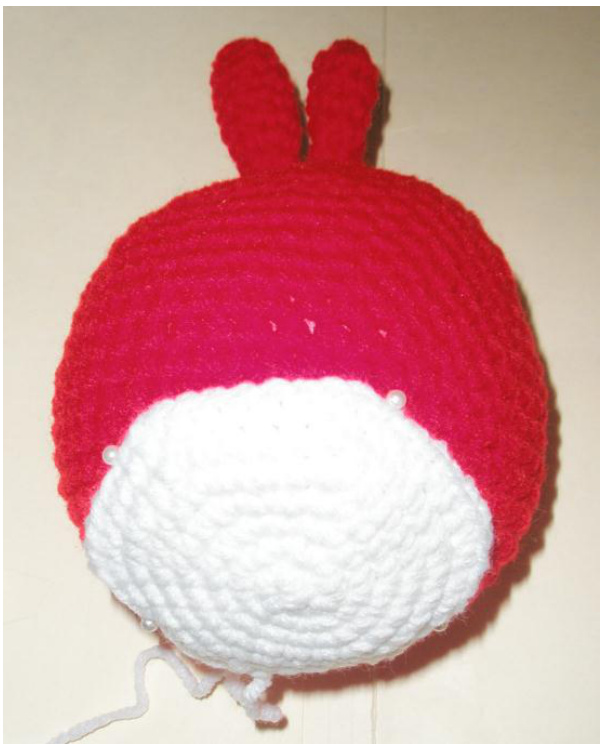
Sew on the large and small feather on top of the head Find center on the bottom and pin into place. Sew on white belly patch.

Pin Mask on one row above belly patch. Sew on
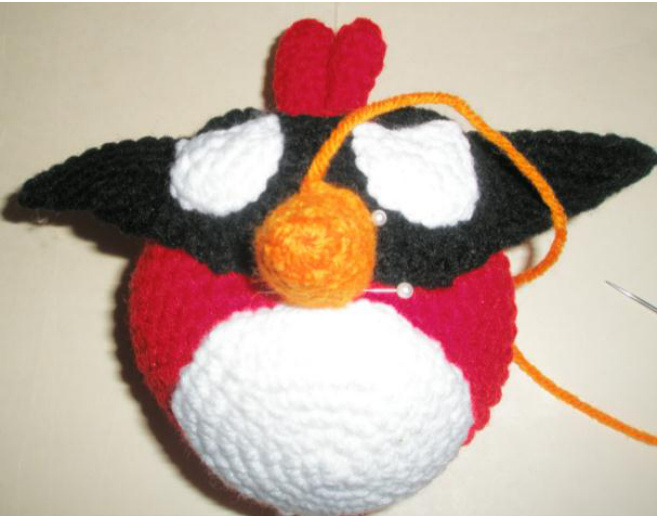
Pin beak on above white patch and on top of the mask.
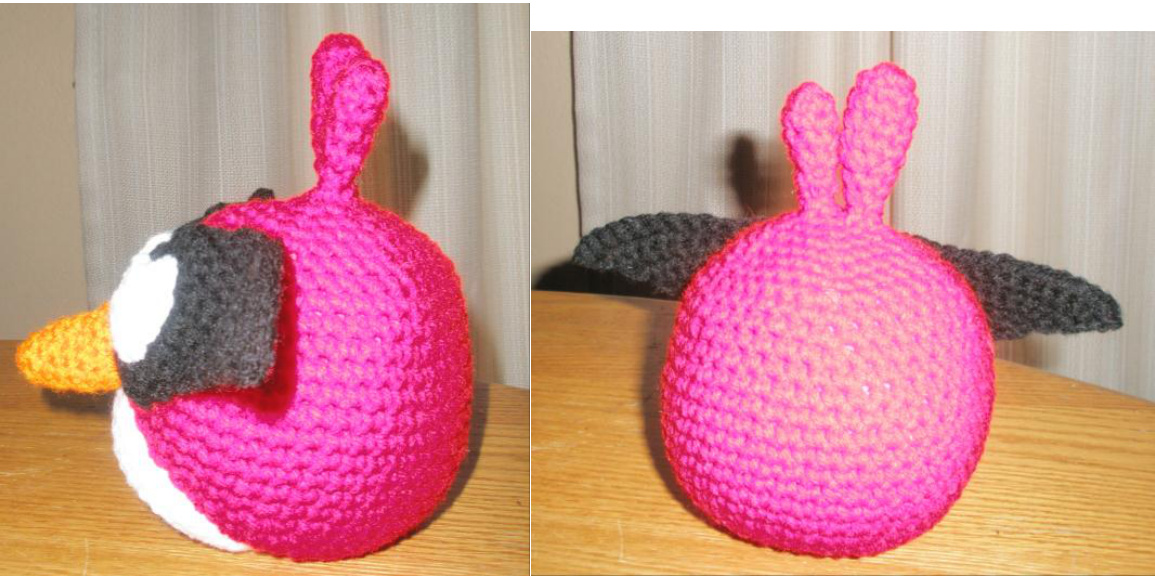
Congrats you now have a
Super Red Angry Bird in Space
This is from Planet June Blog ( thank you June for terrific instructions) www.planetjune.com/help
What is this 'Magic Ring', anyway?
A magic ring is a way to begin crocheting in the round by crocheting over an adjustable loop and then pulling the loop tight. The advantage of the magic ring method (below, right) is that, unlike the regular “chain 2, x single crochet in 2nd chain from hook" method (below, left), there is no hole left in the middle of your starting round.
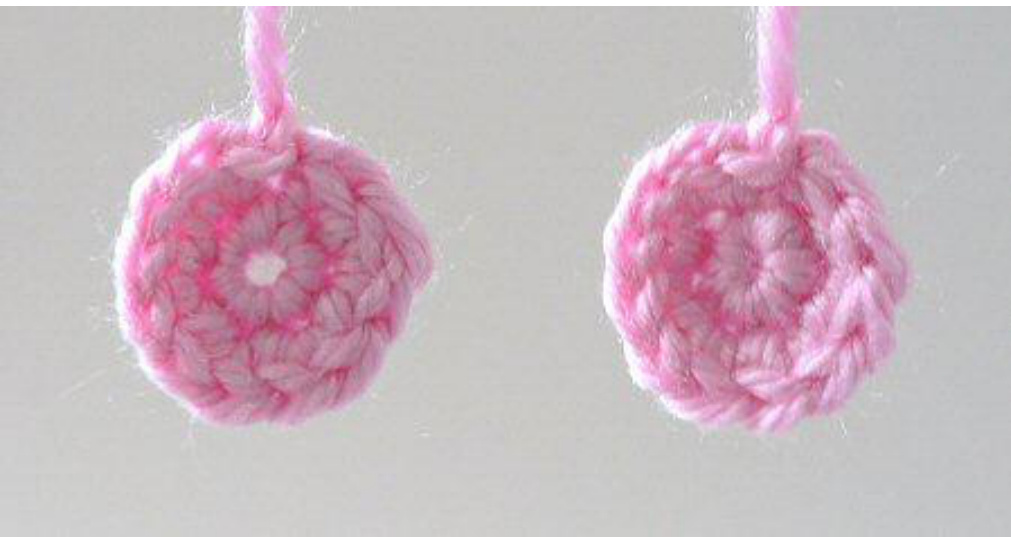
L: ch2, 6 sc in 2nd ch from hook, 2 sc in each st around. R: magic ring, 6 sc in magic ring, 2 sc in each st around.
How do I make a Magic Ring?
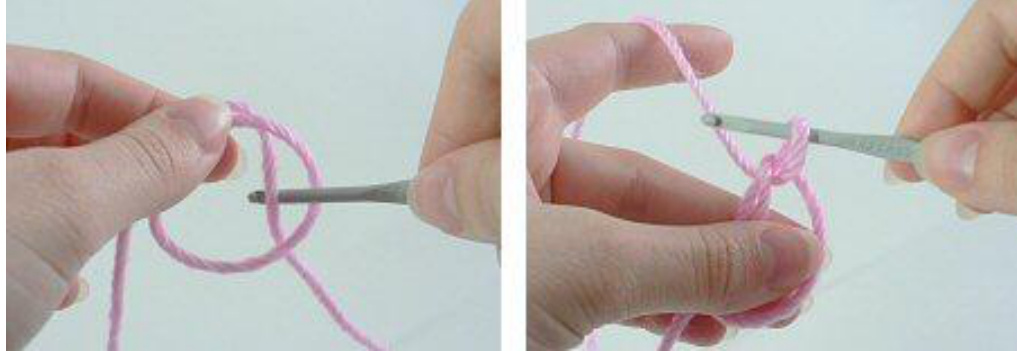
Please note: in the following photos, the starting yarn tail is always on the left and hanging down. The working yarn begins on the right and is then picked up over my left forefinger in Step 2. 1. Make a loop a few inches from the end of your yarn. Grasp the join of the loop (where the 2 strands of yarn overlap) between your left thumb and forefinger:
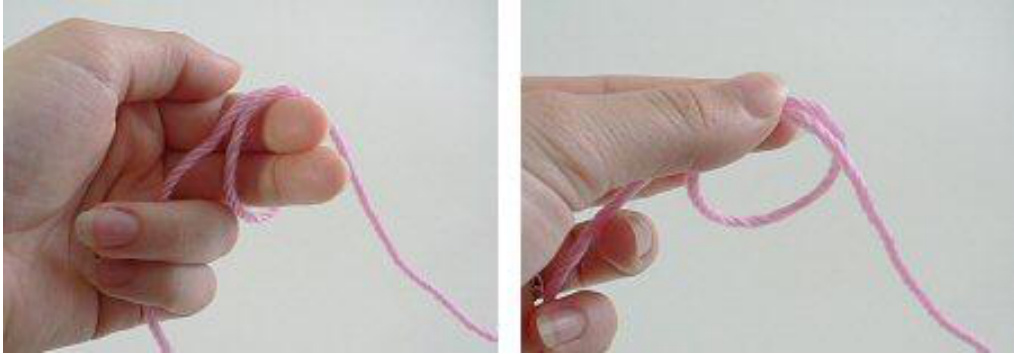
2. Insert hook into the loop from front to back. Draw up a loop:
3. Ch 1. Note: this does NOT count as a stitch:
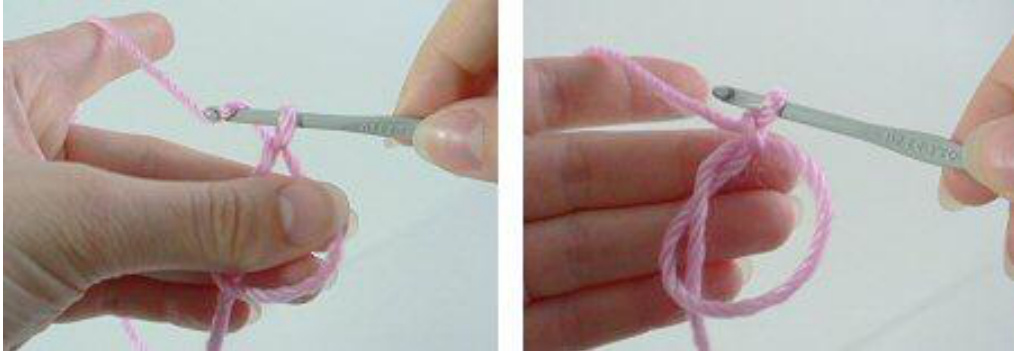
4. Insert hook into the loop, so you are crocheting over the loop and the yarn tail. Draw up a loop to begin your first sc:
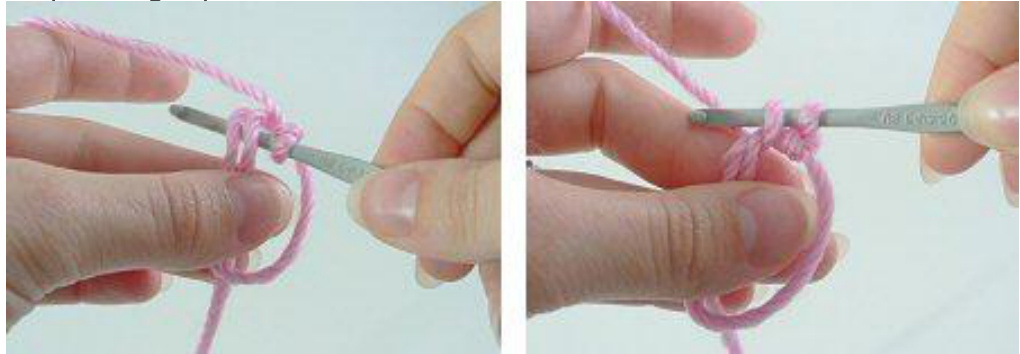
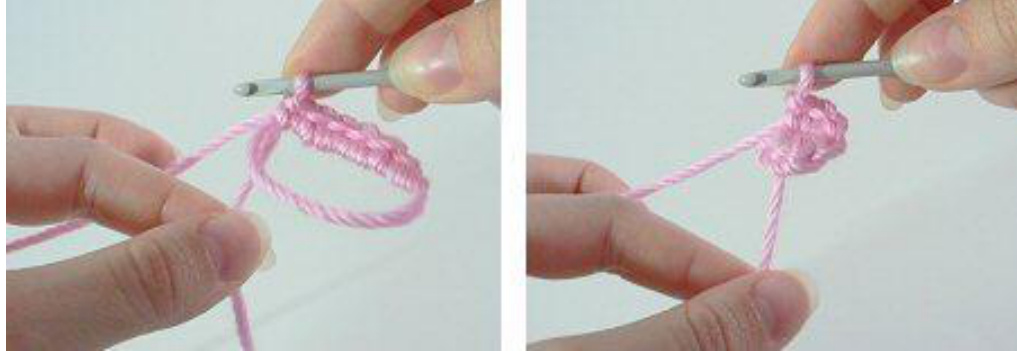
5. Complete the sc. Continue to crochet over the loop and the yarn tail until you have the required number of sc for your first rnd (6 sc shown here):
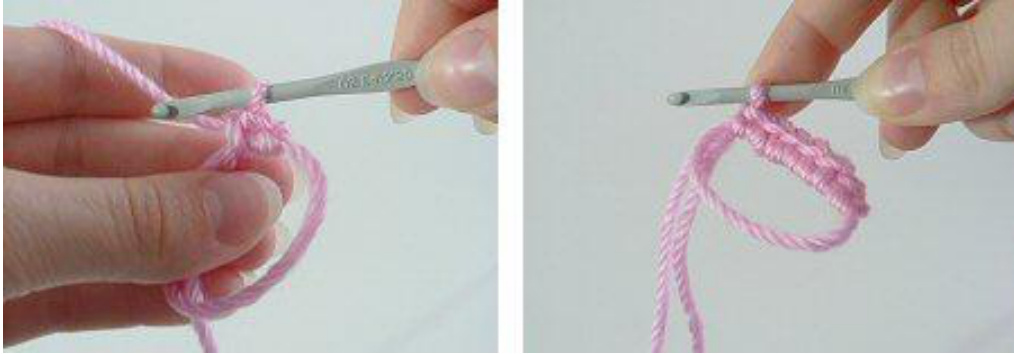
6. Grab the yarn tail and pull to draw the centre of the ring tightly closed:
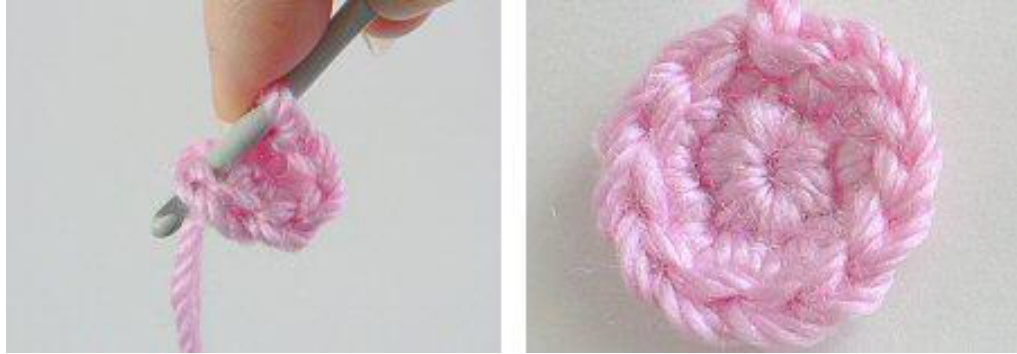
7. Begin your second round by crocheting into the first stitch of the first round (below, left). At the end of round 2 your work will look like this (below, right):
You'll never go back to your old method again.


