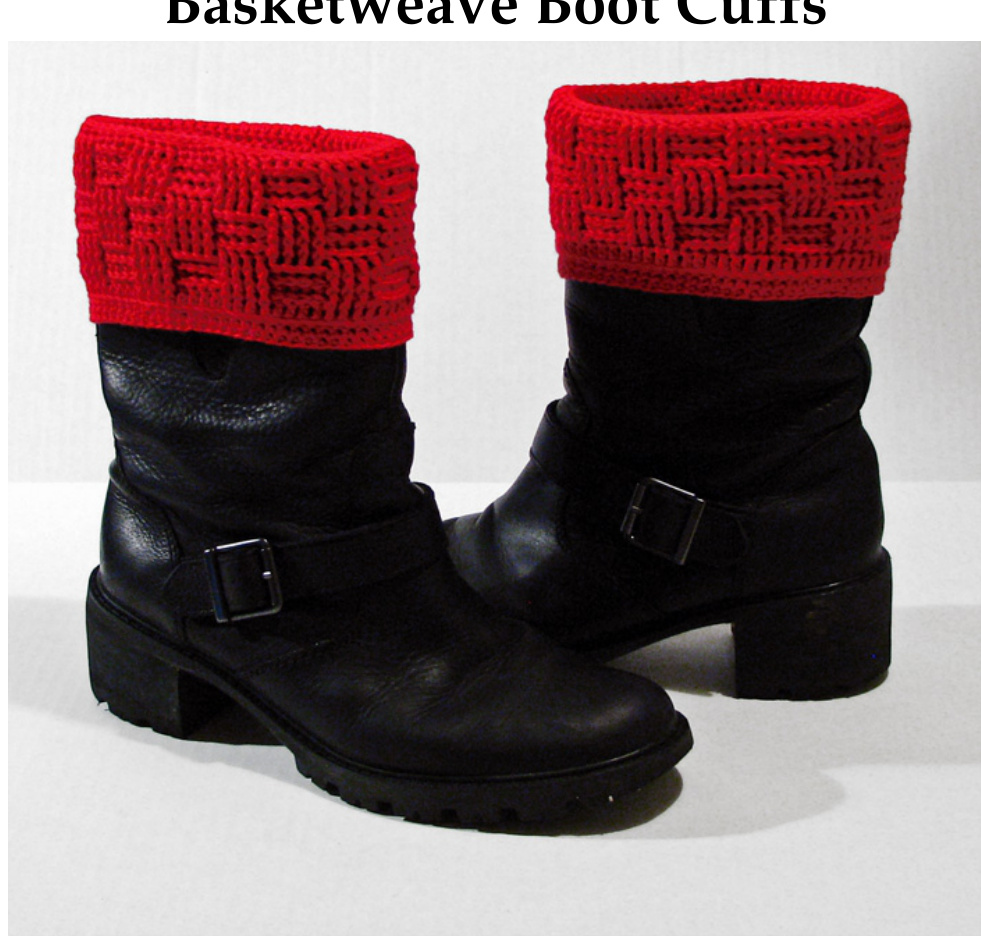
Basketweave Boot Cuffs
Difficulty: advanced beginner/intermediate Size: adult
Materials needed:
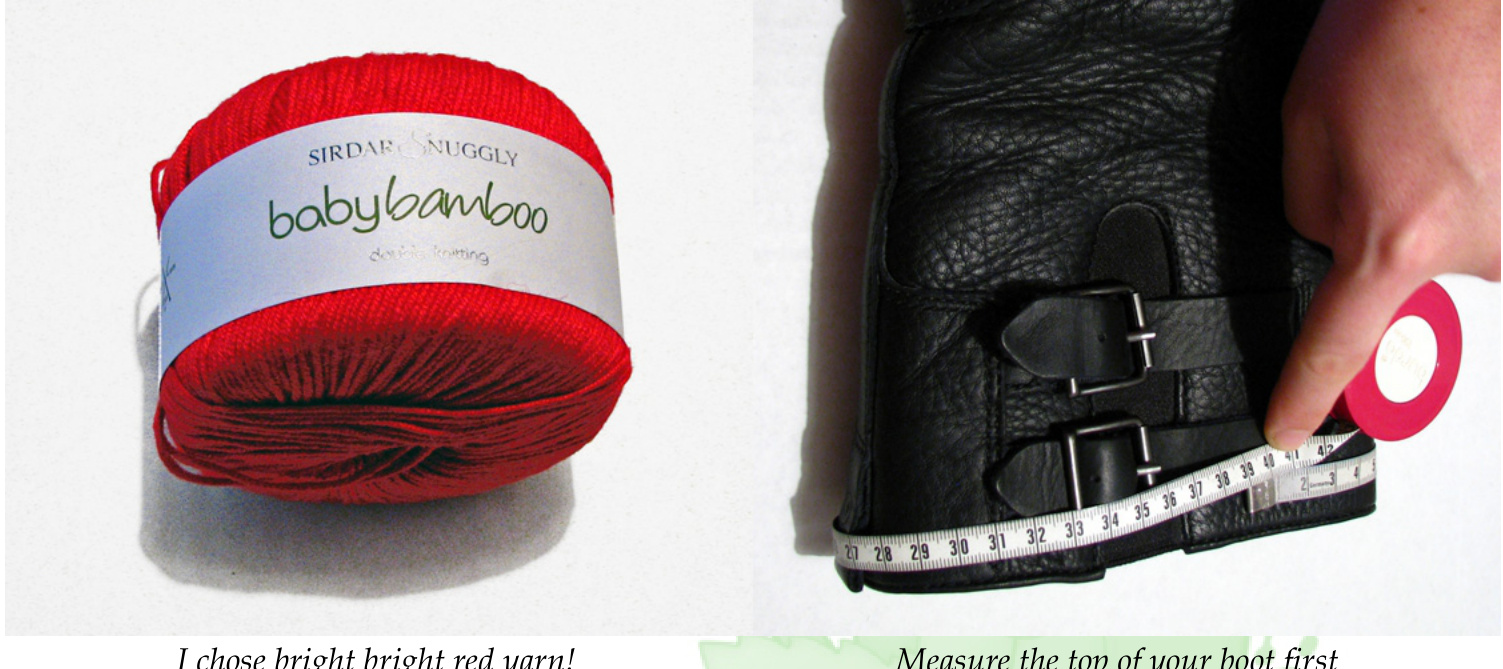
Sirdar Snuggly Baby Bamboo, 2 skeins (substitute any DK weight yarn, approx. 100 yards per cuff) Hooks: size F/3.75mm Darning or tapestry needle
Gauge
6sc x 7 rows = 1 x 1 inches (2.5 x 2.5 cm) Gauge doesn't have to be exact, but a smaller gauge will yield a smaller boot cuff with a stiffer fabric, a larger gauge a larger cuff with a looser fabric. If you are using thicker or thinner yarn, do a test swatch to get to a gauge/fabric density that you are comfortable with and calculate from that how many stitches you will need to get to the desired size for your boot cuff.
Terms and stitches:
ch - chain stitch SC -single crochet sl - slip stitch dc - double crochet (yarn over, insert hook in next stitch, draw loop for a total of three loops on hook, yarn over, pull through first two loops, yarn over, pull through last two loops) fpdc - front post double crochet (instead of crocheting into the top of the stitch, crochet around the post going in from the front of the work piece) bpdc - back post double crochet (instead of crocheting into the top of the stitch, crochet around the post going in from the back of the work piece, in this pattern we will work around the TOP post only, which is a slight amendment from the usual back post stitch to make it less bulky looking, see first image on page 5)
Pattern notes
These cuffs are worked for boots with a top shaft circumference of 39 centimeters (approx. 15 1/4 inches). If your boots are smaller or larger, re-calculate your numbers accordingly. You want your cuff to be about 5 cm (2 inches) shorter than the boot measurement to assure a snug fit. Always go in increments of 4 stitches! (the basketweave is worked in sets of eight, this is further explained in the pattern itself) Chain stitches made at the beginning of a round are used to obtain the correct height for the first stitch, they are not being counted towards total stitches nor are they used as the first stitch in a round! At the end of each round, we skip over the chain stitches made in the beginning and join to the first actual double crochet stitch to keep stitch counts correct.
Boot Cuff
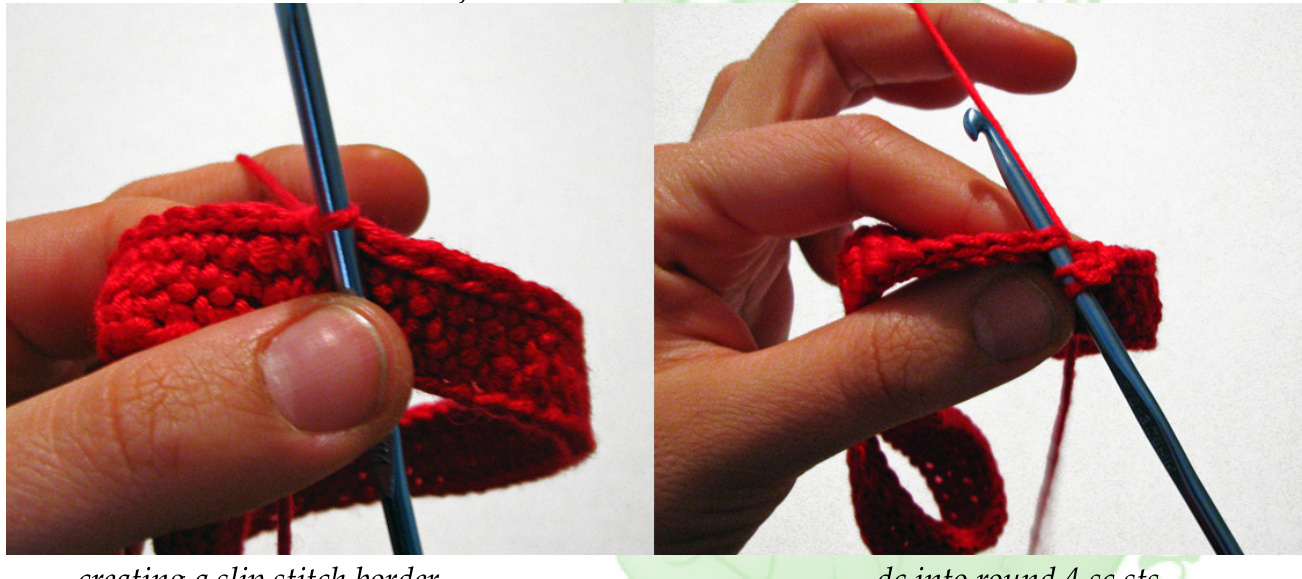
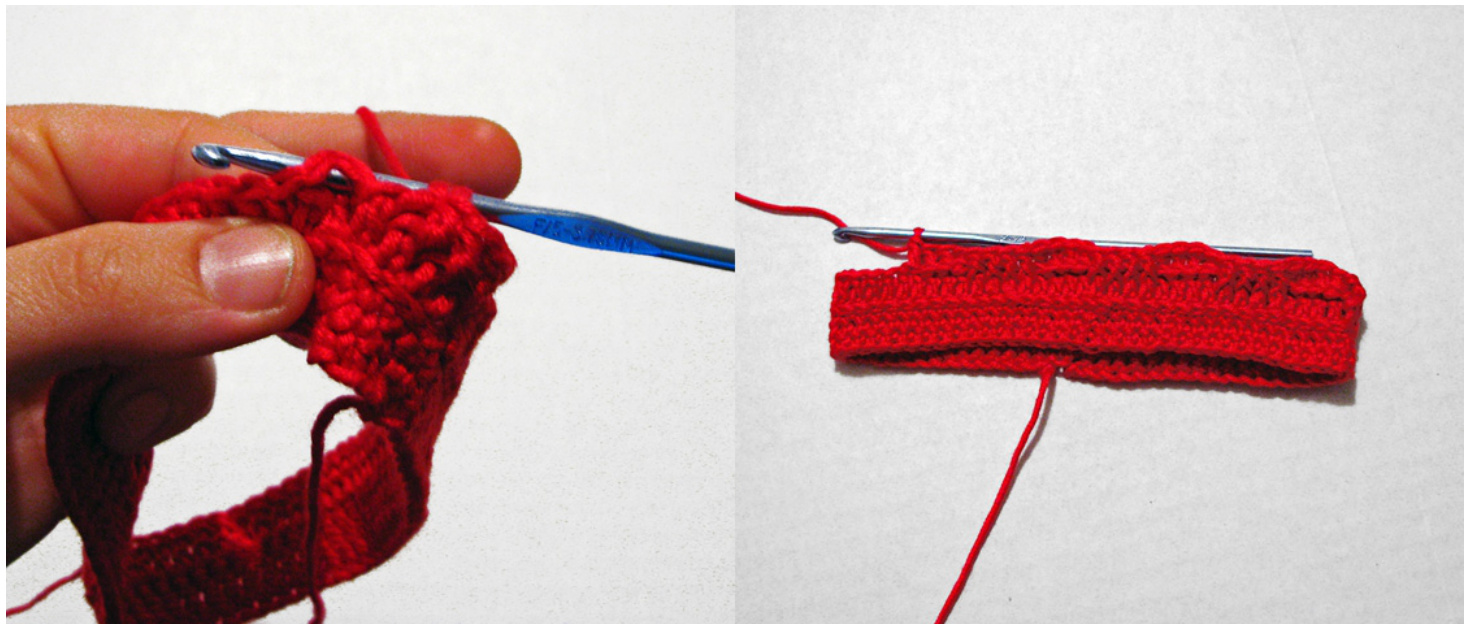
1. chain 68 (or as many as you will need, the cuffs are sized about 5cm/2in smaller so they can stretcl nicely over the boot and stay in place) 2. 1ch, turn, skip 1st chain, 1sc in each stitch around (68 stitches) (this is the only turn in the pattern, all other rows are being joined and worked in the round) Now straighten your work piece and join it by slip stitching into the first sc you made, making sure that the piece is not twisted. 3. 1ch, 1sc in each sc around (68), join to first sc with sl 4. repeat round 3 5. sl into each sc around (68) to make a slip stitch border around your piece, make these sl sts a bit looser than your other stitches, sl into the last stitch of round 4 to 'join' 6. 2ch, 1dc into each of the sc sts we made in round 5, make sure not to work into the slip stitches made in round 5 , join to first dc with one sl st
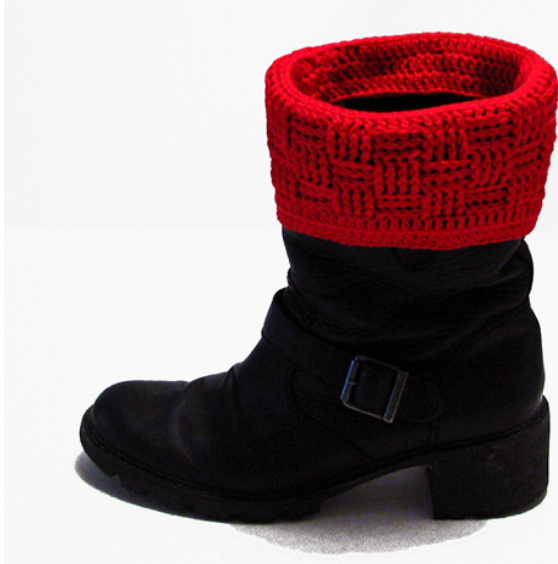
the finished boot cuff
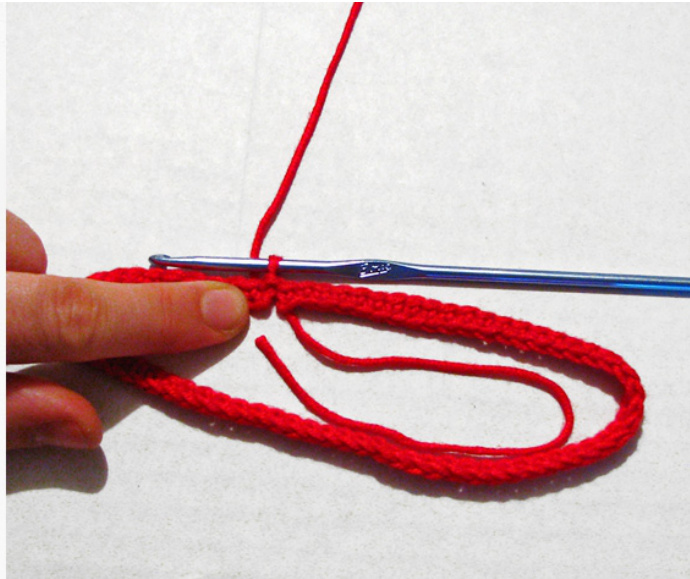
joining the first round, by doing it this way you can just sew it shut with the starting tail and will haveaneatfirstround
This pattern was created by Bianca Wulff for MyntKat Creations. Do NOT sell,copy,alter or offer for download! This is a FREE pattern available through MyntKat.com Works created from this pattern CAN be sold, a note of credit is always appreciated.
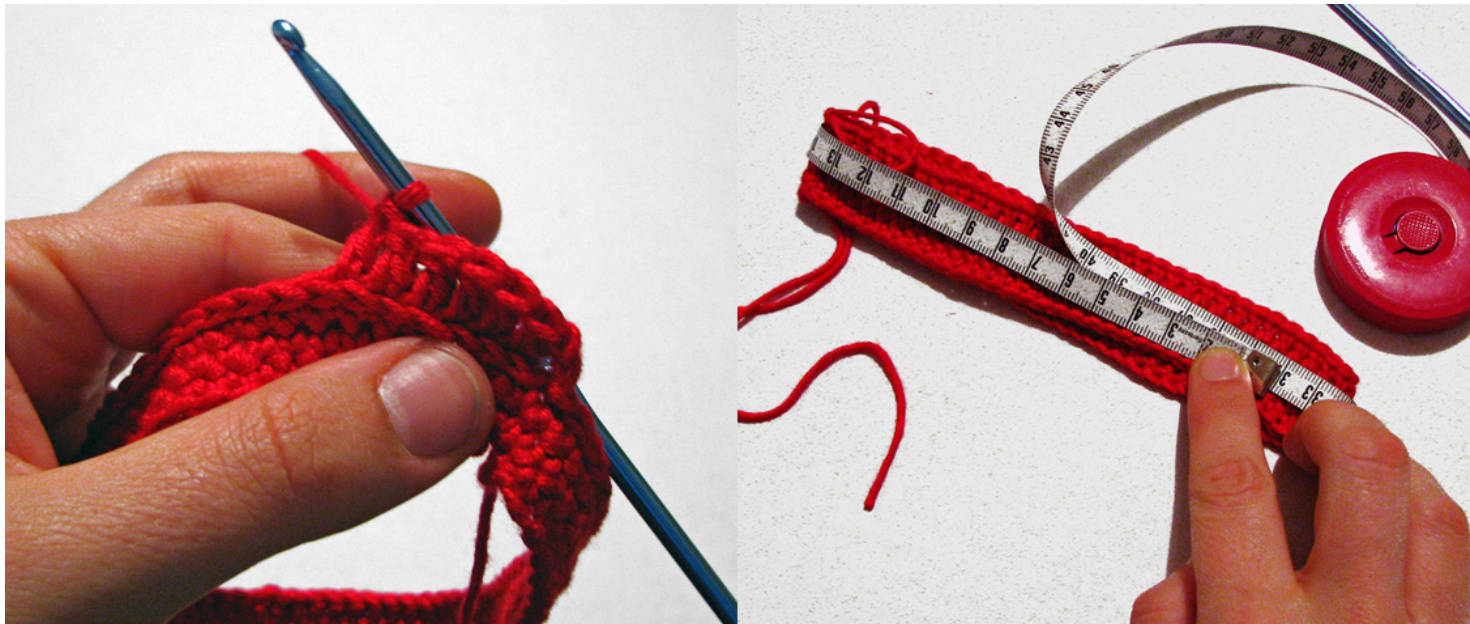
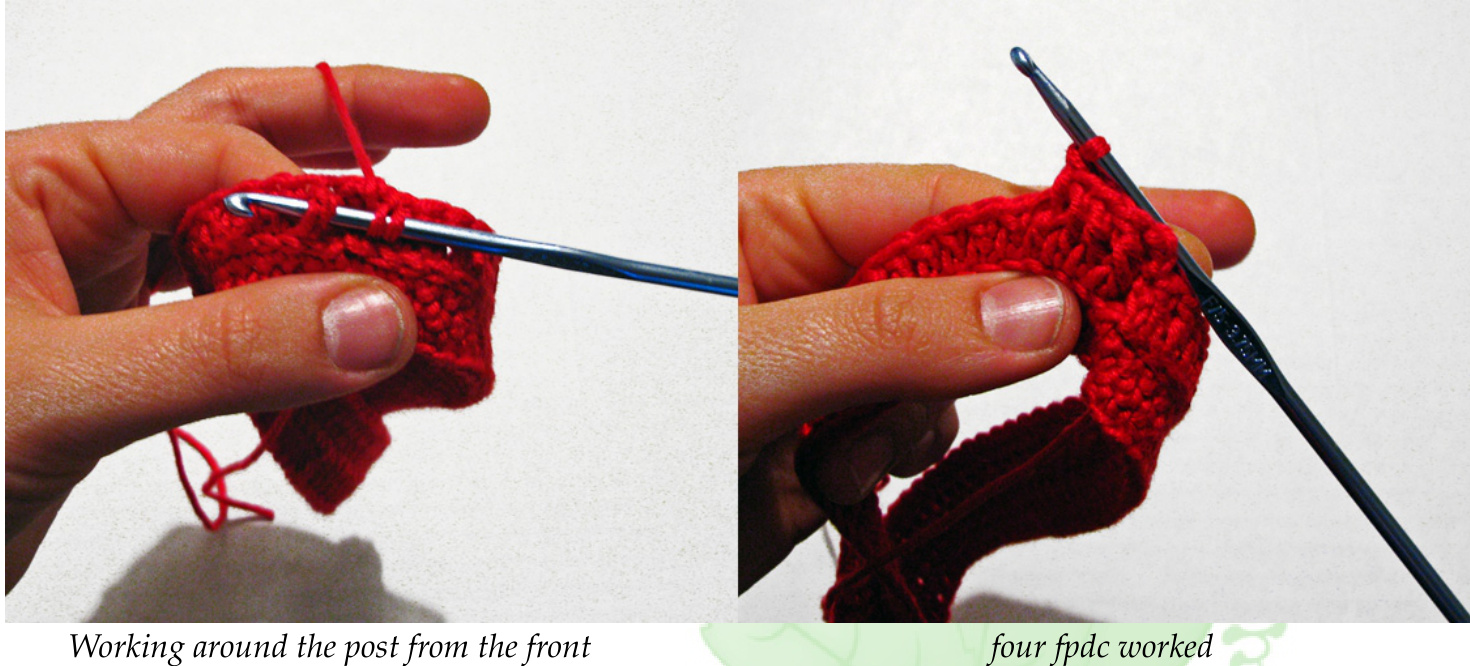
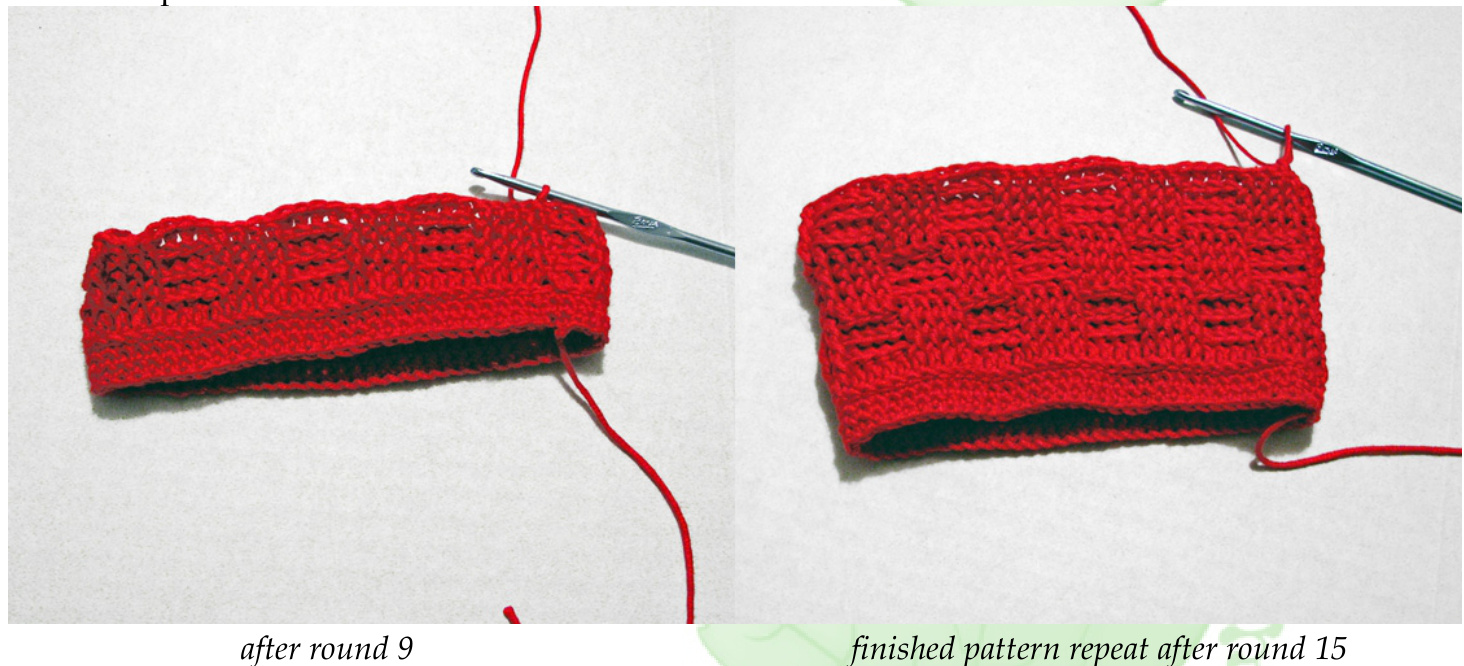
dc into round 4 sc sts 7. at this point you want to measure your work piece to make sure it is not too big or small for your boot, I slipped mine over my boot to test if it's a snug fit we are now starting the basket weave pattern, I am working the bpdc a little different than regular basket weave, see first image on page 5 for visual reference 2ch, work one fpdc in each of the first four dc, then work one bpdc in each of the next four dc, repeat this 8 times (or more or less depending on your number of starting stitches, work these repeats all the way around except for the last four stitches) then work one fpdc in each of the next two stitches, one bpdc in each of the last two stitches, join to first dc with sl st (if you have changed the number of stitches and your number is divisible by 8, work repeats of 4 all the way around)
This pattern was created by Bianca Wulff for MyntKat Creations. Do NOT sell,copy,alter or offer for download! This is a FREE pattern available through MyntKat.com Works created from this pattern CAN be sold, a note of credit is always appreciated.
instead of working around the bottom post, I like to work these stitches around the small post at the top of the stitch for a smoother look of the horizontal rows (working basketweave this way makes it a non-reversible pattern!) several repeats of fpdc and bpdc worked be careful not to accidentally skip stitches when switching from back to front post stitches! 8. 2ch, work 1fpdc into each fpdc and 1bpdc into each bpdc of the previous round, join with sl to first dc of round (68) 9. repeat round 8. 10. (we are now switching the pattern to create the basket weave) 2ch, work 1bpdc into each fpdc and 1fpdc into each bpdc of the previous round, join with sl to first dc of round (68) 11.+12. repeat round 8. 13. repeat round 10. 14.+15. repeat round 8.
This pattern was created by Bianca Wulff for MyntKat Creations. Do NOT sell,copy,alter or offer for download! This is a FREE pattern available through MyntKat.com Works created from this pattern CAN be sold, a note of credit is always appreciated. 16. 1ch, 1sc in each stitch around (68), join with sl to first sc of round 17. make another slip stitch border like we did on round 5. 18. 2ch, work 1dc into the BACK LOOP of the sc sts we made in round 16., join with sl to first dc made in this round (68) 19. 2ch, 1dc in each stitch around (68), join with sl st to first dc made in this round 20. repeat round 19. Bind off, weave in both tails.
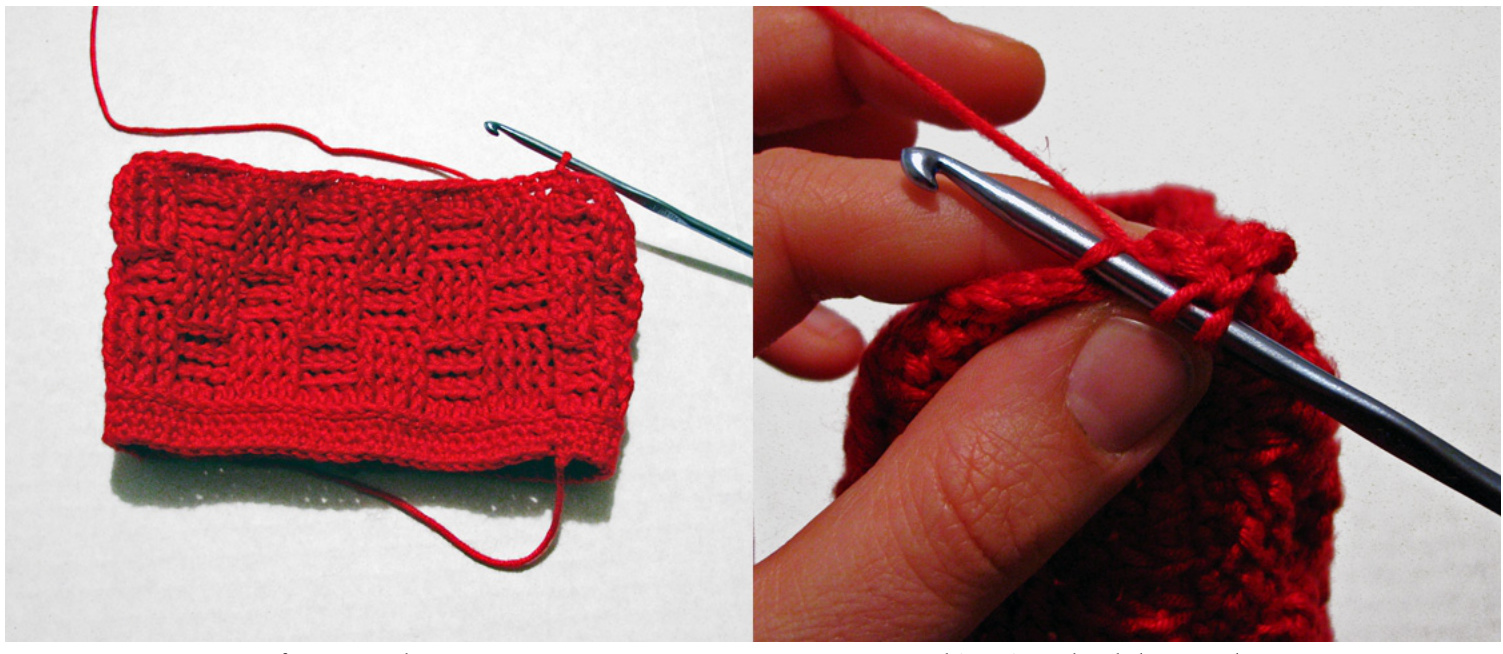
after round 16 working into back loop only
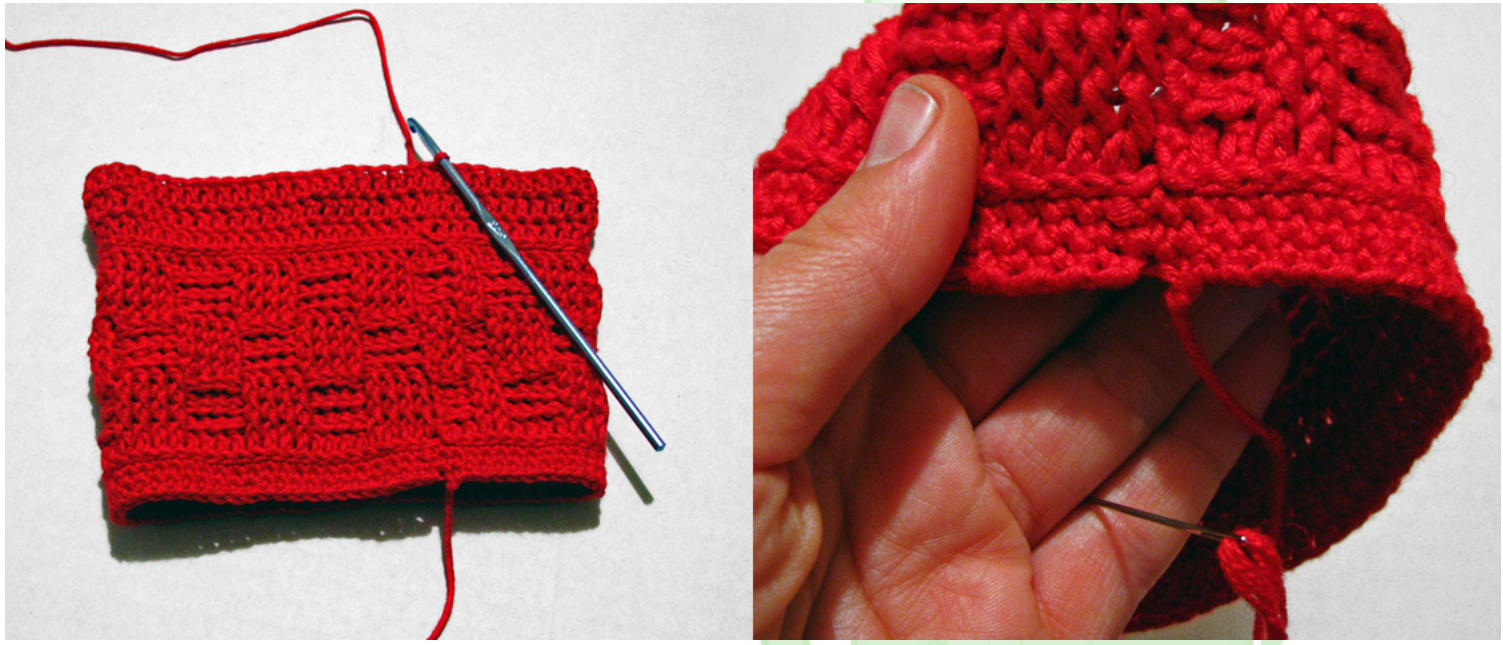
after row 20 sewing the starting round closed This pattern was created by Bianca Wulff for MyntKat Creations. Do NOT sell, copy, alter or offer for download! This is a FREE pattern available through MyntKat.com Works created from this pattern CAN be sold, a note of credit is always appreciated.
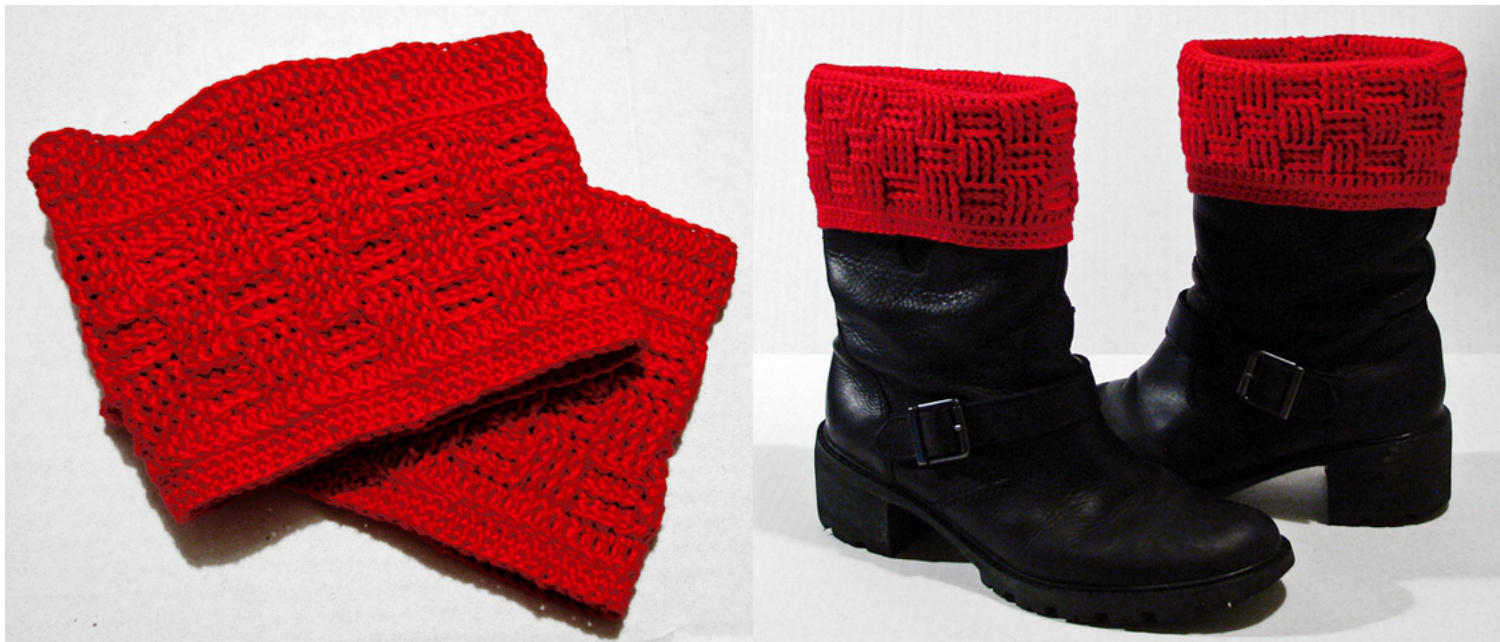
finished boot cuffs cuffs on boots Repeat the full pattern for a second boot cuff. Working round 18 into the back loops only makes it easier to tuck the top of the cuff into the boots.
Fitting the cuff to your boot
I have never had issues with my cuffs coming off when putting on or taking off my boots, however, if you have issues and the cuffs come off too easily, consider making them a little smaller for a snug fit or add a few more rows to the top to give them a better hold.