Ladybird Pattern
A Crochet Pattern from Hayley's Crochet Creatures
Please note: this is a FREE pattern. Anyone can use it or share it with friends. But please please please credit Hayley's Crochet Creatures for the pattern, and don't try to pass it off as your own! You can sell things made from this pattern, but please remember to give credit on listings on the internet/catalogues.
www.facebook.com/hayleys.crochet.creatures.ivybridge Gauge - 3.5mm hook Wool - 4ply or double knit Colours - Dark grey, Red You will also need 10mm 2 safety eyes + an embroidery needle
Key:
R =round Sc = single crochet Ch = chain Sc2tog = single crochet two stiches together to decrease. St = stich Sl st = slip stitch Whenever you are joining the two ends of a round put your hook in from the back of the work, rather than through the front, and then yarn over and make your sl st. This hides the ridge caused by the joins on the inside of the work.
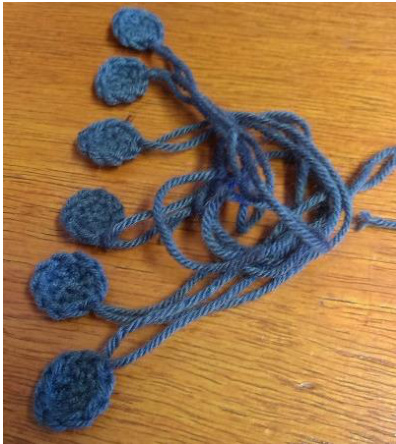
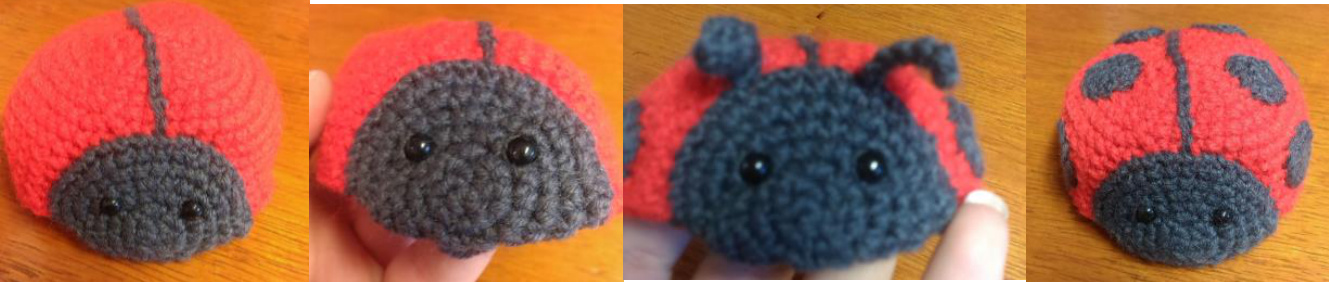
Dots (make 6 or 8)
R1 - In the dark grey, make a magic loop with 6 st, pull tail to tighten the loop. Sl st to join (6) R2 - ch 1, \*2sc into the first st, 1sc into the next st\* around. Sl st to join (9) When you get to the last sc cut your yarn so you have about 3 inches of tail for sewing.
Antennae (make 2)
Row 1 - ch 7, sc into the 2nd st from the hook, and in each remaining st. (5) Tie off. Allow it to curl. This looks really cute on the lady bird. Face
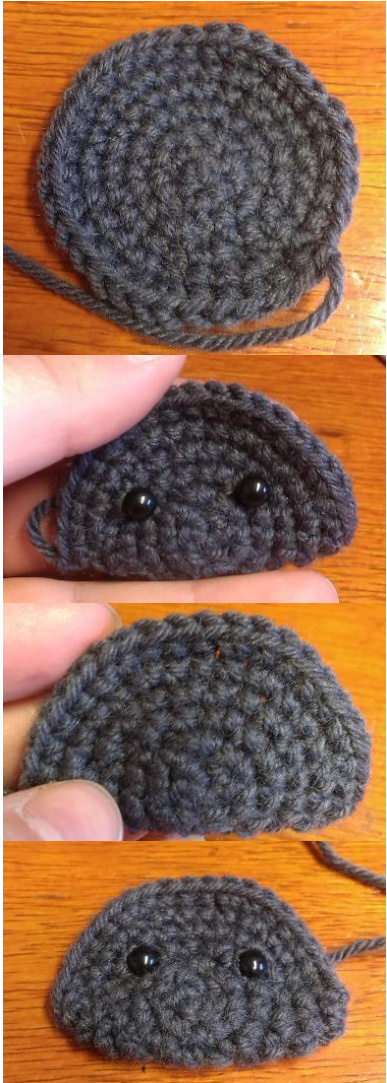
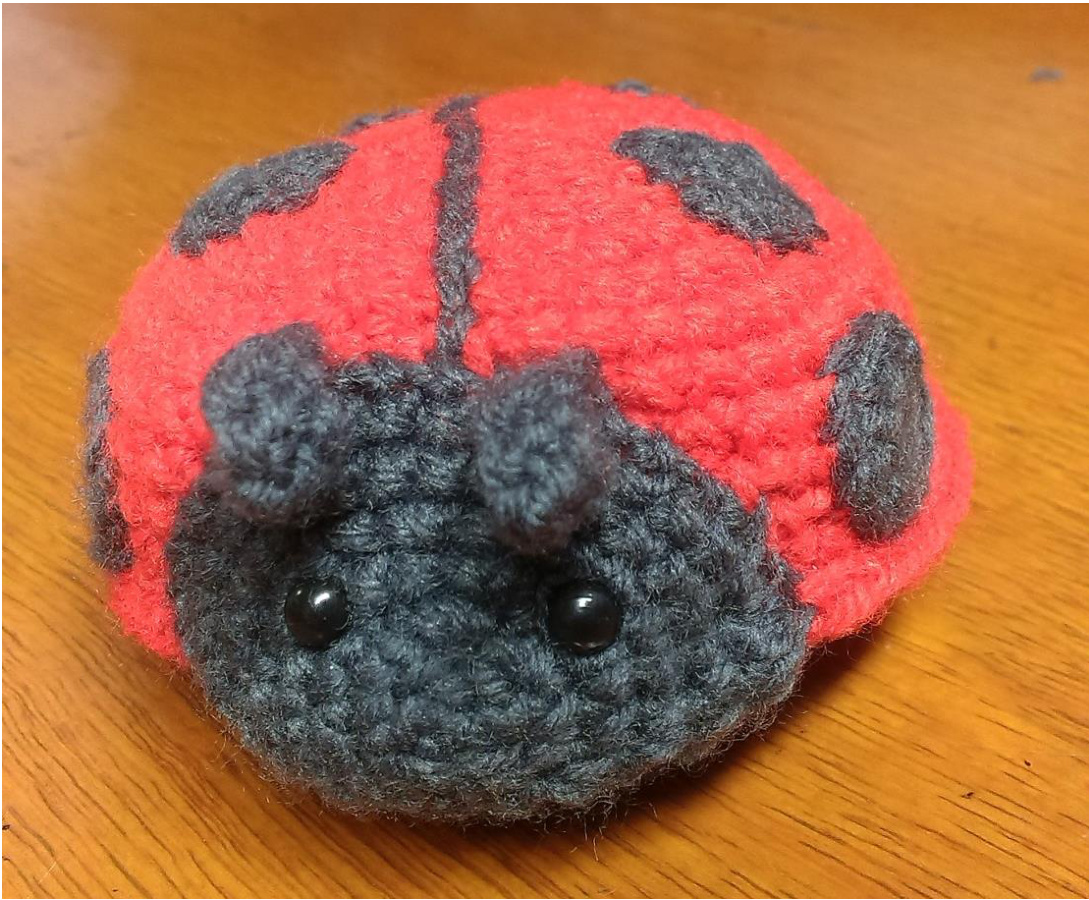
R1 - In the dark grey, make a magic loop with 6 st, pull tail to tighten the loop. Sl st to join (6) R2 - Chain 1. 2sc into each stitch around. Slip st to join. (12) R3 - Chain 1. \*1sc into the first st, 2sc into the next st\* around. Slip st to join (18) R4 - Chain 1. \*1sc into the first 2 sts, 2sc into the next st\* around. Slip st to join (24) R5 - Chain 1. \*1sc into the first 3 st. 2sc into the next st\* around. Slip st to join. (30) R6 - Chain 1. \*1sc into the first 4 sts, 2sc into the next st\* around. Slip st to join (36) Tie off, and leave an extra-long tail for sewing. Fold just over half way down, so that you can see all of round two. Mae sure the tail starts in line with the fold. Insert the safety eyes between R3 and R4, about 6 st apart. Sew the flap to the back. Take care to only use threads on the back that won't show at the front. You should have a bit of a curve to the bottom of the face when you are done.
Body
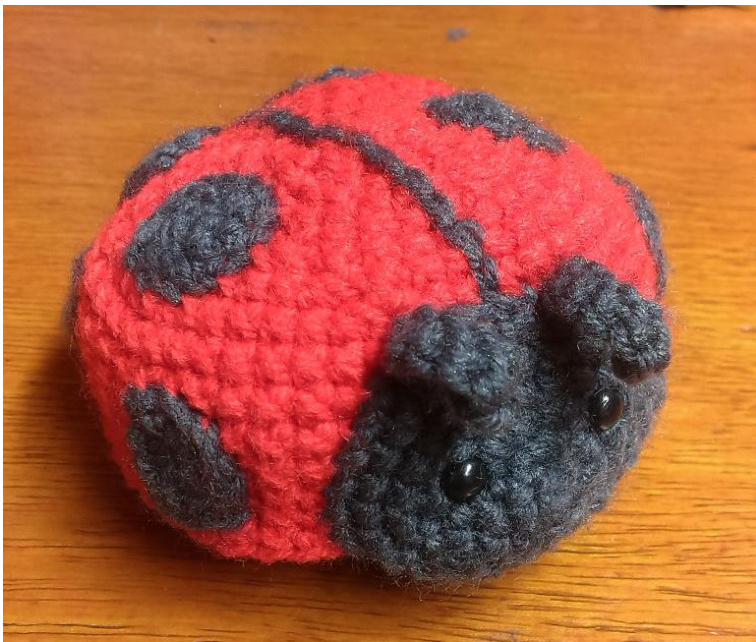
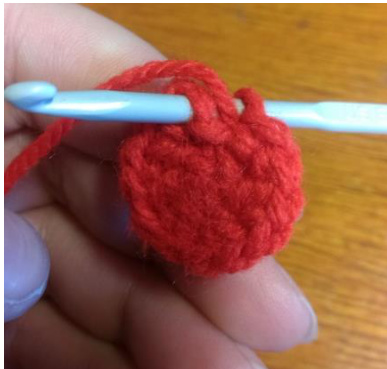
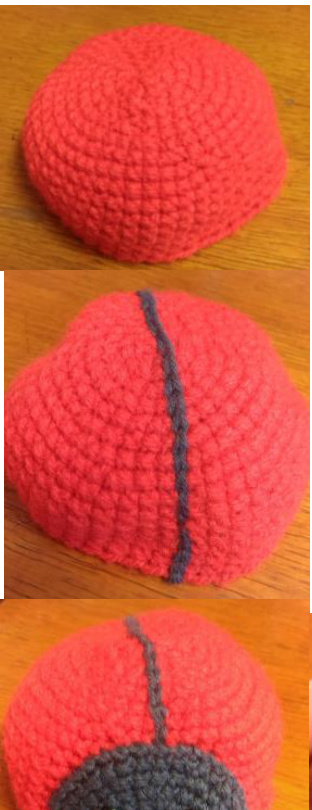
R1 - In red, make a magic loop. 6 sc into the loop. Pull tail to tighten the loop. Slip stitch to join (6) R2 - Chain 1. 2sc into each stitch around. Slip st to join. (12) R3 - Chain 1. \*1sc into the first st, 2sc into the next st\* around. Slip st to join (18) R4一 Chain 1. \*1sc into the first 2 sts, 2sc into the next st\* around. Slip st to join (24) R5 - Chain 1. \*1sc into the first 3 st. 2sc into the next st\* around. Slip st to join. (30) R6 - Chain 1. \*1sc into the first 4 sts, 2sc into the next st\* around. Slip st to join (36) R7 - Chain 1. \*1sc into the first 5 sts, 2sc into the next st\* around. Slip st to join (42) R8 - Chain 1. \*1sc into the first 6 sts, 2sc into the next st\* around. Slip st to join (48) R9-14 - Ch1, sc around. Slip st to join. (48) Tie off and weave in your tail. You won't be sewing in this colour. Attach your dark grey thread so that it attaches in the middle of the line where you wove in your red tail. It will help to hide it in a few steps. Sl st a straight line down the middle of your red dome. This should give you two equal halves. Sew on your face. Make sure that you match the corners up with the bottom of the dome, so that the curve you made at the bottom of the face sits just below the bottom of the dome. The middle of the face should be in line with the grey stripe on the shell. Now is a good time to attach your antennae to the top of the face. Attach your spots. You should have an equal number on each side, and the pattern isn't important, so long as it is symmetrical on both sides of the line.
To make the underside of the body
R1 - In dark grey, make a magic loop. 6 sc into the loop. Pull tail to tighten the loop. Slip stitch to join (6) R2 - Chain 1. 2sc into each stitch around. Slip st to join. (12) R3 - Chain 1. \*1sc into the first st, 2sc into the next st\* around. Slip st to join (18) R4 - Chain 1. \*1sc into the first 2 sts, 2sc into the next st\* around. Slip st to join (24) R5 - Chain 1. \*1sc into the first 3 st. 2sc into the next st\* around. Slip st to join. (30) R6 - Chain 1. \*1sc into the first 4 sts, 2sc into the next st\* around. Slip st to join (36) R7 - Chain 1. \*1sc into the first 5 sts, 2sc into the next st\* around. Slip st to join (42) R8 - Chain 1. \*1sc into the first 6 sts, 2sc into the next st\* around. Slip st to join (48) R9 - in the back loops only, ch 1, sc around, sl st to join (48) R10 - ch 1, sc around, sl st to join. (48)
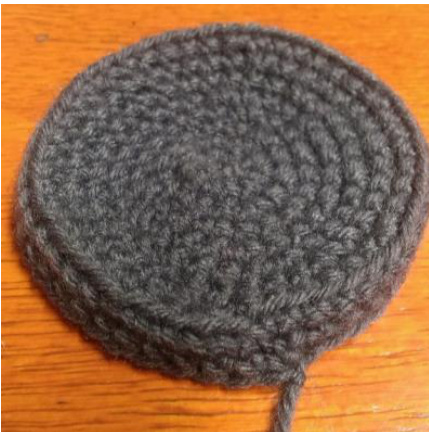
Tie off with an extra-long tail for sewing. When you sew the base to the shell, you need to sew it to R13 not R14. This is because the red shell on a lady bird is the cover of the wings, and is separate to the body. To give the illusion of this, you sew R10 of the grey to the inside of R13, and this will leave a tiny skirt of red separate to the grey, making the shell look separate. When you get most of the way round, remember to stuff it with polyfill before you finish it off. And there you have it, an adorable ladybug! If you need help with anything on this pattern, feel free to contact me on hayleys.crochet.creatures@gmail.com I would also love to see your finished projects! Share them via the above email address or on my Facebook page, /hayleys.crochet.creatures.ivybridge Happy crafting!