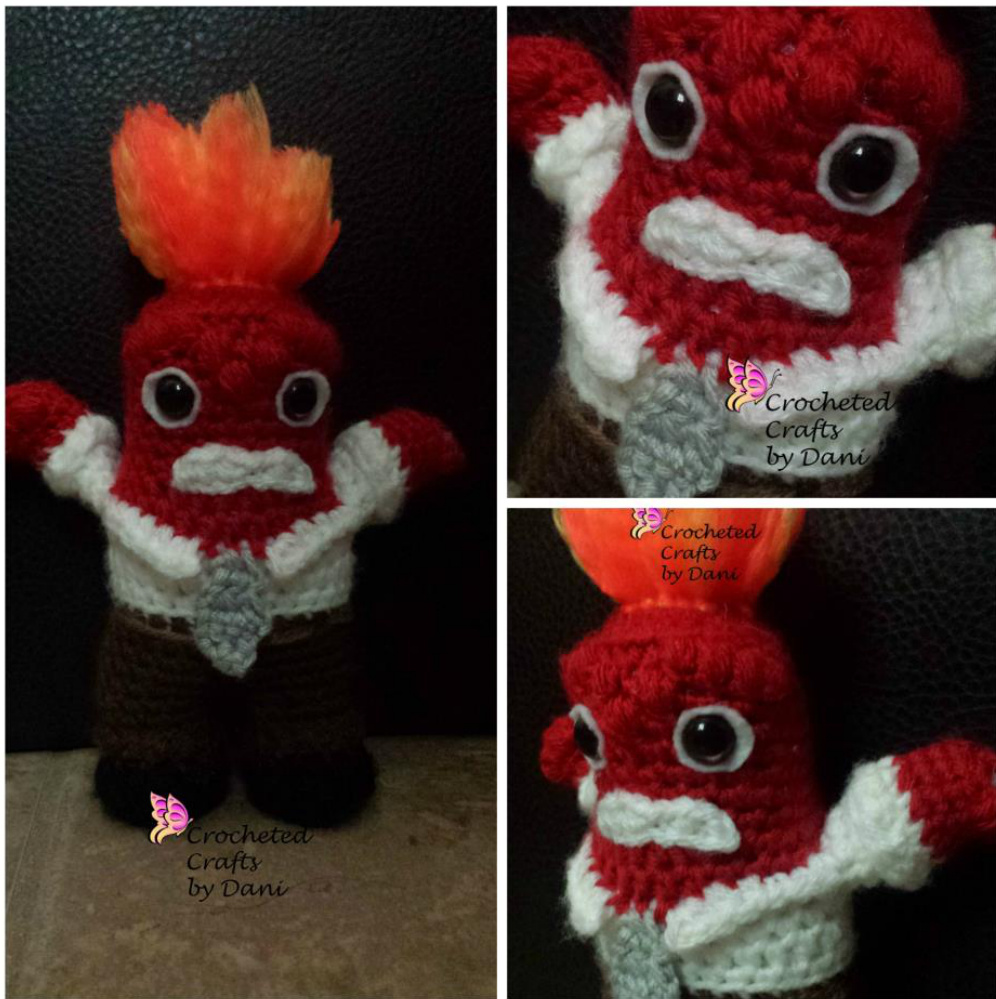
Angry Man
Created by: Crocheted Crafts By Dani
\*The pattern and images in this document are the property of Crocheted Crafts by Dani. Copyright @ 2015. The pattern is available for purchase only. If selling finished product online, please give proper credit for the pattern. No unauthorized reproduction, in whole or part, or distribution of this pattern is allowed.\* If you need any help with this pattern, you may contact me: crochetedcraftsbydani@gmail.com www.facebook.com/crochetedcraftsbydani Ravelry: dniedermaier Materials: F Hook Ww Yarn: Red Orange Yellow Black Brown Light Brown Black White Light Grey White Felt (small amount) Dime 12mm Brown Safety Eyes Poly-Fil Weaving Needle Stitch Marker Scissors
Special Stitches Used:
Magic Circle SC2Tog (single crochet 2 together) \*Insert hook into stitch and pull up a loop, insert hook into next stitch and pull up a loop. Yarn over and pull through all 3 loops on hook. Puff Stitch \*YO, insert hook into stitch, YO, pull up a loop. YO, insert hook into same st, YO, pull up a loop. YO, insert hook into same st, YO, pull up a loop. YO and pull through all7 loops on hook FLO (front loop only) BLO (back loop only) Gauge: 4sc X 5 rows = 1 inch
Finished Size:
7 inches from top of head (not including hair) to base of foot.
Special Notes:
Pattern is worked in continuous rounds, unless noted. Your starting point WiLL move. You may need a stitch marker to keep your place. Now to the pattern...
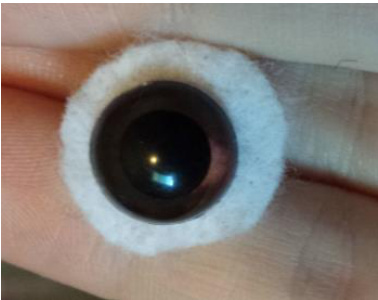
White of Eye:
With white felt, trace a dime and cut 2 circles out. Use a pair of sharp scissors to snip the center. Don't make the hole too big. Push the eye stem through the whole. Set aside for later.
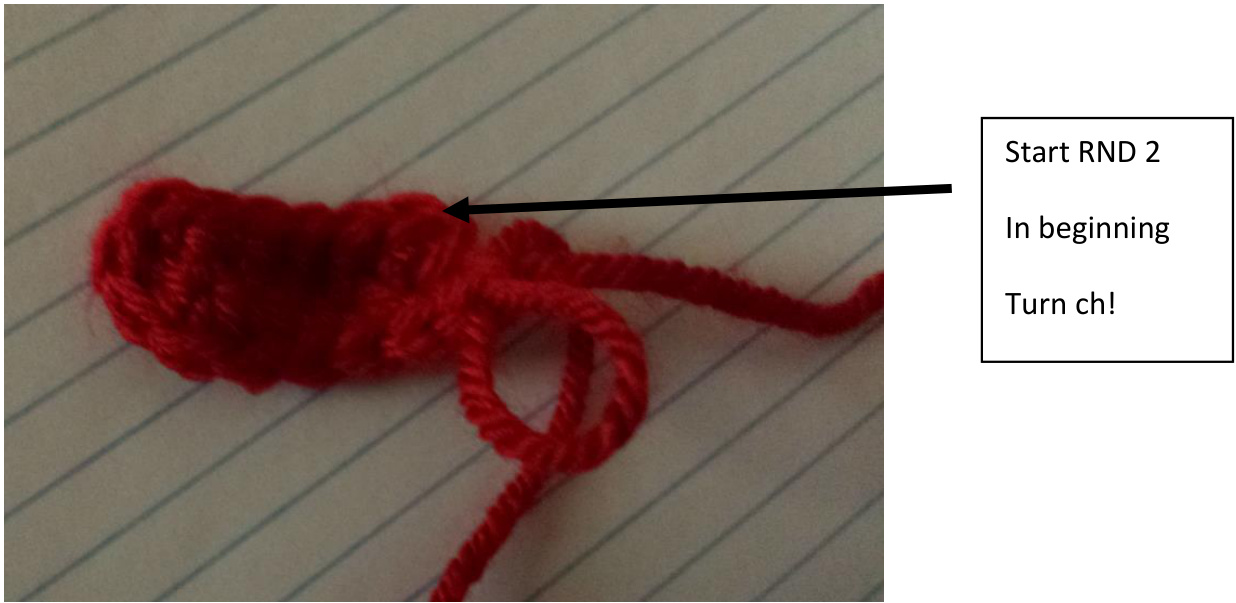
Starting at the head:
With Red Rnd 1: Ch 7. Working down 1 side of the ch, sc in 2nd st from hook and in next 4. 3 sc in last. Working down the 2nd side of the st, sc in the next 4, 2 sc in last. DO NOT JOIN. (15, including turning st in beginning) Rnd 2: 2 sc in turning ch, sc next 4, 2 sc in next 3, sc in next 5, 2 sc in last 2. (21) Rnd 3: 2 sc, sc next 5, \*2sc next, sc next\* 3 times, sc next 5, \*2 sc next, sc next\* 2 times. (27) Rnd 4: Sc around. (27) Rnd 5: Sc 10, in BLO puff st next 4, sc2tog, sc2tog, puff st next 4. Working in both loops, sc next 5.(25) Rnd 6: Sc 14, in BLO puff st next, sc next, puff st next. Working in both loops, sc 8. (25) Rnd 7: Sc 14, in BLO puff st. Working in both loops, sc 10. (25) Rnd 8-11: Sc around. (25) Rnd 12: Sc 2, 2 sc next 3, sc 2, HDC next 6, sc 2, 2sc next 3, sc 7. (31) Rnd 13: Sc 10, HDC next 6, sc next 11 (mark the 11th of these sts with a stitch marker), sc next 4. (31) FO and leave tail to crochet over.
Working the shirt/upper body:
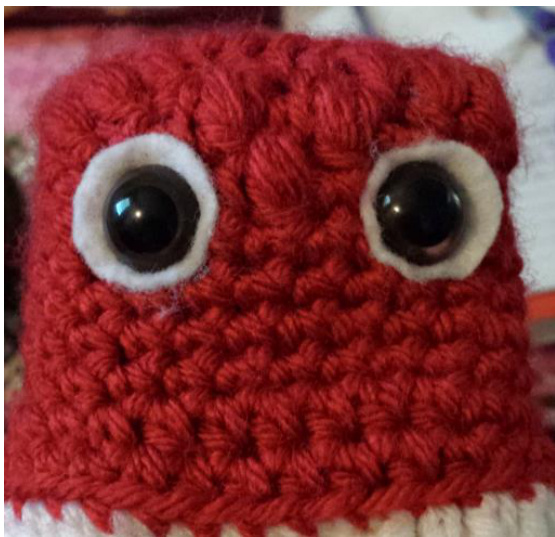
Attach white in marked st. Rnd 14: Working in BLO for this round, sc 4, HDC 10, sc 6, HDC 10, sc last. (31) Rnd 15: Sc 16, sc2tog, sc 13. (30) Rnd 16: Sc 4, HDC 7, Sc 9, HDC 7, sc 3. (30) Rnd 17: Sc around. (30) Pull up your loop. DO NOT FASTEN OFF. Attach eyes at this point. Insert eyes under the eyebrows (formed by the puff sts). Stuff.
Working the pants/lets:
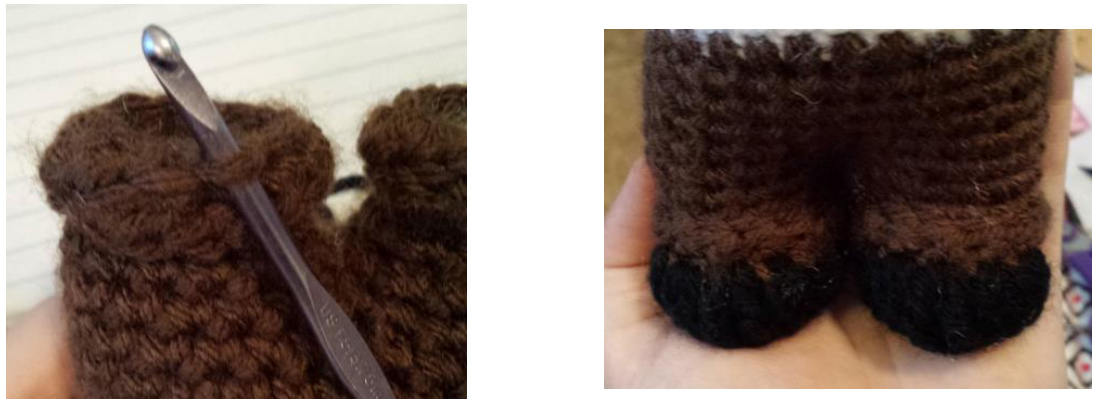
to where you left off, attach brown. FO white and leave tail to crochet over. Rnd 18: Working in BLO for this round, sc around. (30) Rnd 19-22: Sc around. (30) Stuff. Leg 1: Rnd 23: Sc 12, skip 15 sts (leave them unworked), sc next 3. Rnd 24-26: Sc around. (15) Rnd 27: Working in FLO for this round, HDC around. (15) Fasten off, leaving a long tail. Fold the "cuff" up and sew it to the leg. Weave in end. Stuff leg.

Leg 2: Attach brown to an unworked st for the 2nd leg. Rnd 23-26: Sc around. (15) Rnd 27: Working in FLO for this round, HDC around. (15) Fasten off, leaving a long tail. Fold the "cuff" up and sew it to the leg. Weave in end. Stuff leg.
Working the feet:
Attach black to center back of leg in an unworked BL. Rnd 1: Sc 5, 2 DC next 2, 2 TC next, 2 DC next 2, sc 5. (19) Rnd 2: Working in BLO for this round, sc2tog 9 times. (9) Stuff foot. Rnd 3: sc2tog 4 times. (4) Fasten off and weave in end. Repeat process for 2nd foot.
Shirt Collar:
Working the in the unused FL of the upper body/shirt, leave 2 sts unworked in the very center. Turn doll upside down to work these. Left collar: Attach white 6 sts to the RlGHT (remember NOT to include the 2 center sts Rnd 1: 2 sc in first st, sc next, HDC next 2, 2 HDC next. (7) Fasten off and weave in end. Right collar: Attach white in the st to the left of the 2nd unworked center st. Rnd 1: 2 HDC in first st, HDC next 2, sc next, 2 sc last. (7)
Arms:
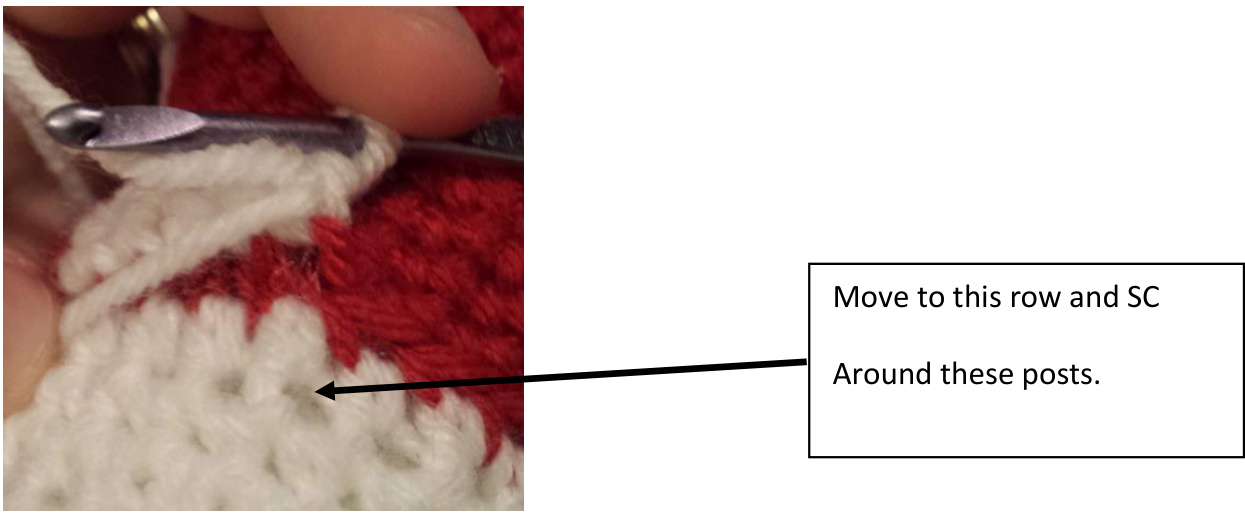
Working in the unused FL of the upper body/shirt for these. Right arm: Attach white to the 6th unworked st to the right of the shirt lapel. Rnd 1: Sc first and next 5. Drop down to the next white row and work 6 sts between those sts. (12) Rnd 2-4: Sc around. (12) Rnd 5: Working in FLO for this round, HDC around. (12) Fasten off, leaving a long tail. Fold the "cuff" up and sew it to the arm. Weave in end. Lightly stuff the arm.
Working the hand:
Attach red to an unworked BL of the cuff, on the underside of the arm. Rnd 1: Working in unused BLs for the round, sc around. (12) Rnd 2: Working in both loops, sc around. (12) Rnd 3: Sc 6, puff st next, sc next, puff st next 4. (12) The puff sts in this round form the bent fingers of the fist. Rnd 4: Working in BLO for this round, sc2tog around. (6) Fasten off and weave in end. DO NOT STUFF! Use your weaving needle to insert it between sts in the arm to pull the stuffin: down into the fist. You do not need the actual arm to be stuffed. This is why we LIGHTLY stuf it before. Left arm: Attach white to the unworked st to the left of the shirt lapel. Rnd 1: Sc first and next 5. Drop down to the next white row and work 6 sts between those sts. (12) Rnd 2-4: Sc around. (12) Rnd 5: Working in FLO for this round, HDC around. (12) Fasten off, leaving a long tail. Fold the "cuff" up and sew it to the arm. Weave in end. Lightly stuff the arm.
Working the hand:
Attach red to an unworked BL of the cuff, on the underside of the arm. Rnd 1: Working in unused BLs for the round, sc around. (12) Rnd 2: Working in both loops, sc around. (12) Rnd 3: Sc 6, puff st next 4, sc next, puff st. (12) The puff sts in this round form the bent fingers of the fist. Rnd 4: Working in BLO for this round, sc2tog around. (6) Fasten off and weave in end. DO NOT STUFF! Use your weaving needle to insert it between sts in the arm to pull the stuffing down into the fist. You do not need the actual arm to be stuffed. This is why we LIGHTLY stuffed it before. Arms are meant to be raised in the air. This places the “finger bumps" on the outside of hand as if you can see his bent fingers while raised.
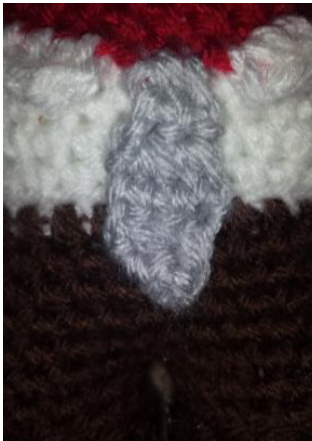
Belt:
With light brown, cut a 15 inch strand of yarn. Starting at front center, go under the center st, over next 3, under next, over next 3, under next, over next 6, under next, over next 6, under next, over next 3, under next, over next 3. You should now be at the beginning. Weave under the skipped center st and repeat around so it is double stranded. Fasten off and leave in ends. Tie: Attach grey to unworked center loop between shirt lapels. Row 1: Sc in 2 unworked sts. Ch 1, turn. (2) Row 2-3: Sc across. Ch 1, turn. (2) Row 4: 2 sc in each st. Ch 1, turn. (4) Row 5: Sc across. Ch 1, turn. (4) Row 6: Sc2tog 2 times. Ch 1, turn. (2) Row 7: Sc2tog. (1) Fasten off, leaving a tail. Tack the tip of the tail to the pants so it stays put. Weave in end.
Mouth:
With white Ch 8. Turn, SL in 2nd st from hook. HDC next, SL next 2, HDC in last 3. Fasten off, leaving a long tail for sewing. Attach mouth, leaving one row between bottom of the white of eye and ends of mouth should be center of pupils.
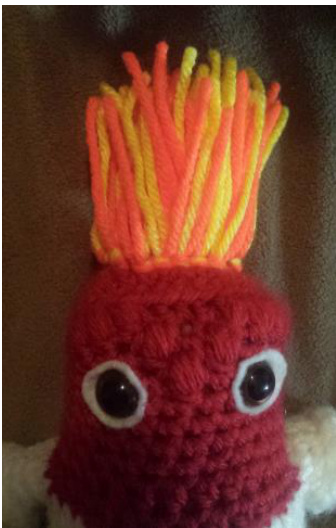
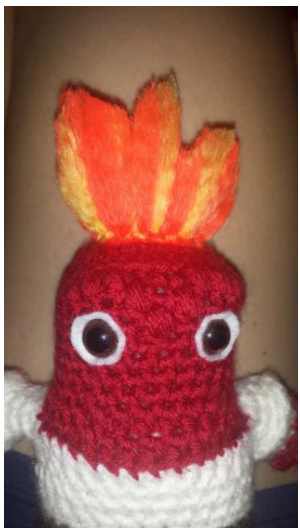
Hair:
Cut 20 strands of both orange and yellow, 5-6 inches each. Fasten one of each in a st at the top, keeping all 20 in the center 3 rows of the top of the head. Using a fine tooth comb or a cats brush (works great), comb out the hair. It will take a long time. You want to separate all 4 of the single strands and then keep brushing until it is soft and fluffy. Shape and cut the hair. You want it to resemble flames as best as you can. I used hairspray to hold it all together.