RICA

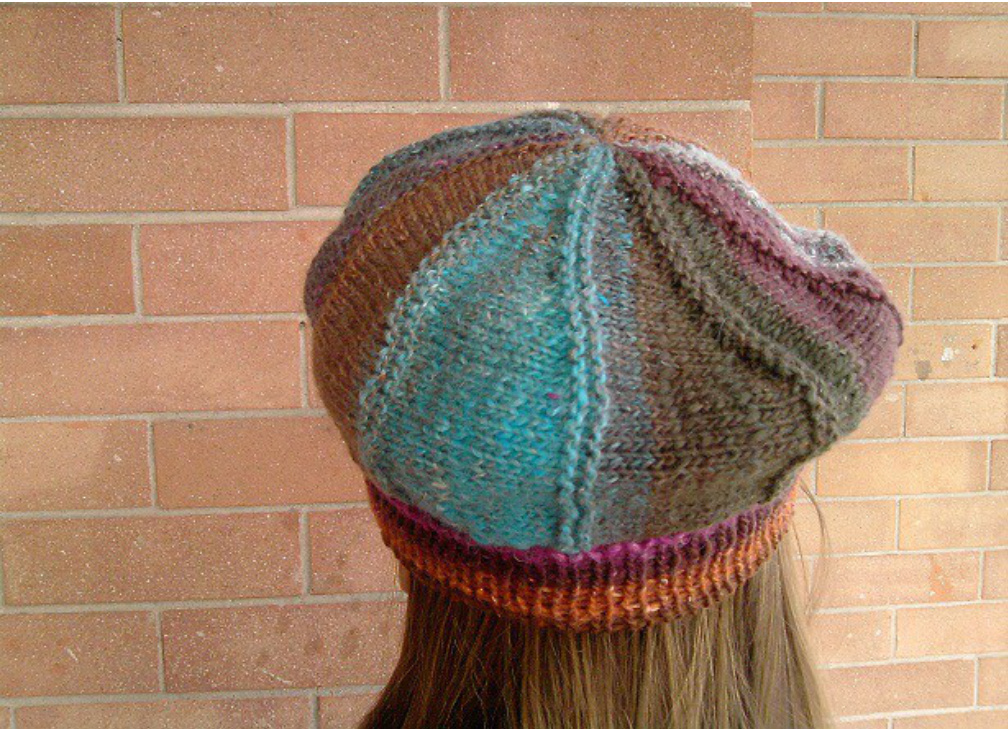
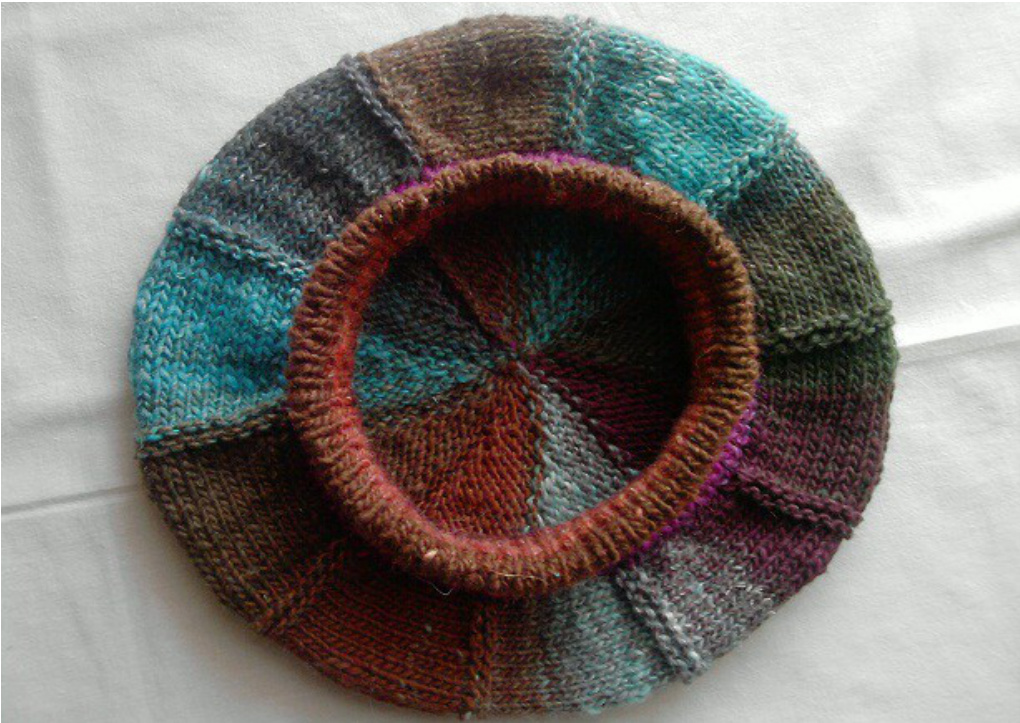
The beret has the colors of the trees and precious stones. And an accessory for winter. I used a lovely Japanese yarn : wool, cotton, silk and angora. I loved it for its shades. Yarn looks like a flame, as once was spun by hand. The end result is fabulous! The beret is made of ten triangles, worked utilizing short rows. You must be very careful in order to avoid unpleasant holes : you have to turn at the end of each row. The last stitch must be wrapped around the first stitch and then turn. Where there is a wrapped stitch you have to pick up the yarn around the stitch and work it together with the stitch. The edge is worked utilizing the tubular technique. Notions: “Kirara" Noro (color 11) 50g - 150m Needles n° 3,75 (US 5) Circular needles 3,5 (US 4) Tapestry needle
Gauge: fn° 3,75: 22m x 32ferri - 10cm
Abbreviations used: k -knit p- purl w&t (wrap and turn) - on a RS row - bring yarn to the front, slip next stitch to right-hand needle. bring the yarn to back of work, slip stitch back to left-hand needle, turn work. Ww - to work wraps together with wrapped sts on a RS row use tip of left needle to pick up the Wrap and place it on right needle and knit them together. pwyf - slip the stitch purlwise to the right-hand needle with the yarn in front kwyb - slip the stitch knitwise to the right-hand needle with the yarn in back
Crown:
With larger needles, CO 35 sts. Knit 2 rows. R 1: k32, w&t. R 2: p. R 3: k30, w&t. R 4: p. R 5: k28, w&t. R 6: p. R 7: k26, w&t. R 8: p. R 9: k24, w&t. R10: p. R11: k22, w&t. R12: p. R13: k20, w&t. R14: p. R15: k18, w&t. R16: p. R17: k16, w&t. R18: p. R19: k16, \* ww, k \* rip. 8, ww, k2. R20: k R21: k. R22: k. This is the first triangle of the beret. Now
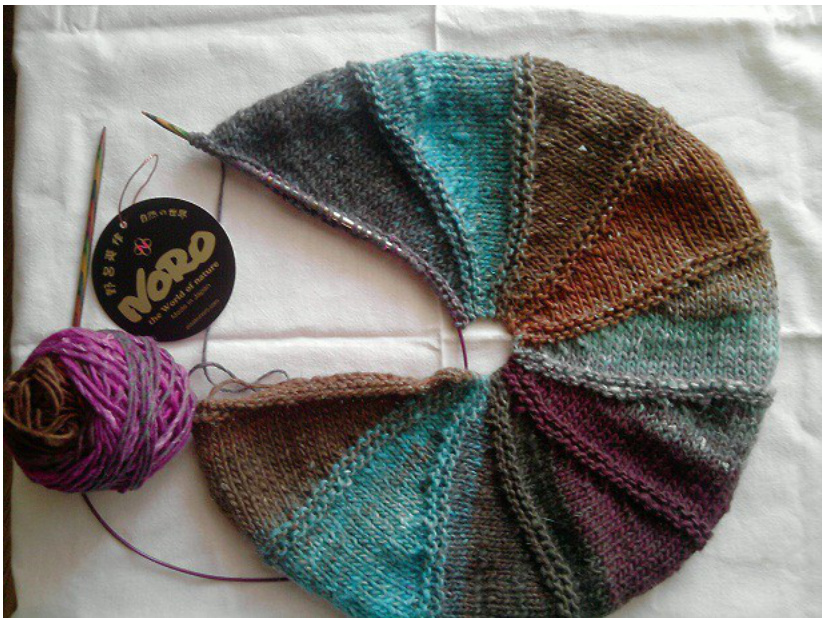
Please Note! In the last triangle you must not work rows 21 and 22, but leave a tail at least 1 meter long. Now you must join the sts from the needle with the first cast on sts from the outside to the inside. Don't cut the yarn but leave a long enough tail to weave into every stitch. Edge : With circular needles, pick up the stitches around the edge : 10 sts from thetriangle and 1 st from the edge - 110 sts. Row 1: \* k, pwyf \* repeat. Giro2: \* kwyb, p \* repeat. Please Note! The tubular will be worked with the circular needles, Check carefully when crossing the stitches to the left needle and the yarn. Repeat these 2 rows 30 times - approx 5 cm high. Bind off with tapestry needle.