Pippa Toque

The Pippa Toque is a cute little hat to keep heads and ears toasty and warm on cold winter days. The close stitches and stranded colour work make this a nice thick fabric for great insulation. Yarn: 1 skein each Rooster Almerino Aran (50% Alpaca, 50% Merino; 103y(94m)/50g) in Ocean, Gooseberry, Rooster, Sugared Almond, Brighton Rock, Custard and Cornish. Or any worsted/aran weight yarn in 7 colours. Needles: US#4 (3.5 mm) [or size needed to get gauge] 16" (40 cm) circular and dpn or long circular for magic loop. Notions: Tapestry needle. Stitch marker. Gauge: 6 stitches/inch. Sizes: Toddler (Child, Adult)/18" (20", 22") Note: Toddler size is pictured above. The main design is the same for all three sizes, while the border design varies slightly to accommodate differences in stitch counts and dimensions.
Glossary
dpn doublepointedneedles MC Main Colour CC ContrastColour KKnit PPurl Kfb Knit through the front and back of the loop K2tog Knit twostitches together SSK Slip two stitches knitwise, place them back on left needle, knit these two stitches together through back of loops PSSO Pass slipped stitch over the stitch just knit
Pippa Toque
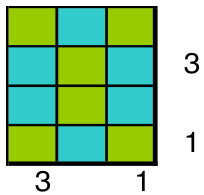
In MC, cast on 104 (116, 130) stitches. Place marker and join to work in the round. Work in K1P1 rib until work measures 1.5" (1.5", 2"). P one round. For Child size only - Kfb, K around (117 stitches). K 1 (2, 3) round(s). Using MC and CC1, work Chart 1 (Chart 2, Chart 3). K 1 (3, 3) round(s) in MC. Work Chart 4. K 1 (3, 3) round(s) in MC. Using MC and CC1, work Chart 1 (Chart 2, Chart 3) again. K in MC until piece measures 8" (9", 11") from cast-on edge.
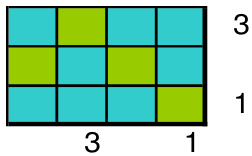
Chart 1 Chart 2
Crown Decreasing:
Change to dpn when there are too few stitches to work on circular needle. \*K2tog, K9, SSK\*, repeat from \* to \* 7 (8, 9) more times. K one round.
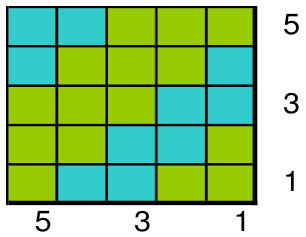
Chart 3 \*Slip1, K2tog, PSSO\*, repeat from \* to \* 7 (8, 9) more times. Cut yarn, pass end through remaining 8 (9, 10) stitches to close hole at top, weave in the end. Block. (A great video on hat blocking can be found at http://youtu.be/kjle86ce96M) Make a pompom (see the photo tutorial to follow) and attach. Enjoy!
Chart 4
Legend
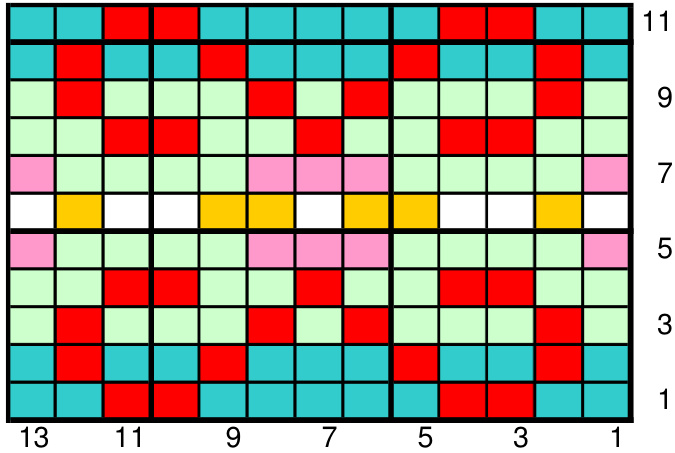
MC (Ocean) CC1 (Gooseberry) CC2 (Rooster) CC3 (Sugared Almond) CC4 (Brighton Rock) CC5 (Custard) CC6 (Cornish)
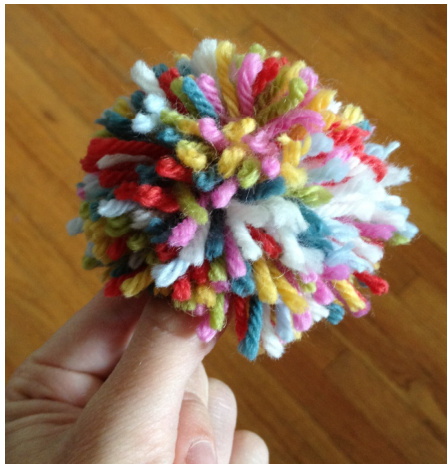
Make Pompom:
Making a pompom is easy and fun. Here is a picture tutorial to help..
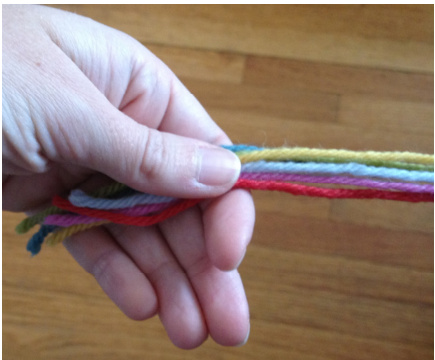
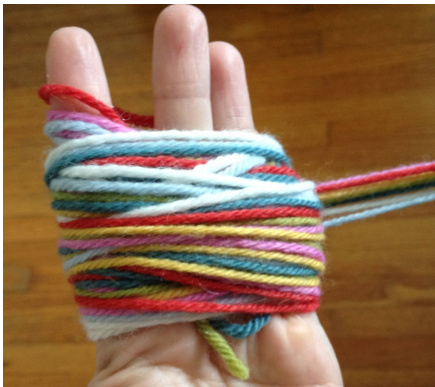
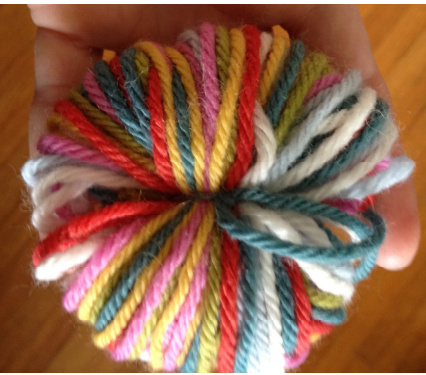
Pull a long strand of each colour of yarn from the balls and hold together, laying across your fingers. Wind around your fingers 15 to 20 times.
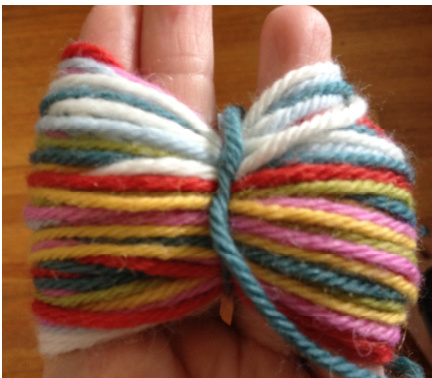
Cut a 12" length of MC yarn. Push one end between your middle two fingers, wrap around the strands at the center and tie very tightly. Do not cut off ends of this tie.
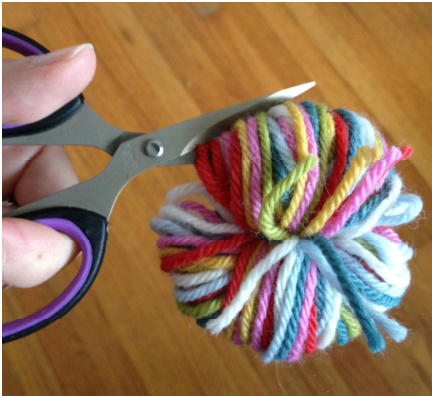
With sharp scissors, cut through the center of the loops on either side of the tie. The resulting pompom will be a little messy and uneven.
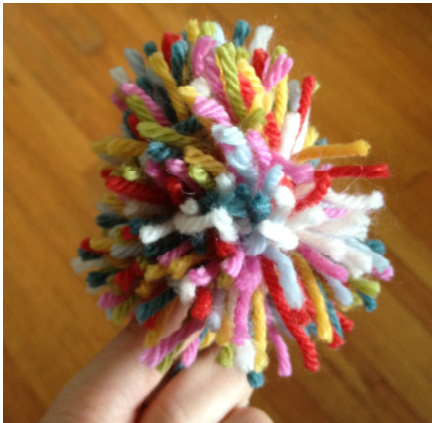
Give it a good fluff and then, using your scissors, give it a trim to make it a nice round ball. Using the long ends of the strand tied around middle of the pompom, tie pompom tightly to the top of the hat. Weave in the ends. Enjoy!