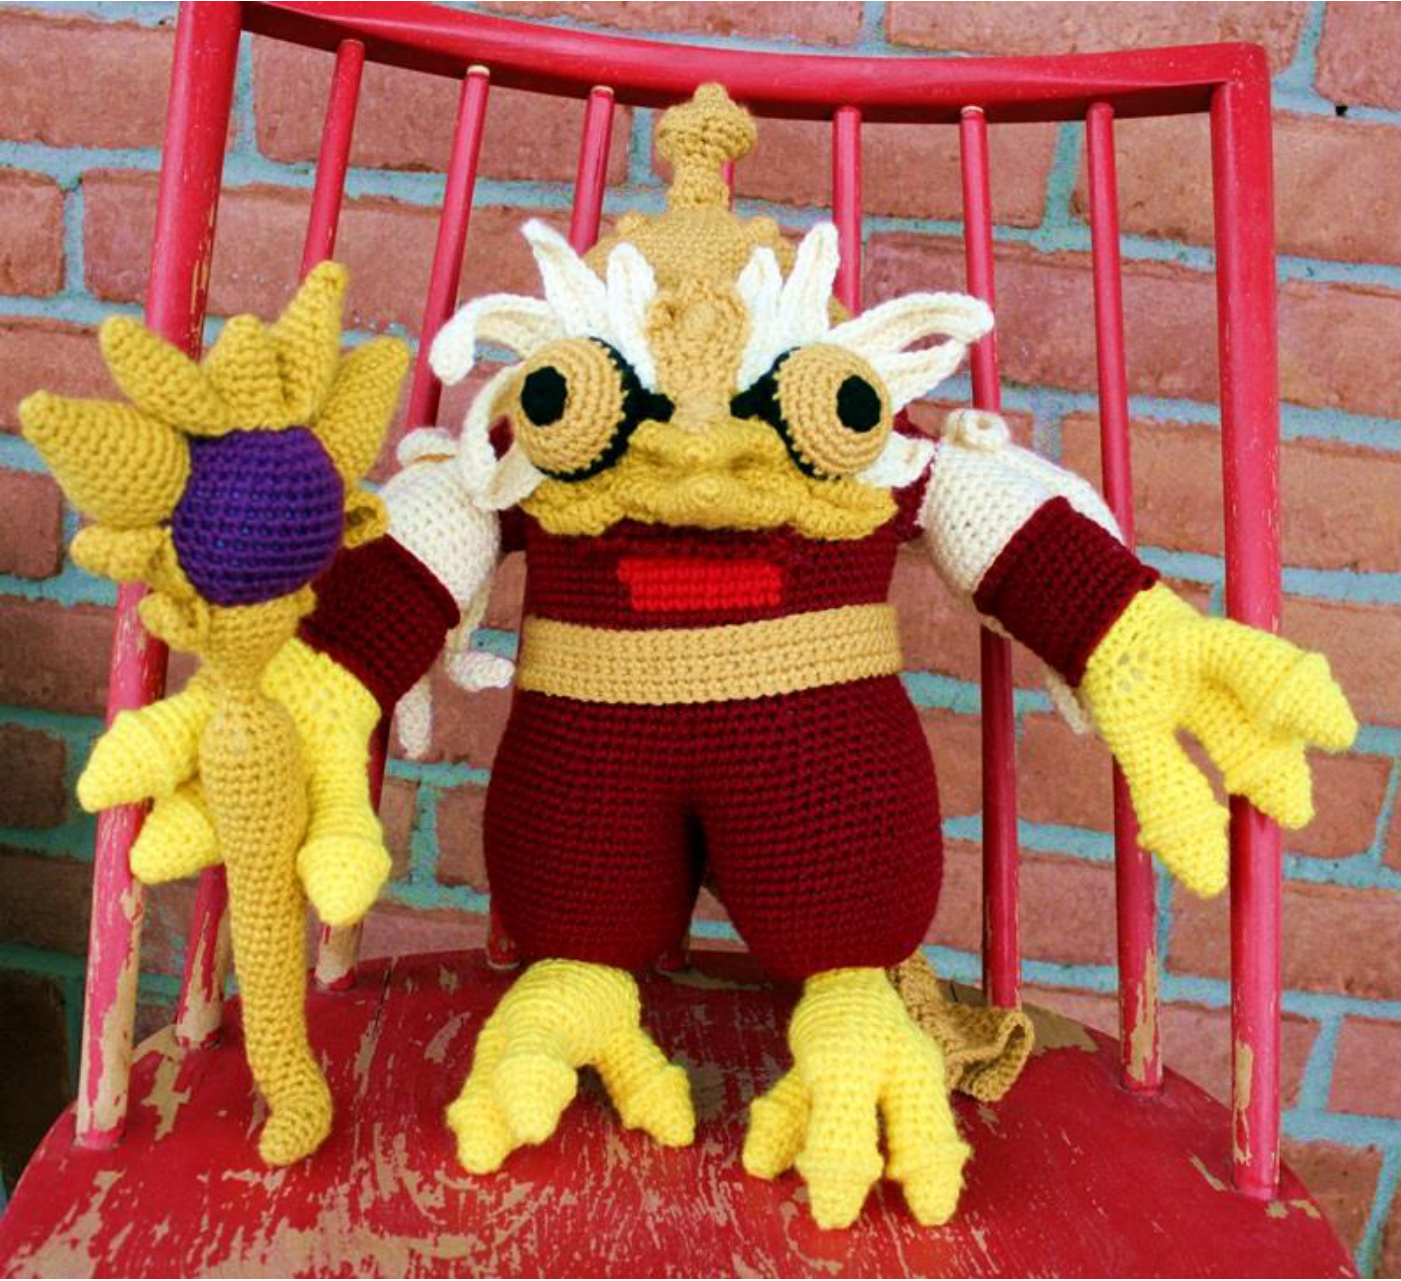
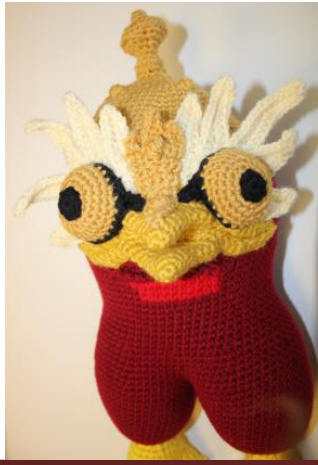
Hoot Loop - Skylanders Gamer Buddies
Pattern designed by Mary Smith? 2015
Supplies
Worsted weight yarn in colors listed. Yellow (Talons) Red Heart: Bright Yellow [100 yds] Dark Red (Body) Impeccable: Claret [260 yds] Red (Spot on Body) Red Heart: Cherry Red [20 yds] Gold (Hat, Eyes, Belt) Hobby Lobby / Love This Yarn: Sungold [150 yds] Black (Eyes) Impeccable: Black [2 yds] Medium Yellow (Beak, Scepter, Loop) Vanna's Choice: Mustard [80 yds] Cream (Feathers, Arms) Hobby Lobby / Love This Yarn: Cream [50 yds] Purple (Scepter Ball) Hobby Lobby I Love This Yarn: Mulbery [20 yds] 14" Round, 9" (23 cm) Long Wooden Dowel F/5 (3.75mm) Yarn needle Stitch markers Fiberfill or stuffing of choice. Finished doll is about 18" tall from feet to top of hat if using worsted weight yarn.
Abbreviations
de-dere (sthext2 stcstogehech ·() number of stitches you should have at the end of your round ·FO - finish off MR - magic ring
Before you begin:
·This amigurumi/plush is worked in continuous rounds. Mark the beginning of each round with a stitch marker.
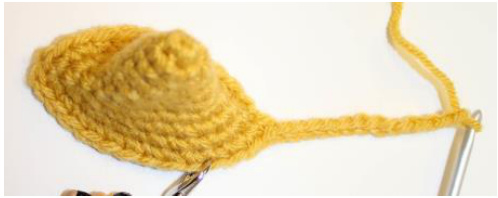
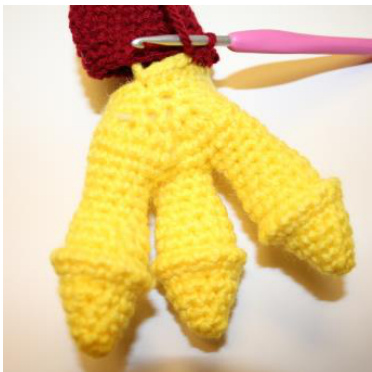
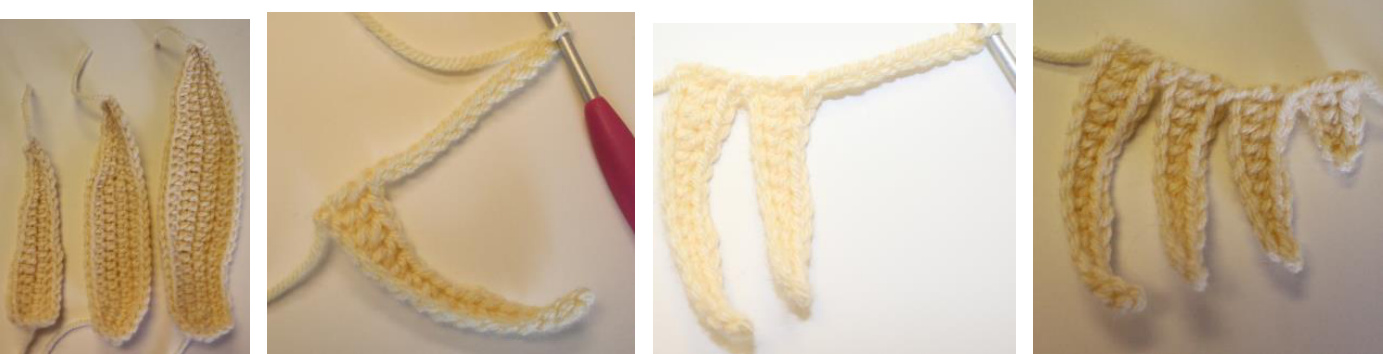
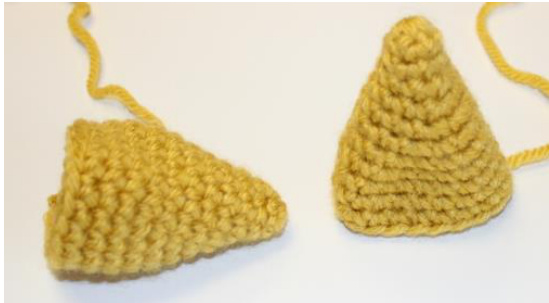
Foot Talon - make 3 per foot (6 total)
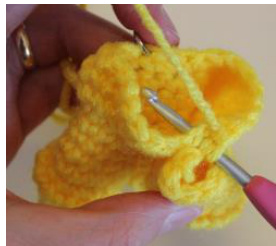
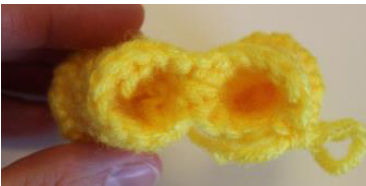
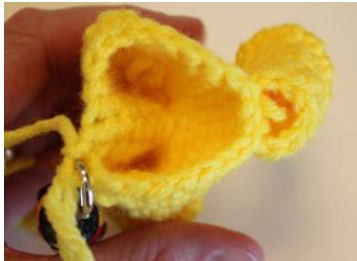
With yellow R1: MR 6 R2: sC 6 R3: [inc, SC 2] x2 (8) R4: [inc, sc 3] x2 (10) R5: [inc, SC 4] x2 (12) R6: FLO SC 12 R7: SC 12 R8: with back loops from R6, sc 12 R9: SC 12 R10: [dec, sc 2] x3 (9) R11-12: sc 9 FO, hide ends on talon 1 (T1) & 2 (T2). Continue on with talon (T3)

Copyright 2015 Mary Smith and Made by Mary Stuff talons % of the way.
Foot - make 2
With yellow R1: with current toe T3, sc 3, pick up T1 and sc 3, [inc, sc 2] x2, go back to T3, [inc, SC 2] x2 (22) R2: sC 9, inc x11, sC 2 (33) R3: sc 9, dec x2, sc 14, dec x2, sc 2 (29) R4: [dec, Sc 1] x4, sc 14, dec, Sc 1 (24) R5: [dec, Sc 2] x2, sc 5, sc 3 with T2, sc 5, dec, sc 1 (21) R6: sc 11, sc 6 around T2, sc 7 (24) R7-8: SC 24 R9: [dec, sc 2] x6 (18) R10: [dec, sc 1] x6 (12) R11-12: sC 12 Finish stuffing talons. Change to dark red. R13: inc x12 (24) R14: [inc, sc 1] x12 (36) R15-16: sC 36 R17: [inc, sc 2] x12 (48) R18-26: SC 48 Stuff firmly. FO, weave in tail.

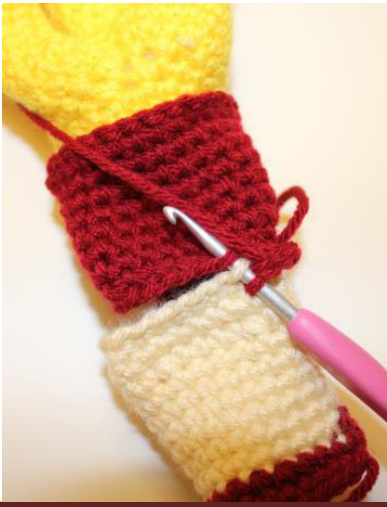
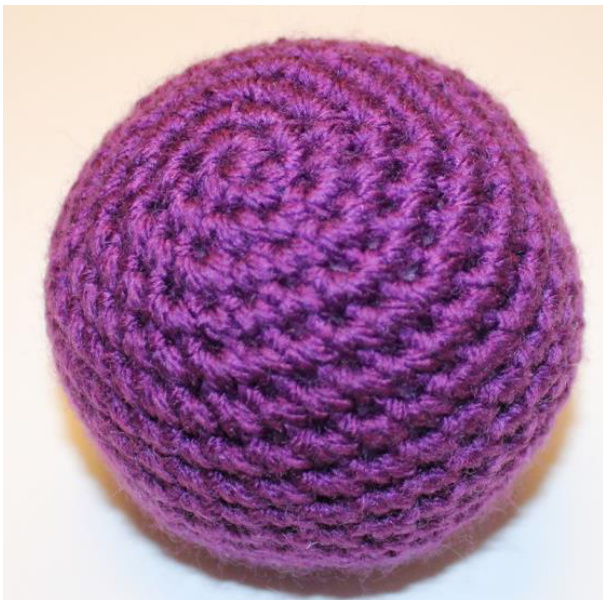
Body
R1: Pick up both legs, talons so they are pointing in the direction you want and away from you. Insert hook in middle stitches and sc legs together, make two more sc between the legs (this 2nd and 3rd sc should come towards your body) joining them well in the middle. The three joining sc will not count in your stitch count. The next stitch you make will be in the leg on your left and this will be the beginning stitch so place your stitch marker here. Continue around left leg and then go around right leg. You want to be working from the back so your color changes don't show. (90) R2: [dec, sc 7] x10 (80) R3-4: sc 80 R5: [dec, sc 6] x10 (70) R6-7: sc 70 R8: [dec, sc 5] x10 (60) R9-13: sC 60 R14: [inc, sc 5] x10 (70) R15: sC 70 R16-17: sc 31, add red (don't cut dark red) with red sc 10, with dark red sc 29 (70) R18-19: with dk red sc 31, with red sc 11, with dk red sc 28 (70) Cut red, continue on with dark red. R20: sc 70 R21: [inc, sc 6] x10 (80) R22-23: sC 80 R24: [inc, sc 7] x10 (90) R25-28: sc 90 R29: [dec, sc 7] x10 (80) R30-32: sC 80 R33: [dec, Sc 6] x10 (70) R34-35: sc 70 R36: [dec, sc 5] x10 (60) R37: SC 60 R38: [dec, sc 4] x10 (50) R39: sc 50 Begin stuffing. R40: [dec, sc 3] x10 (40) R41: [dec, Sc 2] x10 (30) R42: [dec, sc 3] x6 (24) R43: [dec, sc 2] x6 (18) Stuff firmly. R44: [dec, sc 1] x6 (12) R45: dec x6 (6) FO, hide tail.
Bobble Stitch
YO, insert hook into next st, pull yarn through (loops on hook = 3), YO, pull through 2 loops (loops remaining on hook = 2), [YO, insert hook into the same st, YO, pull through, YO, pull through 2 loopsl x2 (loops remaining on hook = 5), YO, pull yarn through all 5 loops.
Hat
With gold R1: MR 6 R2-3: sC 6 R4: inc x6 (12) R5: [inc, sc 1] x6 (18) R6: [inc, sc 2] x6 (24) R7: sC 24 R8: BLO [deC, SC 2] x6 (18) R9: [dec, sc 1] x6 (12) R10: [dec, sc 2] x3 (9) R11-12: sC 9 R13: inc x9 (18) R14: dec x9 (9) R15: sC 9 R16: inc x9 (18) R17: [inc, sc 2] x6 (24) R18: sC 24 R19: [inc, sc 3] x6 (30) R20: [inc, sc 2] x10 (40) R21: SC 40 R22: sc 5, [bobble, sc 9] x3, bobble, sc 4 (40) R23: [inc, sc 3] x10 (50) R24: SC 50 R25: [inc, sc 4] x10 (60) R26-27: sC 60 R28: [inc, sc 5] x10 (70) R29: sC 70 R30: [inc, sc 6] x10 (80) R31: SC 80 R32: FLO sC 80 R33: ch 1, reverse sc 80 To reverse sc, you will work sc sts in the opposite direction you normally work them. For example, if you are right handed and typically move to the left when making your stitches, you instead work backwards and move to the right. It makes a fun ridge design. Photos below, they are in a different color than what you will be working with. FO, weave in tail.
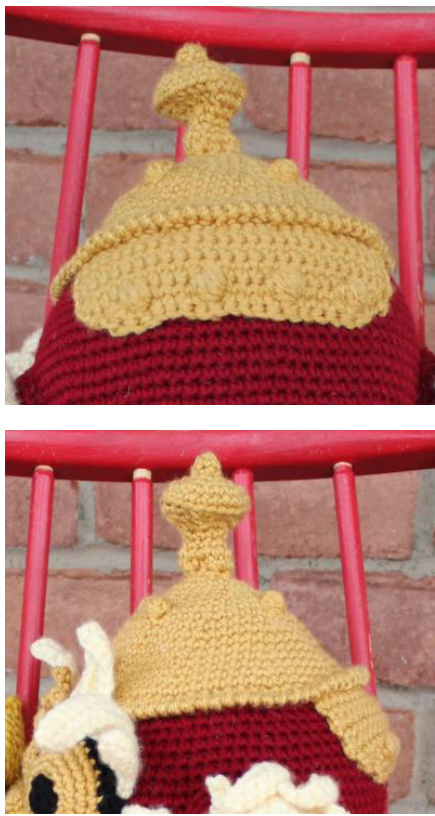
Hat Brim
Withgold Attach yarn to any back loop st from R32 R1: sc 26 in back loops from R32 R2-6: ch 1,turn, sc 26 R7: ch 1, turn, sk 1st st, dec, sc 21, dec R8: ch 1, turn, sk 1 st, dec, sc 2, [bobble, Sc 4] x3, bobble, sc 1, dec R9: ch 1, turn, sk 1st st, dec, sc 15, dec FO, leave long tail for sewing hat to body.
Shirt Tie
With dark red Ch 15, reverse sc 14 FO, leave tail for sewing to body.
Eye Feathers
With cream On all feathers begin with long tail. F1 - make 2: ch 11, sl st in 2nd ch from hook, sc 3, hdc 3, dc 3, 2 sc in post of dc you just made (you are working around to the other side), ch 2, dc 3, hdc 3, sc 3, sl st, FO, weave in end. F2 - make 2: ch 20, sl st in 2nd ch from hook, sc 5, hdc 6, dc 7, 2 sc in post of dc you just made, ch 2, dc 7, hdc 6, sc 5, sl st, FO, weave in end. F3 - make 6: ch 15, sl st in 2nd ch from hook, sc 4, hdc 4, dc 5, 2 sc in post of dc you just made, ch 2, dc 5, hdc 4, sc 4, sl st, FO, weave in end.
Eyes - make 2
With gold R1: MR 6 R2: inc x6 (12) R3: [inc, sc 1] x6 (18) R4: [inc, sc 2] x6 (24) R5-6: SC 24 Change to black R7: sc 12, in next st (sc 1, ch 2, sc 1), sc 11 (25) R8: sc 1, ch 4, sl st in 2nd ch from hook, sl st x2 in ch, sl st back into eye. FO, leave tail for sewing to head.
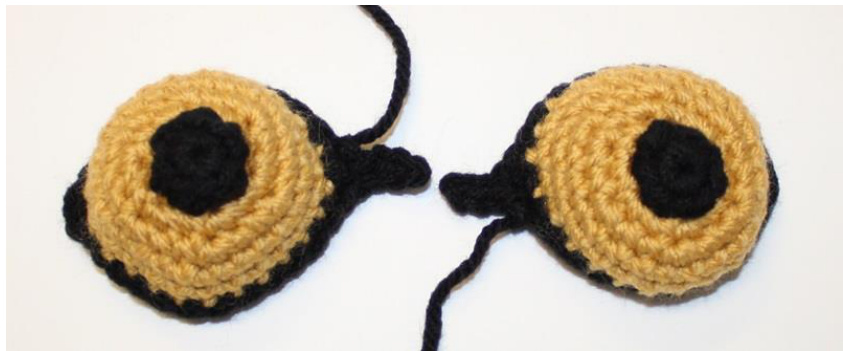
Pupil - make 2
With black MR 8 FO, leave tail for sewing to eye. Sew to center of eye.
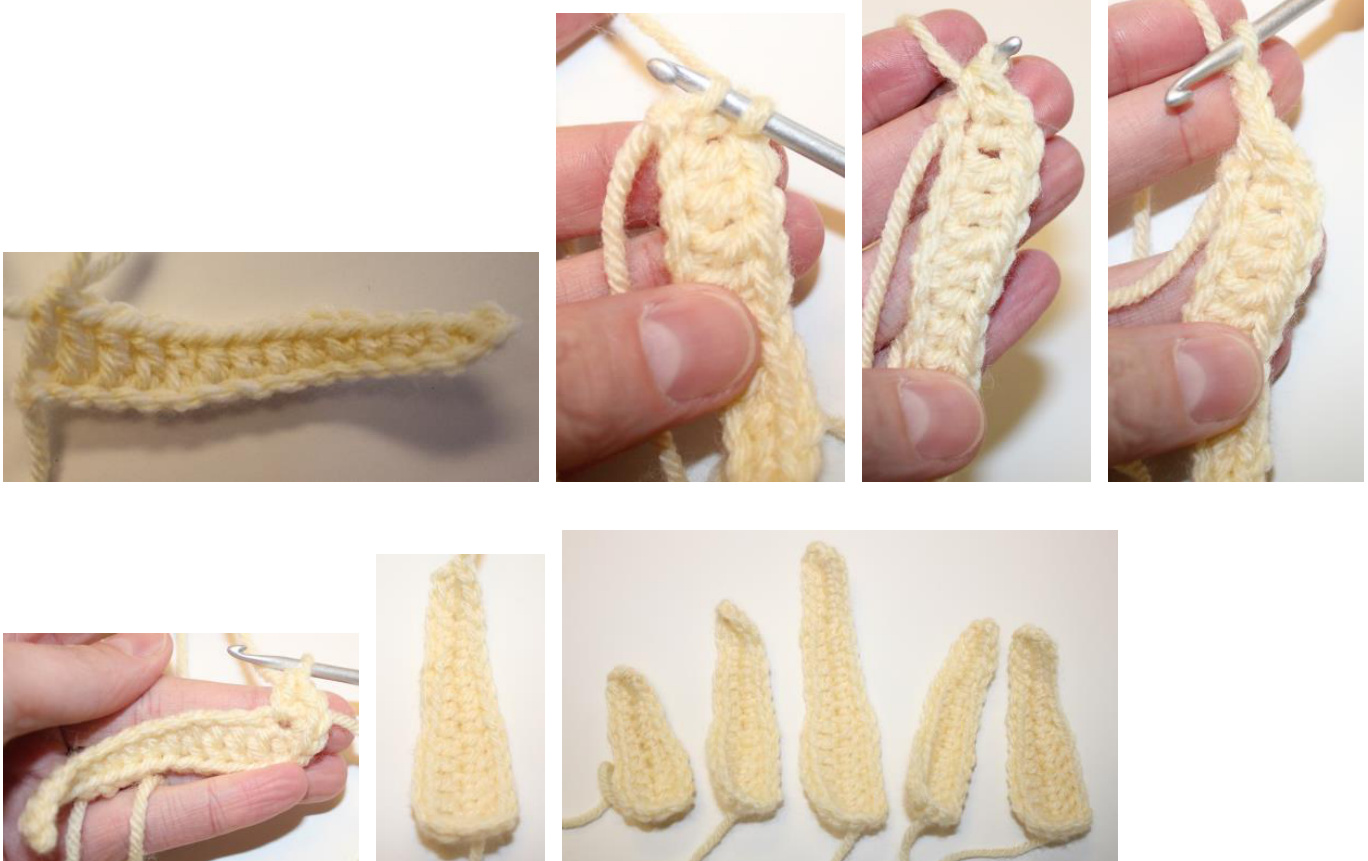
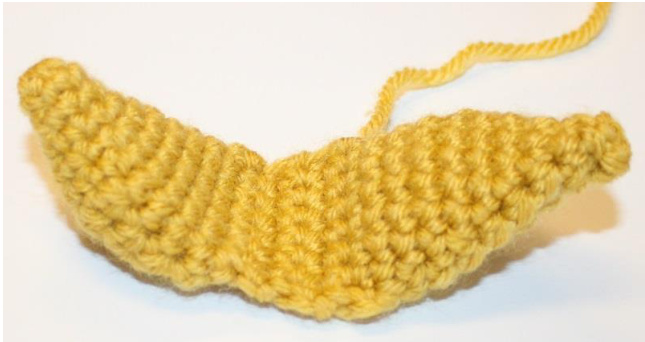
Beak - make 2
With medium yellow

R1: MR 4 R2: [inc, sc 1] x2 (6) R3: [inc, sc 2] x2 (8) R4: [inc, SC 3] x2 (10) R5: SC 10 R6: [inc, sc 4] x2 (12) R7: [inc, sc 5] x2 (14) R8: [3 sc in next st, sc 6] x2 (18) R9: sc 1, 3 sc in next st, sc 8, 3 sc in next st, sc 7 (22) R10: sc 2, 3 sc in next st, sc 10, 3 sc in next st, sc 8 (26) R11: sc 4, ch 12, sl st in 2nd ch from hook, sl st, sc 2, hdc 3, dc 4, sc in same st as ch 12, sc 13, ch 12, sl st in 2nd ch from hook, sl st, sc 2, hdc 3, dc 4, sc in same st as ch 12, sc 9 FO, leave tail for sewing to face.
Nose Guard
Withgold R1: ch 3, sc in 2nd ch from hook, sc in next st, ch 4, sc in 2nd ch from hook, hdc, dc, ch 3, sc in 2nd ch from hook, sc R2: ch 1, turn, working your way across the flat side sc 7 R3: ch 1, turn, Sc 7 R4: ch 1, turn, sc 2, dec, bobble, Sc 2 (6) R5: ch 1,turn, sc 2, dec, sc 2 (5) R6: ch 1, turn, sc 2, dec, sc 1 (4) R7-8: SC 4 R9: sc 1, dec, sc 1 (3) R10: SC 3 R11: dec, sc 1 (2) R12: bobble, sc 1 (2) R13: SC 2 R14: dec (1) R15: SC 1 FO, leave tail for sewing to hea
Assembly
Use tail and sew on hat. Pin eye feathers to head, use tails and sew them into place. You want to make sure all the face parts end up above the red spot on body. Place beak top on feathers, sew on. Place beak bottom under beak top, sew on. Sew nose guard onto beak top. Stuff and sew on eyes. Sew on shirt tie just above, or on top of, red spot

Hand Talon - make 3 per hand (6 total)
with yellow R1: MR 6 R2: SC 6 R3: [inc, sc 2] x2 (8) R4: [inc, sc 3] x2 (10) R5: [inc, sC 4] x2 (12) R6:[inc, sc 5] x2 (14) R7: FLO SC 14 R8: SC 14 R9: with back loops from R7, sc 14 R10: SC 14 R11: [dec, sc 5] x2 (12) R12: [dec, sc 2] x3 (9) R13-15: SC 9 FO, hide ends on talon 1 (T1) & 2 (T2). Continue on with talon (T3) Stuff talons % of the way.
Hand - make 2
With yellow R1: with T3 sc 4, pick up T1 sc 6, pick up T2 sc 9, back to T1 sc 3, and T3 SC 5 (27) R2: sc 17, [inc, SC 2] x3, sc 1 (30) R3: [inc, Sc 2] x6, sc 9, inc, Sc 2 (37) R4: sc 21, dec x8 (29) R5: sc 21, deC x4 (25) R6: sc 21, deC x2 (23) R7: sc 21, inc x2 (25) R8: SC 25 Stuff talons and hands. FO, hide tail.
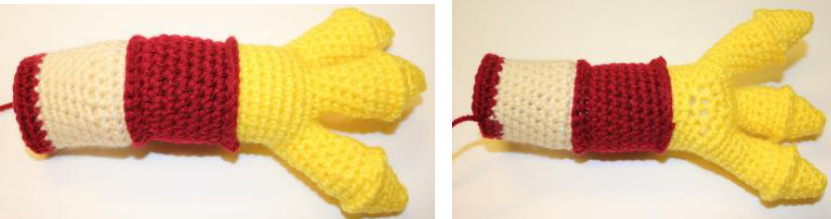
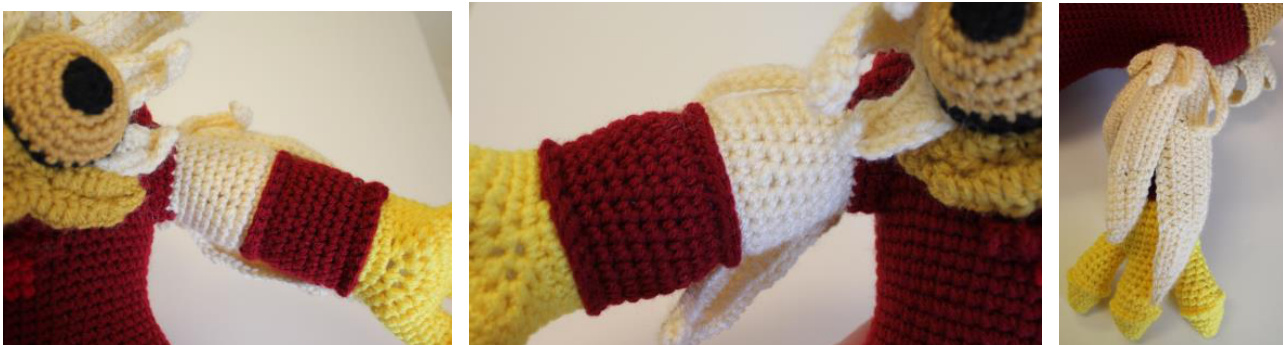
Arm Part 1 - make 2
Withdark red R1: ch 25, join ch with sl st to form circle, sc 25 R2-7: SC 25 Attach to yellow hand with sc around through red and yellow layers.
Arm Part 2 - make 2
Withcream R1: ch 25, join ch with sl st to form circle, sc 25 R2: SC25 R3: [deC, Sc 3] x5 (20) R4-9: SC 20 Change to dark red R10: [inc, Sc 3] x5 (25) R11: SC 2 FO, leave tail for sewing arms to body.
Pick up arm part 1 and part 2. Put cream part and red part next to each other. Sc 25 around through cream and red layers joining the parts. Stuff arms.
Arm Feathers
With cream On all feathers begin with long tail.
Big Feather - make 2
Work in the round around both sides of ch 30 R1: ch 30, sl st in 2nd ch from hook, sl st, sc 3, hdc 5, dc 12, hdc 7, sc 2 in post of last hdc (You are working your way around to the other side.), ch 2, hdc 7, dc 12, hdc 5, sc 3, sl st 2 R2: ch 1, continuing around again, sl st 2, sc 3, hdc 5, dc 12, hdc 7, sc, inc x2, ch 2, hdc 7, dc 12, hdc 5, sc 3 sl st 2 FO, weave in end.

Middle Feather - make 2
Work in the round around both sides of ch 25 R1: ch 25, sl st in 2nd ch from hook, sl st, sc 7, hdc 13, sc 1, inc, ch 1, (Continue around to other side of ch) sc 2, hdc 13, sc 7, sl st 2 R2: ch 1, continuing around other side, sl st 2, sc 7, hdc 13, sc 2, inc x2, sc 2, hdc 13, sc 7, sl st 2. FO, weave in end.
Small Feather - make 2
Work in the round around both sides of ch 20 R1: ch 20, sl st in 2nd ch from hook, sl st, sc 5, hdc 5, dc 7, 2 sc in post of dc you just made, continuing around other side, ch 2, dc 7, hdc 5, sc 5, sl st 2 FO, weave in end.
Tiny Feathers
These are made with chains and stitches. There is really only one row, but they are numbered in feathers to help you keep track of where you are. Do not cut yarn between feathers, just make another chain where you left off the last feather.
Right Side
F1: ch 15, sl st in 2nd ch from hook, sc 4, hdc 4, dc 5 F2: ch 13, sl st in 2nd ch from hook, sc 3, hdc 4, dc 4 F3: ch 10, sl st in 2nd ch from hook, sc 2, hdc 3, dc 2 F4: ch 6, sl st in 2nd ch from hook, sc 1, hdc 2, dc 1 FO, leave tail for sewing to arms.
Left Side
F1: ch 6, sl st in 2nd ch from hook, sc 1, hdc 2, dc 1 F2: ch 10, sl st in 2nd ch from hook, sc 2, hdc 3, dc 2 F3: ch 13, sl st in 2nd ch from hook, sc 3, hdc 4, dc 4 F4: ch 15, sl st in 2nd ch from hook, sc 4, hdc 4, dc 5 FO, leave tail for sewing to arms. Sew arms to body. Sew feathers to arm.
Belt
With gold You want this to wrap around the body. If you need to increase or decrease the initial chain number, please do so. R1: ch 71, sc in 2nd ch from hook, sc 69 R2-5: SC 70 FO, leave tail for sewing to body. Wrap around body and sew ends together.
Belt Tail
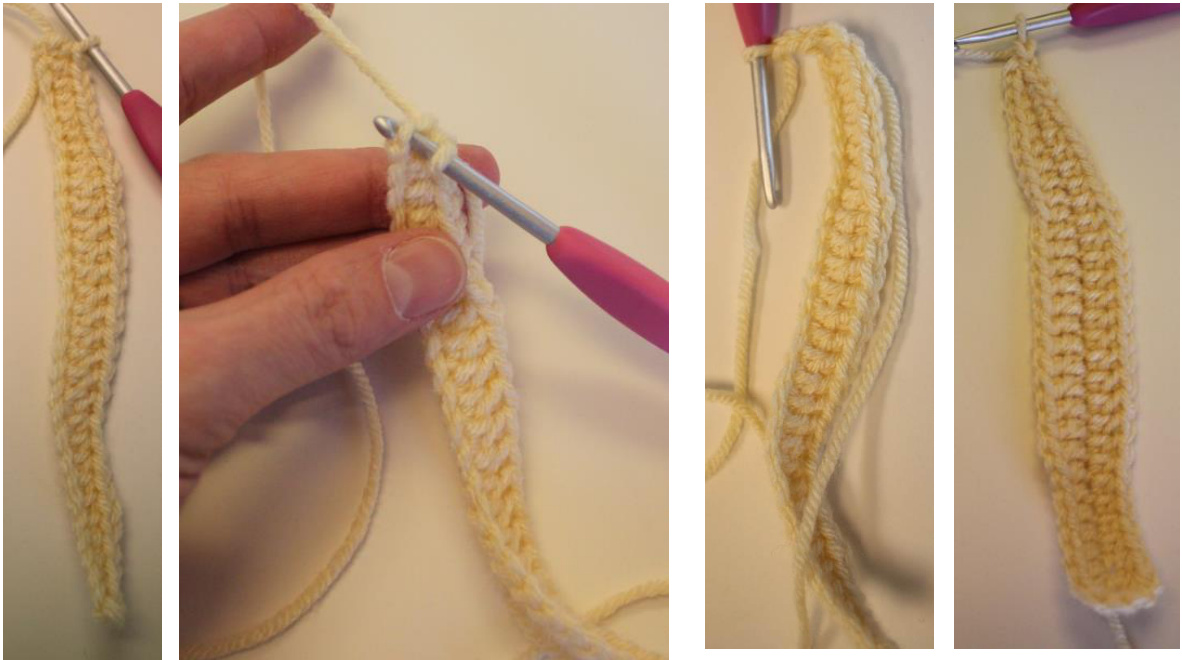
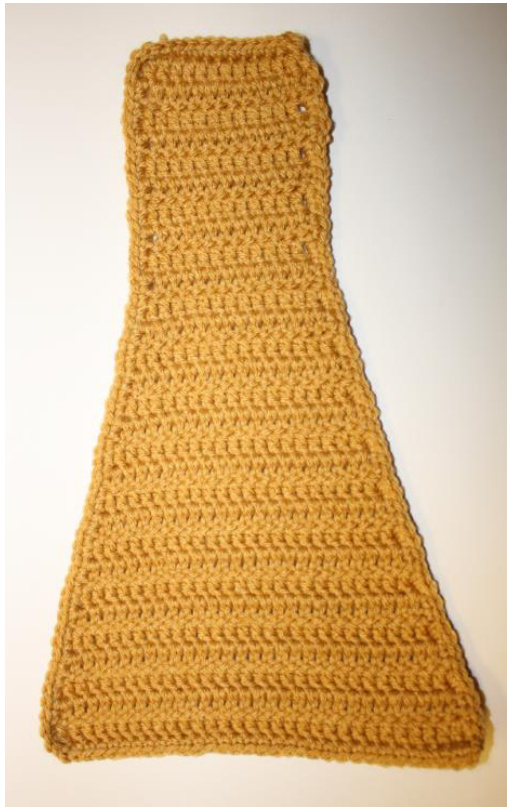
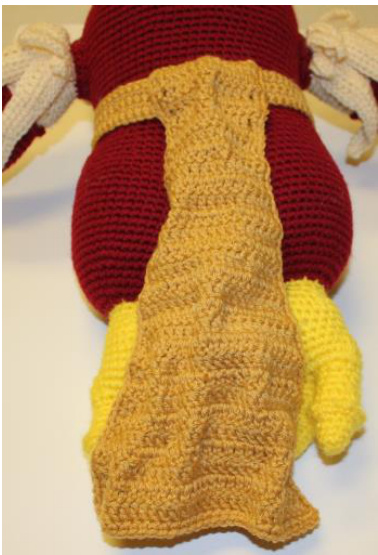
With gold R1: ch 15, dc in 3rd ch from hook, dc 12 (13) R2-10: ch 2, turn, dc 13 R11: ch 2, turn, dc 12, dc inc (14) R12: ch 2, turn, dc 13, dc inc (15) R13: ch 2, turn, dc 14, dc inc (16) R14: ch 2, turn, dc 15, dc inc (17) R15: ch 2, turn, dc 16, dc inc (18) R16: ch 2, turn, dc 17, dc inc (19) R17: ch 2, turn, dc 18, dc inc (20) R18: ch 2, turn, dc 19, dc inc (21) R19: ch 2, turn, dc 20, dc inc (22) R20: ch 2, turn, dc 21,dc inc (23) R21: ch 2, turn, dc 22, dc inc (24) R22: ch 2,turn, dc 23, dc inc (25) R23: ch 2, turn, dc 24, dc inc (26) R24: ch 2, turn, dc 25, dc inc (27) R25: ch 2, turn, dc 26, dc inc (28) R26: ch 2, turn, dc 27, dc inc (29) R27: ch 2, turn, dc 28, dc inc (30) R28: ch 2,turn, dc 29, dc inc (31) R29: ch 2, turn, dc 30, dc inc (32) Sc around Attach to back center of body. Randomly pinch little wrinkles in tail and tie knots in the pinch to make fun wrinkles. Weave in tails.
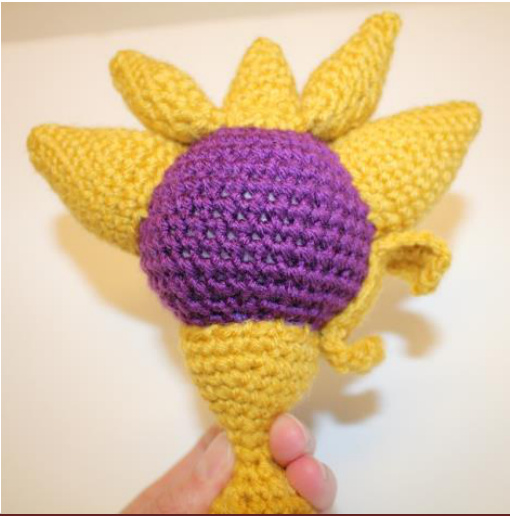
Scepter Ball
With purple R1: MR 6 R2: inc x6 (12) R3: [inc, sc 1] x6 (18) R4: [inc, sc 2] x6 (24) R5: [inc, sc 3] x6 (30) R6: [inc, sc 4] x6 (36) R7-13: SC 36 R14: [dec, sc 4] x6 (30) R15: [sc 3, dec] x6 (24) R16: [dec, sc 2] x6 (18) R17: [dec, sc 1] x6 (12) Stuff firmly. R18: dec x6 (6) R19: dec FO, hide end.
Scepter Top
With medium yellow R1: MR 6 R2: SC 6 R3: [inc, sc 2] x2 (8) R4: [inc, sc 3] x2 (10) R5: [inc, sC 4] x2 (12) R6: [inc, sc 5] x2 (14) R7-10: sc 2, hdc 5, sc 7 (14) Lightly stuff. R11: Flatten and sc 7 through all layers, closing up hole. Work flat: R12-15: ch 1, turn, sc 7 R16: FLO sc 7, work around to BLO, sc 1, hdc 5, sc 1 You are now working in the round again. R17-19: sc 8, hdc 5, sc 1 (14) R20:[dec, sc 5] x2 (12) R21:[dec, sC 4] x2 (10) R22: [dec, sc 3] x2 (8) Lightly stuff. R23: [dec, sc 2] x2 (6) FO, use tail to close last 6 sts.
Scepter Top Center
With gold R1: MR 6 R2: SC 6 R3: [inc, SC 1] x3 (9) R4: [inc, SC 2] x3 (12) R5: SC 12 R6: [inc, SC 3] x3 (15) FO, leave tail Lightly stuff. Sew to scepter top in center on flat part. Sew scepter top to center top part of scepter ball. Scepter Top Sides - make 2 With gold R1: MR 6 R2: SC 6 R3: [inc, sc 2] x2 (8) R4:[inc, sc 3] x2 (10) R5: [inc, sC 4] x2 (12) R6:[inc, sc 5] x2 (14) R7: [inc, sc 6] x2 (16) R8: [inc, sc 7] x2 (18) R9: [inc, sc 8] x2 (20) R10-12: SC 20 FO, leave tail for sewing to scepter. Lightly stuff Sew to scepter ball on sides just below sCt

Scepter Handle
With gold Stuff as you go. After R11, insert stick into handle and begin stuffing around stick as you go. Make a mark about 1 1%2" from the top. You will insert the stick into the scepter ball to that mark. You will
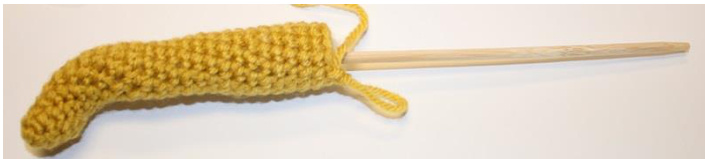
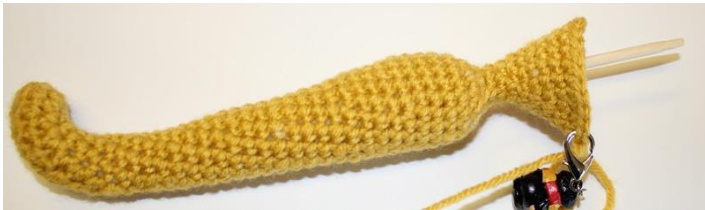
want to crochet to your line. If you are using a different weight yarn, you will need to change the length of your stick and also increase or decrease rows at rounds22-27. R1: MR 6 R2: SC 6 R3: [inc, sc 2] x2 (8) R4-11: sc 4, hdc 4 (8) R12-14: SC 8 R15: [inc, sc 3] x2 (10) R16-20: SC 10 R21: [inc, sc 4] x2 (12) R22-27: SC 12 R28: [inc, sc 3] x3 (15) R29-31: SC 15 R32: [inc, sc 4] x3 (18) R33-36: SC 18 R37: [dec, sc 1] x6 (12) R38: dec x6 (6) R39-40: SC 6 R41: [inc, sc 1] x3 (9) R42: [inc, sC 2] x3 (12) R43: [inc, sc 3] x3 (15) R44: [inc, sc 4] x3 (18) R45: [inc, sc 5] x3 (21) R46:[inc, sc 6] x3 (24) R47: [inc, sc 7] x3 (27) Finish stuffing. FO, leave tail for sewing to ball. Sew to bottom of scepter ball.

Lower Scepter Curvies - make 2
With gold Begin with long tail. R1: ch 16, sc in 2nd ch from hook, sc 14 (15) R2-4: ch 1,turn, SC 15 FO, leave long tail. With end tail and needle. Thread yarn into each end 5 sts in. Pull through and tighten a little. This will curl the ends up a little. Then use ends to sew middle section to scepter ball.
Scepter Strap
Withgold Begin with long tail. R1: ch 18, sc in 2nd ch from hook, sc 16 (17) R2: SC 17 FO, leave tail. Sew strap to scepter using tails.
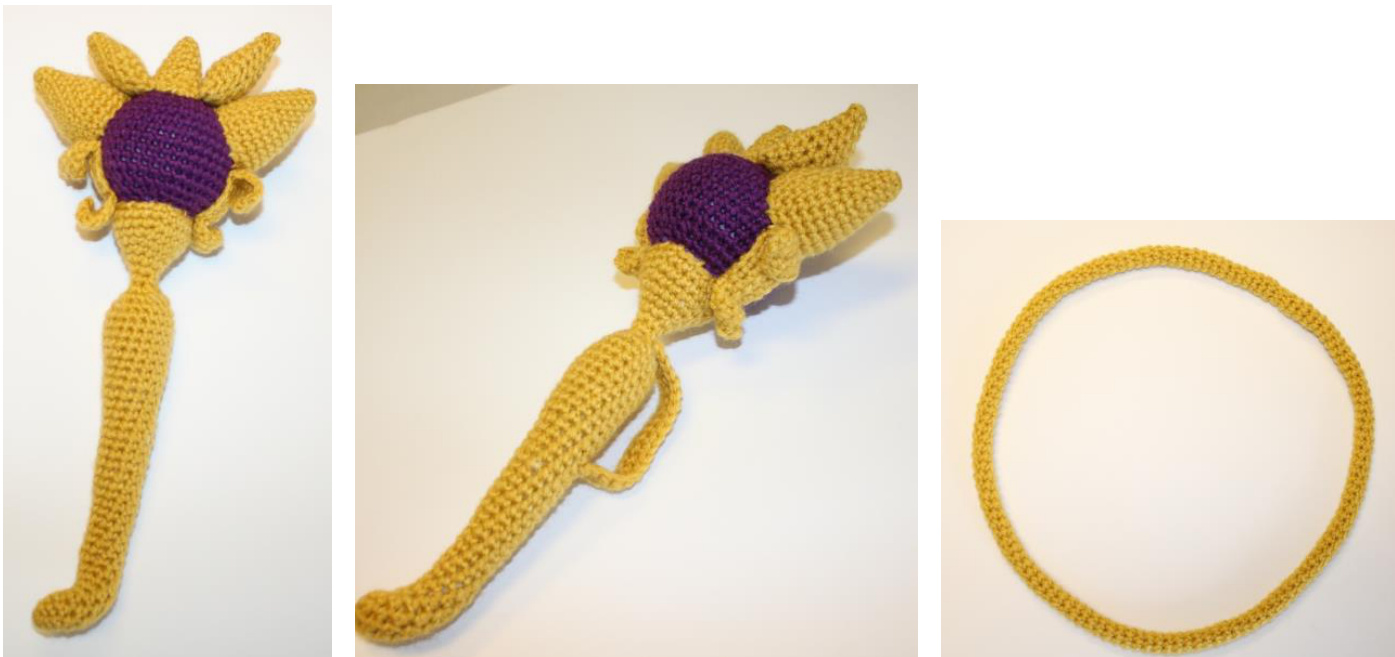
Loop
Withmedium yellow Make loop as long or short as you want. You can increase or decrease the number or rows! R1: MR 6 R2-125: SC 6 FO, leave tail and sew ends of loop together.
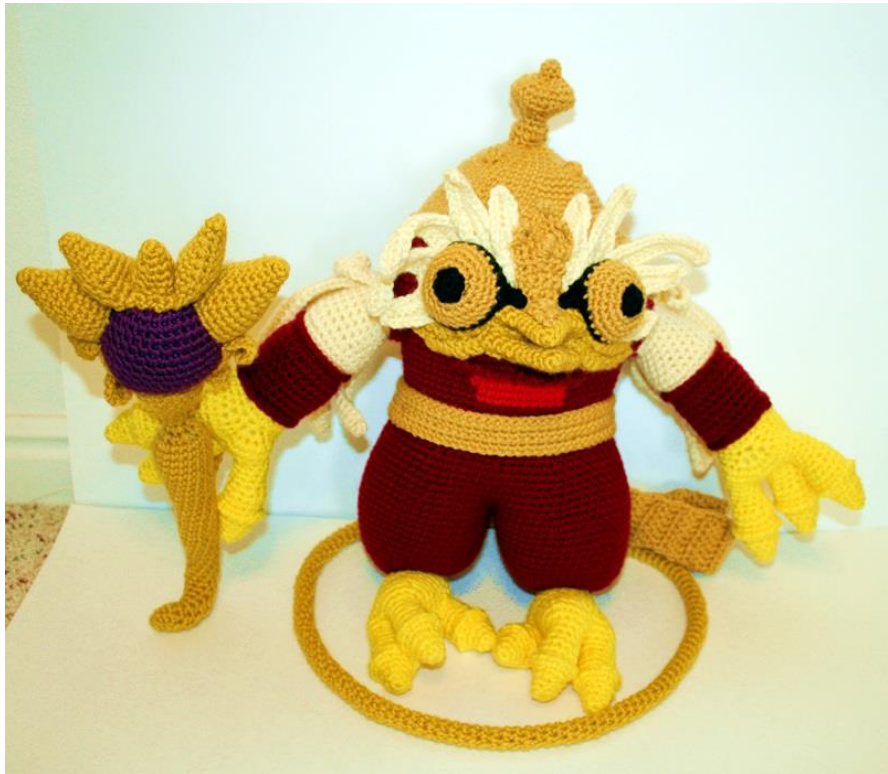

Congratulations!
Your Hoot Loop doll is now complete and ready for play or display. I hope you enjoyed making this pattern. Watch for more Gamer Buddies!! Note: Be careful when giving your finished plush to young ones. Your amigurumi now contains small parts and pieces. If these pieces were to come off, they could pose a choking hazard to small children and pets.
Additional Information
I am happy to answer any questions or try to help while you are making your amigurumi toy. Please feel free to contact me at mary@madebymary.biz. Please share your finished pictures and get updates by visiting my facebook page. You can also get updates and new product peeks. Facebook: http:/ /www.facebook.com/craftsmadebymary If you enjoyed this pattern and would like to check out more of my creations, please visit one of my shops: Ravelry: Mary Smith Designs http:/ /www.ravelry.com/stores/mary-smith-designs Etsy: Made by Mary maryabbie986.etsy.com
Copyright Info
Thank you for purchasing my pattern! I worked very hard on designing and writing this, so please do not copy, alter, share or upload this pattern anywhere. Please contact me if you have obtained this pattern anywhere other than directly from me. You have worked hard on your finished item and may use pieces made with this pattern for non-commercial and commercial purposes. Commercial permission includes online handmade communities/shops, local craft fairs, etc. Commercial permission does not include mass market or factory production of any kind. Please do not claim this pattern or design as your own. The only thing l ask is a clear designer credit to Mary Smith or Made by Mary and a link back to my etsy shop. Please make yourself aware of copyright laws for licensed characters, properties, items, etc. I am not affiliated with Skylanders and do not claim copyright/ownership of the original character that inspired this amigurumi. I will not be held liable for sale of this or any other character inspired item by another party/person.


