The Untitled Hat
By Miki Ohara
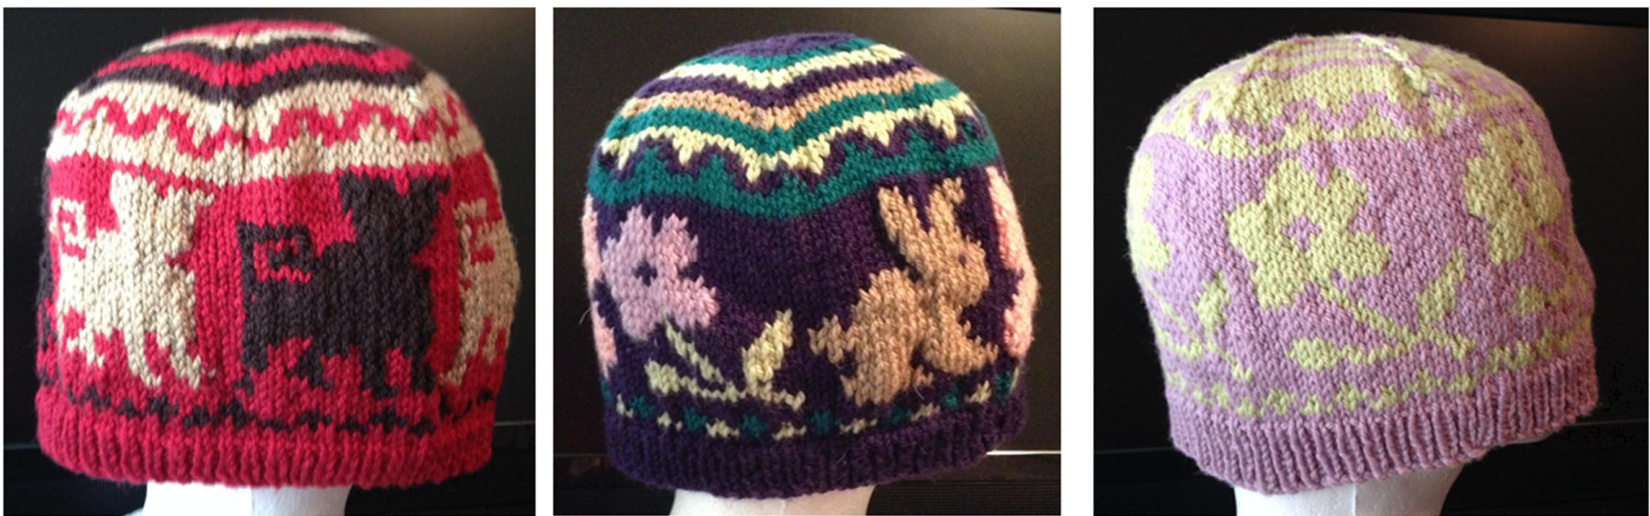
A simple, cozy beanie with infinite possibilities. Choose one motif or six, and use as many colors as your imagination allows. For the more adventurous knitter, a blank chart is included to design your own motif. Let your creativity loose, and knit a hat with your own personal touch.
Yarn
0Ewe Ewe - Wooly Worsted. (100% merino; 50 grams; 95 yards) I Uall UI IIaII UUIUI (IvIU) At least 1 ball of Contrast Color (CC) (you can choose to use as many contrasting colors as youwould like) Needles US #4 straight 13" US #6 straight 13"
Notions
O 5Stitch markers O Tapestry needle O Optional - 6 yarn bobbins (hand wound yarn butterflies can be used instead) Gauge O Stockinette stitch using #6 needles - 22 stitches x 25 rows = 4" Finished Measurements Brim circumference = 20" Height 8"
Notes:
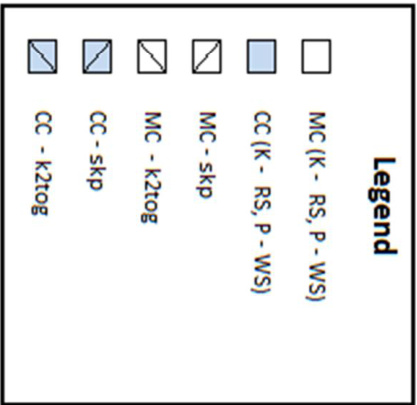
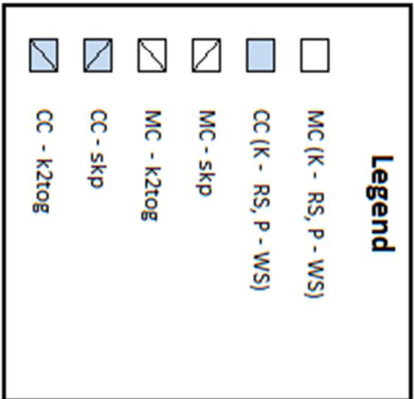
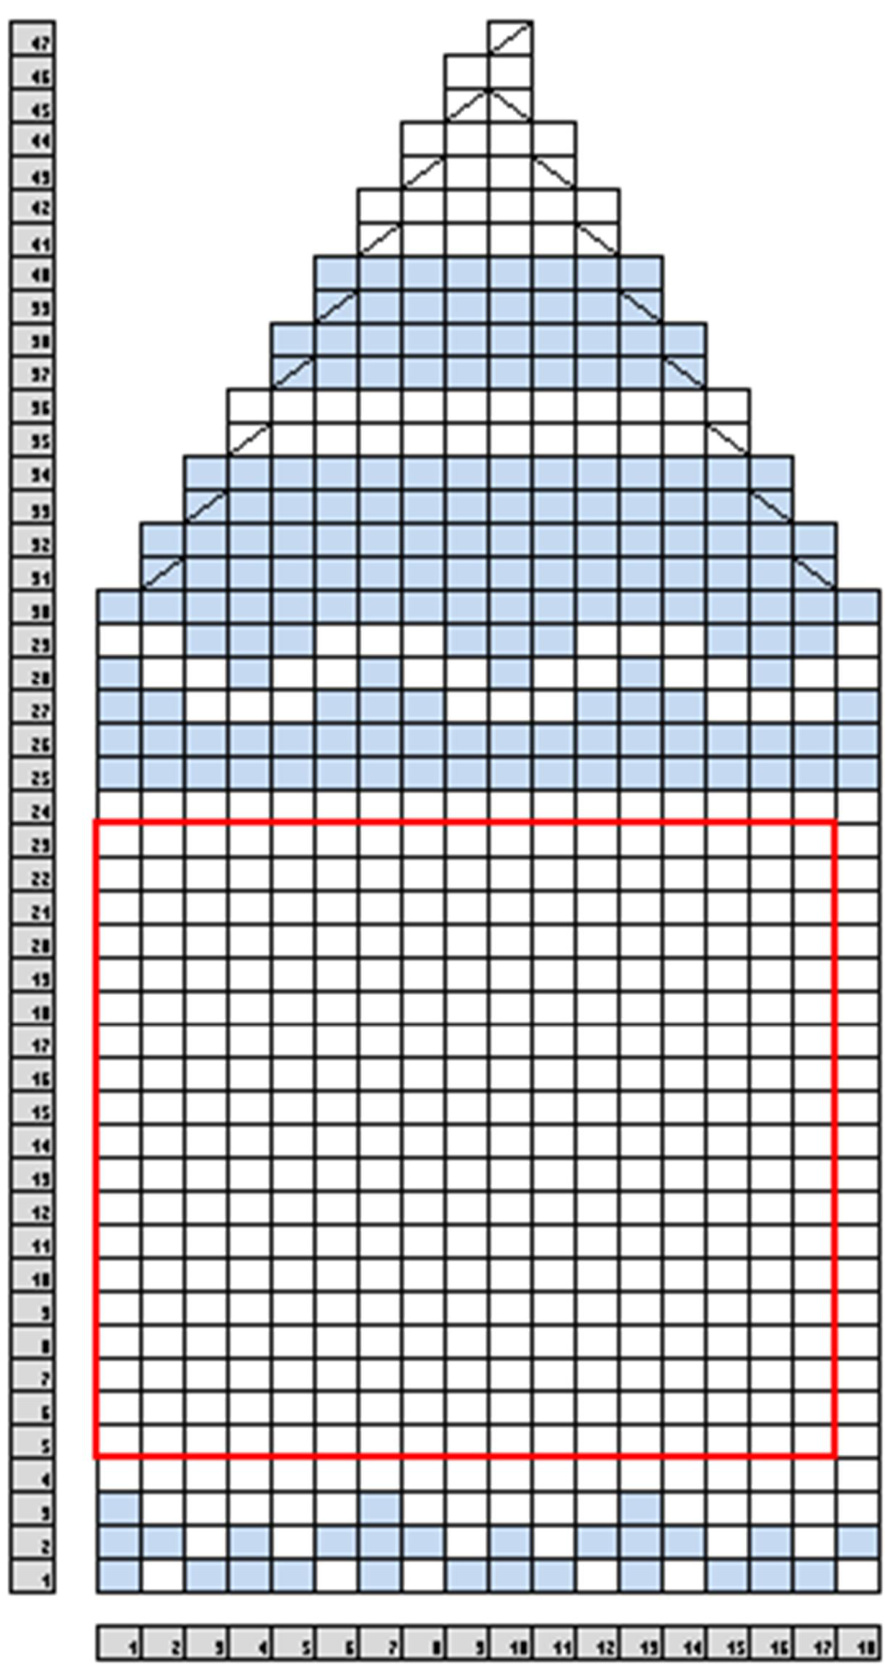
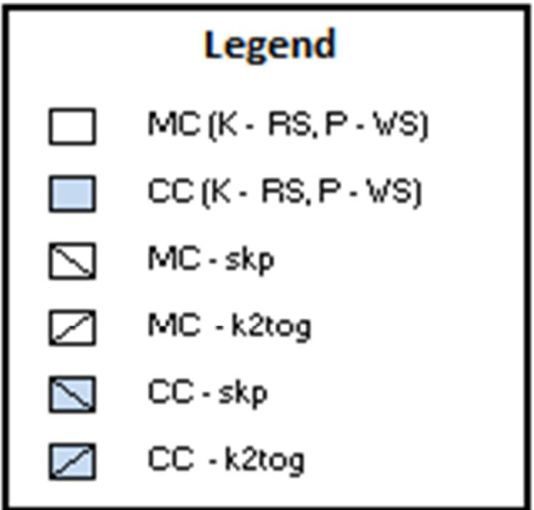
This hat is knit flat from the bottom up and seamed. There are 6 sections of 18 stitches each, plus one stitch of garter on each side as a selvedge edge for a clean seam. If you choose to use only two colors, instructions for knitting in the round are included as well. Abbreviations: O CO - Cast On MC - Main Color CC - Contrasting Color K - Knit P -Purl k2tog - knit 2 stitches together skp - slip one stich knit wise, K1, pass slipped stitch over PM - place marker RS - right side O WS - wrong side Using smaller needles CO 110 stitches. I used a cable cast on, but a long tail cast on will do just fine too. arger needles. (K1,P18, PM, \*P18 PM\* repeat from \* 4 more times, P18, K1 Begin Chart starting on a RS row (See pages 3 - 8 for charts) · Complete chart as written, slipping a marker as you complete each pattern repeat. Remember to knit the first and last stitch of each row. These selvedge stitches are NOT included in the chart. 0 At the end of the chart you will have 8 stitches remaining (1 stitch left from each of the 6 pattern repeats, plus 2 garter edge stitches). Cut yarn leaving about a 30" tail. Thread through remaining stitches. Use the tail to seam the hat using mattress stitch from the right side of the work. Block lightly being careful not to stretch the ribbing. O Weave in ends. Option for 2 color version in the round. 0 If you choose to make a hat with just 2 colors you can knit the hat in the round. You'll need one extra stitch marker that looks different than the other 5 to mark the beginning of your round. 0 Use 16" Circular needles (#4 for the ribbing, and #6 for the body) and switch to #6 DPN's for the crowndecreases. Cast on 108 (which omits the 2 selvedge stitches) and follow your chart. You will have 6 stitches at the end of the chart. Cut yarn leaving about an 8" tail. Thread through remaining stitches and pull through tightly. Block lightly being careful not to stretch the ribbing. Weave in ends.
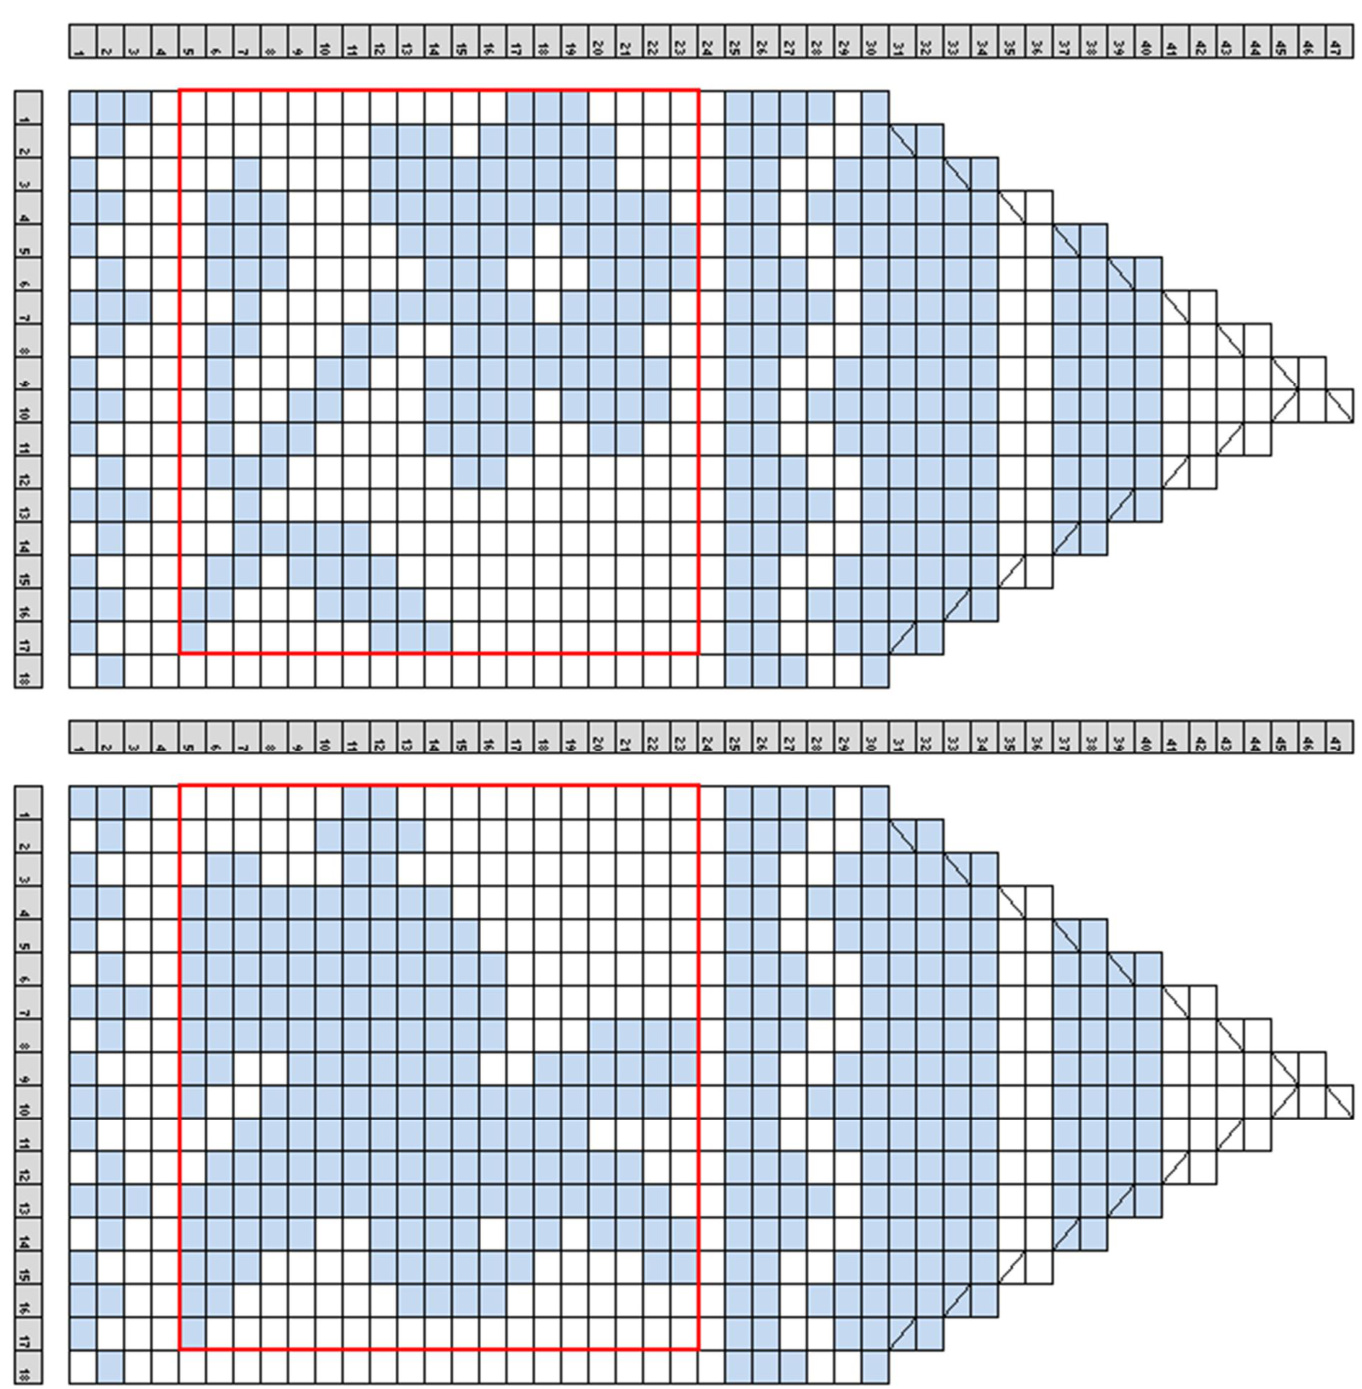
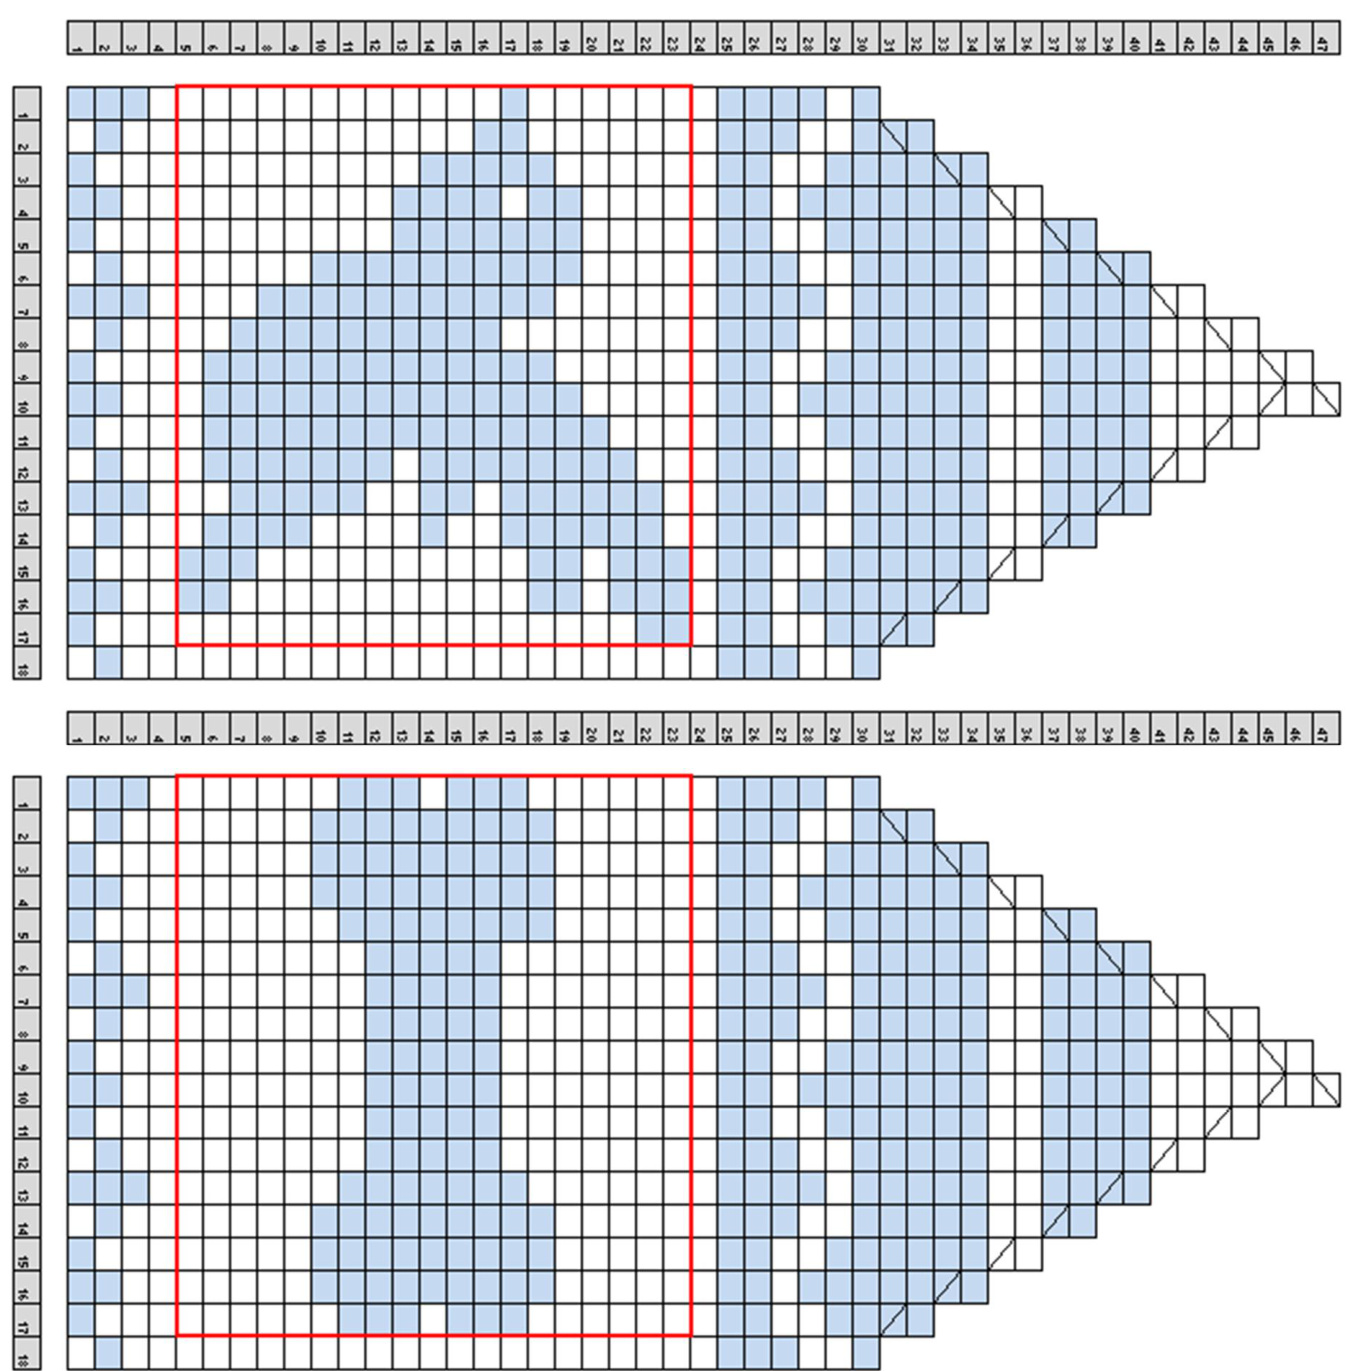
Charts
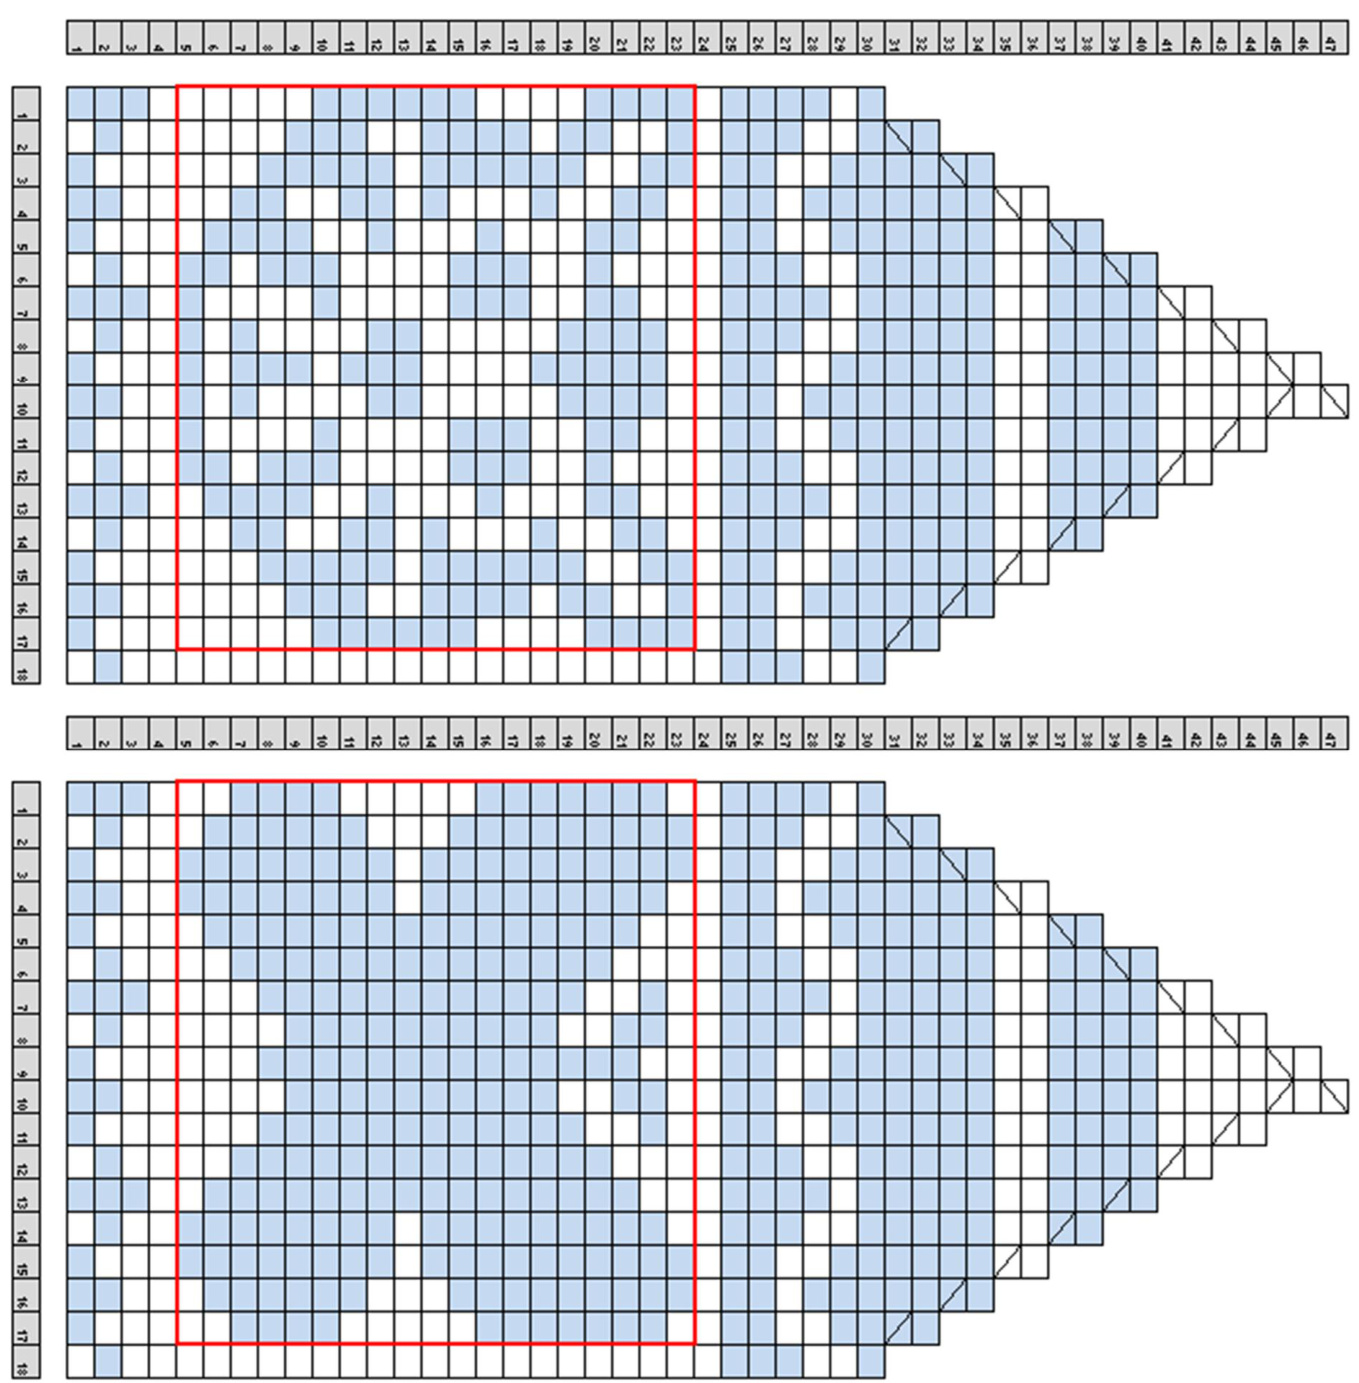
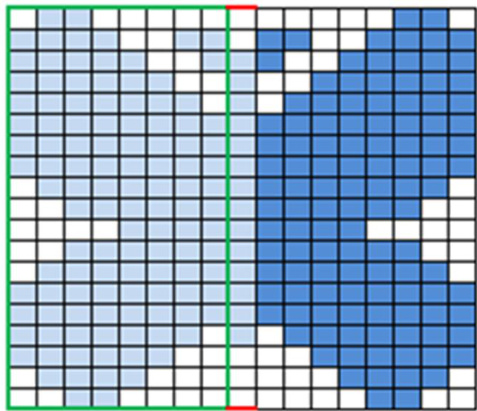
0 You can either select a pre-written motif or design your own using the blank chart at the end of this section. O There's also the option of using more than one motif. Just print out up to six motifs and lay them ou' likethis:
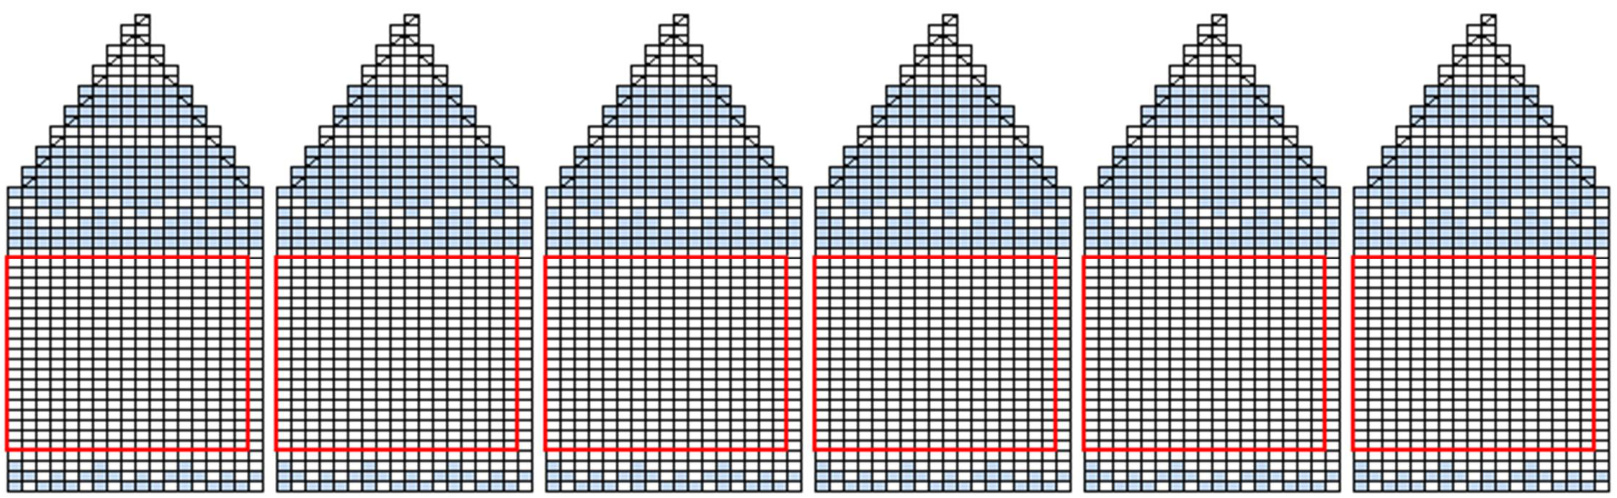
0 The chart doesn't include the selvedge stitches - so remember to keep 1 stitch of garter on each side.

ravelry id: pugmutt
ravelry id: pugmutt
ravelry id: pugmutt
ravelry id: pugmutt
Tips for designing your own motif
·Start lightly by sketching in pencil. Then darken the sketch to fit the blocks in the chart. Your first attempt may not look exactly like your sketch. Erase blocks and make adjustments as needed. Don't get too caught up in details. Keep things simple. Remember you're trying to convey curves using a limited number of squares. If you are trying to draw an object make it fit the entire red box for best results. If it's an abstract motif you don't have to fill in the entire space. If your motif is symmetrical do one side first and then copy it in mirror image on the other side.
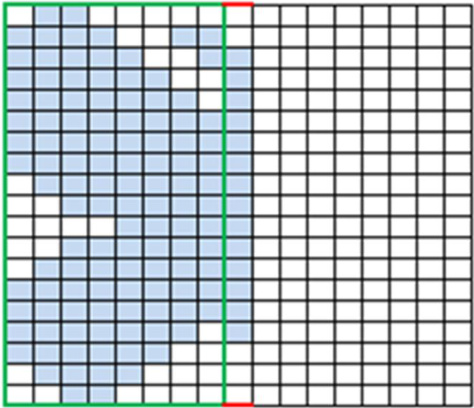
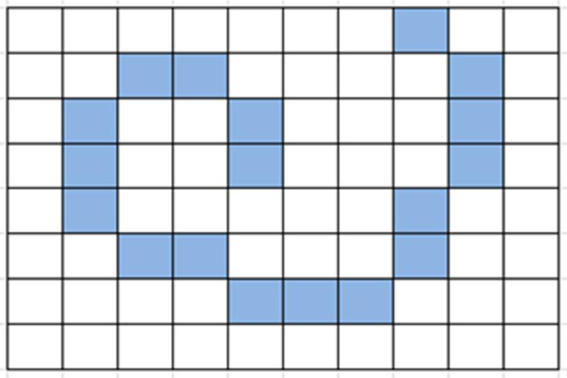
If you want to make a curvy single stitch line it will look better if the stitches touch at more than just the corners...which means... This examplewill lookalotbetterwhenknitted... ...than this

· Remember a knitted stitch is not a perfect square. If you want your chart to closely resemble what you knit, use kniing graph paper where each block is a ratio of 5:7. My preference is to chart in Excel using a column width of 4, and a row height of 20.25.


