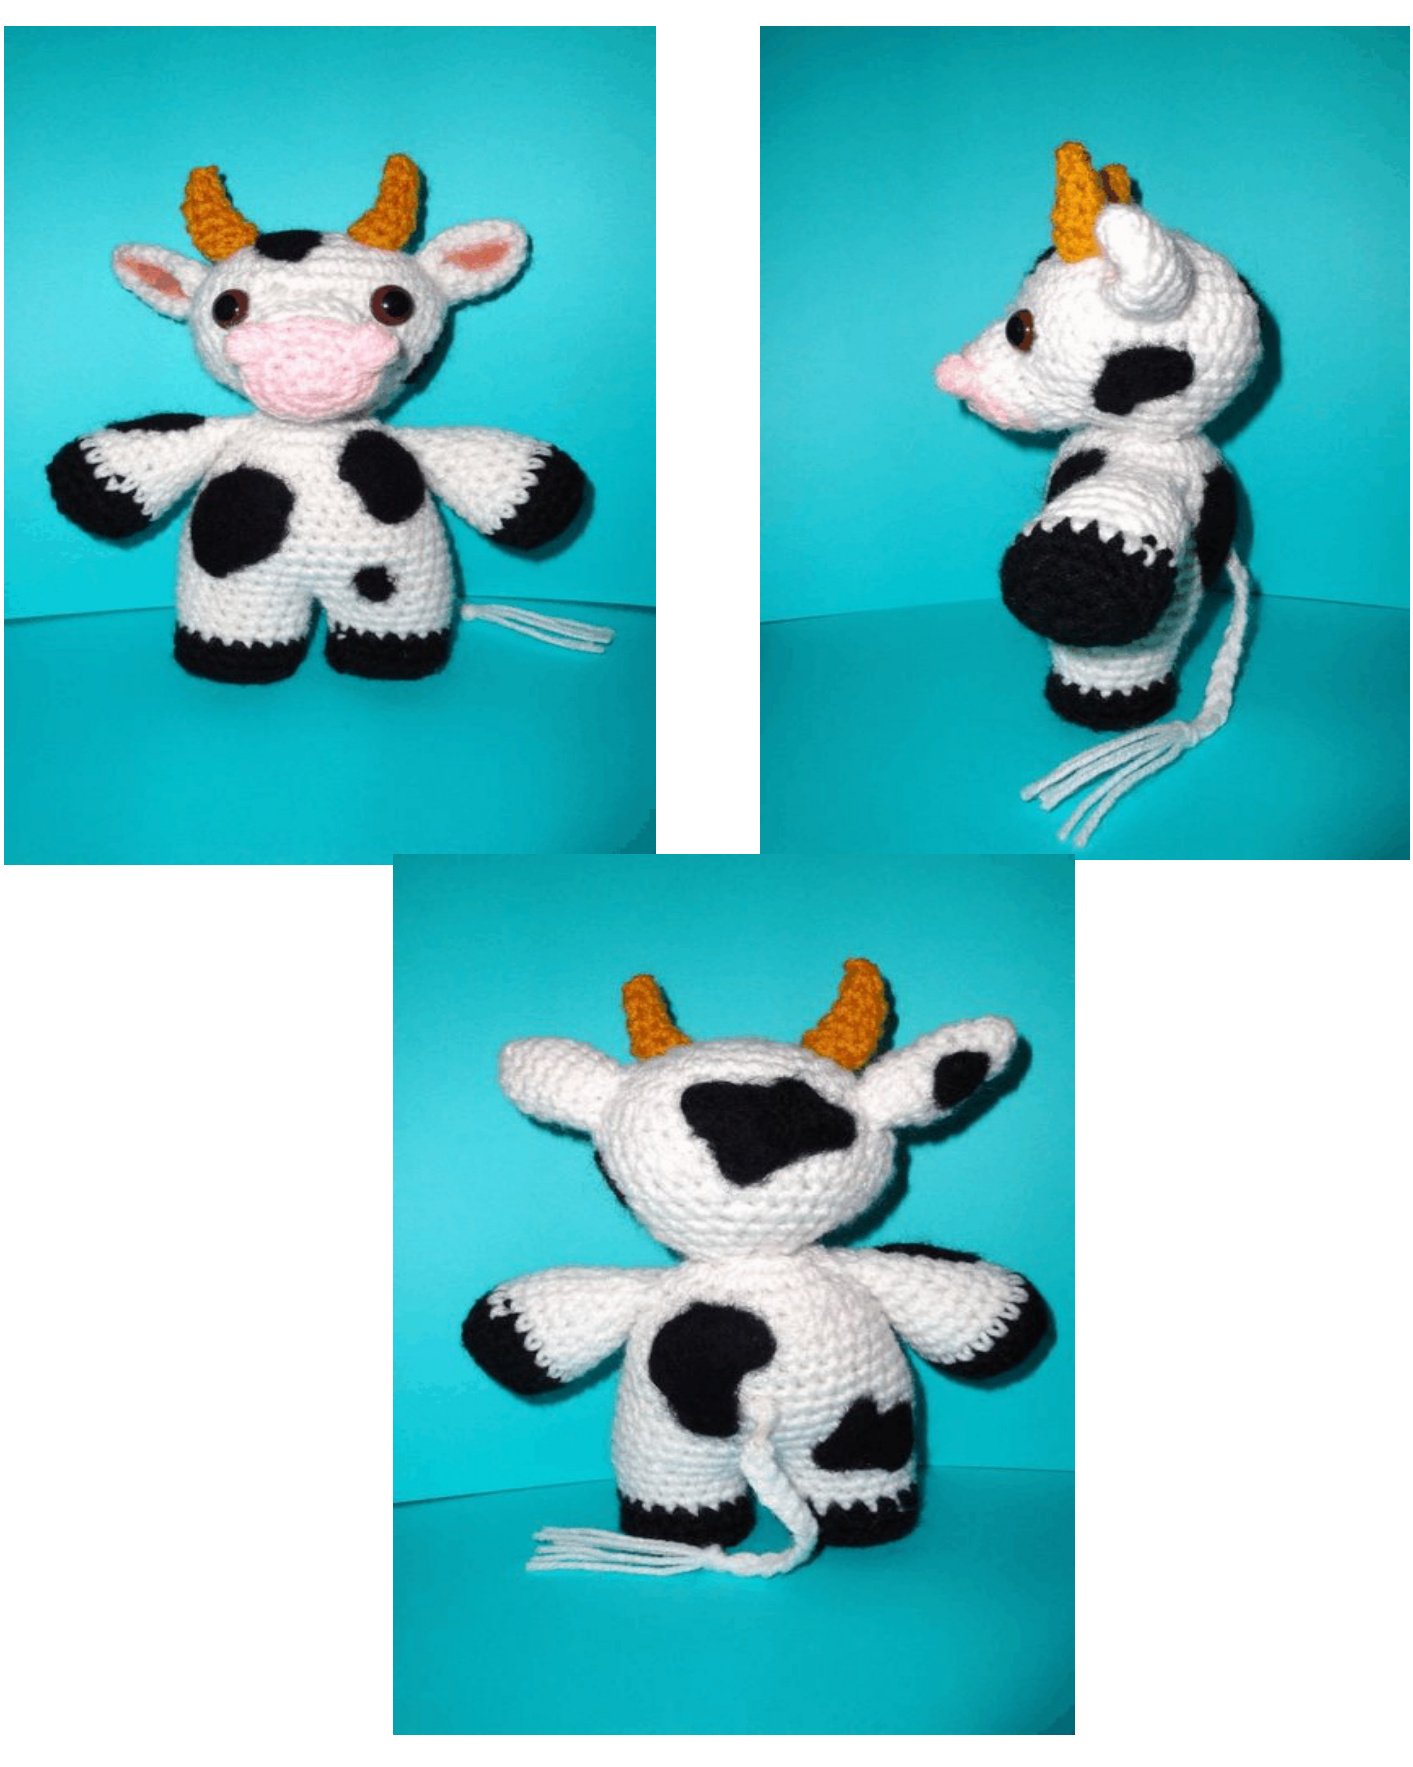
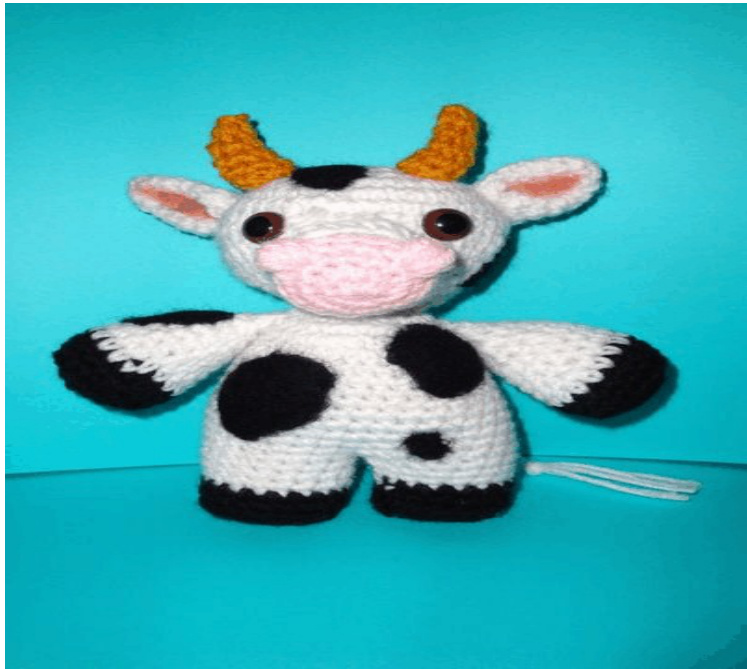
Amigurumi BULL
Amigurumi Pattern Designed by Sherry www.Chiwaluv.Etsy.com
This pattern is protected under Creative Commons Attribution-NoncommercialNoDerivative works 3.0
You may not use this pattern or doll produced from this Pattern for retail or commercial purposes. For more information, go towww.creativecommons.orq If you have any question while making the bull or found mistake in this pattern, send email to me at : Chiwaluv@comcast.net See more pictures of my amigurumi at: http://www.flickr.com/photos/chiwaluvchis/ MaterialsMaterials: · Acrylic yarn; black, white, pink · Crochet hook suitable for the yarn you use (I use an E) · two pair of 9 mm. safety eyes · Black roving wool · Polyester fiber fill · Sewing needle for yarn and needle punch for wool roving Finished Size: Approximately 7 1/2" tall to tips of horns Your finished bull might finish in bigger or smaller than mine depending on your tension and the yarn you use. Abbreviation I use: 1. = Round ch = chain sc = single crochet inc = increase (2sc in same stitch) dec = decrease (2sc worked together) sl st = slip stitch(es) FO = fasten off yarn, lv tail for sewing BLO = back loop only of next stitch \* = repeat directions between \* and \* as many as indicated I start crochet by making a Magic ring as in Japanese style. It makes the starting hole tight and secure. You can start in which ever way you feel comfortable. NOTE: Work in continuous spiral round; do not join rounds unless otherwise stated. Mark first stitch of each round, If the number goes up on the next row, increase to that number of stitches, if thenumber goes down, decrease to that number of stitches. HEAD: Make 1 In white 1. SC 6 2. sc inc to 12 3. sc inc to 18 4. sc inc to 24 5. sc inc to 30 6. sc inc to 36 7. sc inc to 42 8-10. sc 5, hdc 11, sc 10, hdc 11 , sc 5 11. sc dec to 36 12. sc dec to 30 13. sc dec to 24 14. sc dec to 18 15. sc dec to 12 stuff 16. sc dec to 6 FO lv long tail to attach to body NOSE: Make 1 begin with pink yarn, will need white also 1. SC 6 2. sc inc to 12 3. sc inc to 18 4. sc 4, make 5 dc bobble, sc 4, make 5 dc bobble,sc around to end of row. (to bobble; YO, insert hook in st, YO and draw up a loop, YO and draw through 2 loops on hook) 4 "times",YO and draw trough 5 loops on hook - 1 complete bobble. Change to White yarn here: 5.sc BLO around 6. sc 3, 2 dc in next 4 sts, sc 5, 2 dc in next 4 sts, sc 3, sl st lv long tail to sew to head, FO lightly stuff Chiwaluv.etsy.com Creative Commons Attribution-Noncommercial-NoDerivative Works 3 ODY AND LEGS: Make 1, you will be using white and black yal 1. sC 6 2. sc inc to 12 3. sc inc to 18 4. sc inc to 24 5. sc inc to 30 6. sc inc to 36 7-15. sc around 16. sc 18, sc in marked st, begin 1st leg (working on these sts) 17-20. sc around (18) change to black yarn here: 21 -22.sc around Iv long tail to sew on bottom of hoof, stuff body section..now work other leg. 23. repeat rows 17-22 for other leg. NOTE: If you don't want to needle punch your spots onto the body, then crochet black circles, in differnet sizes, using the same pattern as body, rows 1-6, stop on whichever row gives you the size circle you want. Stitch each circle to body, when your bull is completed. BOTTOM OF HOOF: make 2 with black yarn 1. SC 6 2. sc inc to 12 3. sc inc to 18 sl st FO EARS: make 2 , white or black, or one white one black 1. sc 4 2-8. sc inc two sts per row (18) Fo lv tail for sewing 9. Pinch bottom together and sew to head, note photos for placement Note: Optional, I add a little human blush in the ears for drama effect. Chiwaluv.etsy.com Creative Commons Attribution-Noncommercial-NoDerivative Works 3 HORNS: 1-2. sc5 3. BLOsC5 4-5. sc5 6. sc decto 4 7. scdecto3 8. sc dec to 2, FO, work in end, shape like a horn, note photos for placement ARMS: Make 2 begin with black yarn 1. SC 6 2. sc inc to 12 3. sc inc to 18 4. BLO sc 18 5-6. sc 18 around Change to White here: 7. sc 18 8-10. sc dec to 16 11-12. sc dec to 12 13. sc dec to 8 FO lv tail to sew to body sides TAIL: Make 1 white yarn Cut 6 pieces of yarn 12" long, section into 3 (2 strands per section, braid, tie a knot at botton of braid to secure, attach at other end to bottom back of bull. Note Photo for placement. Optional: Now you may needle punch your wool roving onto your Bull for his spots. Being careful not to poke you! Or attach your crocheted circles. TA DA! Your BULL is FINISHED. ENJOY! Chiwaluv.etsy.com Creative Commons Attribution-Noncommercial-NoDerivative Works 3 Creative Commons Attribution-Noncommercial-NoDerivative Works 3