Little Piggie Amigurumi Ornament
Little Piggie Amigurumi Ornament
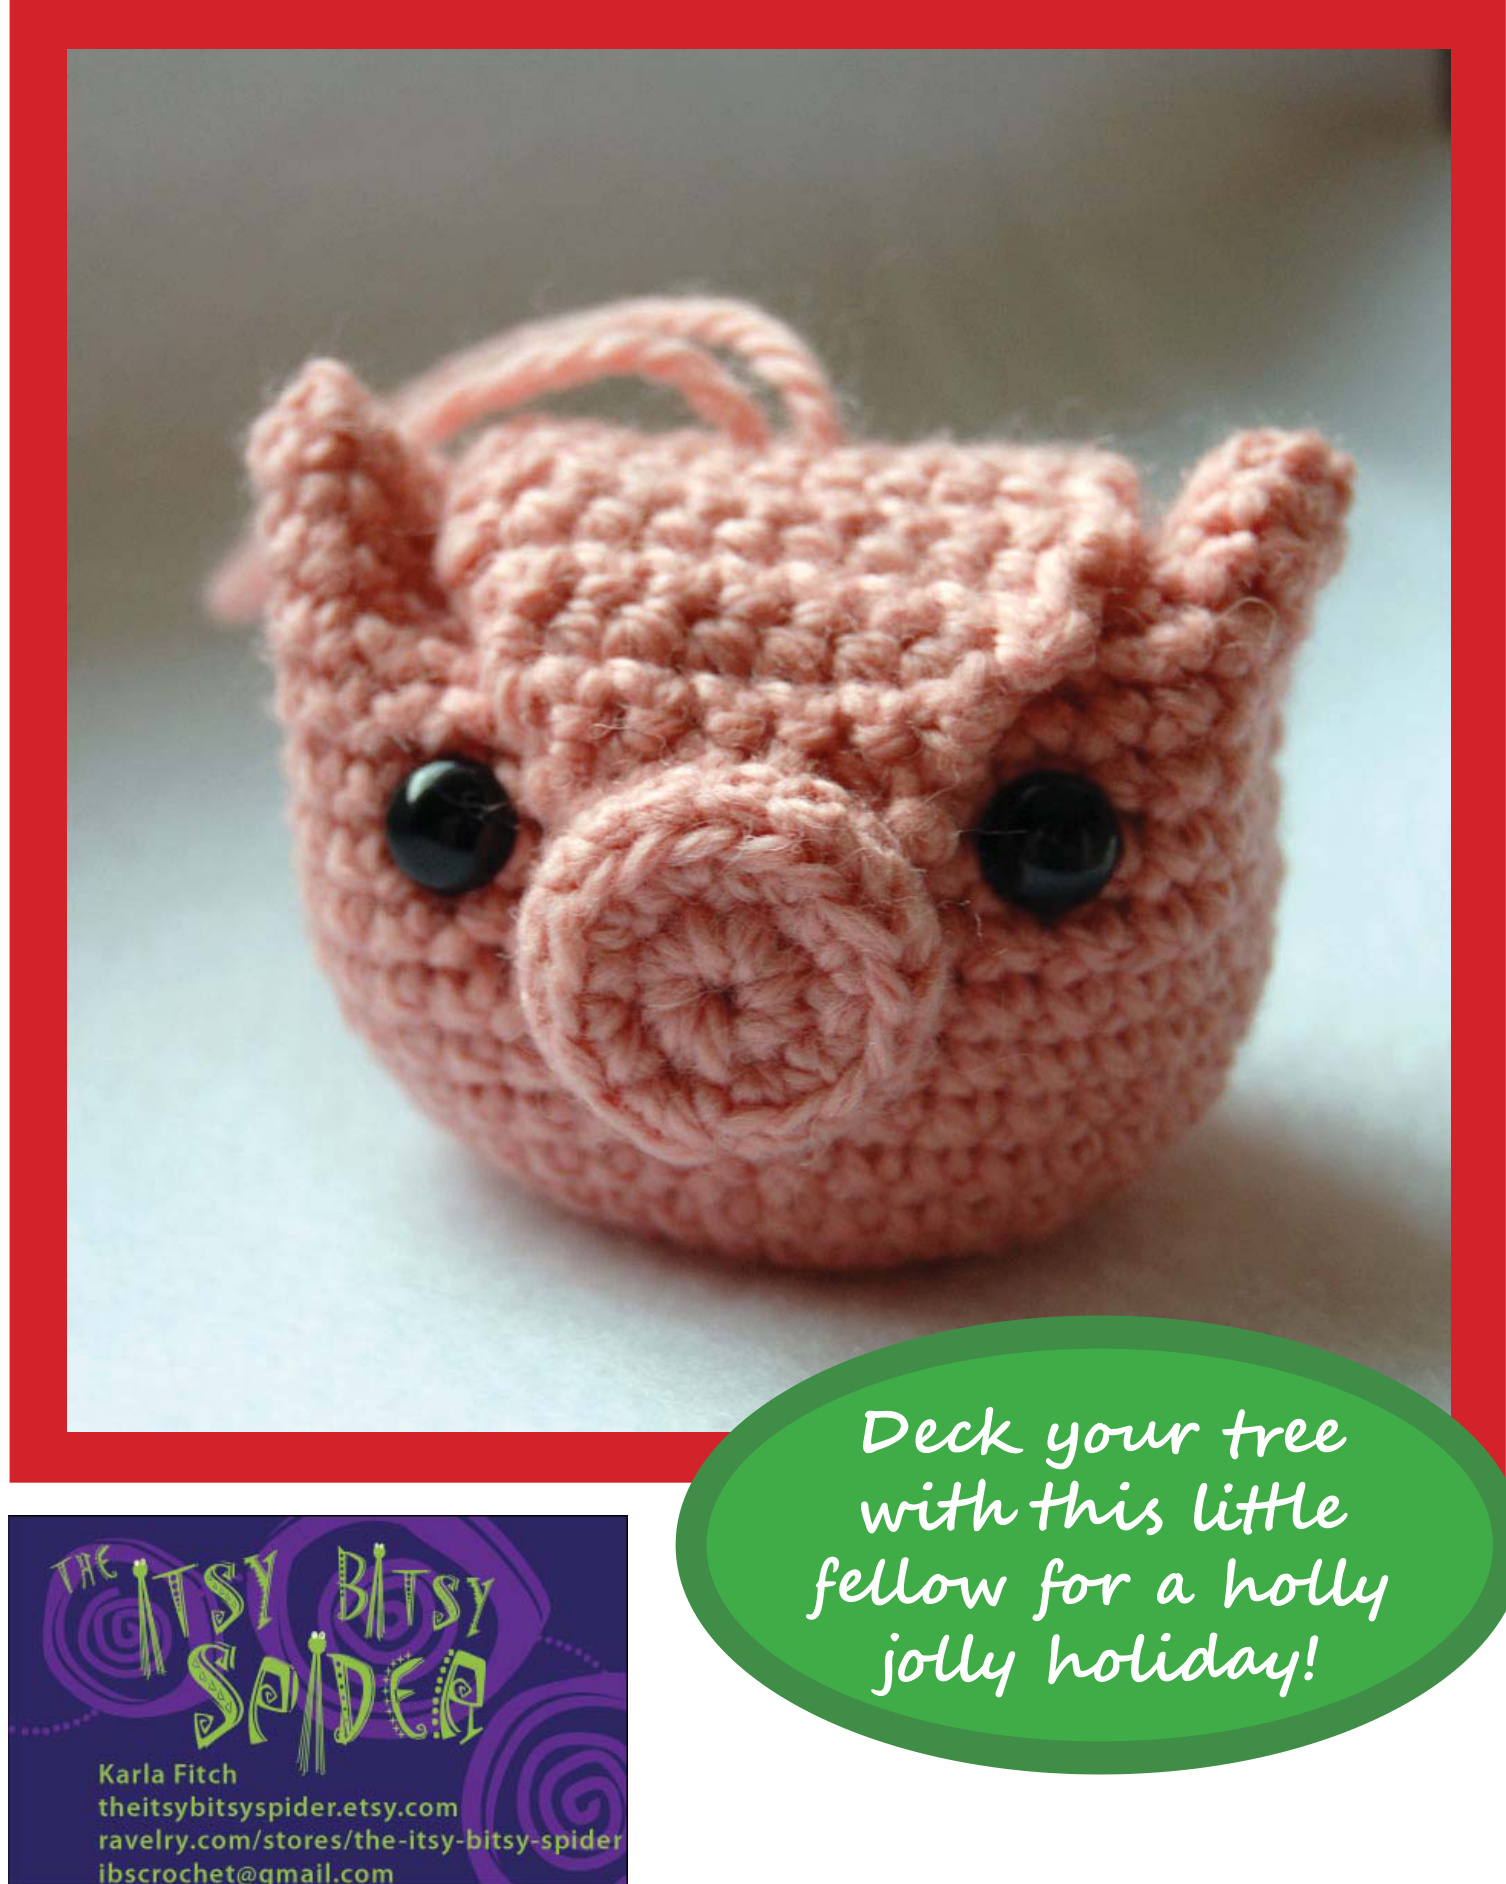
A perfect gift for pig lovers year round, this little piggie cried "wee wee wee" all the way to the Christmas tree!
MATERIALS
Small amounts of pink worsted weight weight, or desired colors (see pattern notes for specific yarns used) Fiber fill 2 9mm plastic doll eyes (optional) · Size E crochet hook (or size needed to obtain gauge) Yarn needle Stitch marker
STITCHES AND ABBREVIATIONS USED IN THIS PATTERN
CH chain stitch SC single crochet DECR decrease ST stitch STS stitches MM move marker FO finish off For the project shown in the photographs, I used Patons Classc Merino yarn in Water Chestnut. Note: When determining whether to use buttons or other small embellishments, keep in mind the age of the intended recipient. Doll eyes and other decorations may pose a choking hazard for children under three. A safer alternative for the very young is to sew eyes and any other decorations using embroidery thread or yarn.
PART 1: HEAD
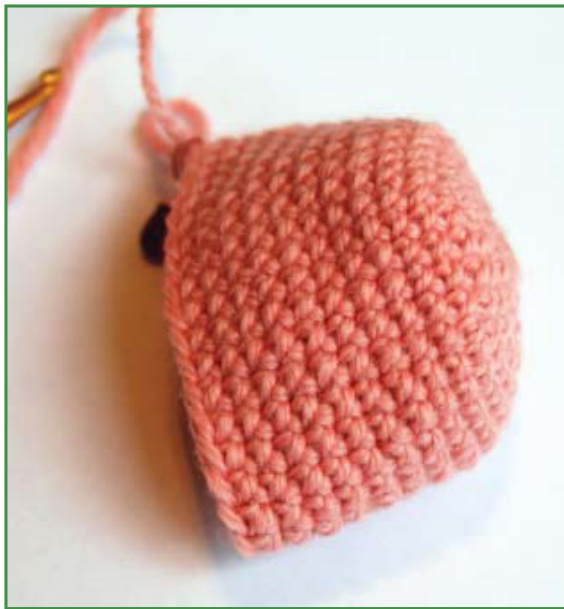
Figure 1: Head The head portion of the amigurumi piggie is made in one piece by creating a circle and then bringing the sides up into a cylinder. The finished piece looks like a little cup. Round 1: CH 2. 6 SC in second chain from hook. Place stitch marker in the last SC to mark the end of the round. Round 2: 2 SC in each ST around (12 SC). MM. Round 3: $^{\star}2$ SC in first ST, 1 SC in next. Repeat from \* around (18 SC) MM. Round 4: $^{\star}2\,\mathsf{S C}$ in first ST, 1 SC in each of next two STS. Repeat from \* around (24 SC) MM. Round 5: $^{\star}2\,\mathsf{S C}$ in first ST, 1 SC in each of next three STS. Repeat from \* around (30 SC) MM. Round6: $^{\star}2$ SC in first ST, 1SC in each of next four STS. Repeat from \* around (36 SC) MM. Rounds 7-15: SC in each ST around. MM. FO after round 15. Leave a long tail (about 18 inches) for sewing.
PART 2: PRELIMINARY ASSEMBLY
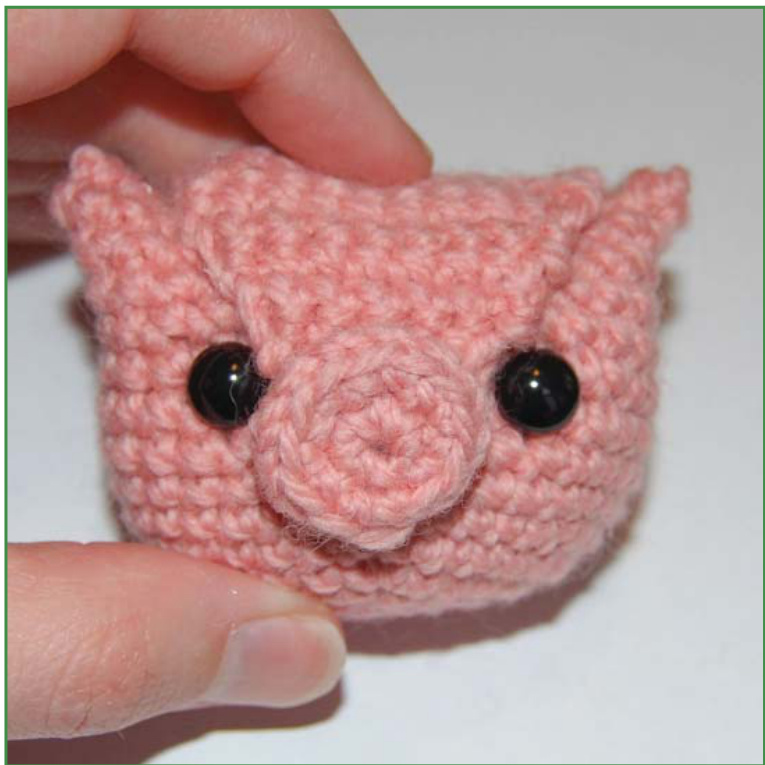
1. If using plastic safety eyes, attach eyes about 1" apart at roughly round 12. (See Figure 2.) 2. The pig head should look like a smallcup, with the top open. Pinch the top shut, collapsing the circle to a straight line. Using the tail left after finishing off the piece, begin stitching the two sides together with a whip stitch. (See Figure 3.) 3. When a small amount of space remains, stuff the piece. Continue whip stitching the top closed until no gap remains. (See Figure 4.)
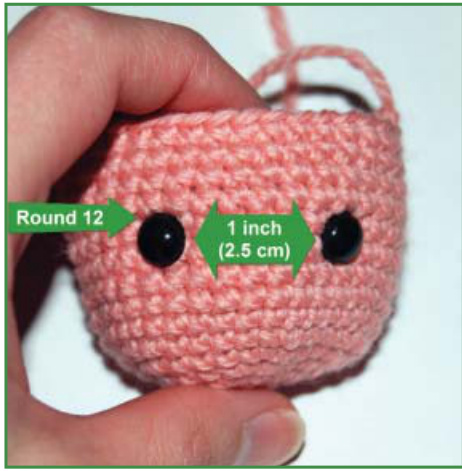
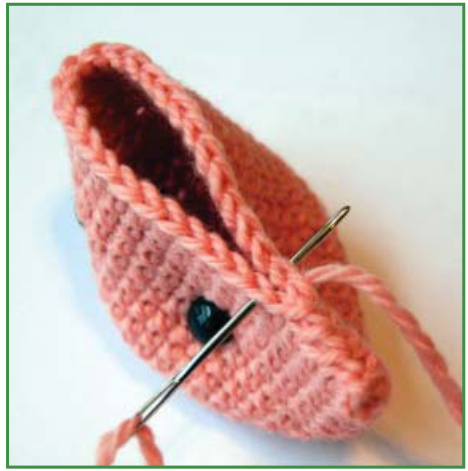
Figure 3: Top seam
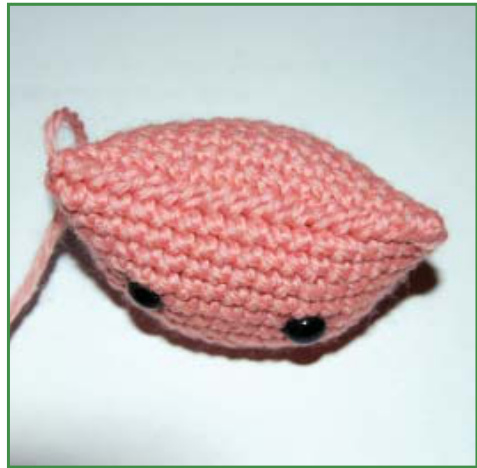
Figure 4: Sewn head
PART 3: FORM EARS
1. With eyes facing out and the end of the yarn you used to stitch the head shut coming out the right side of the piece, count backward 3 or 4 stitches. (See Figure 5.) Pass your needle under the stitches and pull the end out toward the center of the head. We'll call this point A. (See Figure 6.)
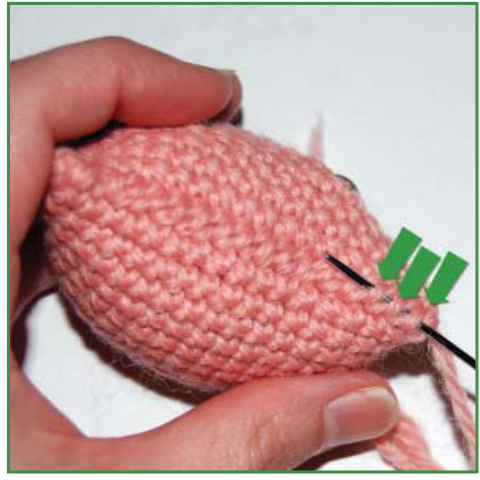
Figure 5: Three stitches in
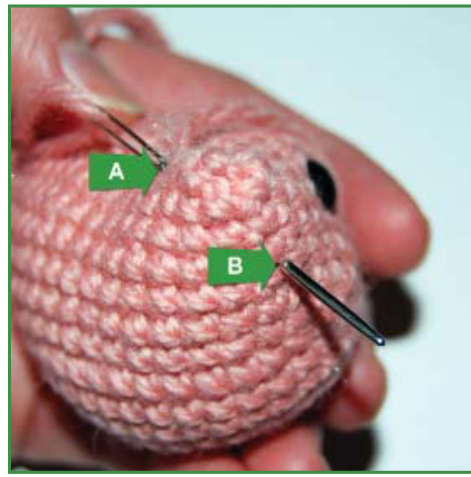
2. Pass the needle back through the head toward the right outside edge. Your needle should emerge 3-4 rounds below where you finished sewing the gap closed. This is point B. (See Figure 6.) 3. Pass the needle between points A and B a few more times. Right ear formed. 4. After finishing the right ear, pass the needle all the way through the center of the head to come out the left side, about 3-4 rows below the top seam. This is point C. 5. Pass the needle back through the head toward the center, roughly the same distance in from the edge as point A. We'll call this point D. 6. Pass the needle between points D and C a few more times. Bring the yarn in toward the center of the head and finish off.
PART 4: FOREHEAD
To make the forehead, you will pick up stitches across the back of the head. After a few rows worked even, you will decrease at the beginning of each row to make a triangular shape.
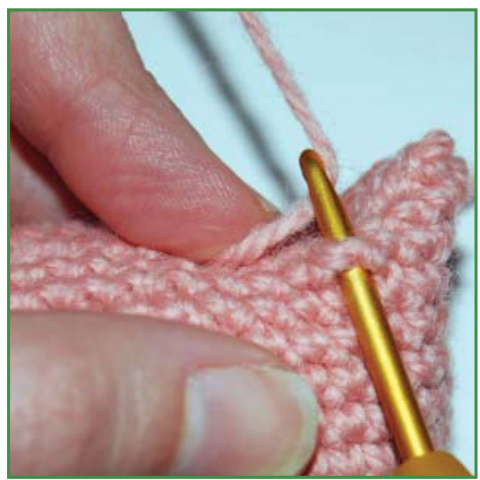
Figure 7: Pick up stitches Row 1: Pick up roughly 11 stitches along the back of the head, about three rows down from the seam. (See Figure 7.) CH 1 and turn.
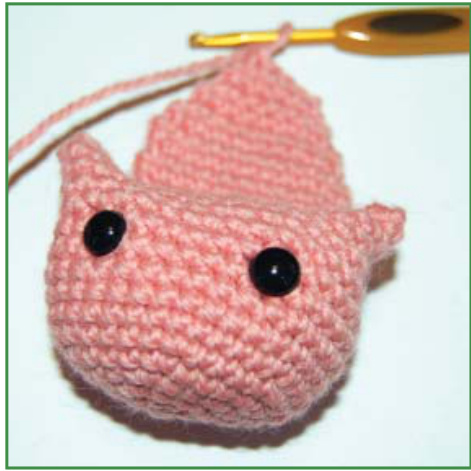
Figure 8: Forehead piece Row 2: SC across. CH 1 and turn. Row 3: SC across. CH 1 and turn. Row 4: SC across. CH 1 and turn. Row 5: SC across. CH 1 and turn. Note: for the remaining rows, do not CH 1 before turning. This results in a 1 stitch decrease per row. Row 6: SC across. Turn. Continue reducing until 4 SCs remain. FO. Leave a tail to attach the forehead to the rest of the piece.
PART 5: SNOUT
The snout portion of the amigurumi piggie is made in one piece by creating a circle and then bringing the sides up into a cylinder. The finished piece looks like a little cup. Round 1: CH 2. 6 SC in second CH from Hook. Place stitch marker in the 6th SC to identify last stitch. Round 2: 2 SC in each ST around (12 SC). MM
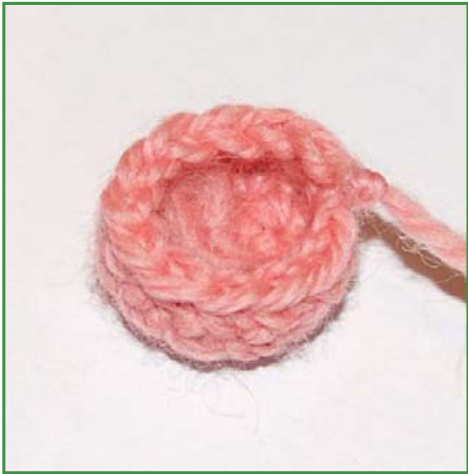
Round 3: Working in outside loops only, 1 SC in each ST around (12 SC). MM Round 4: SC in each ST around. FO, leaving a tail to sew to the head. Row 1: Ch 7. Turn. Row 2: SC in first CH. 3 SC in second CH. 2 SC in second CH. 1 SC in each of the four remaining chains and FO, leaving a tail to sew.
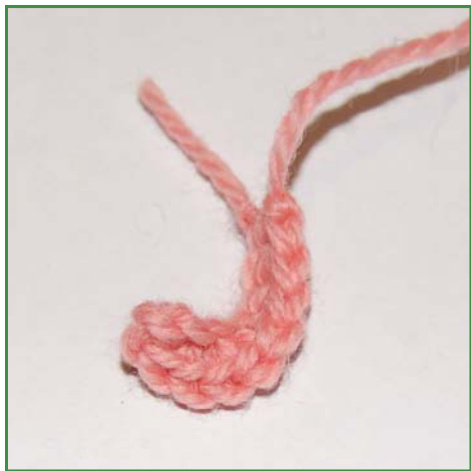
Figure 10: Tail
PART 7: FINAL ASSEMBLY
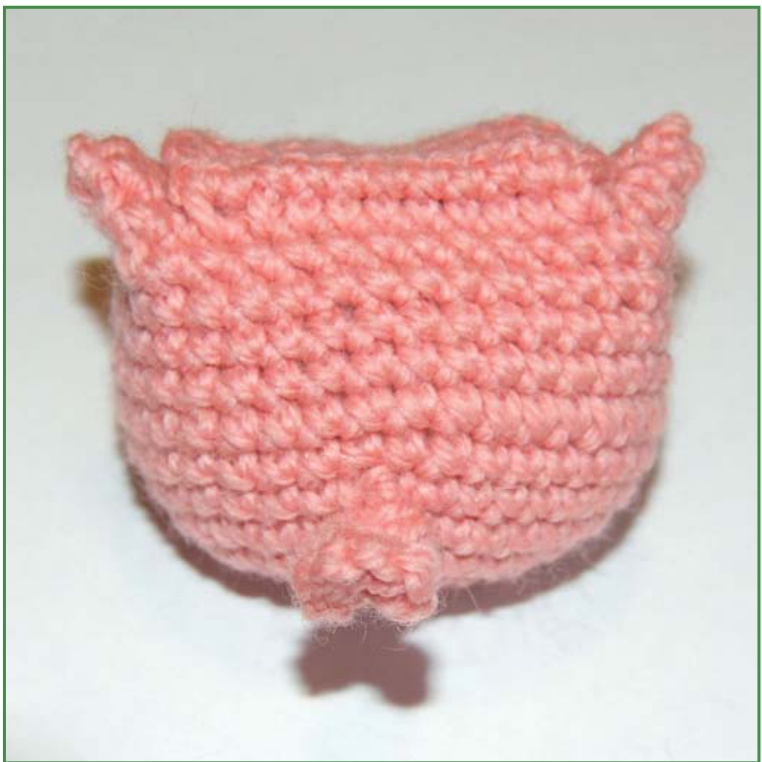
1. Fold the forehead piece over so that the point falls between the pig's eyes and stitch in place. (See Figure 11.) 2. Attach the snout over the base of the forehead so it covers the last row from the forehead piece. 3. Attach the tail on the reverse side of the ornament, near the base. 4. Optional - Add a loop for hanging.
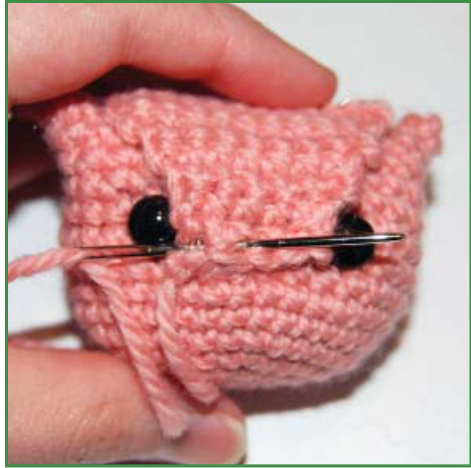
Figure 11: Sew forehead