Papagena
scarf by Caoua Coffee
materials:
330yds/ $300\mathrm{m}$ heavy lace weight yarn in a solid or semisolid color. (sample: 2/15NM 4ply, $40\%$ cashmere/ $60\%$ viscose, ColourMart) US2 / 2.75mm needles (circular or straight) or size needed to produce a fabric you like ${\sim}10$ inches of smooth scrap yarn tapestry needle
size:
6x70 inches (15x175cm)
abbreviations:
CO $=$ cast on k $=\,\mathrm{knit}$ ktbl $=$ knit through the back loop k2tog $=$ knit 2 together nupp $=$ bobble made by working multiple sts into 1 st on RS and purling all sts together on WS (see stitch explications below!) $=$ purl pfb $=$ purl into front and back (thus increasing 1 stitch) RS $=$ right side / public side sl wyf $=$ slip stitch as if to purl while holding yarn in front
;12k1p2sso $=$ centered double decrease, worked like this: slip two stitches together as if to knit, knit 1, pass 2 slip stitches over isk $=$ slip 1 as if to knit, slip stitch back onto left needle, knit 2 together through the back loops it(s) $=$ stitch(es) 70 $=$ yarn over 702 $=$ double yarn over (i.e. wrap the yarn around needle twice) NS $=$ wrong side / private side 3-t0-2 $=$ decrease 3 stitches into 2 stitches by working a sl2klp2sso on RS and a pfb on WS (thus decreasing 2 sts on RS and increasing 1 st on WS)
stitch explications:
nup: on the Rs: [knit into the stitch, but don't slip the stitch from your left needle, yo] 3 times knit a last time into that same stitch, then slip it off your left needle. you now have 7 sts on your needle instead of 1 st. on the Ws: purl all 7 sts together, i.e. you are again left with only 1 st.
construction notes:
the scarf consists of a border, the main pattern and another border. you first knit one border and place it on a piece of scrap yarn. then you knit the second border plus the main pattern of the scarf and a transition chart. at the end, you just graft the two pieces together. as written, the pattern makes for a rather narrow scarf. if you would like to get a wider scarf or stole, simply knit more repeats widthwise. (pattern repeats are marked in the charts). for each additional repeat widthwise, just cast on 24 extra stitches - and of course: you will need more yarn.
instructions:
first border:
very loosely CO 45 stitches (I used a knitted cast on, which works exceptionally well). work the first row as follows: WS: sl wyf, purl to end work rows 1 - 42 of border chart A once. work rows 1 - 12 of border chart B once. (attention: work only to row 12, don't work the whole chart!) cut the yarn, leaving a tail long enough to weave in later. put all the stitches of your first border on a piece of smooth scrap yarn.
second border:
make another border as described above, this time don't cut yarn at the end but continue by working rows 13 - 42 of border chart B once.
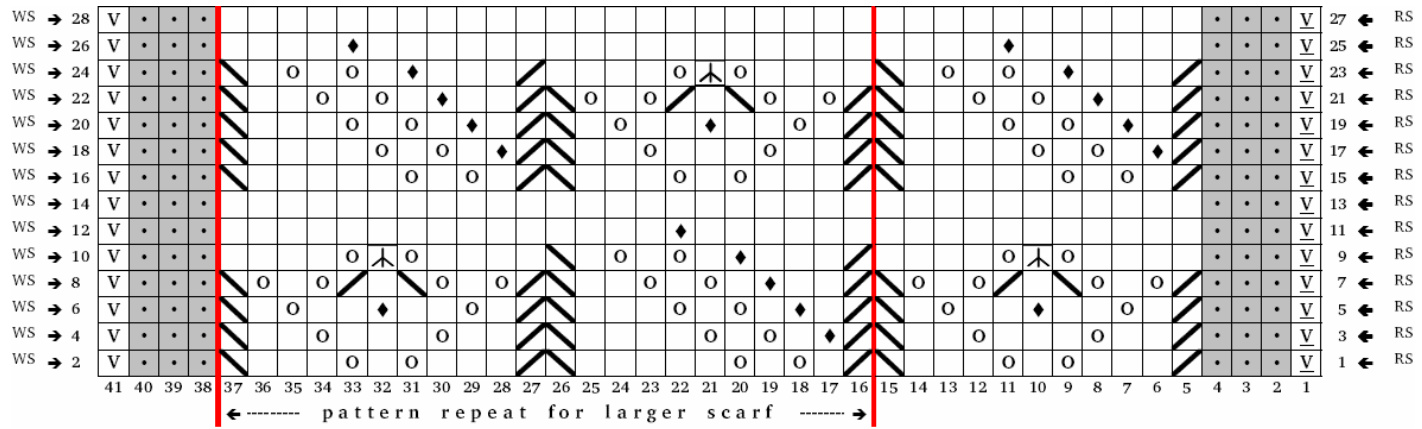
main pattern:
work rows 1 - 28 of the main pattern chart. repeat these 28 rows until scarf is about 8 inches shorter than desired length. end after row 14 of the main pattern.
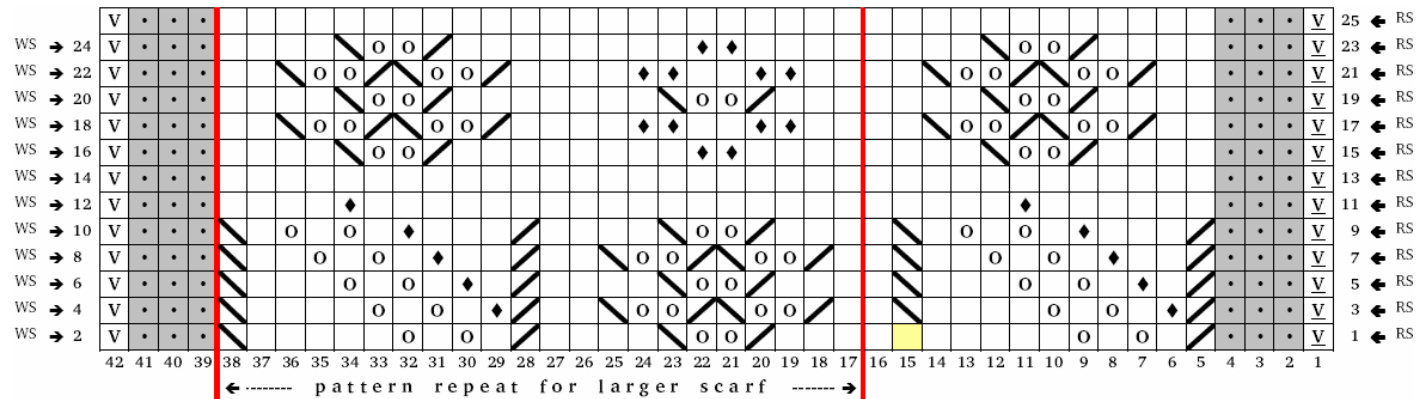
border transition:
work rows 1 - 25 of the border transition chart once (it ends with a RS row, don't purl back!) cut yarn, leaving a tail of at least 40 inches (1m) to graft the scarf to the first border.
finishing:
put the stitches of your first border back onto a knitting needle (with RS facing, needle tip pointing to the right). then hold the first border and the end of the long scarf together with RS outwards (Ws facing together), both needle tips pointing in the same direction. thread the long yarn tail on a tapestry needle and kitchener stitch the two pieces together. weave in all ends and block lightly.
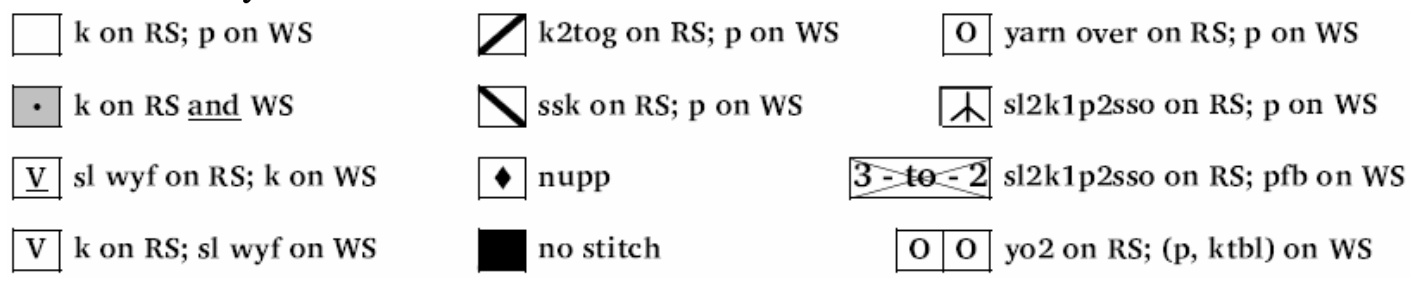
stitch keys:
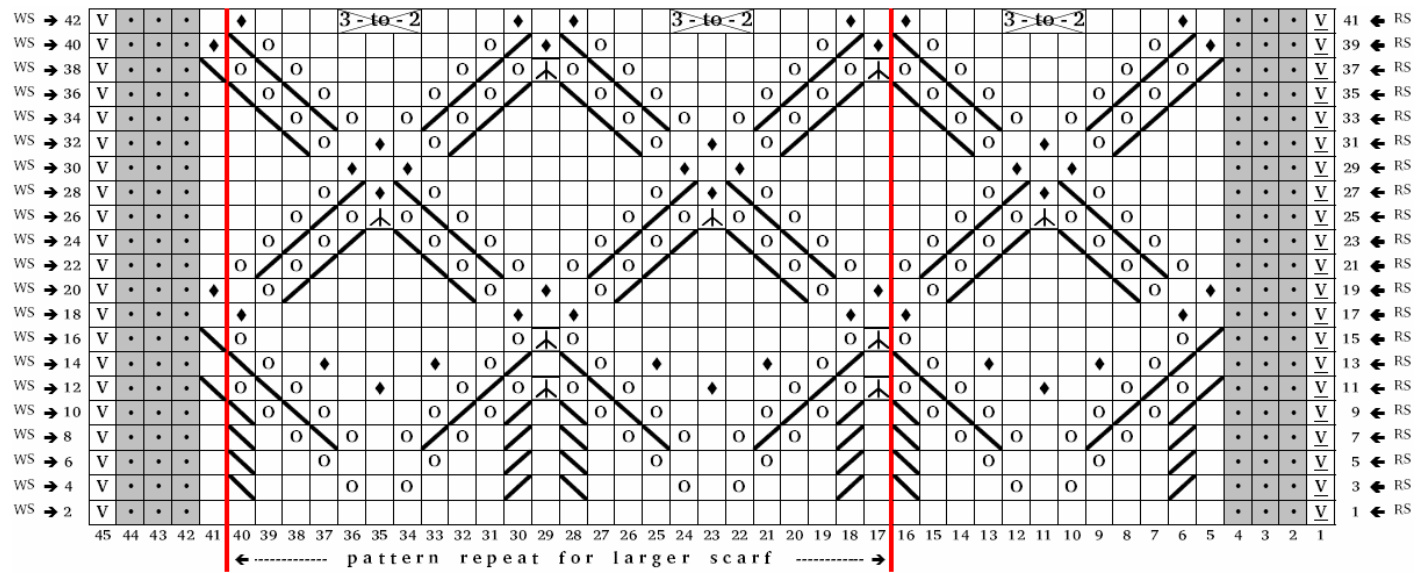
charts:
note: nearly every line of the charts is worked twice, first as a RS row, than backwards as a WS row. make sure you pay attention to the different meanings of the chart keys (see above) depending on whether you are working them on the RS or on your way back on the WS! border A:
border B:
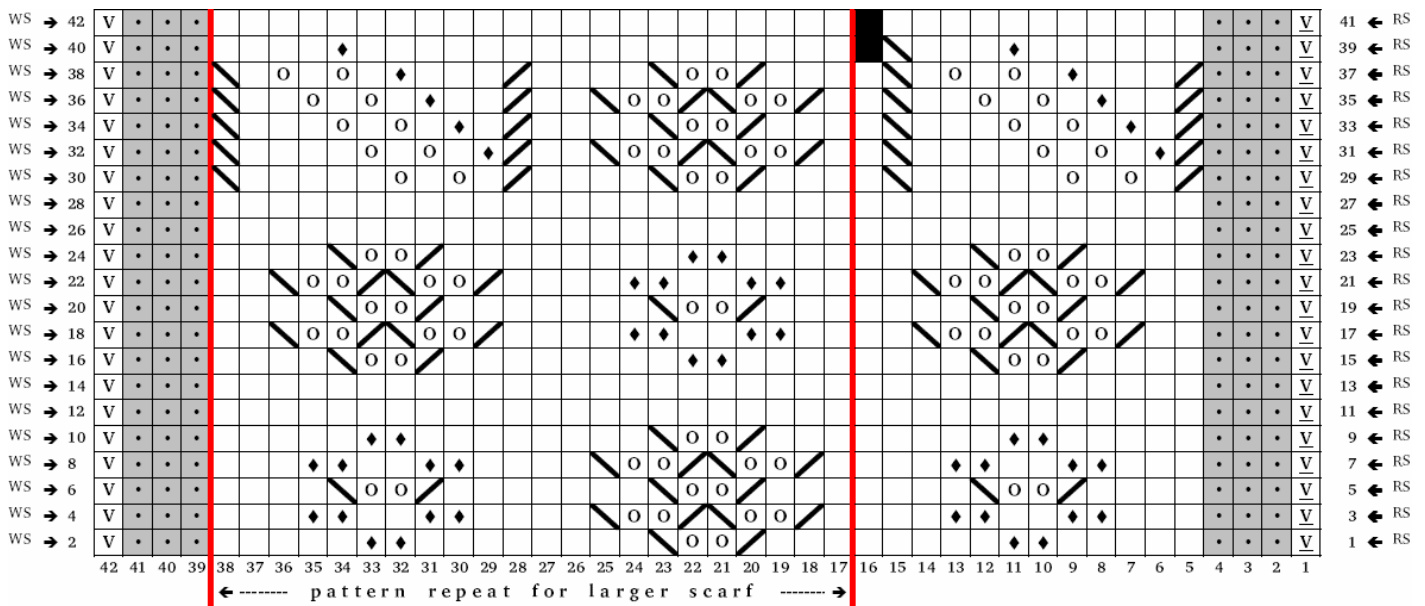
note: st number 15 in row 1 is a simple knit (no ssk!). this increases the stitch count to match the first border later and to permit grafting the same number of stitches.
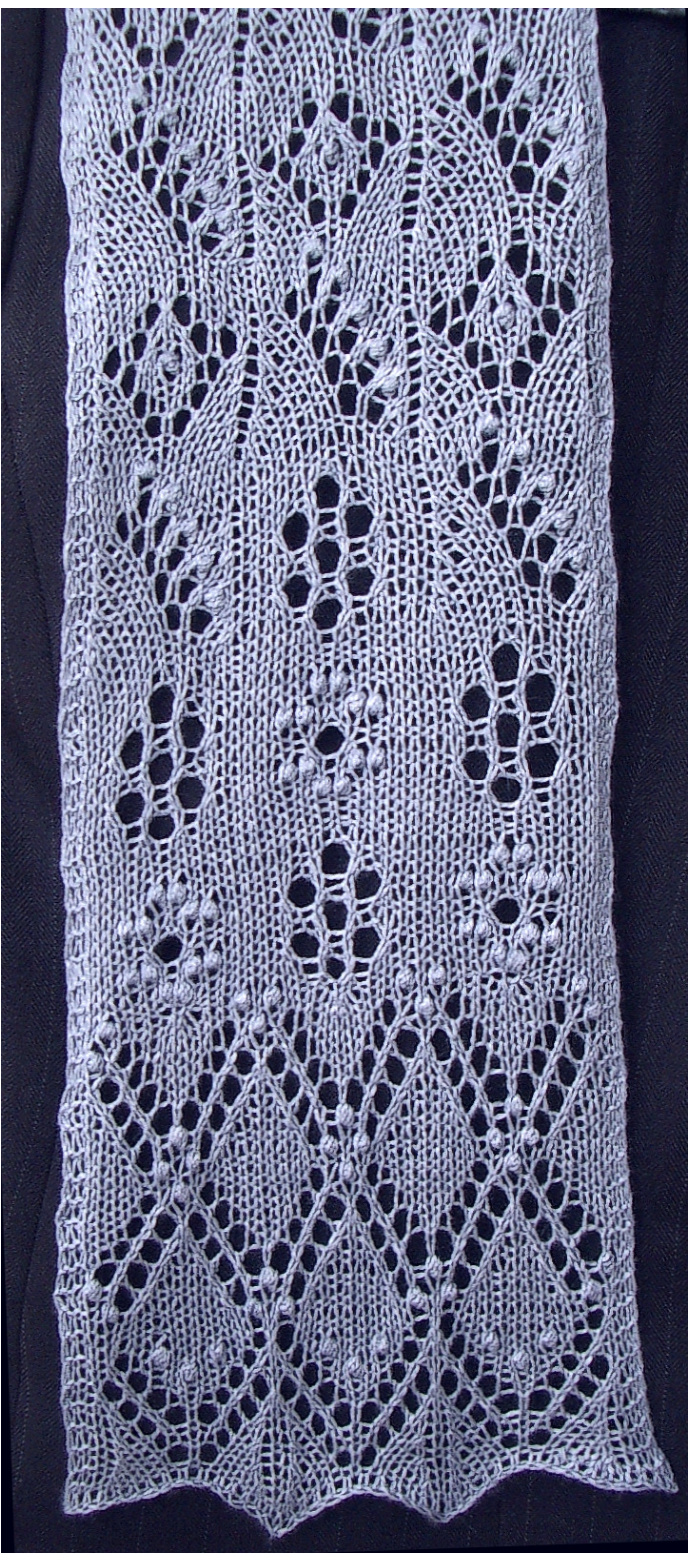
about this pattern:
Papagena is this young, pretty and playful woman in W.A. Mozart's opera The Magic Flute', whom I always imagined to be a sort of flower girl, as she enchants the birdcatcher Papageno. this very feminine, whimsical scarf would suit her ideally. all three patterns come from an Estonian stitch pattern book ('Haapsalu sall'by Siri Reimann, Aime Edasi; Apollo) that is a treasure trove of traditional Estonian patterns for fine lace scarfs. I used the patterns with little modifications to make them flow smoothly one into the next.


