Cactuar Amigurumi
By Amy S. Lee Not intended for small children This pattern is not to be sold. Finished projects of this pattern are not to be sold. This work is licensed under the Creative Commons Attribution-NoncommercialNo Derivative Works 3.0 United States License. To view a copy of this license, visit http://creativecommons.org/licenses/by-nc nd/3.0/us/ or send a letter to Creative Commons, 171 Second Street, Suite 300, San Francisco, California, 94105,USA.
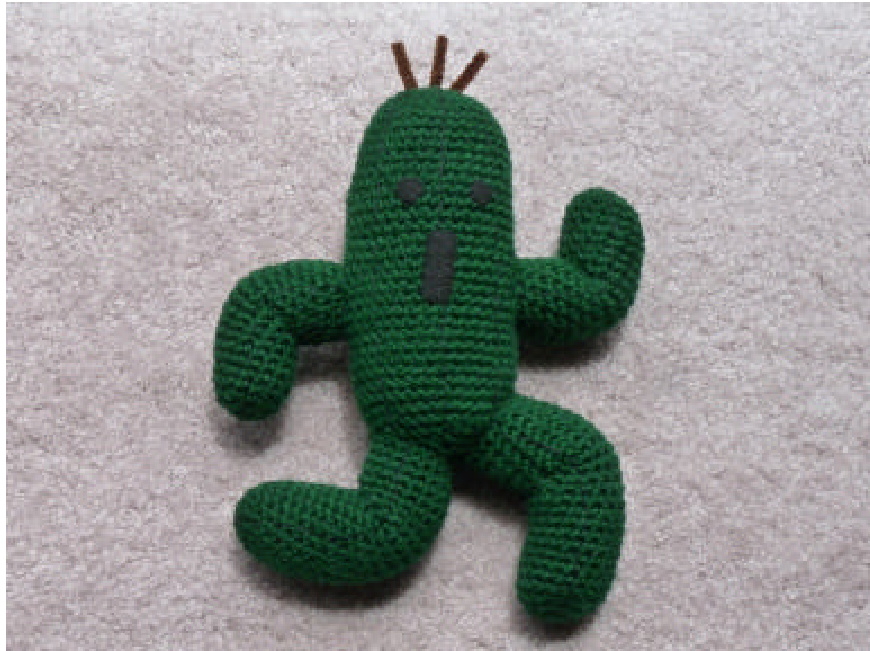
Any fan of the Final Fantasy video games has most likely come across these enemies. They're cute. They offer lots of experience. They don't have a lot of hit points. They can teach you magic. They're deadly! 1,000 needles or even worse 10,000 needles can KO any unwary adventurer. Make your own Cactuar for fun or cosplay. This is an easy project using mostly single crochet and slip stitches. This pattern is worked in continuous rounds. Stitch markers will help with identifying the last stitch of eachround. Finished size: about 11 inches high by about $7~\%$ inches wide Gauge: 4 stitches by 5 rows equals one inch Stitches: $\mathbf{S}\mathbf{C}=$ single crochet $\mathrm{CH=}$ chain $\mathrm{SS}=$ slip stitch ${\bf I N C}=$ increase (two single crochet stitches worked in the same space) $\mathrm{DEC=}$ decrease (a single crochet stitch worked over two spaces) [stitches] $=$ group to be repeated
Materials Used:
Red Heart Super Saver yarn in hunter green (worsted weight) (This yarn was the yarn used in the picture; any worsted weight yarn should befine) Size G crochet hook Brown Pipe cleaners (chenille stems) Stuffing (such as polyfil or rags) Black felt Green sewing thread Black sewing thread Sewing needle Yarn needle Black embroidery thread Stitch markers (optional)
Body:
Round 1: 6 SC using the finger wrap/magic circle technique (6) (Alternately you can do this for Round 1: CH2, work 6 SC in the first SS (6) Round 2: INC around (12) Round 3: [SC, INC] around (18) Round 4: [SC, SC, INC] around (24) Round 5: [SC, SC, SC, INC] around (30) Round 6: [SC, SC, SC, SC, INC] around (36) Round 7 - 32: SC around (36)
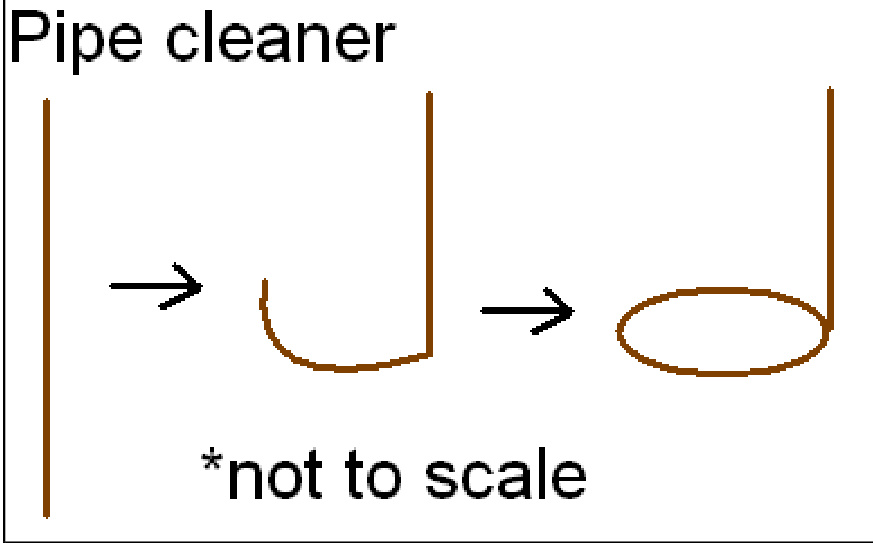
Take the pipe cleaners and bend each one $1\%$ inch from the end. Make a small loop at the bend with the end that is NOT the $1\%$ inch side. Insert one of the pipe cleaners though the center of the top of the head with the loop on the inside. Add the other two pipe cleaners next to the center one. Stuff the body most of the way. Round 33: [SC, SC, SC, SC, DEC] around (30) Round 34: [SC, SC, SC, DEC] around (24) Round 35: [SC, SC, DEC] around (18) Round 36: [SC, DEC] around (12) Finish stuffing the body Round 37: DEC around (6) Stitch the hole closed and hide the tail inside the body
Leg (make two):
(Alternately you can do this for Round 1: CH 2, work 6 SC in the first SS (6)) Round 2: INC around (12) Round 3: [SC, INC] around (18) Round 4: SC around (18) Round 5: SC around (18) Round 6: SC around (18) Round 7: SC around (18) Round 8: SC around (18) Round 9: SC around (18) Round 10: SC around (18) Round 11: SC around (18) Round 12: SC around (18) Round 13: SC around (18) Round 14: SC around (18) Round 15: SC around (18) Round 16: SC around (18) Round 17: SC around (18) Round 18: SC around (18) Round 19: SC around (18) Round 20: SC around (18) Round 21: SC around (18) Round 22: SC around (18) Round 23: SC around (18) Round 24: SC around (18) Leave long tails for attaching to the body Stuff the leg
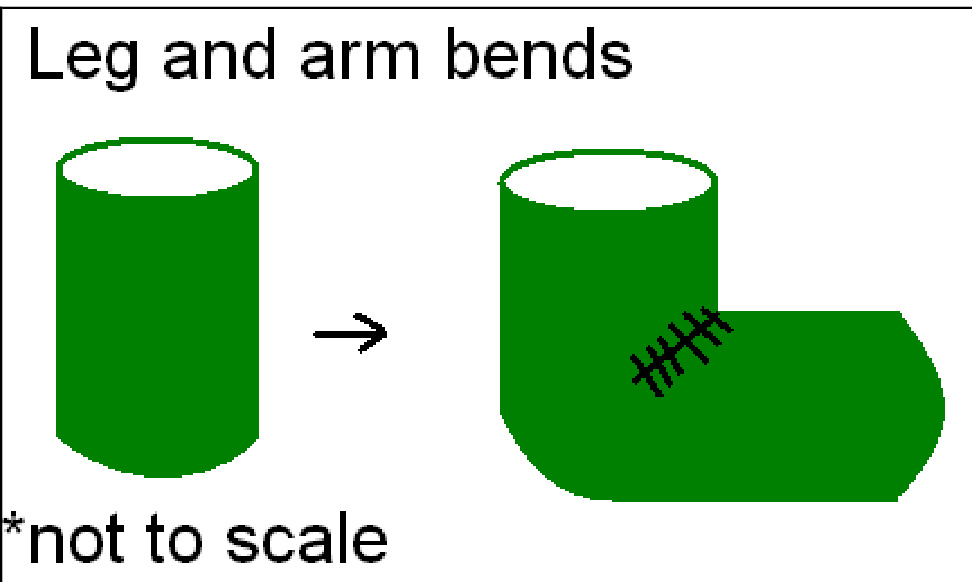
Bend the leg at round 10 (about a 90 degree angle) Using the green thread and a needle sew the $7^{\mathrm{th}}$ and $13^{\mathrm{th}}$ rounds half way around together to keep the leg bent
Arms (make two):
Round 1: 5 SC using the finger wrap/magic circle (5) Round 2: INC around (10) Round 3: [SC, INC] around (15) Round 4: SC around (15) Round 5: SC around (15) Round 6: SC around (15) Round 7: SC around (15) Round 8: SC around (15) Round 9: SC around (15) Round 10: SC around (15) Round 11: SC around (15) Round 12: SC around (15) Round 13: SC around (15) Round 14: SC around (15) Round 15: SC around (15) Round 16: SC around (15) Round 17: SC around (15) Round 18: SC around (15) Round 19: SC around (15) Round 20: SC around (15) Leave long tails for attaching to the body Stuff the arm (see above picture) Bend the arm at round 11 (about a 90 degree angle) Using the green thread and a neede sw the $8^{\mathrm{th}}$ and $14^{\mathrm{th}}$ rounds half way around together to keep the leg bent Shape by hand
Assembly:
Using the long tails sew the legs onto the bottom of the body, like in the picture Sew on the arms with the long tails $9.1\mathrm{cm}$ from the top of the head with one arm pointing upward and the other downward Using the embroidery thread stitch eight vertical lines, evenly spaced on the body and four evenly spaced lines on the arms and legs Cut out two circles from the felt with a diameter of $1.5\mathrm{cm}$ , those will be the eyes The mouth is $3.15\mathrm{cm}$ long and $1.5\mathrm{cm}$ wide. Round off the mouth edges. Sew on the eyes and mouth with black thread. The eyes should be placed $1.7\mathrm{cm}$ inward from the sides, have $2.1\mathrm{cm}$ between them and be $5.6\mathrm{cm}$ from the top of the head Sew on the mouth $1.9\mathrm{cm}$ downward from the eyes and $3.5\mathrm{cm}$ inward form the sides. This is roughly the size the eyes and mouth should be

Enjoy!


