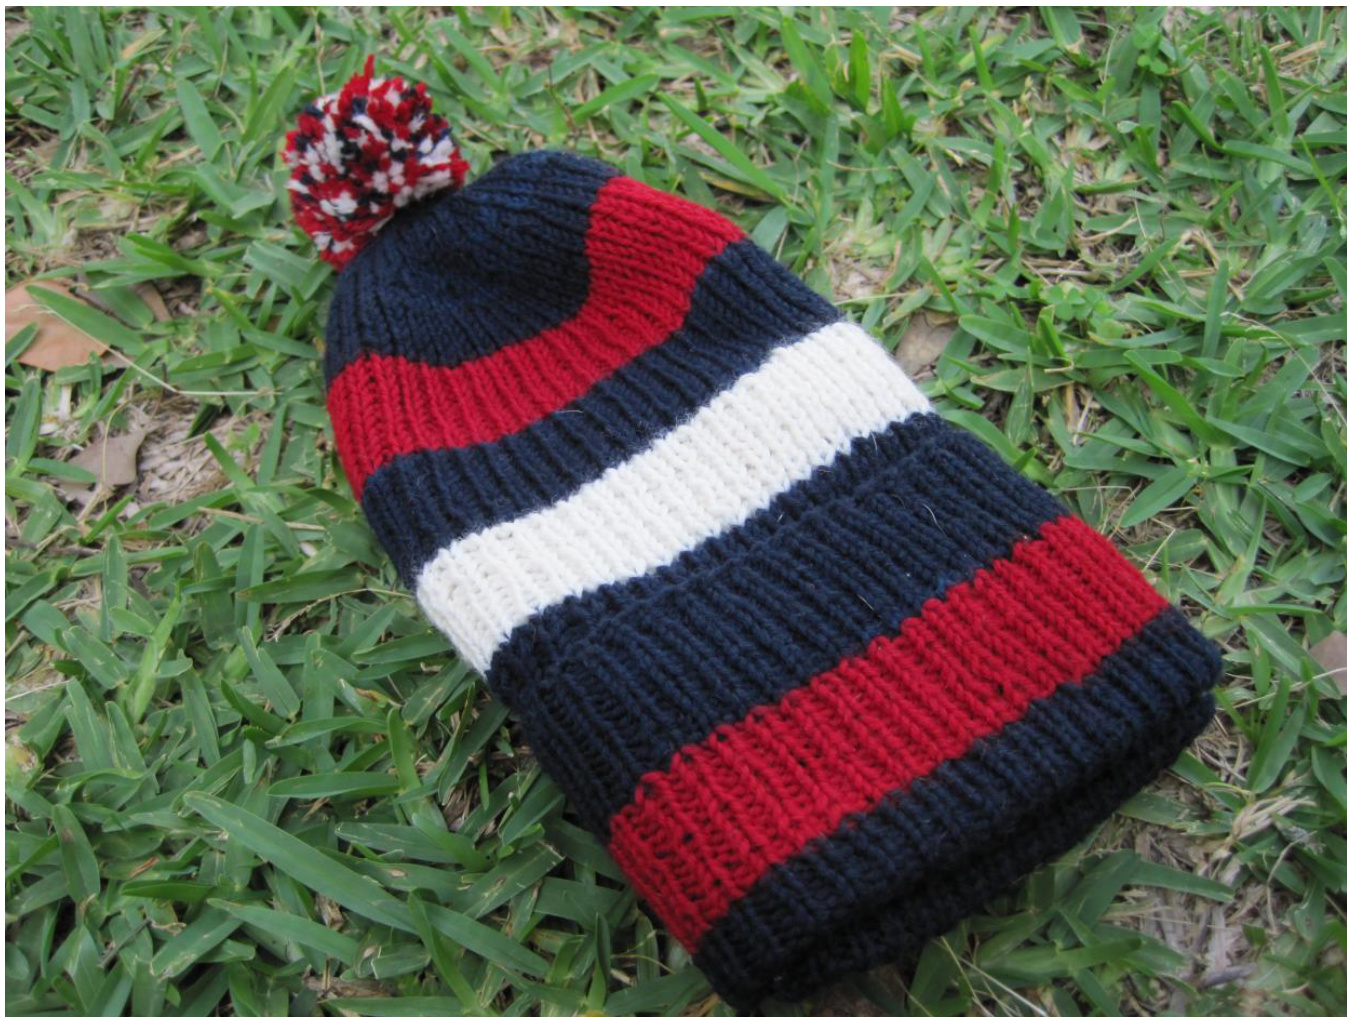
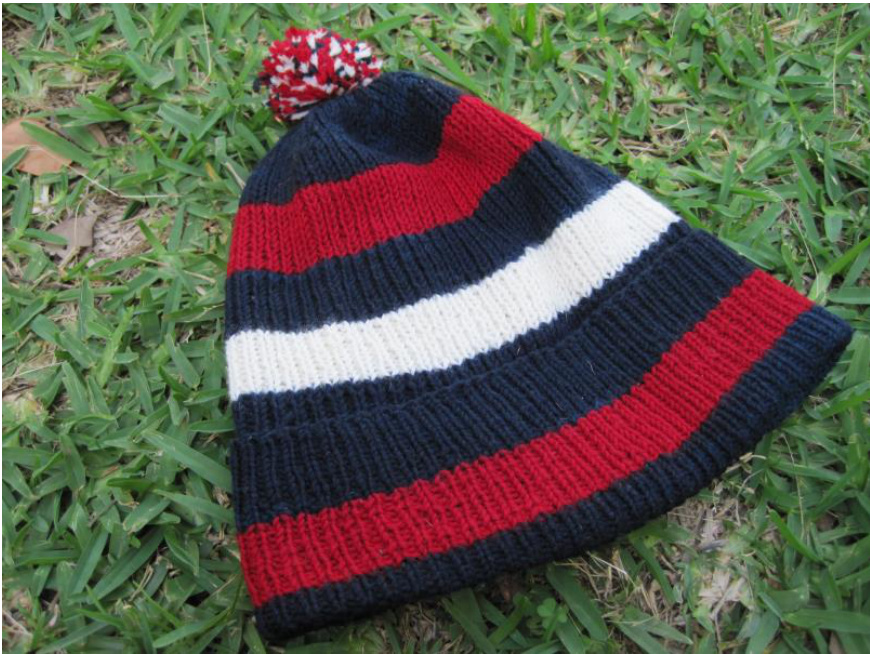
Instant Replay Hat

Pattern by Megan Doherty ? 2013
Instant Replay Hat
You know how we (and by we, I mean us knitters) are always looking at clothing and accessories and confidently boasting, “I can knit that." Well, this past play-off season, dear husband just had to have this beanie he saw New England quarterback Tom Brady wearing - and of course said hat was sold out. He searched high and low online, lamenting his misfortune at missing his chance to purchase this hat he just couldn't live without. He was distraught and his poor head seemed so cold - so I said, “I can knit that." Silly knitter. After multiple attempts, lots of frogging, and numerous missed plays, I finally succeeded in replicating the hat for my dear, dear husband. So in proper Instant Replay fashion, I have included my pattern notes below so you can avoid any flags on the play and customize a hat for the sports lover in your life!
One Size Available:
Fits heads with 18 - 24" circumference.
Gauge:
28 stitches in pattern = 4 inches
Materials
Yarn Main Color (MC): Fingering weight yarn approximately 175 yards Contrasting Color 1 (CC1): Fingering weight yarn approximately 75 yards Contrasting Color 2 (CC2): Fingering weight yarn approximately 50 yards Needles Size US 2 - 16" circular needles and DPNs or use a 40" cord or longer for Magic Loop ·One stitch markerDarning needle
Glossary
K, k - Knit P, p - Purl
k2tog - Knit 2 stitches together Pattern: k1, p1 (1 x 1) ribbing.
Instructions:
Cast on 156 stitches. Join for working in the round, being careful not to twist the stitches. Place marker to indicate the beginning of the round. The entire hat is worked in k1, p1 (1 x 1) ribbing unless otherwise specifie Fold-up Hat Band: Work k1, p1 ribbing for 1 inch Switch to CC1 and purl one row. Work in pattern for 1 inch. See notes on Page 3 for knitting jogless stripes Switch to MC and purl one row. Work in pattern for 4 inches. Hat Body: Switch to CC2 and knit one row. Work in pattern for 1 inch. Switch to MC and knit one row. Work in pattern for 1 inch. Switch to CC1 and knit one row. Work in pattern for 1 inch. Switch to MC and knit one row. Work in pattern for 1 inch. Hat should measure 10 inches. Decrease Rows: Work all decreases continuing in MC. Row 1: K4, k2tog and repeat until end of row. Row 2: Knit Row 3: K3, k2tog and repeat until end of row. Row 4: Knit
Row 5: K2, k2tog and repeat until end of row. Row 6: Knit Row 7: K1, k2tog and repeat until end of row. Row 8: Knit Row 9: K2tog and repeat until end of row. Row 10: K2tog and repeat until end of row. Cut yarn leaving a six inch tail and pull tail tight through remaining stitches to close the hat. Weave in all ends and block.
Finishing Instructions:
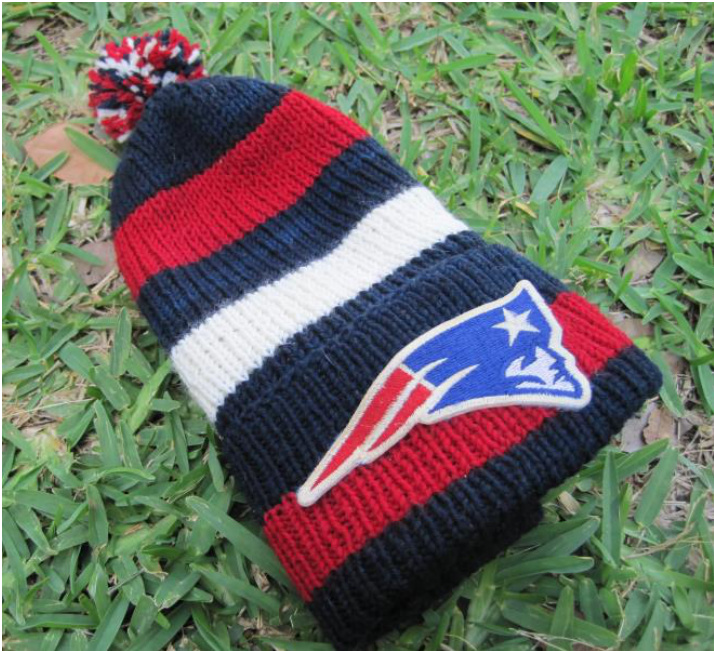
Fold up the bottom of the hat onto the RS of hat until the bottom (or CO edge) is approximately %2" below the white stripe all the way around the hat. Pin in place. Seam folded band in place. Add a pom-pom for the finishing touch! See notes below for pom-pom assembly. Optional: Apply team patch to folded band centered in stripe for maximum team spirit and awesomeness!\* \*Not endorsed by any professonal sports association - unlessthey want to. Which means, why yes, I am available for the designing of knitrwear for professional athletes. Have you seen hovw cold it gets in those open air stadiums??
Notes
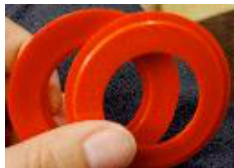
Jogless Stripes I most certainly did not invent this technique but have found it to be easy and useful for avoiding jogs in colorwork, particularly when knitting in the round. The trick: Work the first row of a new color as described in the pattern. Slip the first stich of the second round of a new color and work the rest of the row as described in the pattern. nitty also details a different technique which I have used with equal success. Check it out here: http://www.knitty.com/ISSUEff10/FEATff10TT.php Make a Pom-Pom What a fun word - pom-pom! Use one of the following methods make your own pom-pom: 1. Find or make a set of two rings the same size, similar to large washers. Cardboard and ready-to-use plastic rings both work great. Wrap the yarn around the lips of both washers (around the outside and inside loop) until wraps are desired thickness. I wrap until I cannot see any of the ring underneath. Carefully cut the yarn around the outside edge of the rings.
2. Using a matching or coordinating piece or yarn, cut a length of yarn long enough to wrap around your pom-pom and tie securely, leaving an additional 8 - 12" tail to secure pom-pom to the top of hat. This is your ‘yarn tie.? 3. Carefully cut the yarn around the outside edge of the rings. Once yarn is cut, slip yarn tie between the two rings around the middle of your cut yarn. Wrap yarn tie tight around the middle of cut yarn bundle and secure with a knot. 4. Use needle and tail of yarn tie to attach pom-pom at the crown of the hat. Secure pompom by weaving in yarn tail (as much as needed - not the whole length!). Fluff out pom-pom. Carefully clip any longer or stray yarn from pom-pom How-to Pom-pom Links: Irt: http://www.marthastewart.com/921445/pom-pom-yarn-glossary-tips-and-tricl Hello Knitty: http://www.helloknitty.com/pdfs/pompom.pdf Questions? Comments? You can reach me by e-mail at: megan.doherty320@gmail.com


