ABSINTHE YARN TM
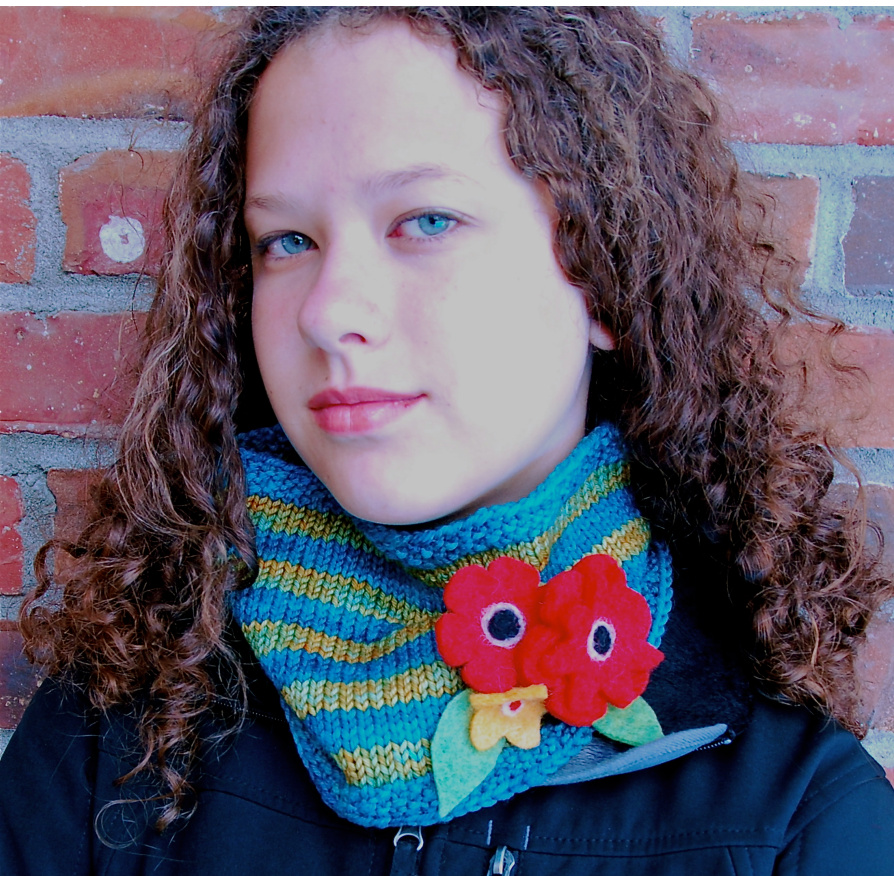
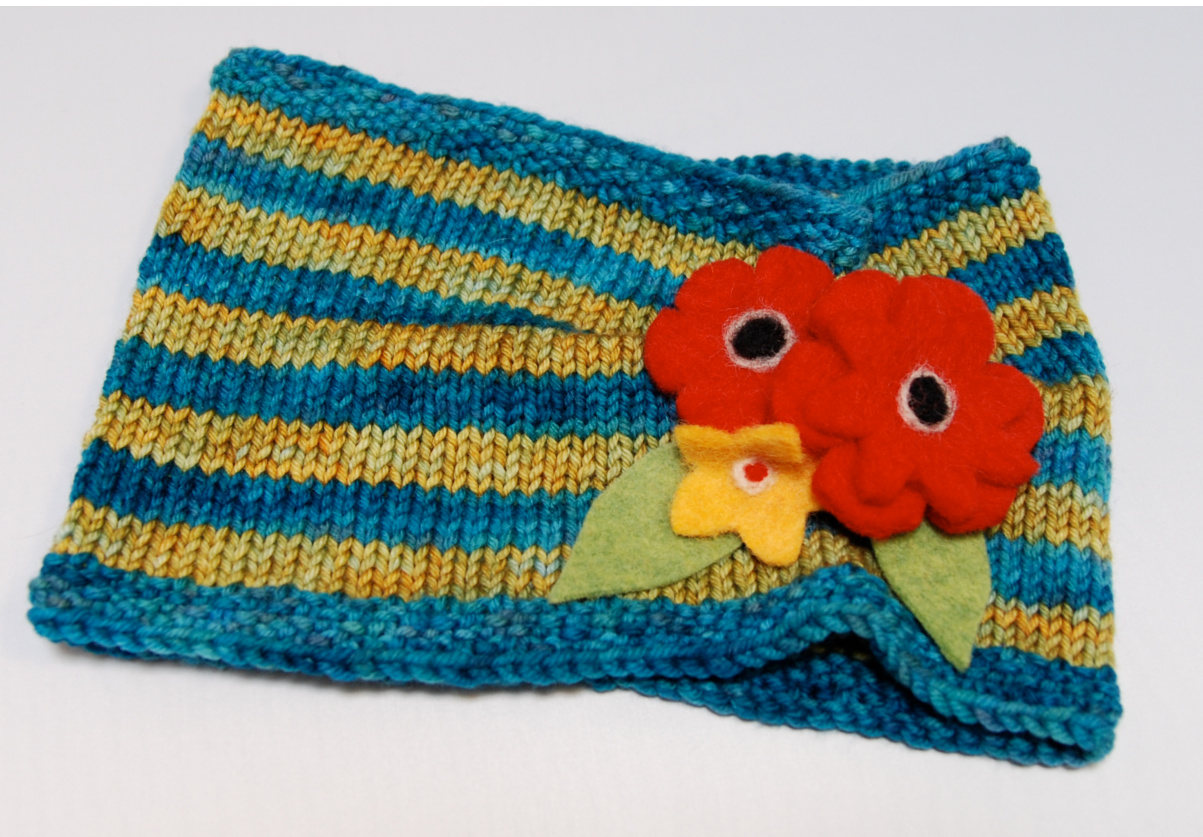
Mayme Corsage Cowl
Felted Flower Brooch Materials:
(You should be able to find these items at Michaels, Hobby Lobby, or JoAnn Fabrics) 1-8 inch square of wool felt fabric in each: red, yellow, and green 1-sew-on pin back small amounts of wool roving in black, white, and red (or your choice of colors) for flower centers 1 single felting needle and felting foam or brush felting surface Red, green, and yellow sewing thread a free pattern designed by Kathy Guttosch Here's a quick little cowl with a removable felted flower brooch that will help cheer up any dreary winter day. It uses barely half a skein each of 2 colors--perfect for stash-busting. I used a worsted weight here, but a nice DK, like Madelintosh DK, will work also (provided you get the proper gauge), and give you a slightly lighter, drapier cowl. The felt brooch is easily assembled using simple sewing skills; the flower centers are needlefelted, but you could also use a few wonderful vintage buttons, seed beads, or even embroidery.
Cowl Materials:
Yarn: 125 yds each, 2 colors of worsted weight (or DK weight) yarn; I used Dream in Color Classy in "Blue Lagoon," (MC) and 'Spring Tickle" (CC) Needle: US 7, 16" circular (or size needed to get gauge)(l used a 32" circular and the "Magic Loop" method Gauge: 18 sts x 27 rows over 4 inches Notions: stitch marker Finished Size: 19" diameter x 7" H Seed stitch: \*K1, P1\* repeat to end of round, slip marker, then \*P1, K1\* repeat to end of round (repeat these two rows) Stocking Stitch in the round: K all rows Cast on 88 sts with main color (MC). Join to work in the round and place marker. Knit 4 rounds in Seed Stitch. Then, slip marker and join contrast color (CC)--do not break MC yarn, but carry it up on the inside of cowl. Work 4 rounds in Stocking Stitch (StSt). Do break yarn; carry yarn up. Pick up MC yarn; \*knit 4 rounds StSt in MC, knit 4 rounds CC.\* Repeat 3 more times. You will have a total of 9 stripes in StSt, starting and ending with your contrast color. Using MC, Knit 4 rounds in Seed Stitch. Bind off loosely knitwise. Weave in ends and block. classiceliteyarns.com/VWebLetter/Stitches/CircularStrip
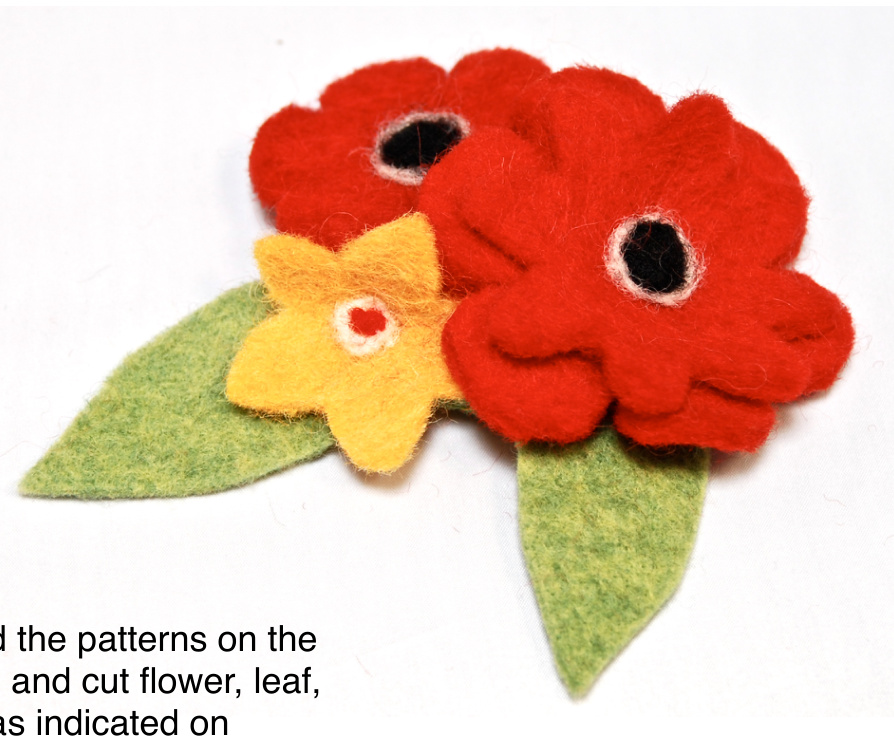
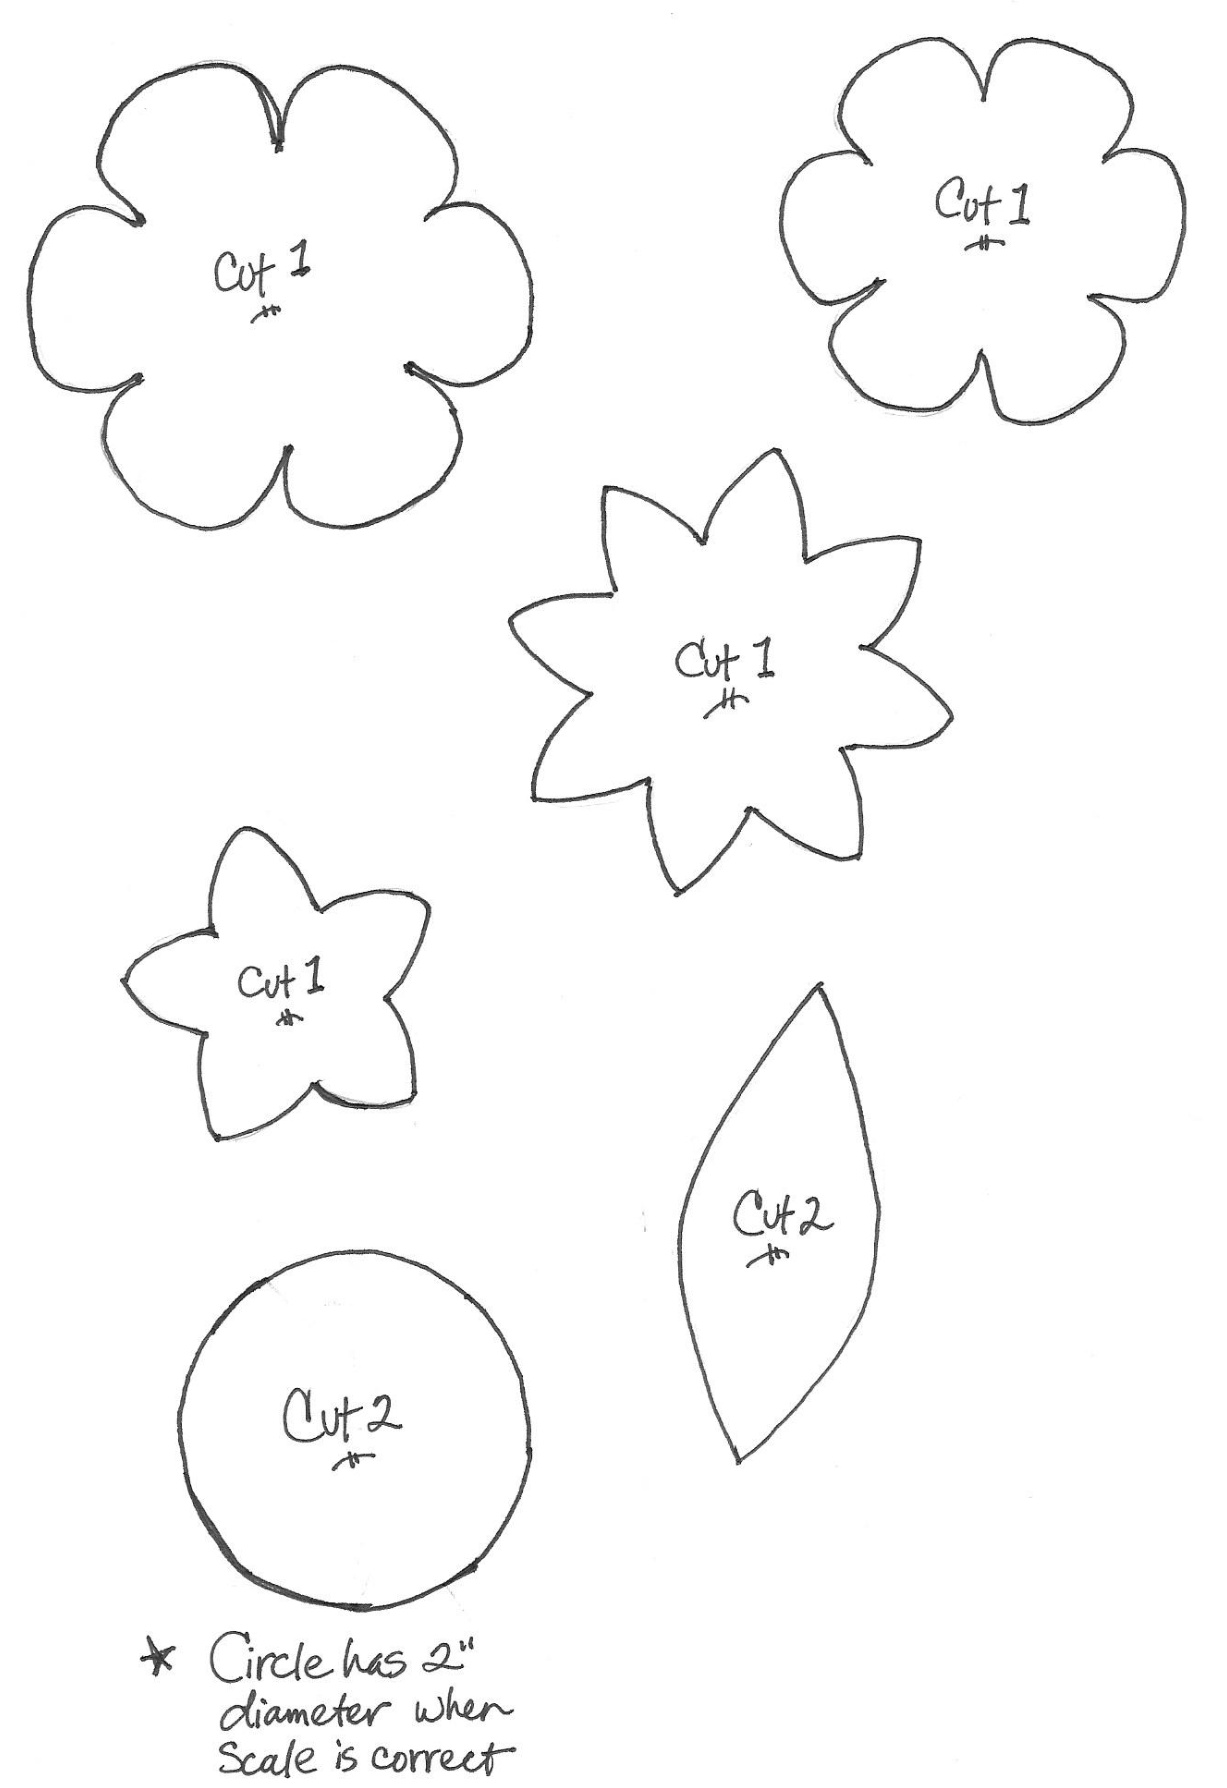
Step 1: and base shapes as indicated on pattern.
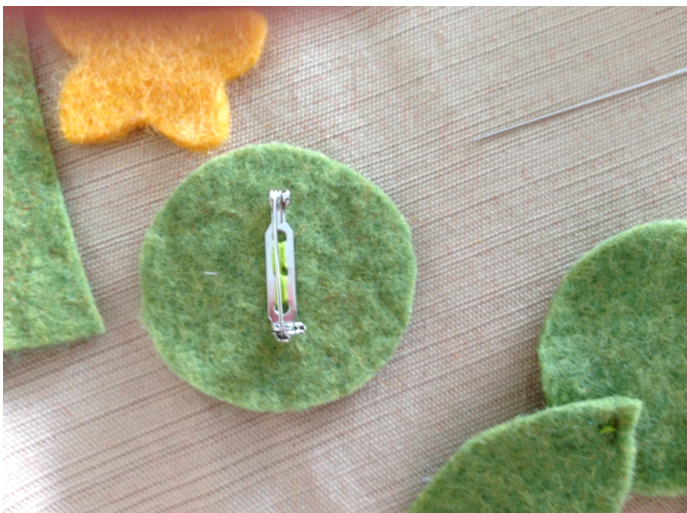
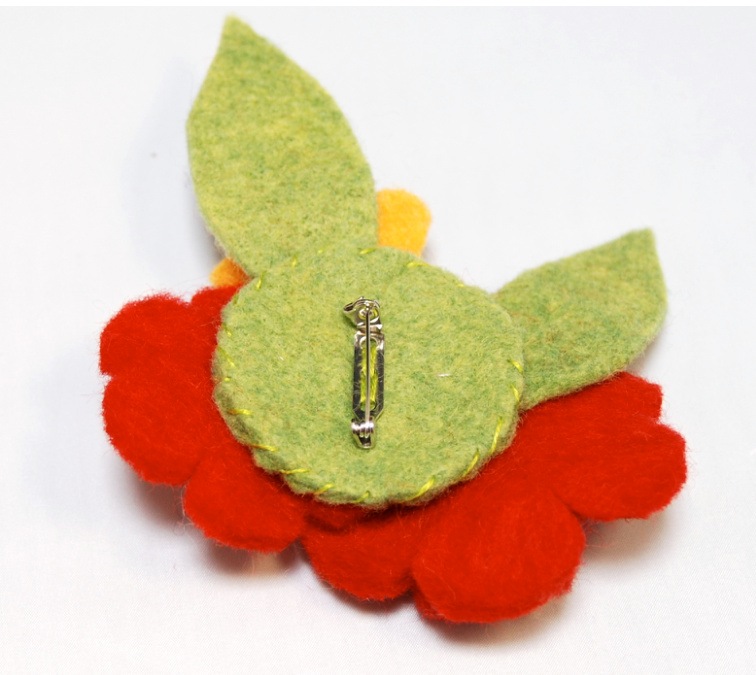
Step 2: Stitch your pin back to the center of one of the circular felt base pieces as shown. Set aside.
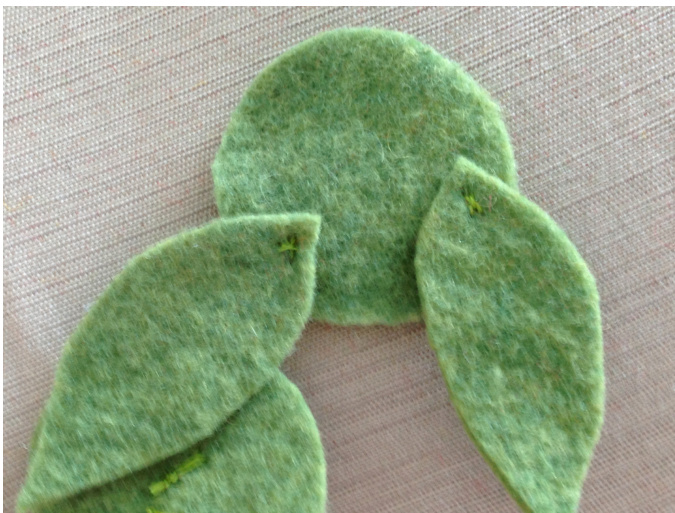
Step3: Stitch leaves to the other circle base piece as shown.
Step 4a:
(Do this only if you plan to use buttons, beads, or French Knot embroidery in the flower centers--you'll find the felt is too thick to do so after all is assembled) Sew your buttons, beads, or French Knots to the single yellow and red flowers, and to the 8 petal top flower. Sew the 8 petal flower to the large red flower.
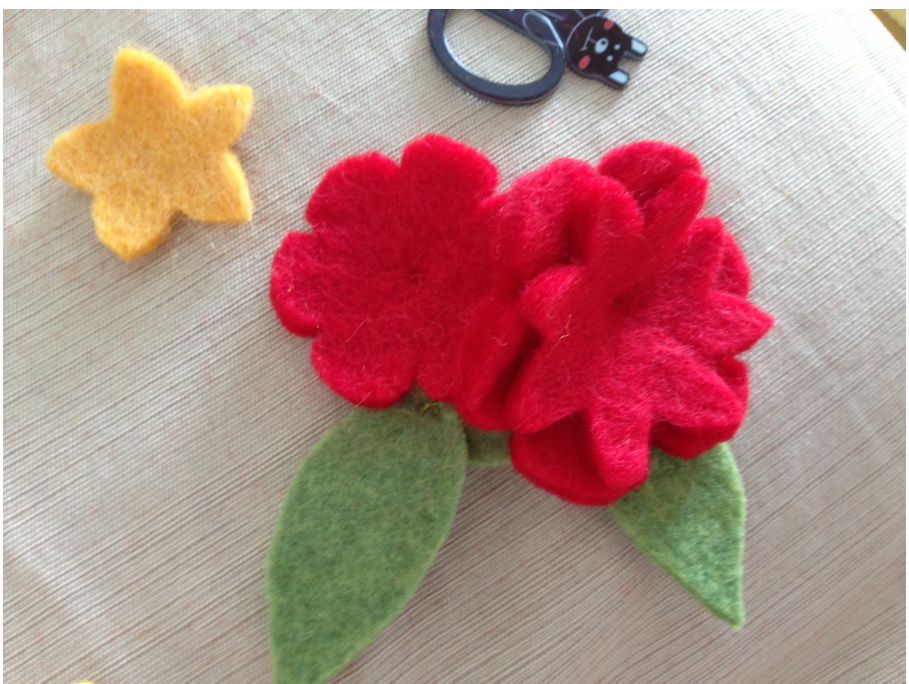
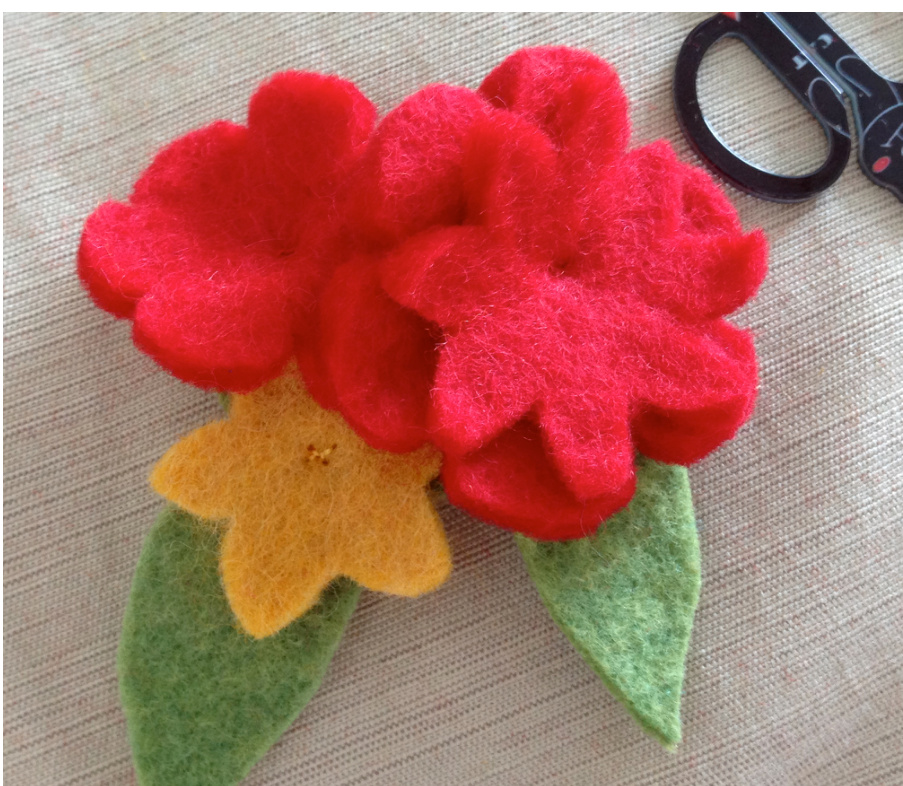
Step 4b: Stitch your flower shapes into place on the base piece over the leaves, one at a time, working from the bottom to the top--in other words, build your corsage using the larger flower shapes first, then add successive layers of smaller flowers.
Step5: Turn over your assembled corsage. Using the circular base with the pin back, place wrong side together with the corsage base and whipstitch in place, as shown. This will cover all the thread ends and knots sandwiched between the two circles and make it all pretty and tidy. Make sure the pin back is situated so that it will be easy for you to place on the cowl. I placed mine so it would sit perpendicular to the top of the cowl to help keep it from drooping. I slightly crowded the flowers so the petals would push up and have more dimension.
www.absintheyarn.etsy.com
Step 6:
Using protective base and care (those felting needles are barbed and sharp as all get-out) needle felt the centers of your flowers using small balls of wool roving (step not shown). For needle felting tips, check Youtube: http://www.youtube.com/watch?v=lkdGCiu7Tzk
Step 7:
When your cowl is completely dry, pinch and fold the fabric into a pleat in the spot where you want your pin to sit. Attach your pin, going through all four layers of knitted fabric. Voila!

\*This free pattern is provided for your non-commercial, personal use only. You may not distribute or sell electronic or paper copies of this pattern, or sell items made from thispattern..