Just A Little Stupid
By Crafts Meow
CraftsMeow.etsy.com
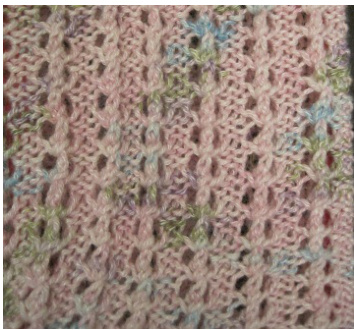
What's in a name? Well, I wrote a pattern called \*Just a Little Loopy"' and had a tester working on it. I decided to play with it too in my {cough} spare time {cough}. I read my own pattern wrong and this was the result. I really like it! Gauge: 8 stitches and 12 rows per inch using fingering-weight sock yarn. Sample socks were knit using 2.5 mm needles at 8 stitches per inch using Crystal Palace Panda Superwash. \*\*Note: this is a 70-stitch sock on the leg, reducing to 64 stitches mid-foot. If 70 stitches is too big on an 8 stitch/inch gauge, decrease your needle size to a 8.5 or 9 stitches per inch. If this is too snug on the foot, just go up a needle size to an 8 stitches per inch gauge when you finish the gusset. It will beworth it! Cast on 70 stitches using a very stretchy cast on, join and don't twist your stitches when you do (seems kind of silly to always say that but as someone who has started more than one Mobius sock I feel it is a must). The cast on I prefer is the twisted cast on (http://www.youtube.com/watch?v=QxLyFk4t53U&feature=related). Alternatives would be to cast on with the next size needle, or even two sizes, but the twisted cast on is cleaner and looks much less messy than all of those. WTip:cattitwujsltst ttt de ii last stitch together. This eliminates the little jog at the top of the sock. Pattern is written for magic loop or two circulars. If you're a dpn knitter, divide your stitches evenly. Pattern is in multiples of 5 stitches, divided 40 sole stitches, 30 instep stitches. Work in 5x5 rib for 1.5". If you wish to turn down the cuff when wearing, I suggest at least 2"' of ribbi Begin pattern: Round 1: \*P1, k3, p1; repeat from \* around Round 2: \*P1, k3tog, p1; repeat from \* around Repeat these 3 rounds until sock is as long as you want it tobe.
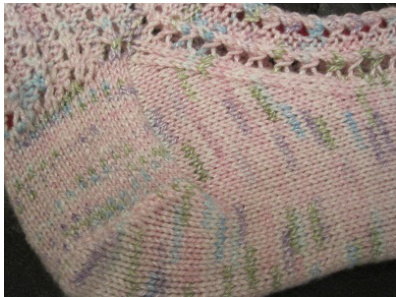
Heel flap: You're now working only on the 40 sole stitches. Knit across one row WNew!This hel stitch is abi different than thetraditional lsll fllowedby a plainrow.You're doing the slip every row, and it makes for a reinforced, yet very soft to the feel, heel flap. Additionally, this heel flap wraps around the heel for a snug fit. Row 1: Sl 1, pl, sl 1 across row, ending with p1 Row 2L Sl 1, k1, sl 1 across row, ending with k1 the heel flap is as high as you want for a good fit. Sample has a 2.25" heel flap. Purl 1 row, and start th
# Turn heel:
S1 1, knit the next 22 stitches, ssk, k1, turn Sl 1, p5, p2tog, pl, turn Sl1, knit to 1 stitch before gap, ssk 1, k1 turn Sl1, purl to 1 stitch before gap, p2tog, pl, turn Repeat these 2 rows until you have 22 stitches on the needle (last row will end with p2tog), turn Knit across the 22 stitches and begin the gusset Gusset: Work across the heel flap stitches only, with the tip of the needle pick up 24 stitches along the side of the heel. Pick up a stitch from the row below the first instep stitch to prevent a hole: 25 stitches picked up. Work across the 30 instep stitches in pattern. From now on, the sock willbe done in pattern stitches on the instep only; the sole is stockinette. Now pick up a stitch from the row below the first heel stitch to prevent a hole, and pick up 24_stitches along the right side of the heel. The beginning of each round is the center point of the heel, and if it helps you to remember place a marker there.
Shape Gusset:
Dec. round: Knit across the heel stitches to the last 3 stitches, k2tog, k1. Knit instep stitches in pattern. At the beginning of the gusset, k1, ssk, knit the rest of the round. Work the next round without decreases - be sure to stay in pattern on the instep side. Continue to work these 2 rounds until you have 34 sole stitches. Rearrange the stitches moving 1 sole stitch to the instep on each side. This means you're starting and ending each instep section with a knit instead of a purl, and that you have 32 stitches for each the instep and sole. You're in perfect position for the toe decreases when you get there. Continue working the foot until you are 1 12 inch from the desired length of the foot.
Shape toe:
Round 1: On needle one, k1, ssk, knit until 3 sts before the end of the needle, k2tog, k1. Repeat on needle two. Work the next round plain. Work these two rows until you have 20 stitches left on each needle. If you prefer a more rounded toe, work increases every round until there are 12 stitches remaining on each needle. If you prefer a more traditional toe, continue working the decreases every Otherround. Block if desired...