Reversible Sock Yarn Beanie or Slouch Hat
Designed by Vicky Samala Small Women or Teen Size Yarn used: Deborah Norville Serenity Sock Yarn-Harlequin-1.76oz/50g and 230yd/210m Crochet Hook: 3.25mm [US E-5] GAUGE: 11 sts = 2"; 12 rows = 2" in pattern. CHECK YOUR GAUGE. Use any size hook to obtain the gauge. ABBREVIATIONS: ch = chain; sl st = slip stitch; sc = single crochet; dec = decrease; st(s) = stitch(es); yo = yarn over; \* or \*\* = repeat 2013 vsamala. You may make hats to sell, but do not redistribute or sell pattern as your own. Please link any reference to pattern to listing on ravelry.com
Band:
ation row: Chain 23, sc in 2nd chain from hook, sc across, turn. (22 sc) Row 1: Ch 1, sc across in back row only, turn (22 sc) eat row one until desired band length is acheived, my row count was 114 Connecting row: sc ends of band together to create a continuous loop, do not cut yarn.
Hat:
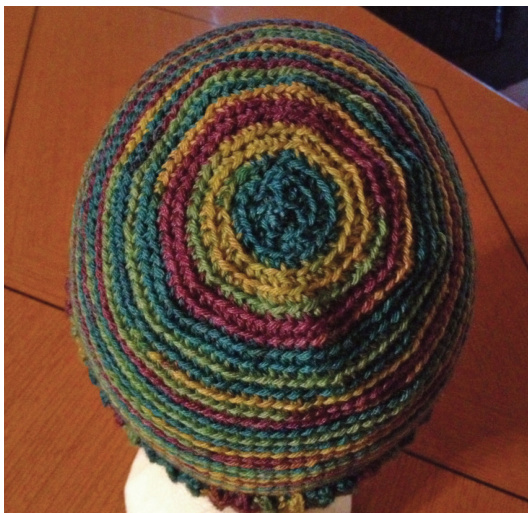
Row 1 of Hat: Fold band in half lengthwise to achieve a double thick band. beginning fom connection point sc evenly around band so the stitches do not end up stretching or pulling in width of band, it should look like a smooth transition from band to stitches. 90 - 100st. (lt is your choice to either sl st to first sc and work each row separately, or work in a continous round. You can either use a marker for each row or just work until desired height of hat is achieved. Use same pattern to make a snug beanie or a slouchy beanie, depending on how many rows you make.) I chose to do mine continuous so it is not obvious if stripes in yarn do not match up. Row 2-25: sc in each sc around. (Do not connect to first sc, continue in rounds until height is achieved, you can extend further than 25 rows if you like it longer) (For slouch beanie, add 20-25 more rows) Begin decrease (It's perfectly fine if rows do not start and stop at connection point) Row 26: \*dec, sc 14, 6 times, do not connect row Row 27: \*dec, sc 13, 6 times, do not connect row Row 28: \*dec, sc 12, 6 times, do not connect row Row 29: \*dec, sc 10, 6 times, do not connect row Row 30: \*dec, sc 9, 6 times, do not connect row Row 31: \*dec, sc 8, 6 times, do not connect row Row 32: \*dec, sc 4, until you are close to connection point, do not connect row Row 33: \*dec, sc 3, until you are close to connection point, do not connect row Row 34: \*dec, sc 2, until you are close to connection point, do not connect row ec until you have about .5" or 1" of a hole left. Finish off leaving a long ta Finishing: using a yarn needle, thread tail around through each ending single crochet and pull tight. Carefully secure and weave ends through so they are not obvious from either side.
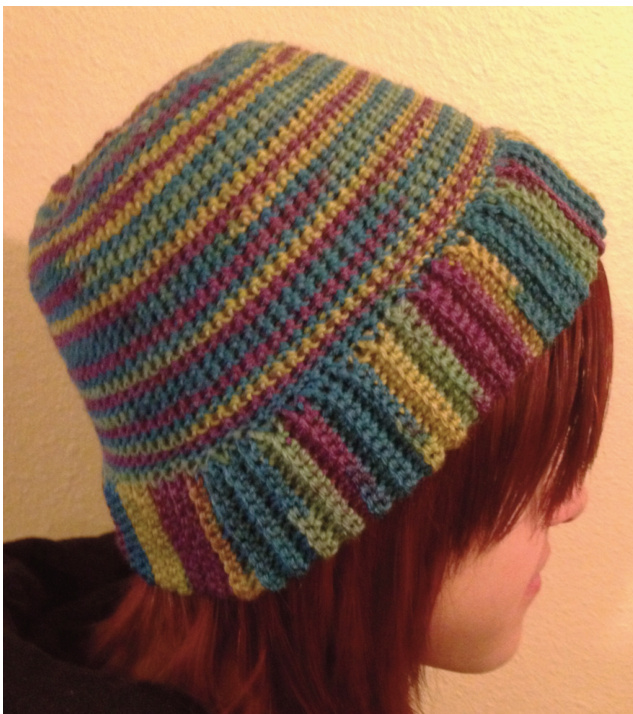
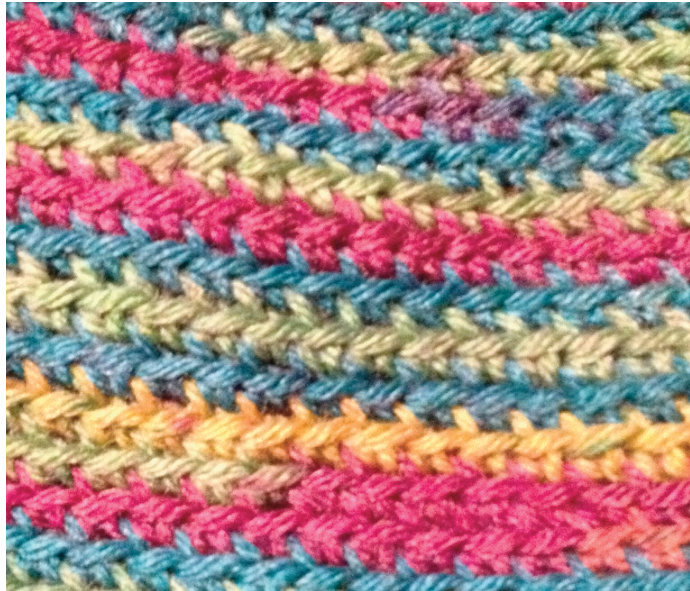
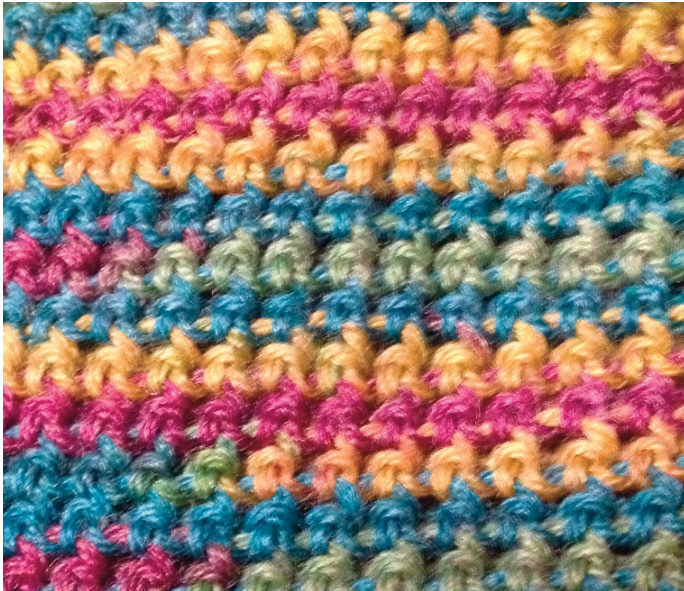
This hat has a different texture on each side and can be worn either way. Note: Hat can be made larger or smaller by adding or subtracting rows to band and adding rows to body of hat. You may need a second skein of yarn for a larger hat or a slouch beanie version.
Outside texture
Inside texture


