
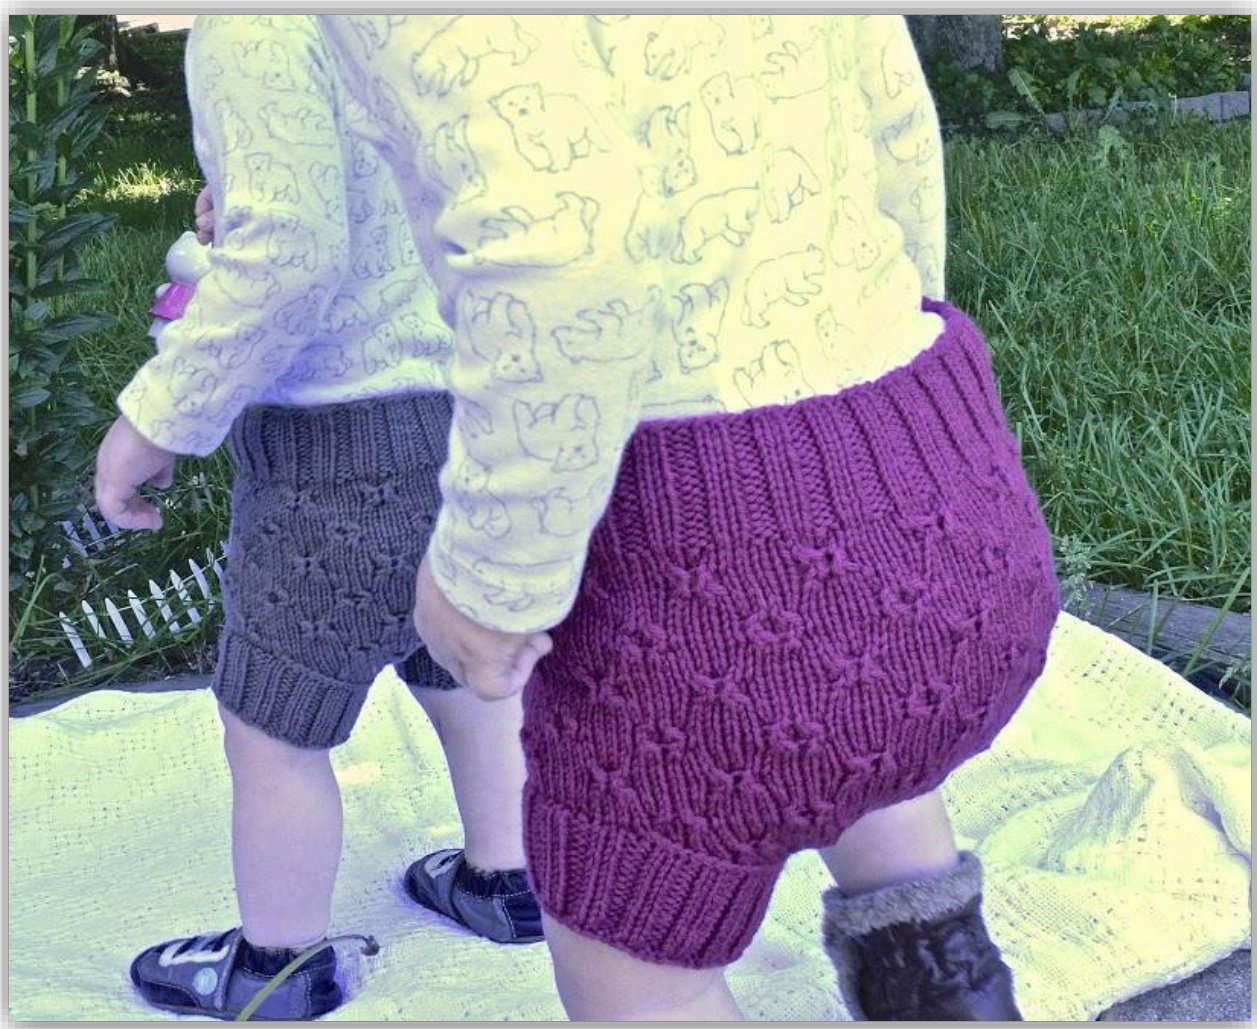
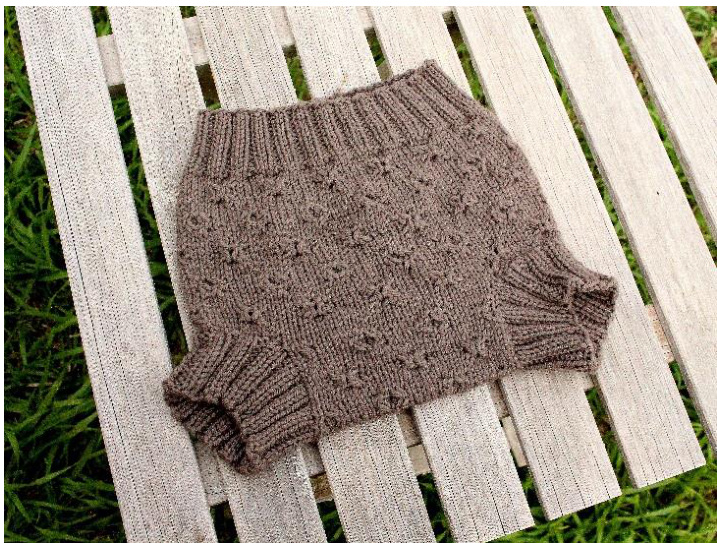
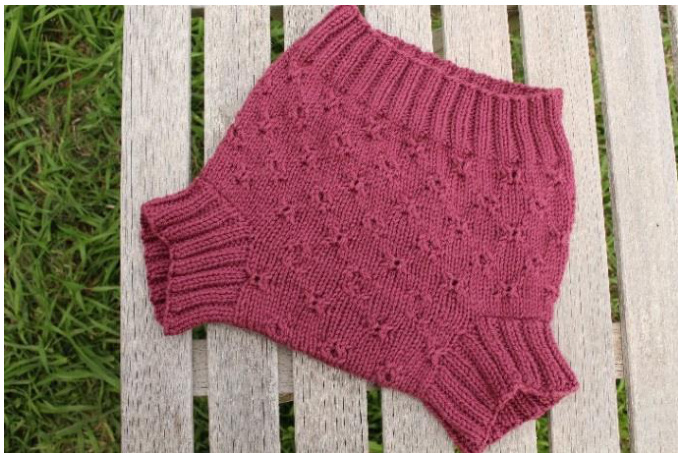
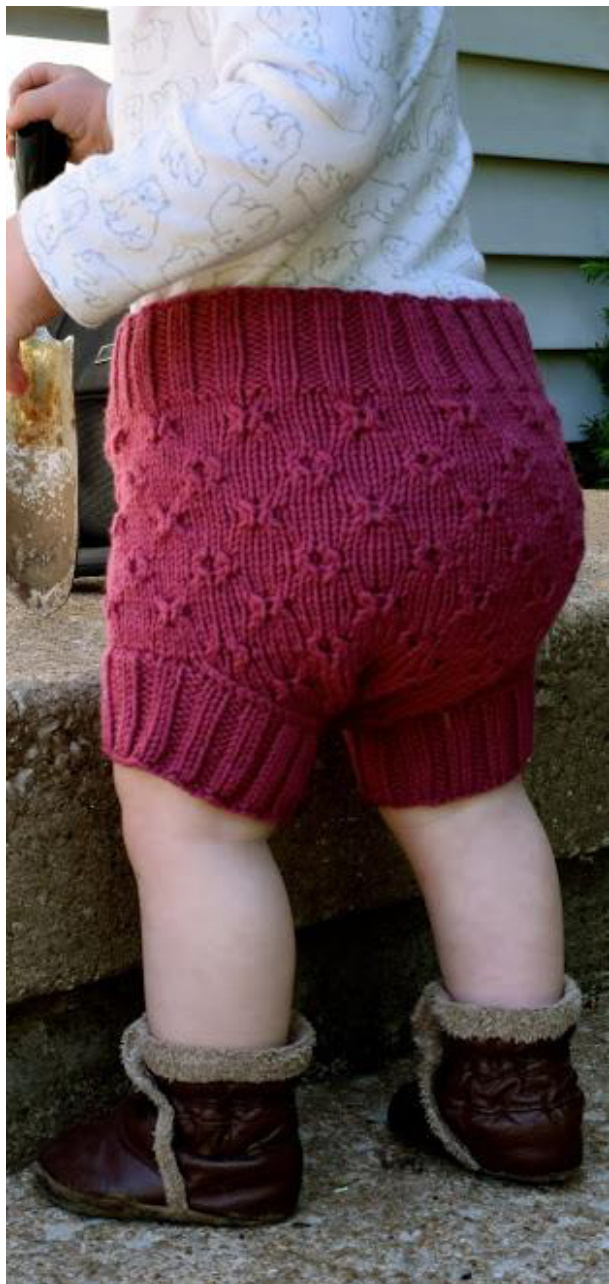
100%Wool DiaperSoaker Cover By Jennie Santopietro of A Lovely Homemade Life www.alovelyhomemadelife.com http://www.ravelry.com/stores/a-lovely-homemade-life-designs on Etsy at www.etsy.com/shop/alovelyhomemadelife The xOxO Soaker Cover is designed to be knit in 100% wool for use with cloth diapers. The wide ribbed waist band and leg cuffs make for a snug fit and optimal leak protection. Of course, for those that don't cloth diaper, it would also be an adorable addition to baby's wardrobe either under a dress or tunic so a disposable diaper doesn't show, or as something cute and sweet to wear for baby pictures. The X and O pattern is perfect for your little sweetheart! Included are 5 sizes to fit NB-24 months with variations provided for babies with those adorable extra chubby thighs. This pattern is suitable for advanced beginner and intermediate knitters, and techniques used include knitting in the round and flat, decreasing, grafting and picking up and knitting stitches. Pattern stitches are charted and written for your convenience. As a bonus, an excellent summary of how to care for your wool soaker is included on page 6.
Sizing and Materials
Sizes: NB (0-6, 6-12, 12-18, 18-24 months) Finished Measurements (after blocking): Hips (unstretched)—13.5"(15, 17, 19, 20.5)" Fits thighs up to—8" (9, 10, 11, 12)" around (alt directions given for babies with larger thighs) Rise (top of front waist band to top of back waist band between legs)—13" (14, 16, 17, 18)" Yarn: Cascade 220 Worsted (100% wool, 220 yards per 100 g skein); 1 skein all sizes. Shown in Savona Rose, Antiqued Heather, Smoke OR Ella Rae Classic Solids, Heathers & Marls (100% wool, 219 yards per 100 g skein); 1 skein all sizes. Shown in Tumbleweed Pink Yarn yardages: approx. 120 (140, 165, 190, 215) yds Needles: 3.5mm/US size 4 & 4mm/US size 6 needles\* for working a small circumference in the round: DPNs, 1 long circ magic loop, or 2 short circs \*Always check gauge. Adjust needle size to obtain proper gauge. Notions: Cable needle, tapestry needle, stitch marker (if desired) Gauge: 22 sts x 28 rows = 4" in X0x0 Pattern
Stitch Glossary:
K -Knit P-Purl st/sts - stitch/stitches Rnds - Rounds RS - Right side Ws -Wrong side CO - Cast on BO- Bind off K2, P2 rib - (Knit 2 sts, purl 2 sts) repeat around, worked over multiples of 4 sts K2tog - Knit 2 stitches together SSK - Slip first st knitwise, slip second st knitwise, insert LH needle into the front loops of both stitches (L to R) and knit them together RT (right twist) - Skip next st on LH needle, K 2nd st in front of skipped st, then K skipped st, slip both sts from LH needle LT (left twist) - With RH needle behind LH needle, skip next st on LH needle; knit 2nd st through the back loop, then knit skipped st in front loop slip both sts from LH needle This pattern is copyright protected and cannot be copied or reproduced in whole or in part. Please do not share thispattern. If youwould liketomakethesesoakerstosell atcraft shows and fairs, on your personal website,oron sites such as Etsy, there is no need to purchase a cottage license, but I do request that you reference me as the designer (Jennie Santopietro of A Lovely Homemade Life) and includealinktomyRavelryShopand/orwebsiteinthe listing. http://www.ravelry.com/stores/a-lovelyhomemade-life-designs
www.alovelyhomemadelife.com
If you have questions or comments,pleasecontact meatalovelyhomemadelife@gmail.com Thank you for respecting and supporting my work!
XOXO Chart In THE ROUnd
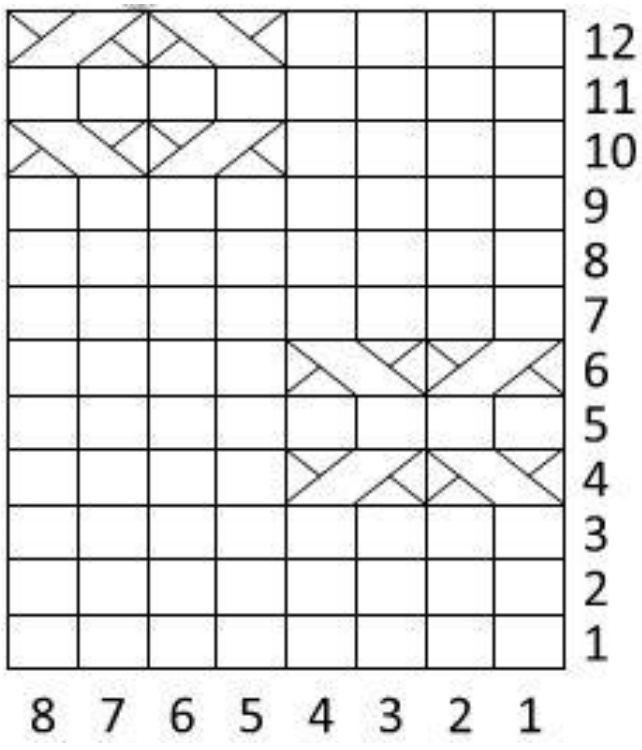
K(RS);P(WS)

RT(right twist):Skip next stonHneedle,K2ndstin front of skipped st,thenK skipped st,slip both sts fromLHneedle

LT (left twist):WithRH needlebehind LHneedle, skipnext st onLH needle; knit 2nd st through the back loop,then knit skipped st in front loop, slipbothstsfromLH needle Written Instructions: In The Round Rounds 1-3: K8 Round 4: LT, RT, K4Round 5: K8 Round 6: RT, LT, K4Rounds 7-9: K8 Round 10: K4, RT, LTRound 11: K8 Round 12: K4, LT, RT
XOXO Chart woRKED FLAT
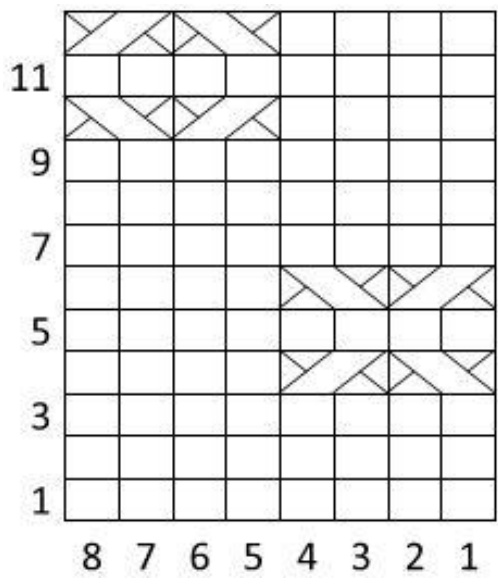
Written Instructions: worked Flat (ODD ROWS are WS & EVEN ROWS are RS) Row 1 and all wS rows: P8 Row 2: K8 Row 4:LT, RT, K4 Row 6: RT, LT, K4 Row 8: K8 Row 10: K4, RT, LT Row 12: K4, LT, RT

The Pattern
With smaller needles, C0 80 (88, 96, 104, 112) sts using long tail co. Join to work in the round, being careful not to twist. Place marker if desired. Work in K2, P2 rib around for 10 (11, 12, 13, 14) rnds. Switch to larger needles and begin working xoxO Pattern IN THE ROUND (either work from the Chart OR the Written Instructions)--repeat 10 (11, 12, 13, 14) times around. Work Pattern Rnds 1-12 TWICE (all sizes), then additionally as follows: NB-Rnd 1 0-6—Rnds 1-3 6-12—Rnds 1-5 12-18—Rnds 1-7 18-24—Rnds 1-9
Divide for Front and Back:
While working Rnd 2 (4, 6, 8, 10) of the pattern, Knit 2 (0, 2, 0, 2) sts BO 9 (10, 11, 12, 13) sts knitwise\* \*Remember during BO you "carry one st" along, soBO thegivennumber and thest thatremains counts towards the total for the following section. Work 22 (24, 26, 28, 30) sts (front) You may wish to remove these Front sts to waste yarn or hold live on your cable, as you prefer. BO 9 (10, 11, 12, 13) sts knitwise\* Work to end, plus 2 (0, 2, 0, 2) sts--There will now be 40 (44, 48, 52, 56) sts for the back. YOU WILL NOW WORK THE BACK FLAT (BACK AND FORTH IN ROWS)--ODD rows (WS) are now PURLED. See p. 5 for Alternate Directions for larger thighs.
Crotch Shaping:
Working onlyback sts, continue to follow chart starting with WS Row 3 (5, 7, 9, 11) WHILE AT THE SAME TIME decreasing 2 stitches each RS row as follows: K1, SSK, work in pattern to last 3, K2tog, K1. NB-Work Rows 3-12, 1-8 0-6—Work Rows 5-12, 1-12 6-12—Work Rows 7-12,1-8, 7-12, 1-2 12-18—Work Rows 9-12, 1-12, 1-2, 7-12 start on st 55\*\* 18-24— Works Rows 11-12, 1-12, 1-2, 1-10 There will remain: 22 (24, 26, 28, 30) sts. \*\*Start on st 5 to offset the pattern by 4 sts, ensuring that the design will line up with the held front stitches for grafting.
Flap:
Continue working in pattern over remaining sts as follows: NB-Work Rows 9-12, 1-6 0-6—Work Rows 7-12 start on st 5\*\*, 1-4 6-12—Work Rows 1-12 12-18-Work Rows 1-12 18-24—Work Rows 11-12, 1-2,1-10
Seaming:
All sizes, all variations--break yarn, leaving a 3-4 foot tail. Line up the front and back needles with RS facing and Kitchener the opening closed. If rows have been worked as given, the pattern should line up with the front (with an extra row in between motif stitches).
Leg opening:
For ribbed leg openings, work one leg at a time and, with larger needles, pick up and knit 36 (40, 44, 48, 52) sts. Place marker, if desired. Work K2, P2 rib for 9 (10, 11, 12, 13) rounds. B0 loosely in pattern.
Finishing:
Weave in ends. See p. 6 for specific care instructions for your finished soaker, including washing and blocking and lanolizing the wool for optimum leak protection. Jennie Santopietro |A LOVELY HOMEMADE LIFE ? 2015 ALL RIGHTS RESERVED ALTERNATEDIRECTIONSFORBABIESWITHEXTRA CHUBBY THIGHS (extra rows added for more length):
Crotch Shaping:
Working only back sts, continue to follow chart starting with WS Row 3 (5, 7, 9, 11) WHILE AT THE SAME TIME decreasing 2 stitches each RS row as follows: K1, SSK, work in pattern to last 3, K2tog, K1. NB-Work Rows 3-12, 1-8 0-6—Work Rows 5-12, 1-12 6-12—Work Rows 7-12, 1-2, 1-8, 7-12, 12-18—Work Rows 9-12, 1-12, 1-2, 7-12 start on st 5\*\* 18-24— Works Rows 11-12, 1-12, 1-2, 1-8, 7-8 There will remain: 22 (24, 26, 28, 30) sts. \*\*Start on st 5 to offset the pattern by 4 sts, ensuring that the design will line up with the held frontstitchesfor grafting.
Flap:
Continue working in pattern over remaining sts as follows:
JennieSantopietro|ALOVELYHOMEMADELIFEO2015ALLRIGHTSRESERVED NB—Work Rows 9-12, 1-2, 1-6 0-6—Work Rows 6-7, 6-12 start on st 5\*\*, 1-4 6-12—Work Rows 1-2, 1-12 12-18—Work Rows 1-2, 1-12 18-24— Work Rows 9-12, 1-2, 1-10 Seaming: same as above
Leg opening:
For ribbed leg openings, work one leg at a time and, with larger needles, pick up and knit 40 (44, 48, 52, 56) sts each leg. Place marker, if desired. Work K2, P2 rib for 9 (10, 11, 12, 13) rounds. B0 lo0sely in pattern. Finishing: same as above The final page of the pattern is devoted to an excellent summary of how to care for your new wool soaker, specifically if it will be used for cloth diapering. This guide is written by an expert (and very dear friend of mine), Bibi Estlund. If your soaker is a gift, you may wish to include the final page for reference. (Intended for personal, non-commercial use only) ou can find more of Bibi's writings on er blog at www.theconsciousdoer.con nd her cloth diapering advice website ww.myclothdiapers101.com.

By Bibi Estlund of The Conscious Doer and My Cloth Diapers 101 When you first begin your journey into wool soakers,it can feel a little intimidating. So let me help with some tips to demystify the process. I'm guessing you have probably heard many of the great benefits to wool soakers, but in case you haven't, here are some of my favorites: They are the best cloth diapering solution for night time. Hands down. · You may only have to wash them every few weeks. · Wool is very breathable and will help prevent diaper rash for your baby. · Can you say vintage chic? They are so darn cute, especially in the way that only hand-knit items can be. There are two important components to caring for your wool soakers-washing and lanolizing. To wash a wool soaker: Use a small amount of your favorite wool wash and warm water. Being careful not to deform your soaker, gently wash your soaker with your hands allowing the water to rinse through the fibers as you gently submerge the garment under the water, and then pick it up...and allow the water to run out. It is fine to use hot water on your soaker as long as you do not agitate it. To lanolize a wool soaker: When you first knit up your wool soaker the yarn that you use will have little to no lanolin left in it. Lanolin is the natural oil that sheep have in their fleece that helps them repel water. This is exactly what we want for our soakers. We want them to repel urine and keep the diaper from wicking liquid from the inner diaper to...let's say your couch. As time goes on and your baby wears the soaker(s) that you make, the lanolin will wear off and the cover will need to be lanolized again. I recommend using the more solid version of lanolin that comes in a tube. Some stores sell liquid lanolin, but it is not nearly as effective in making soakers water-proof. You can purchase lanolin at self-compounding pharmacies nationwide. Step One: Dissolve your lanolin in very hot water. I usually put a small amount of very hot water into my sink and dissolve the lanolin in the water before adding the soaker. Step two: Next, fill your sink with water (I use very hot water as an extra measure). Step Three: Soak the soaker for a few minutes. 5 minutes is plenty. Do NOT agitate your soaker. Most people believe that felting happens from hot water, however, felting occurs when you agitate your knitted goods. So definitely do not agitate your soaker. Step Four: Press excess water out of your soaker. I usually squeeze the soaker in the sink a little bit, and then roll it in a towel. Step Five: Lay the soaker flat to dry. Knowing when baby needs a change: Obviously baby needs to be changed when soiled, and you can use the sniff test to ascertain that info. You will know that baby is wet when your soaker feels just the slightest bit damp on the outside. Wool does not wick liquid to the outside like other natural fibers do, and it can hold a large amount of liquid It's a good idea to wash your soaker every few weeks, however here are some tips in case you need some stronger guidelines. You will know that it is time to wash and lanolize your soaker again when one of three things happens. 1. It gets soiled with feces. 2. It starts to have a urine like odor. 3. It becomes less water-proof.

Jennie Santopietro|A LOVELY HOMEMADE LIFE ?2O15 ALL RIGHTS RESERVED


