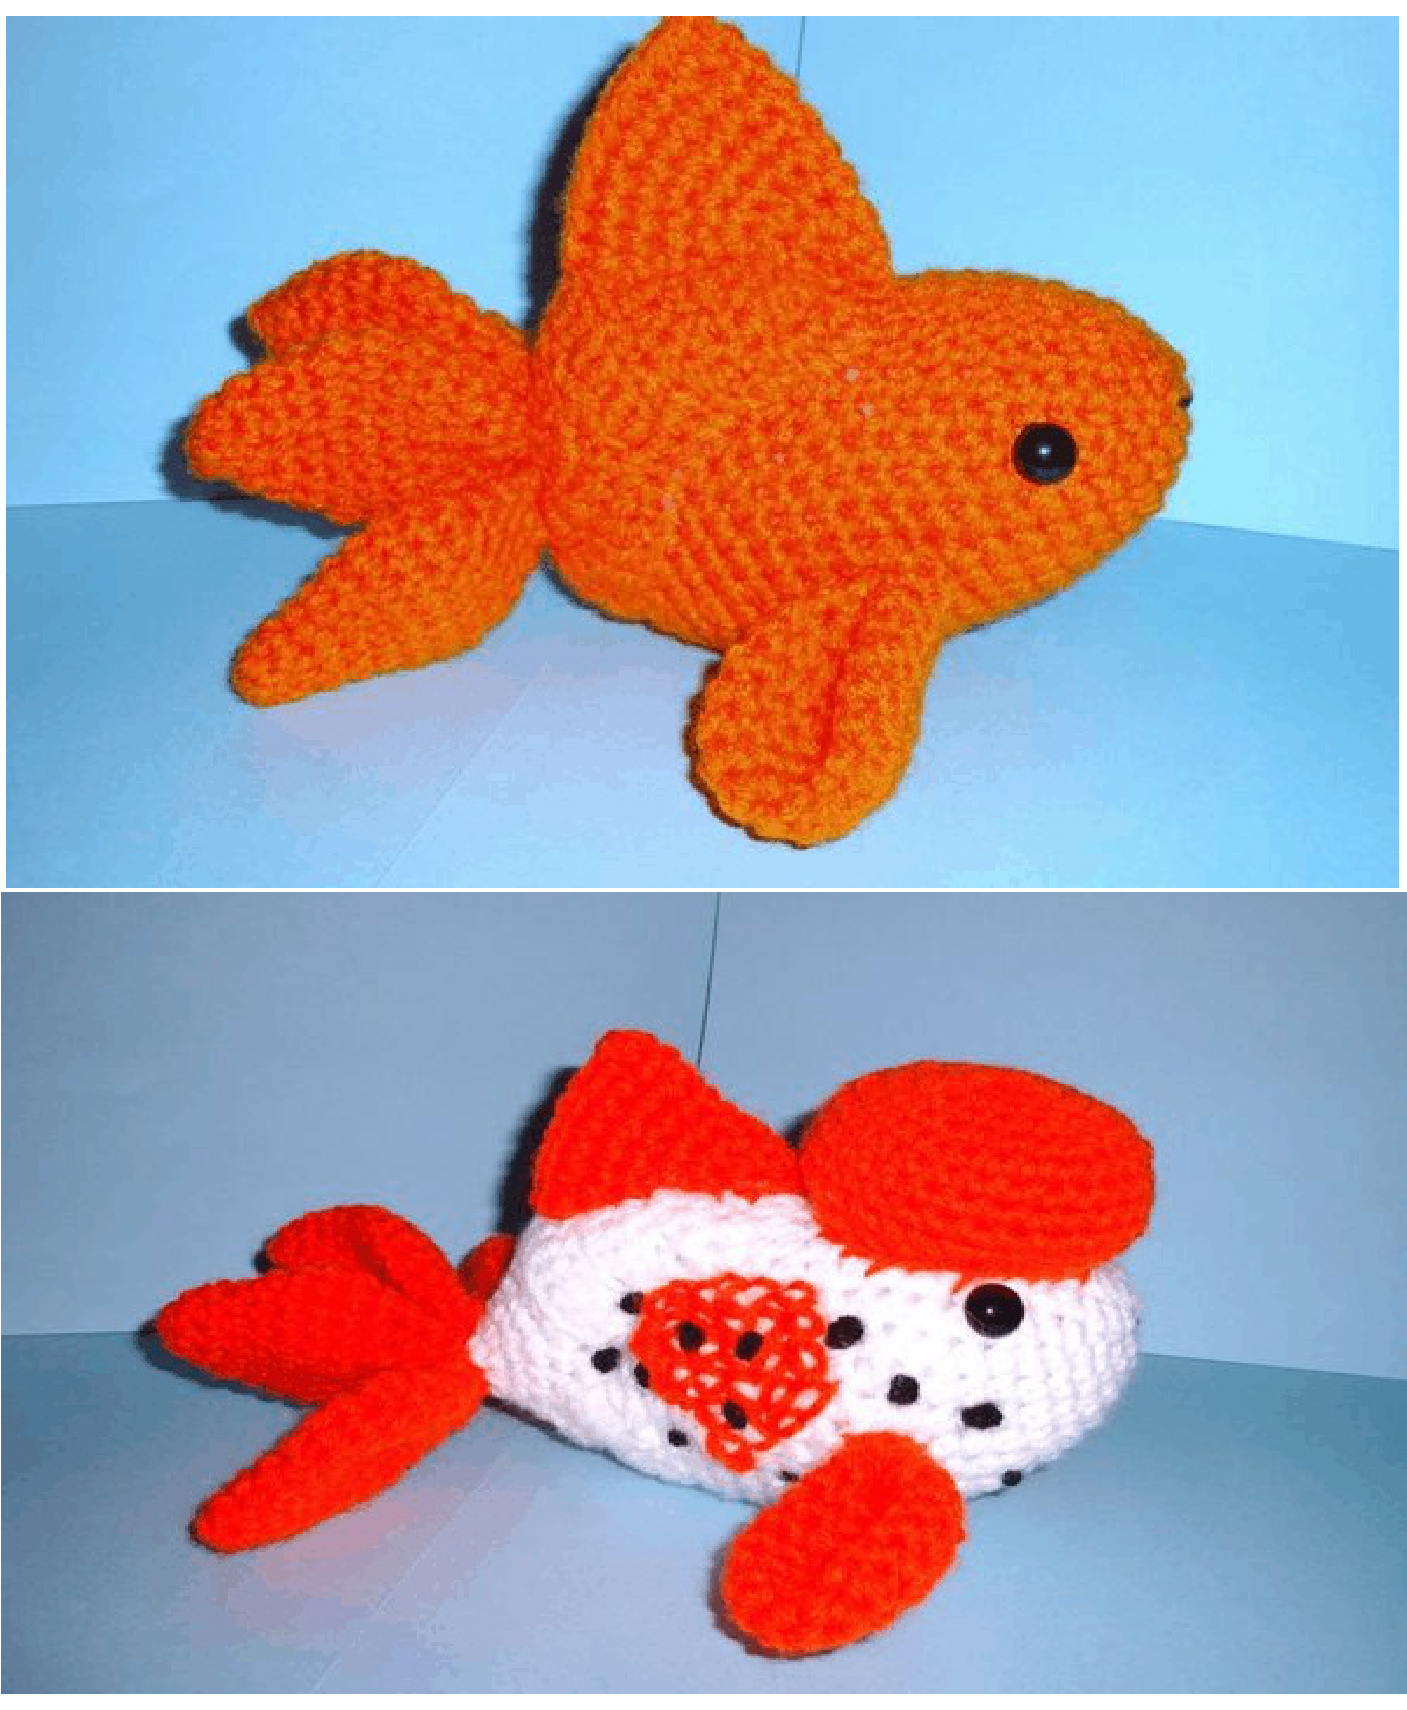
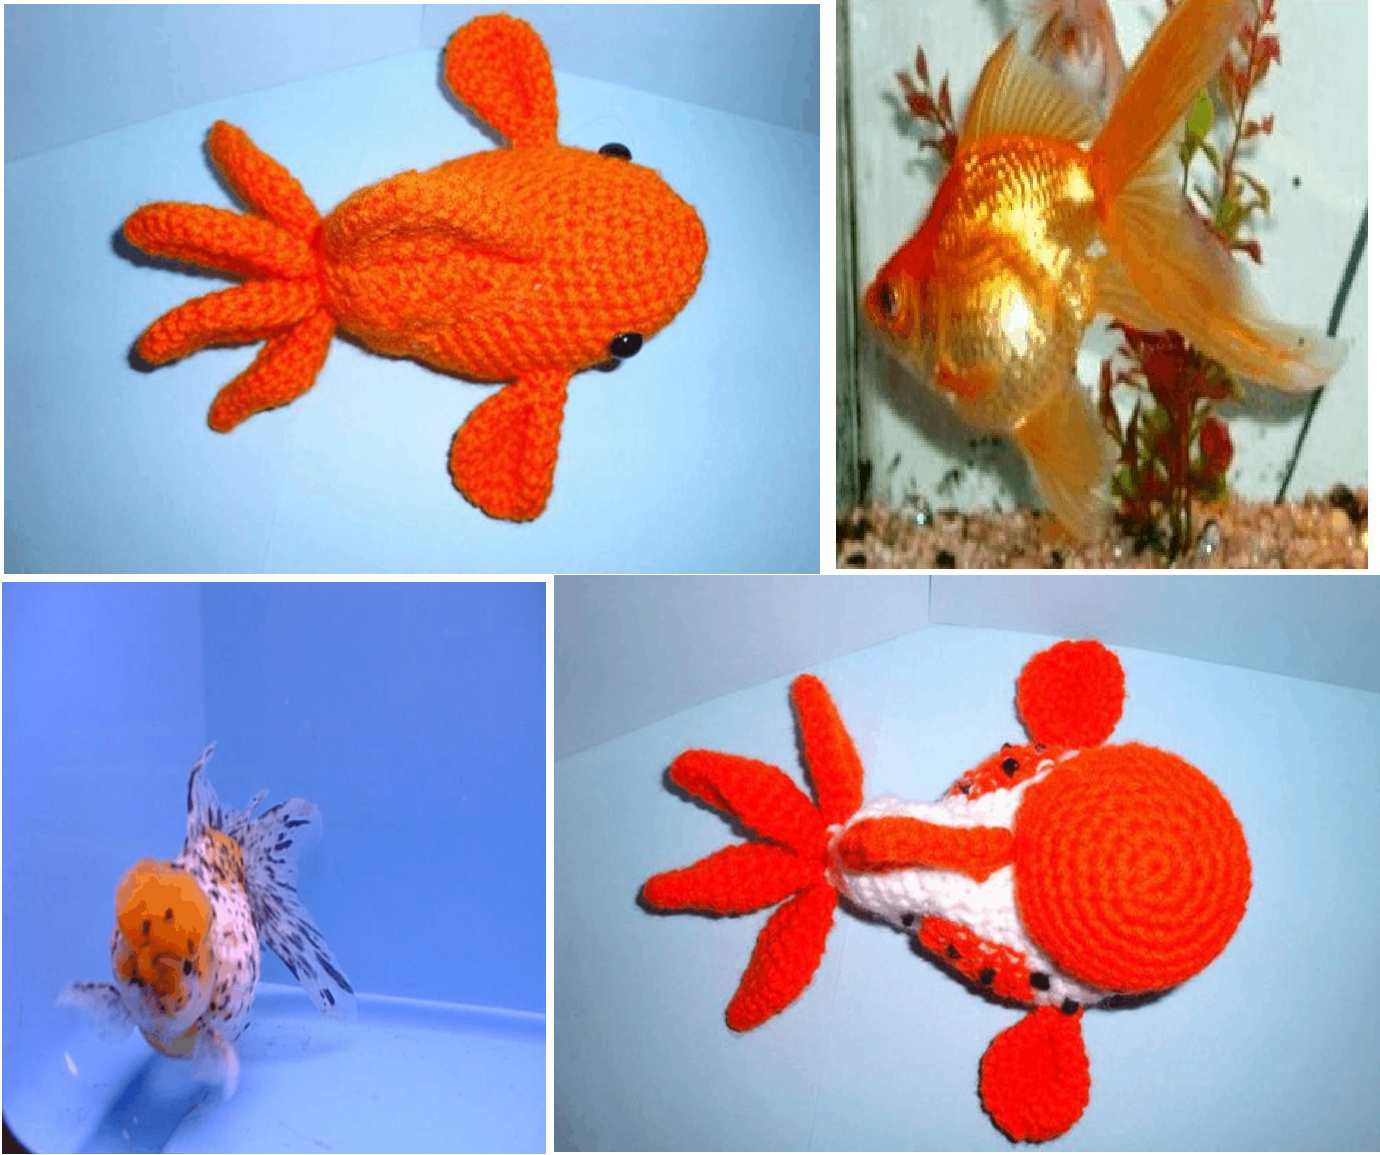
Oranda and Fantail Goldfish
Amigurumi Pattern Designed by Sherry www.Chiwaluv.Etsy.com
This pattern is protected under Creative Commons Attribution-NoncommercialNoDerivative works 3.0
You may not use this pattern or doll produced from this Pattern for retail or commercial purposes. For more information, go to www.creativecommons.org If you have any question while making the Goldfish or found mistake in this pattern, please send an email to me at : Chiwaluv@comcast.net See more pictures of my amigurumi at: http://www.flickr.com/photos/chiwaluvchis/ MaterialsMaterials: · Acrylic yarn; black, white,orange · Crochet hook suitable for the yarn you use (I use an E) · two pair of 12mm. safety eyes · Polyester fiber fill · Sewing needle for yarn Finished Size: Approximately 51/2" tall to tips of fin Your finished fish, may be bigger or smaller than mine depending on your tension and the yarn you use. Abbreviation I use: 1. = Round ch = chain sc = single crochet inc = increase (2sc in same stitch) dec = decrease (2sc worked together) sl st = slip stitch(es) FO = fasten off yarn, lv tail for sewing BLO = back loop only of next stitch FLO = front loop only of next stitch \* = repeat directions between \* and \* as many as indicated I start crochet by making a Magic ring as in Japanese style. It makes the star hole tight and secure. You can start in which ever way you feel comfortable NOTE: Work in continuous spiral round; do not join rounds unless otherwis stated. Mark first stitch of each round, If the number goes up on the next rov increase to that number of stitches, if the number goes down, decrease to the number of stitches. Pattern is written for both Gold fish, The ORANDA and The FANTAIL HEADANDBODY ONE PIECE:Make 1
1. Make a magic ring with 6 sc 2. \*sc inc 1\*, repeat 5 times (12) 3. sc 12 4.\* sc 1, sc inc 1 \* repeat 6 times (18) 5.sc 18 6-7. \* sc 2, sc inc 1 \* repeat 6 times (24 ) 8-12. \* sc 3 sc inc 1 \* repeat 6 times (30 ) 13. \* sc 4, sc inc 1 \* repeat 6 times (36 \*\*\*\*\*\*\*\*\*\*\*\*\*\*\*\*\*\*\*\*\*\*\*\*\*\*\*\*\*\*\*\*\*\*\*\*\*\*\*\*\*\*\*\*\*\*\*\*\*\*\*\*\*\*\*\*\*\*\*\*\*\*\*\* NOTE: Add 12 mm saftey eyes before stuffing fish... Optional: I Hot glue mine into place after the fish is finished, I find, I get a better placement this way,They will not pull out, the hot glue really cements them to the yarn! :D \*\*\*\*\*\*\*\*\*\*\*\*\*\*\*\*\*\*\*\*\*\*\*\*\*\*\*\*\*\*\*\*\*\*\*\*\*\*\*\*\*\*\*\*\*\*\*\*\*\*\*\* 14. change to CC , sc 36 NOTE: (carry both yarns throught body of fish, change color everyother row) 15. MC sc 36 16. CC sc 36 17. MC \* sc 4, sc dec 1 \* repeat 6 times (30 ) 18. CC sc 30 19. MC \* sc 3, sc dec 1 \* repeat 6 times (24 ) 20. CC sc 24 21. MC \* sc 2, sc dec 1 \* repeat 6 times (18 ) 22. CC sc 18 23. MC \* sc 1. sc dec 1\* repeat 6 times (12) 24. CC sc 1, sc dec 1,around FO , lv tail for sewing (gather) opening closed. TAIL BASE: Make 1 This piece will naturally curve as you work it...to fit the body. 1. Make a magic ring with 6 sc 2. \*sc inc 1\*, repeat 5 times (12) 3. sc 12 4\* sc 1, sc inc 1 \* repeat 6 times (18 ) 5. sc 18 6. sc,hdc, 2dc, 2dc, hdc, sc 2 then, BLO sc inc in the next 8sts, (16 sc), sc 1 ,sl st, ch-1 turn (do not finish around, lv marker in place, DO NOT move it for the rest of the work!!!!) 7. FLO sl st, dec 1, sc 10, dec 1, sc, sl st, ch-1 turn 8. BLO sc 2 sc dec , sc 6, dec in next 2 sts, sl st ch-1 turn 9. FLO sc across, (10) sl st in last st (11) , ch-1 turn 10. BLO sl st, sc dec , sc in next 5 sts, sc dec, sl st ch-1 turn 11. FLO sl st, sc 7, sl st ch-1 turn 12. BLO sl st, sc 2, sc dec, sc 2, sl st in next sc, (lv last stitch) ch-1 turn 13. FLO sc dec, sc, sc, sc dec, sl st, ch-1 turn 14. BLO sl st, sc dec, sc dec, - DO NOT TURN THIS TIME! 15. Continue down the left side of piece towards your marker..sc 11 to 12 stitches, dc inc in next 7 sts,hds, then work 11 to 12 sc up the right side of piece. FO lv long tail for sewing to back of Goldfish body. Note phot for placement. Chiwaluv.etsy.com Creative Commons Attribution-Noncommercial-NoDerivative Works 3 TAIL FINS: Make 4
4. sc 3, sc inc 1,sc 3, sc inc 1, ( 10) 5. sc 4, sc inc1, sc 4, sc inc 1 (12) 6. \* sc 1, sc inc 1 \* repeat 6 times (18 ) 7-8. sc around 9. \* sc 1. sc dec 1\* repeat 6 times (12) 10. sc 4,sc dec 1,sc 4, sc dec 1 (10) 11. sc 3, sc dec 1, sc 3, sc dec 1 ( 8) 12. sc 2,sc dec1, sc 2, sc dec 1 (6) FO lv tail to sew to back of fish bod
SIDE FINS: Make 2
1. Make a magic ring with 6 sc 2. \*sc inc 1\*, repeat 5 times (12) 3. \* sc 1, sc inc 1 \* repeat 6 times (18 ) 4-6. sc 18 7. \* sc 1. sc dec 1\* repeat 6 times (12 ) 8. sc around 9. sc 5, sc dec 1, sc 5 (10) 10. sc 4, sc dec 1, sc 4,( 8)2 FO , lv tail to sew to sides offish body Chiwaluv.etsy.com Creative Commons Attribution-Noncommercial-NoDerivative Works 3 BACK FIN: Make one 1. Make a magic ring with 4 sc 2-3. sc 2 sc inc 1, sc 2 (6) 4. sc inc 1, sc 4, sc inc 1 (8) 5. sc 2, sc inc 1, sc 2, sc inc 1, sc 5 (12) 6. sc 2, sc inc 1, sc 2, sc inc 1, sc 2, sc inc 1, sc around 7. sc 2, sc inc 1, sc 2, sc inc 1, sc 2, sc inc 1, sc 2, sc inc 1, sc around (NOTE: Continue to rows 8-9 for FANTAIL GOLDFISH) FO , whip stitch end closed. lv tail for sewing to body \*\*\*\*\*\*\*\*\*\*\*\*\*\*\*\*\*\*\*\*\*\*\*\*\*\*\*\*\* Add these two rows if making the "FANTAIL GOLDFISH' 8-9. sc around FO, whip st end closed, lv tail for sewing to body ORANDA HEAD CAP: Make 1 (NOTE: you do not need this if making the "FANTAIL GOLDFISH!")
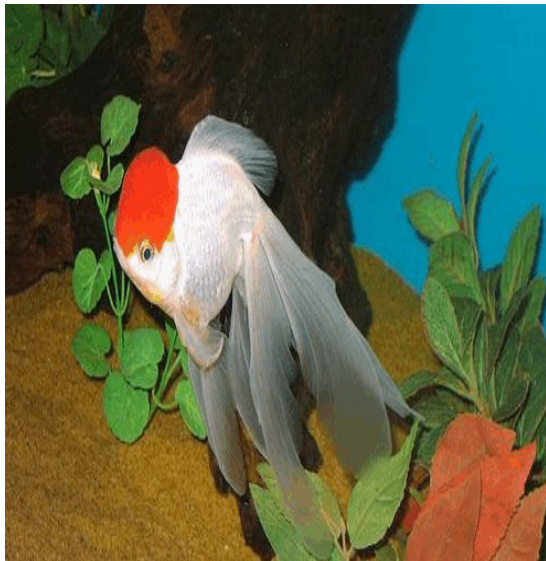
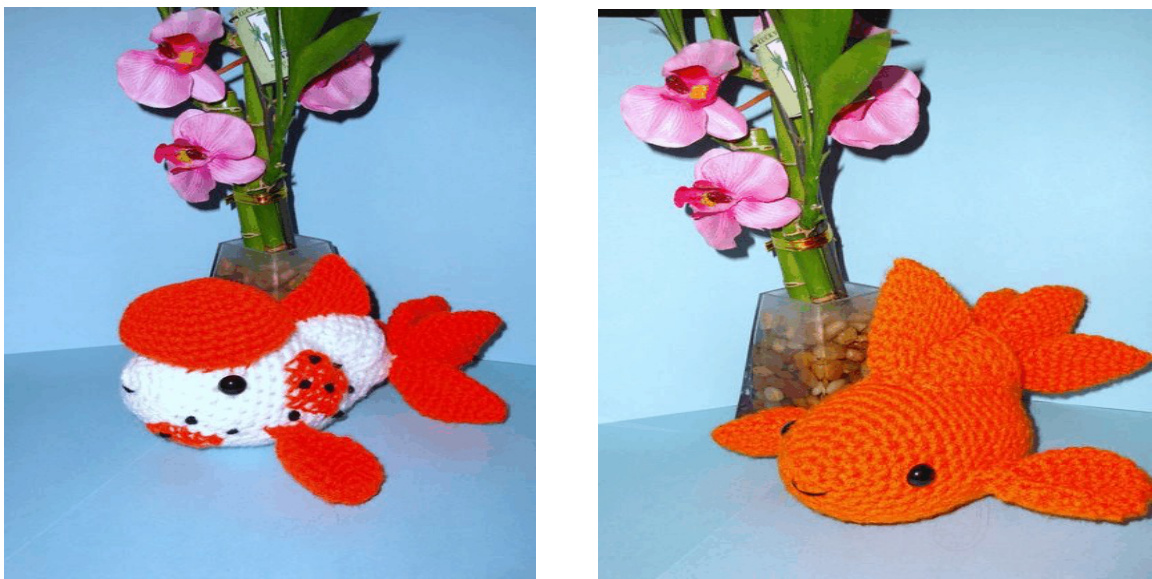
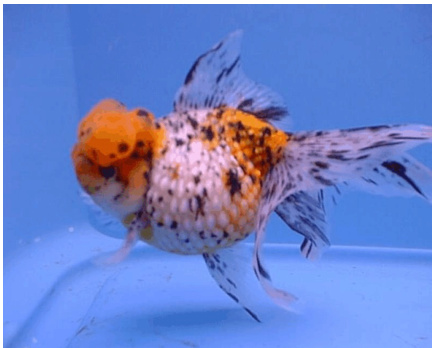
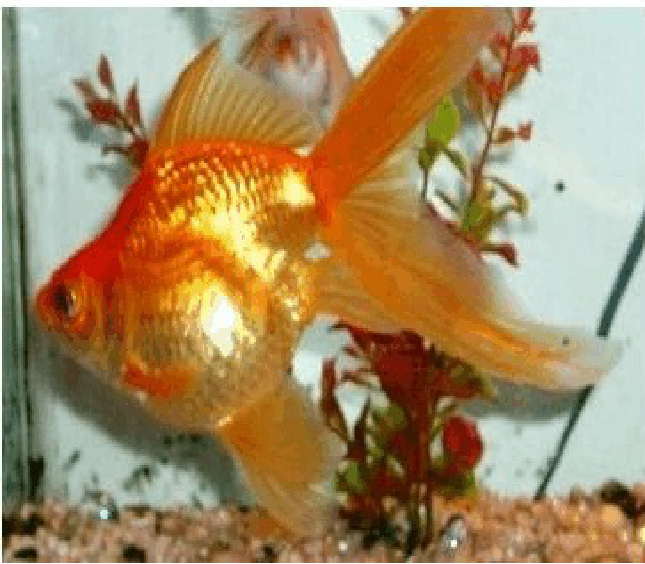
1. Make a magic ring with 6 sc 2. \*sc inc 1\*, repeat 5 times (12) 3. \* sc 1, sc inc 1 \* repeat 6 times (18 ) 4. \* sc 2, sc inc 1 \* repeat 6 times (24 ) 5-8. sc inc to 30 9. BLO sc inc to 36 10. sc 1, dec 1 around FO , lv tail to sew to top of head.. Lightly stuff, if you over stuff it will be to tall! OPTIONAL: you may cross stitch spots on the Oranda, using orange yarn, and use black yarn to make french knots for the specks on the sides of the fish. This is called a Calico Oranda. If you leave the fish all white with an orange cap, it is known as a "Red cap Oranda". I have also included various photos of the real fish.
ENJOY!
Chiwaluv.etsy.com Creative Commons Attribution-Noncommercial-NoDerivative Works 3