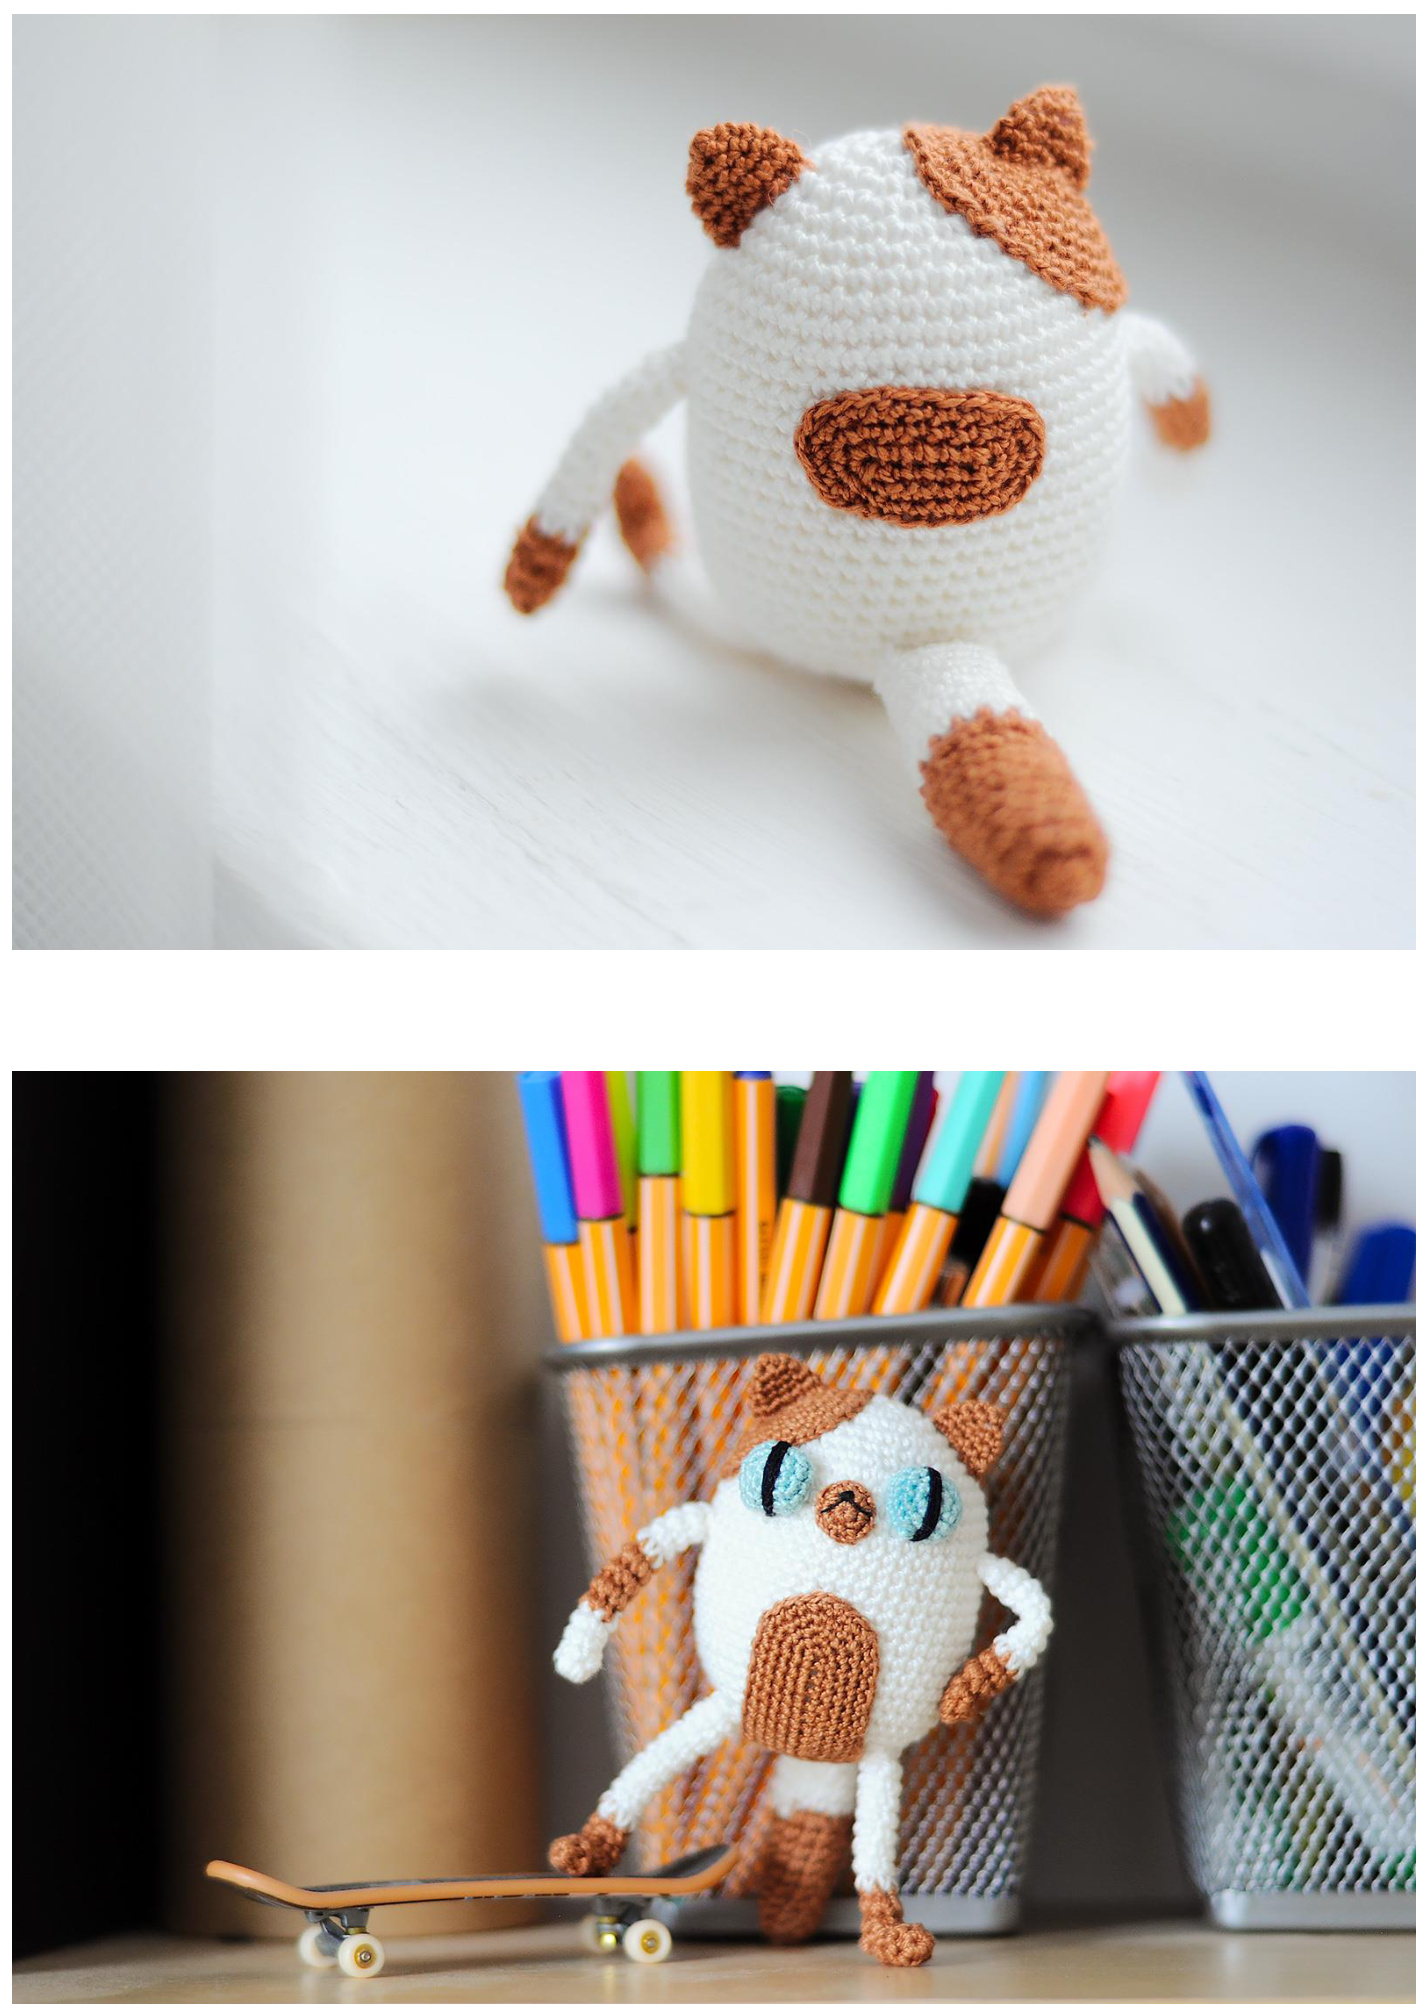
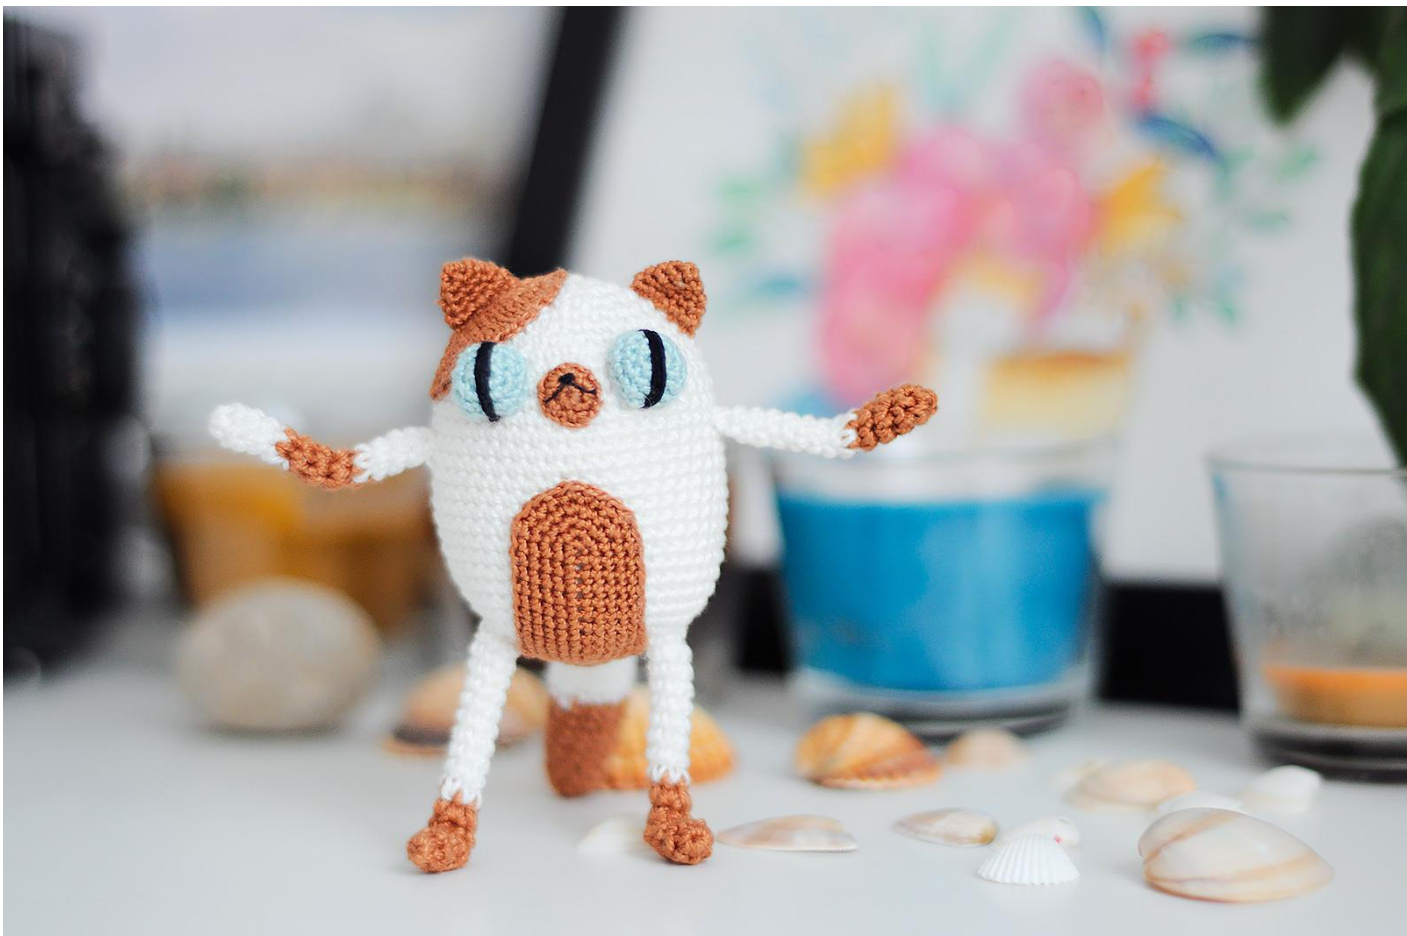
Adventure Time's amigurumi Cake
Materials
White (body), brown (body, spots), blue (eyes) yarn: 150 meters / 25 grams (164 yards / 0.88 ounces), 100% mercerized cotton—lace weight (Just for reference: I've used Iris by Kirov Yarn Mills.) Some black embroidery thread for the eyes Fiberfill 2 mm hook Sewing needle
Abbreviations
X: single crochet V: 2 sc in one stitch ^: 1 sc in two stitches MR: magic ring (aka double ring)—-please read or watch a tutorial ontheweb [2X, V] x 6 (24): 2 sc, 2 sc in one stitch, repeat 6 times (total 24 stitches in a row)
Notes
Cake is made in rounds. Don't join rounds. Use a stitch marker to mark the start of a round—-a small piece of yarn placed under a stitch at the start of a round. Stuff Cake with fiberfill as you progressing to stuff him evenly.
Feedback and support
If you have any questions or you want to report a mistake, please e-mail me at greymelangequeen@gmail.com or contact via Etsy. Please do not sell this pattern or any items made by following the pattern, but don't hesitate to share it with your friends, it's free! Thank you! Follow me on Instagram or like on Etsy.
1. Body: white yarn, 2 mm hook
MR Row 1: 6X Row 2: 6V (12) Row 3: [X, V] x 6 (18) Row 4: [2X, V] x 6 (24) Row 5: [3X, V] x 6 (30) Row 6: [4X, V] x 6 (36) Row 7: [5x, V] x 6 (42) Row 8: [6X, V] x 6 (48) Rows 9—24: 48X Row 25: 6X, ^ (42) Row 26: 5X, ^ (36) Row 27: 4X, ^ (30) Row 28: 3X, ^ (24) Row 29: 2X, ^ (18) Row 30: X, ^ (12) Row 31: 6^
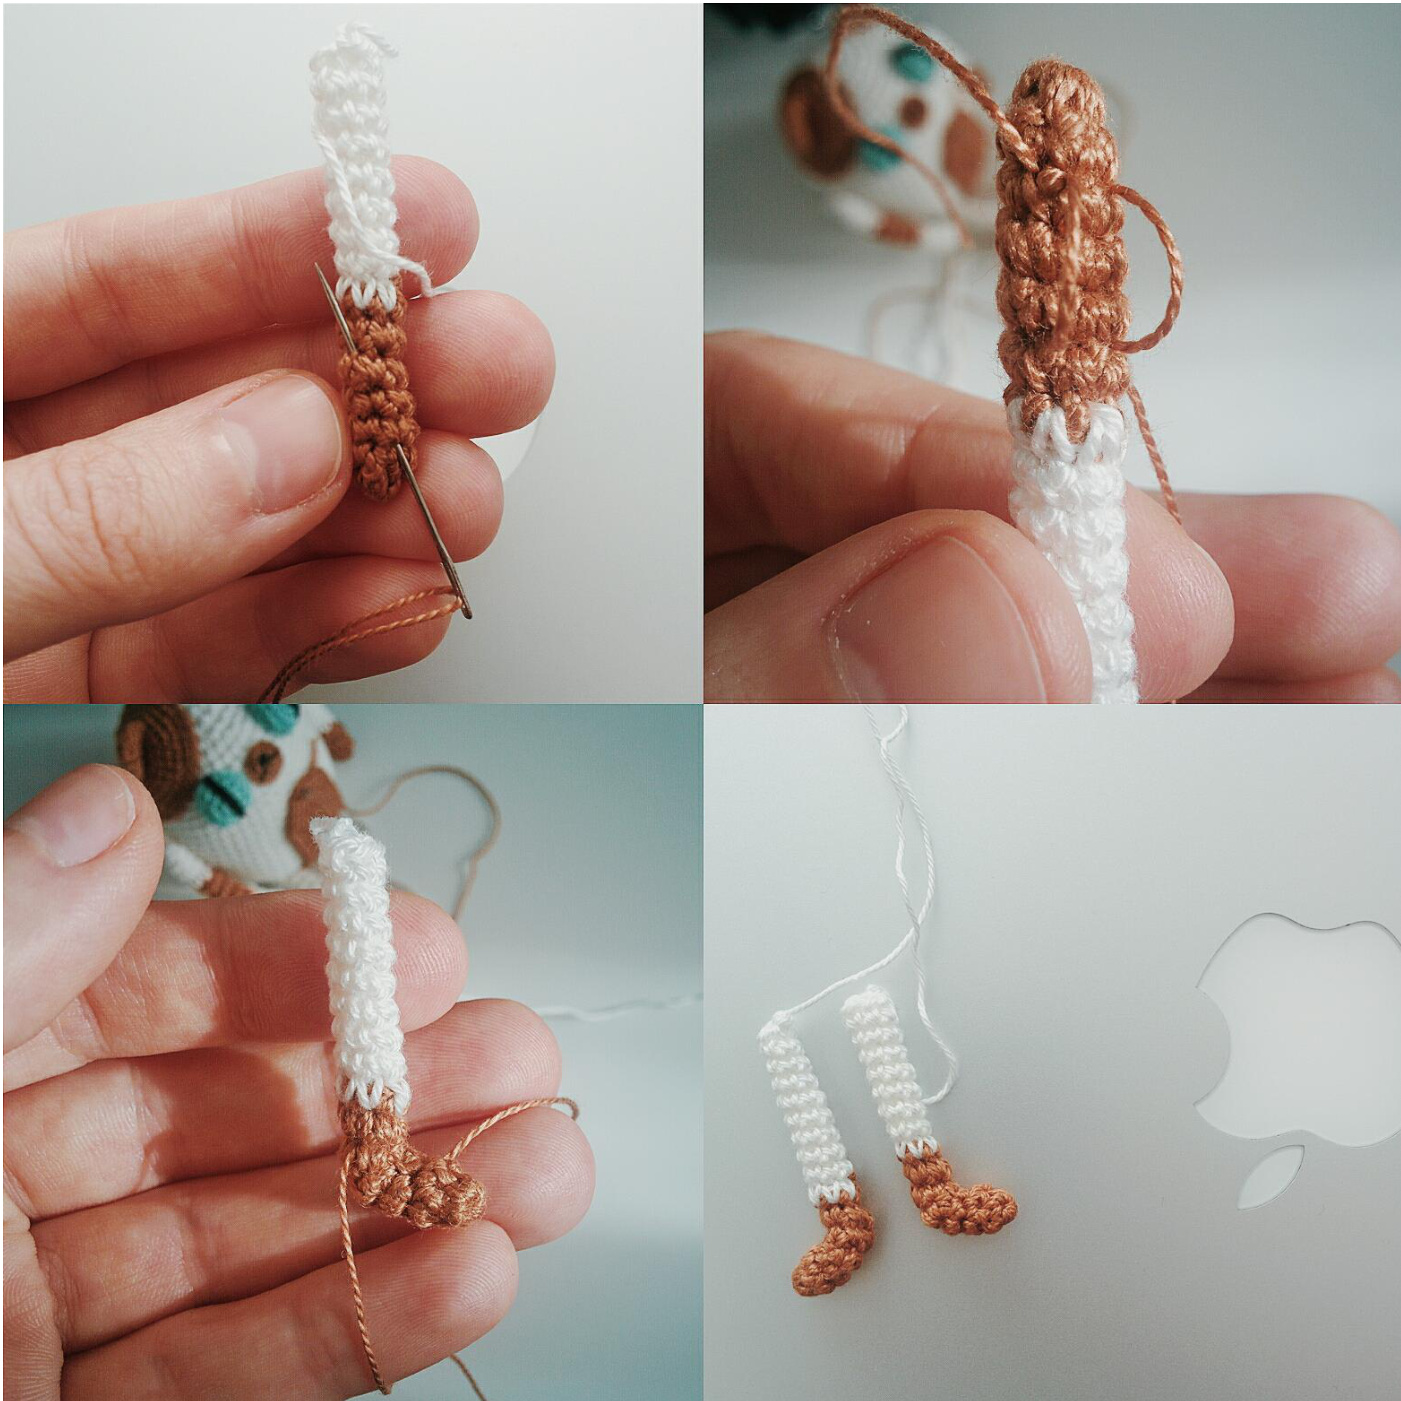
2. 2 legs: white and brown yarn, 2 mm hook
Start with the brown yarn. Rows 2-6: 6X Switch to the white. Rows 7—15: 6X There and after: please don't forget to leave some yarn before cutting — you'll need this extra length to sew the parts on.
3. 2 hands: white and brown yarn, 2 mm hook
First hand
Start with the white yarn. MR Rows 1—4: 6X Switch to the brown. Rows 5—9: 6X White again. Rows 10—13: 6X
Second hand
Start with the brown yarn. MR Rows 1—4: 6X Switch to the white. Rows 1—13: 6X
4. Tail: white and brown yarn, 2 mm hook
Start with the brown yarn. MR Row 1: 5X Row 2: 10X Rows 3—6: 10X Row 7: 4X, V, 4X, V (12) Rows 8—10: 12X Row 11: 5X, V, 5X, V (14) Switch to the white. Rows 12—14: 14X Row 15: 5X, ^, 5X, ^ (12) Rows 16—18: 12X Row 19: 4X, ^, 4X, ^ (10) Row 20: 10X Row 21: 5^
5. 2 ears: brown yarn, 2 mm hook
Row 1: 4X Row 2: 4V (8) Row 3: 3X, V, 3X, V (10) Row 4: 4X, V, 4X, V (12) Row 5: 5X, V, 5X, V (14)
6. 2 eyes: blue yarn, 2 mm hook
MR Row 1: 6X Row 2: 6V (12) Row 3: [6X, V] x 6 (18) Rows 4—5: 18X
7. Face: brown yarn, 2 mm hook
MR Row 1: 6X Row 2: 6V (12)
8. Small head spot: white yarn, 2 mm hook
MR Row 1: 6X Row 2: 6V (12) Row 3: [X, V] x 6 (18) Row 4: [2X, V] x 6 (24) Row 5: [3X, V] x 6 (30) Row 6: [4X, V] x 6 (36) Row 7: [5X, V] x 6 (42)
Legend
+ +0+< ++++++ ++++++ +++0+++ +++0+++ +0+ + + +
10. Big belly spot: brown yarn, 2 mm hook
(please zoom in your PDF to pick up the details)

Assembling
When all the parts are ready, embroider the nose and mouth on the face and sew it on—-it's the central part that will help you to position everything else. Sew on the head spot, ears and eyes (when eyes are half done, stuff them with fiberfill and proceed sewing); embroider the pupils. After that sew on the spot on the back, big spot on the belly, hands. Put the legs into shape: make two stitches with another thread (like on the first two pics), then tighten them to bend the leg; hide the ends. Sew on the legs and, finally, the tail. That's it!