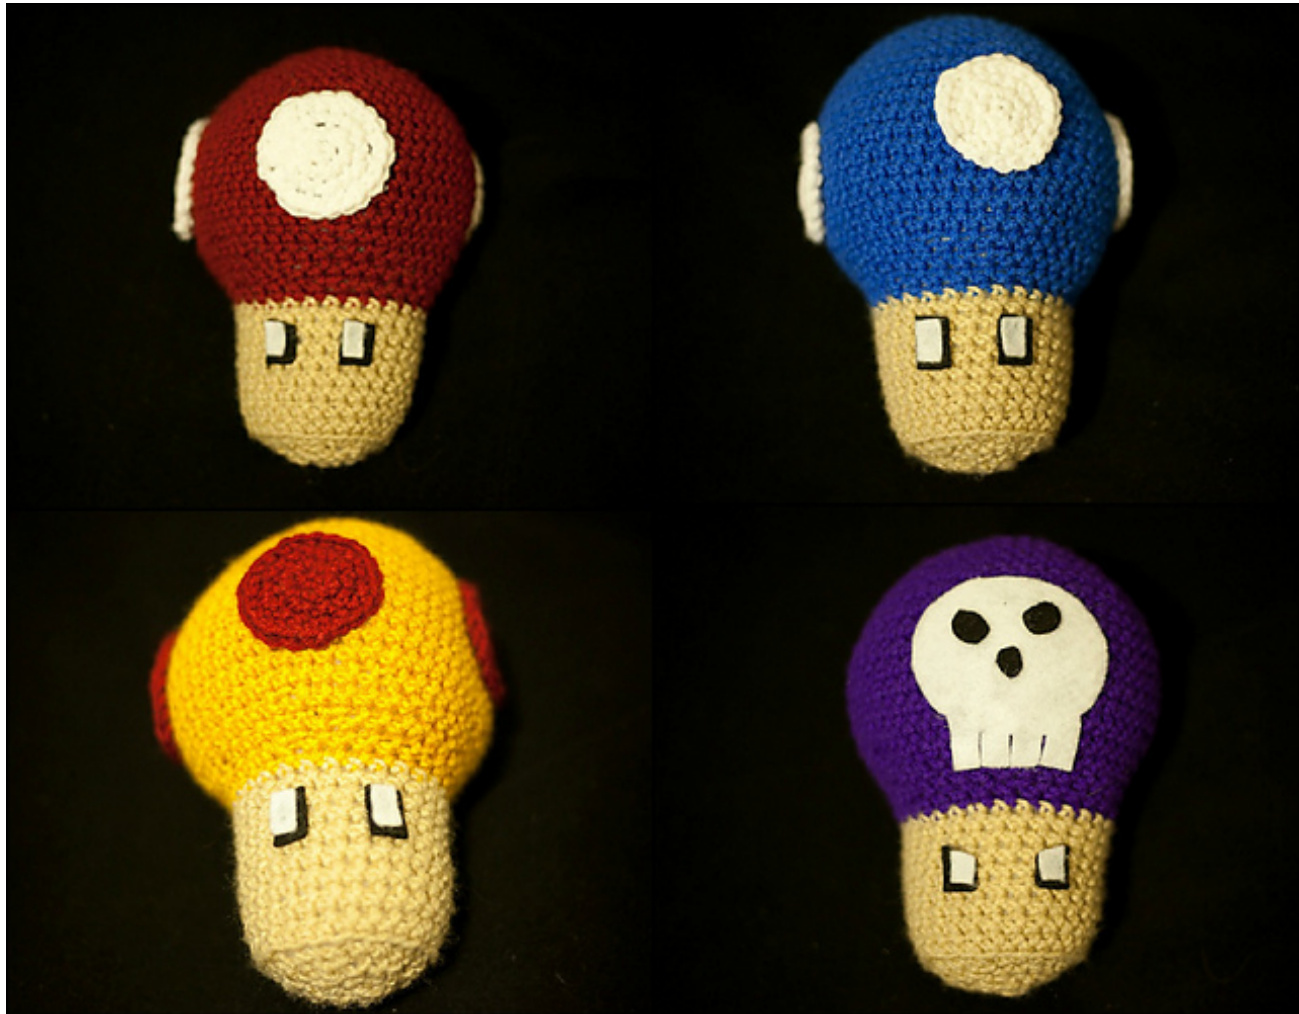
migurumi Mario Mushroom
Haterials: Worsted Weight Yarn - Red and white Black and White Felt Scissors (to cut felt) J/6 Crochet Hook Fabric Glue or thread and needle (To glue/sew on felt eyes and white circles) Stitch Marker Fiberfill Stuffing
Hario Hushroom:
In this example I will be making a Green 1 Up Amigurumi Mario Mushroom With Green yarn, chain 6, and connect to beginning stitch R1: Work 2 sc in each sc around (12 sts) R2: \*Sc 1, 2 sc in next sc\* Repeat 6 times R3: \*Sc 2, 2 sc in next sc\* Repeat 6 times R4: \*Sc 3, 2 sc in next sc\* Repeat 6 times R5: \*Sc 4, 2 sc in next sc\* Repeat 6 times R6: \*Sc 5, 2 sc in next sc\* Repeat 6 times R7: \*Sc 6, 2 sc in next sc\* Repeat 6 times R8: \*Sc 7, 2 sc in next sc\* Repeat 6 times R9 -R17: sC around R18: \*Sc7, Dec next sc \*Repeat 6 times R19: \*Sc6, Dec next sc \*Repeat 6 times R20: \*Sc5, Dec next sc \*Repeat 6 times R21: \*Sc4, Dec next sc \*Repeat 6 times Around here you will want to stuff the ball and continue to stuff until it feels right until you close off. R22-R32: Here you will want to attach the beige yarn, \*Sc around\* Here is where it gets tricky. You will want to Postscript crochet in order to get the bottom to close and look neat. You will want to start single crocheting INTO the backstitchfromR32. R33: \*PSCT 4 Sc, DEC in next Sc\* Repeat R34: \*PSCT 3 Sc, Dec in next Sc\* Repeat R35: \*PSCT 2 Sc, Dec in next Sc\* Repeat, Stop, STUFF, Here it gets tricky. R36: \*PSCT 1 Sc, Dec in next Sc\* Repeat until you can close up the bottom, Sew in string to the body to make it perfect! Great, onto the dots!
Dots (Create H):
With white yarn, chain 6 R1: Work 2 sc in each sc around (12 sts) R2: \*Sc 1, 2 sc in next sc\* Repeat 6 times R3: \*Sc 2, 2 sc in next sc\* Repeat 6 times R4: \*Sc 3, 2 sc in next sc\* Repeat 6 times and slip stitch off. You may need to pull at the sides a bit to give it proper roundness. Here you will want to sew on the circles in the middle, equally spaced apart Next cut out shapes shown on eyes, then assemble and either sew or hot glue on. Once you do this you should be all done and congrats! J Email me if you see any challenges or mistakes! @ Codi Booher - All Rights Reserved O You may use this pattern for personal use, as gifts or for charity but you are not permitted to sell this pattern or the finished tem fo finonciol gin. If you have any questions or problems regarding this pattern, or you find any errors, please feel free to email me at knittygrittymaine@yahoo.com


