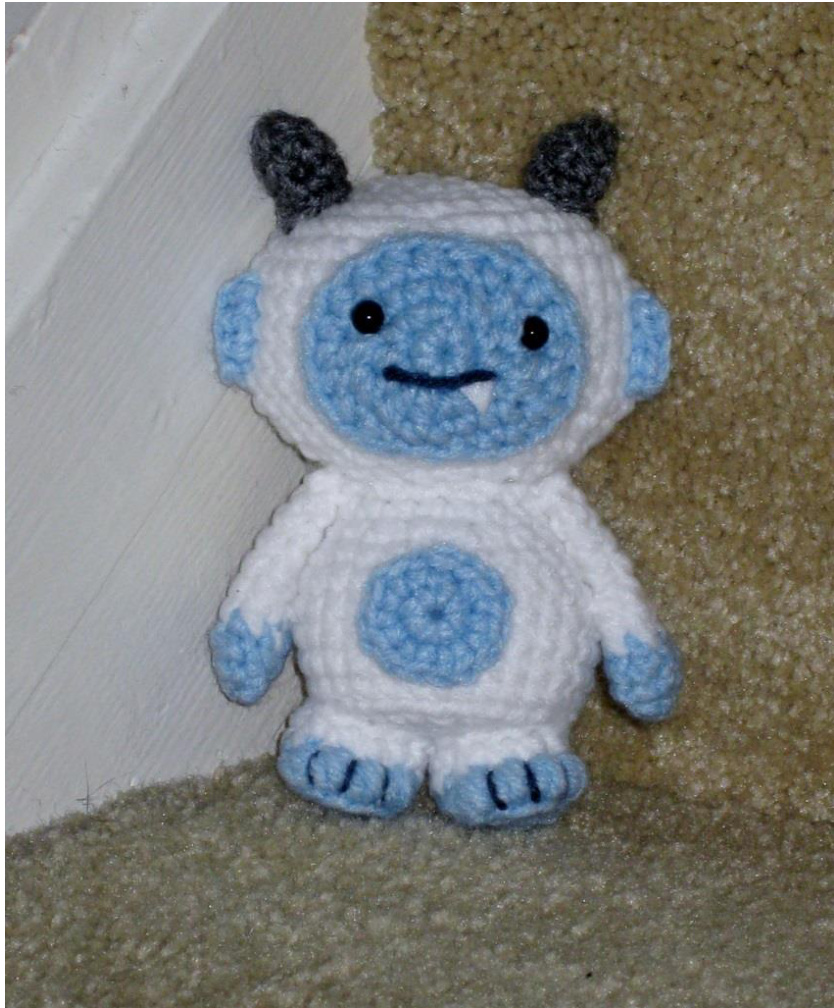
PHILIPPE THe YeTI BY:LaURen SYnoWIec
Materials:
·Yarn in White, Light Blue, Gray and a small amount of Dark Blue (I used Red Heart Brand) Amigurumi Size Hook- I use an E size hook because that is what works for me. I know most people use a size G Fiberfil Safety Eyes ?Small amount of Felt Tapestry Needle Stitch Marker
Notes:
Gage isn't important provided you keep the same gage all the way around. Philippe came out to be about 5 inches tall. The numbers in the parentheses () is the count you should have at the end of the row. Each row starts at the stitch marker. I sew everything on before connecting the head and body, I find this makes a neater project and makes it easier to attach everything. This project is worked in the Round Abbreviations: (this is done in the US style) sc: Single Crochet hdc: Half Double Crochet inc: Increase- two stiches in the same stitch hdinc: Increase using Half Double Crochet dec: Decrease by joining two stitches together clu: Cluster Stitch (yarn over, insert hook and pull a loop through, yarn over, pull a loop through so you now have five loops on your hook, yarn over, pull through all five loops) Blo: Back loops only Sl: slip stitch
Head- White
Rnd 1: 8 sc into magic circle (8) Rnd 2: inc in all (16) Rnd 3: 3sc, inc, inc, 6sc, inc, inc, 3sc (20) Rnd 4: (1sc, inc) x 10 (30) Rnd 5: 6sc, inc, inc, inc, 12sc, inc, inc, inc, 6sc (36) Rnd 6-12: Sc around (36) Rnd 13: 6sc, dec, dec, dec, 12sc, dec, dec, dec, 6 sc (30) Rnd 14: (3 sc, dec) x 6 (24) Rnd 15: (2sc, dec) x6 (18) Rnd 16: 2 sl, F/0 leave a small tail. You will attach head to body with a separate strand
Face- Light Blue
Rnd 1: 8sc into a magic circle (8) Rnd 2: inc, inc, hdinc, hdinc ,inc, inc, hdinc, hdinc (16) Rnd 3: 4sc, hdinc, hdinc, 6sc, hdinc, hdinc, 2sc (20) Rnd 4: 5hdc, hdinc, 2hdc, 6sl, hdinc, 4 hdc (22) Rnd 5: 2 slp F/0 leave tail to use when attaching to head
Horns: Make 2 in Gray
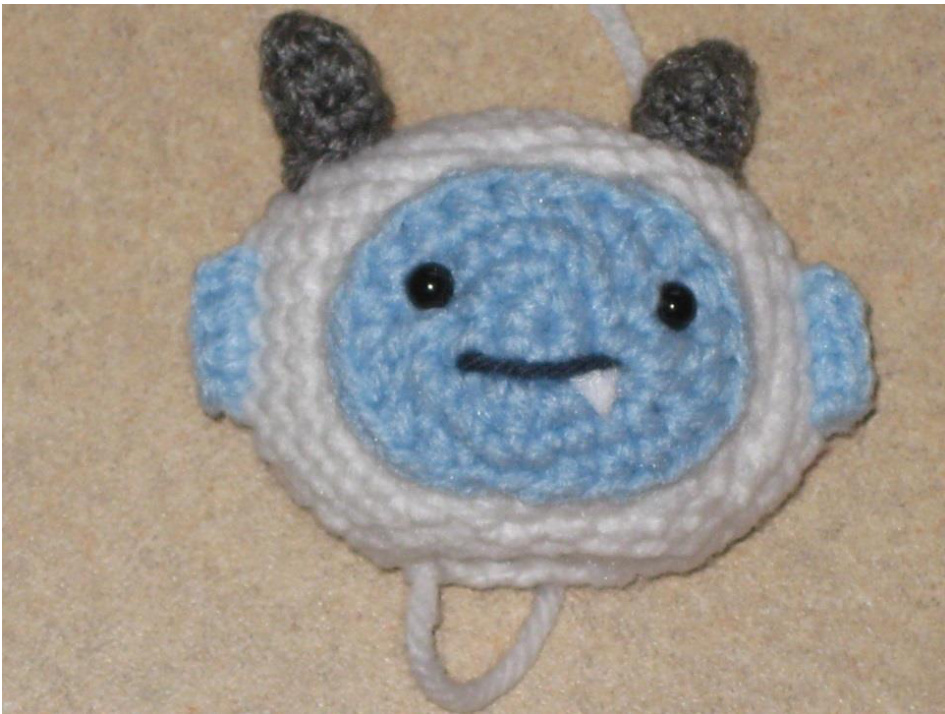
Rnd 1: 3sc in magic circle (3) Rnd 2: inc around (6) Rnd 3: sc around (6) Optional Rnd 4: sc around (6) 2 sl and F/o leave tail to use when attaching to head Connect the horns and face to the head. I feel by connecting the facial features before finishing the project gives for a neater end effect. It is also a little bit easier for those who struggle. For the ears I used this fabulous Youtube video I came across one day: http: //youtu.be/Qtnlw9Apa A I enjoyed the technique. Stick on safety eyes (or sew your own) and embroider your facial expression you desire. I added a tooth with felt and clear tacky glue; I also used a tooth pick to push the tooth under the mouth for a nice look. I stuffed the horns a little as well.
Body: White
Rnd 1: 8sc in a magic circle (8) Rnd 2: Inc all around (16) Rnd 3: 3sc, inc, inc, 6sc, inc, inc, 3sc (20) Rnd 4: (1sc, inc) x 10 (30) Rnd 5: sc around in blo (30) Rnd 6-9: sc around (30) Rnd 10: 4sc, dec, dec, dec, 10 sc, dec, dec, dec, 4 sc (24) Rnd 11: (2sc, dec) x 6 (18) Rnd 12: sc around (18) 2 sl and F/0
Tail: White
Rnd 1: 4sc in a magic circle (4) Rnd 2: 1sc, inc, 1sc, inc (6) Sl and F/O with a tail for sewing to the body
Belly: Light Blue
Rnd 1: 7sc in a magic circle (7) Rnd 2: inc around (14) 2 sl, F/O with a tail to sew to the body. I pulled my belly after making it to give it more of an ovalshape
Feet- Make 2 using Light Blue and White
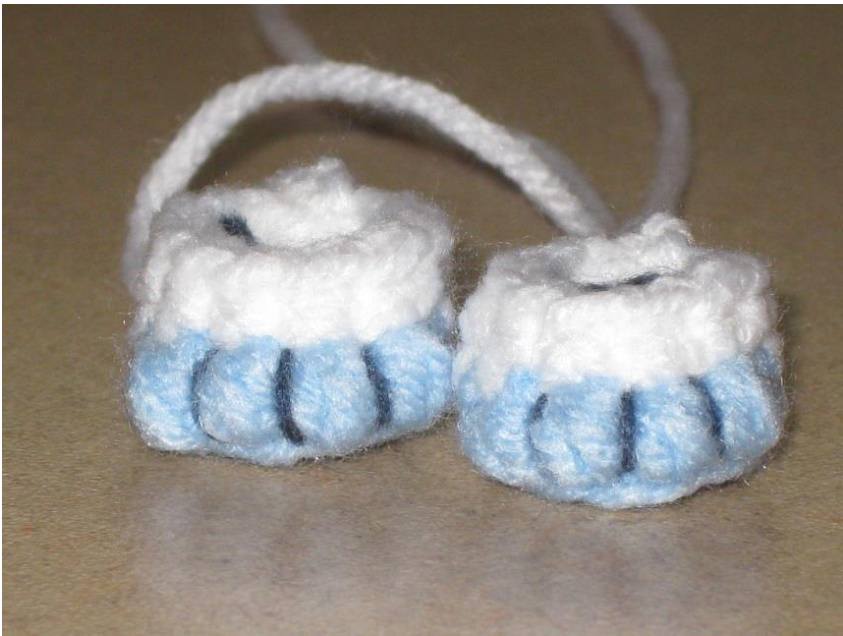
In Light Blue Rnd 1: 6sc in to a magic circle (6) Rnd 2: inc around (12) Rnd 3: in BL0: 4sc, 4 clu, 4sc (12) Change Color to white Rnd 4: 4sc, 4 sl, 4 sc (12) Rnd 5-6: sc around (12) 2 sl F/O Leaving a tail to use when attaching to the body Use the darker blue (I used Windsor Blue because that's what was in my stash) embroider one line in between the toes to give them some definition.
Arms-Make 2 using Light Blue and White
In Light Blue Rnd 1: 4sc in a magic circle (4) Rnd 2: inc around (8) Rnd3: sc around (8) Change to White Rnd 4: sc around (8) Rnd 5-10 sc around (8) 2 sl and F/o leaving a tail for attaching
Assembly:
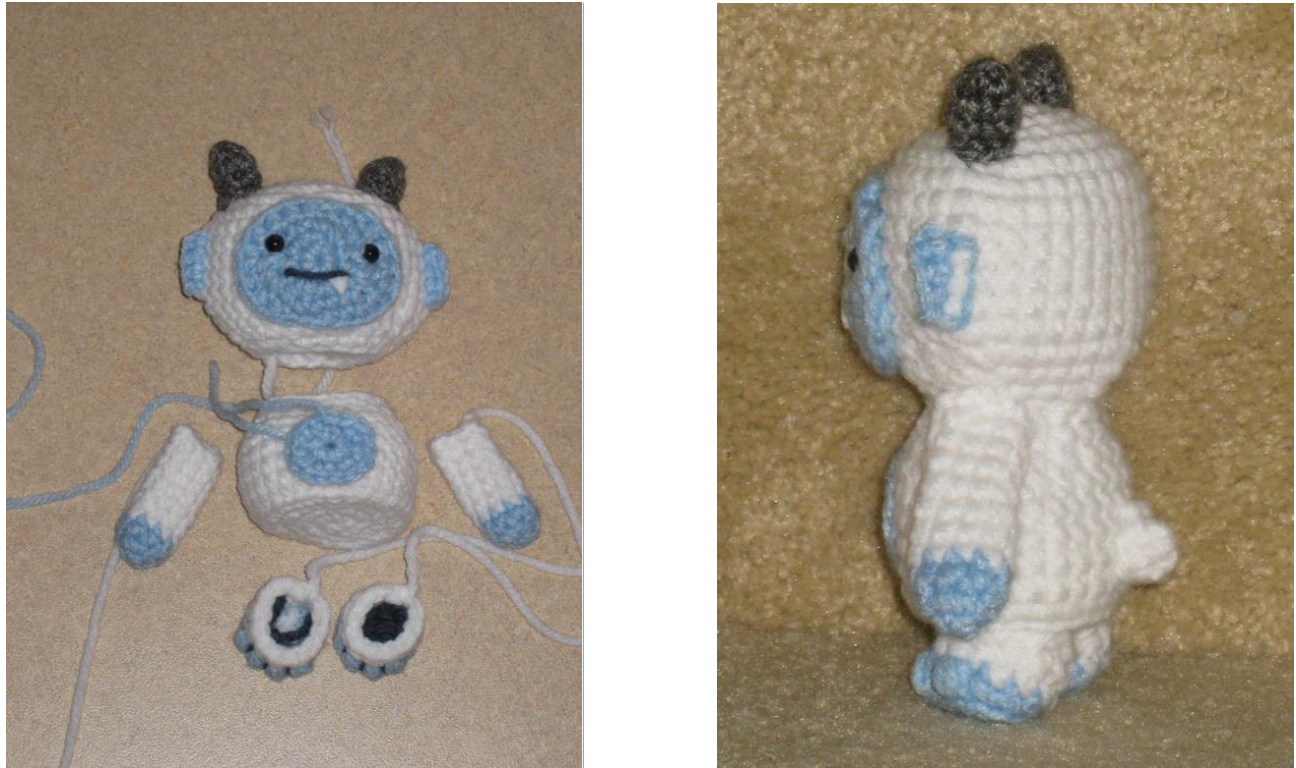
Attach all the parts to the body (as seen in picture). I started with the feet, then tail, belly and arms. Feel free to make the arms longer or shorter based on your needs. I stuffed all parts but the Arms. I liked the flat look but if you want the fluffy look, go for it. When sewing the arms I tacked down the sides and the top so they would lay flat on the body. Once you have all parts on, attach body to head and you are done! I hope you enjoy your very own Yeti. Please do not sellthis product or claim it as your own design since I have posted it for free. I enjoy free patterns and sharing ideas so please respect that.