Little Blue Crochet Car
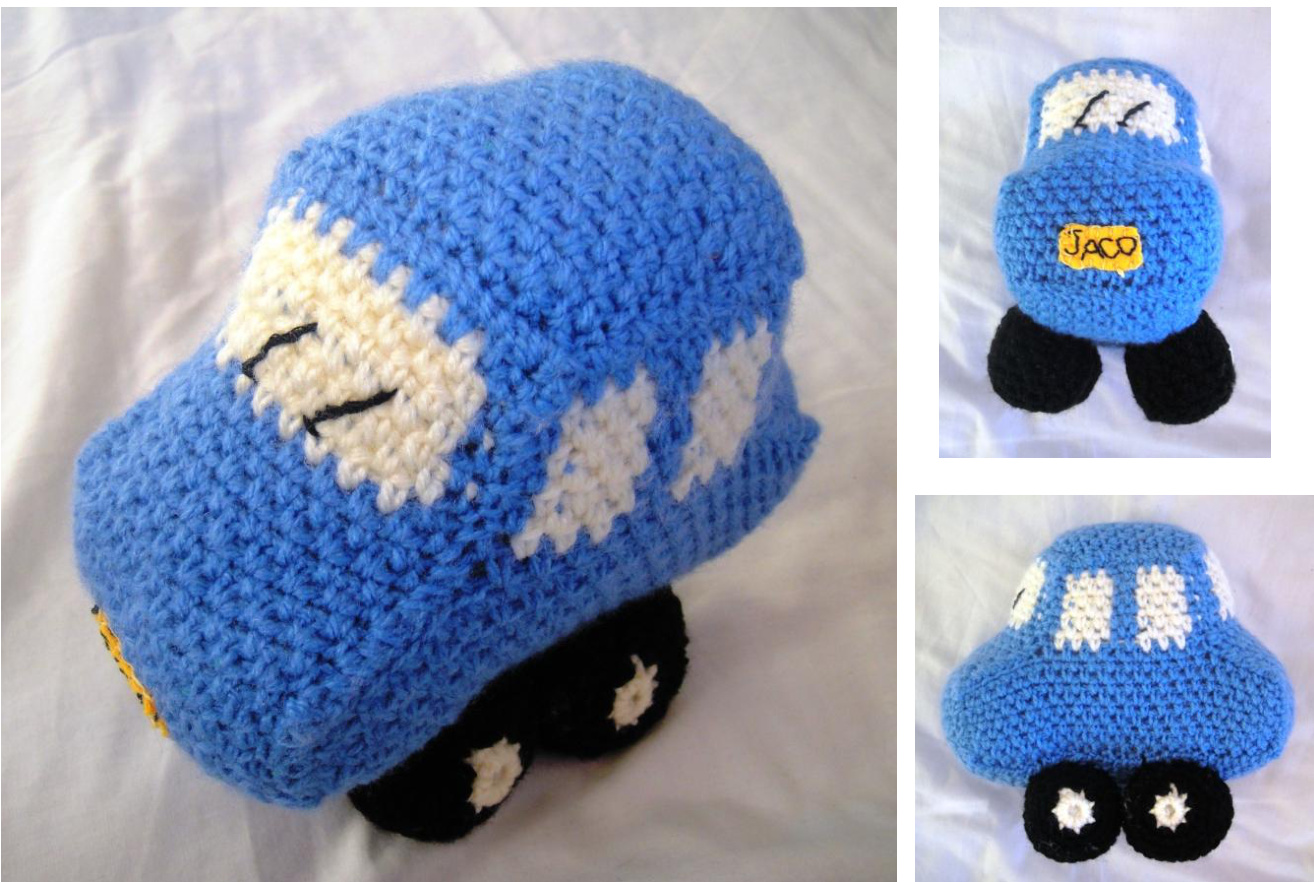
I badly wanted a little girl, but God, in his infinite wisdom, has blessed me with three amazingly cute and quirky boys. Craft-crazy me, therefore, has set about trying to make my crochet-work more boy-friendly. This was the first pattern I ever designed for them and took me on-and-off a year to complete, test, and (finally!) write up. I hope you get great joy from making this little car. I have tried to keep the instructions as simple as possible, but if any confusion arises, please feel free to contact me for an explanation. You can also find the patterns for the Crochet Tractor and the Crochet Digger Loader at www.lookatwhatimade.net
Dedri
Abbreviations
| Ch | Chainstitch |
| Sc | yarnthroughbothloopsonhook. |
| Sc2tog | u pinous no idool e dn jnd pue yots xau u ybnoui yoou no ind 'dooi |
| MC | MainColour |
| Ch-1 space | The space in the previous row created by chaining one stitch between two single crochet stitches.All single crochet stitches in this pattern,unless stated otherwise,areworkedintothisspace. |
Materials
4mmCrochethook 50g Double knit wool in a nice vibrant colour for the body of your car! Double knit white wool (just enough for the 6 windows) Double knit black wool (for wheels, so not very much) Tip: If you use 100% wool, your car will naturally felt. If you use acrylic yarn, you won't get any felting and the car would require less maintenance as you could just chuck it in the normal wash.
Optional:
A tiny rectangle of yellow jersey cotton for the number plate Embroidery needle for embroidering the number plate and finishing touches Embroideryyarn Note: gauge is not included as it does not really have any impact on the end product. Using the specified yarn and hook, however, will yield a car that is roughly 20 cm long from bumper to bumper.
Sides
(Make 2)
Note: All sc's (apart from those worked into the foundation chain) will be worked into the ch-1 spaces of thepreviousrow. 1. Ch 40 in Main Colour. 2. SC in one loop only of 4th ch from hook. \*ch, sc\* into one loop only of every second ch until end. Ch 2 (These two chain stitches at the end of the row will count as the first sc cluster in the next row). Turn. You should
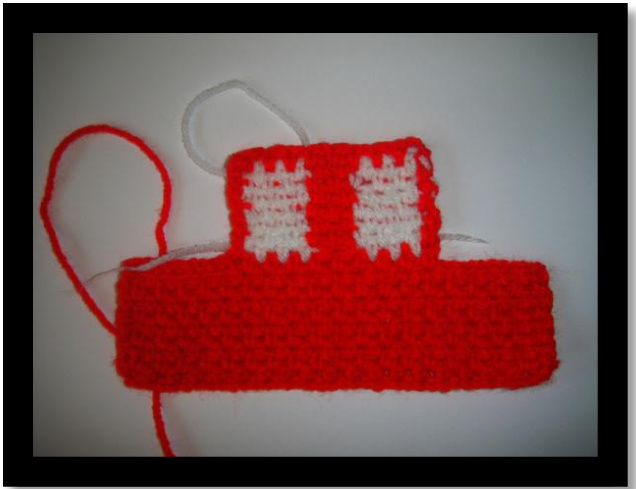
4-9.Repeat row 3. 10. Repeat row 3, but when you get to the end of the row, ch 1 and turn. 11. Skip one stitch and sl st in 1 loop only of each of the next 9 st. Ch 2, \*sc, ch\* x9. Now you need to change to white (or whatever colour you will be using for your windows). Ch 1 in the new colour and turn. 12. White: sc in first ch-1 space. \*ch,sc\* x 2. Colour: \*ch, sc\* x2. White: \*ch, sc\* x 3. Colour: ch, sc, ch . White: ch. Turn Note: When you swap colours, you can either keep the yarn you are not using to the back of your work, or you can crochet over the yarn and thus incorporate it into your stitches. If you are going to keep it to the back of
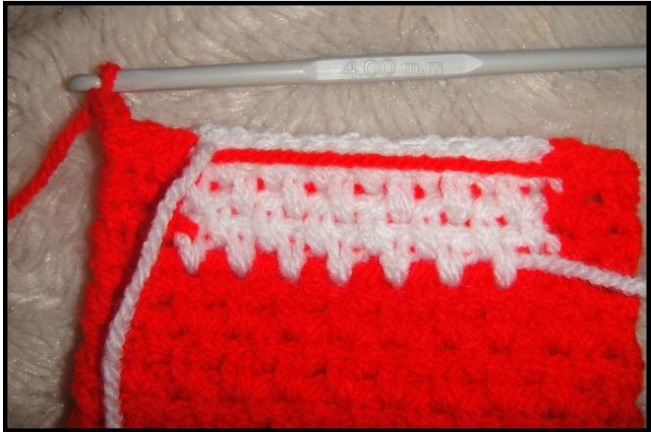
Yarn: to the back of the work in top row and crocheted over inotherrows your work, take care to keep it to the same side for every row, otherwise you will have loose lines of yarn running acrossyourwindows If you are going to crochet over the yarn, make sure that you put your hook in under the coloured yarn when you work into the ch-1 space. This will pull the colour up under the next row, making it less visible.
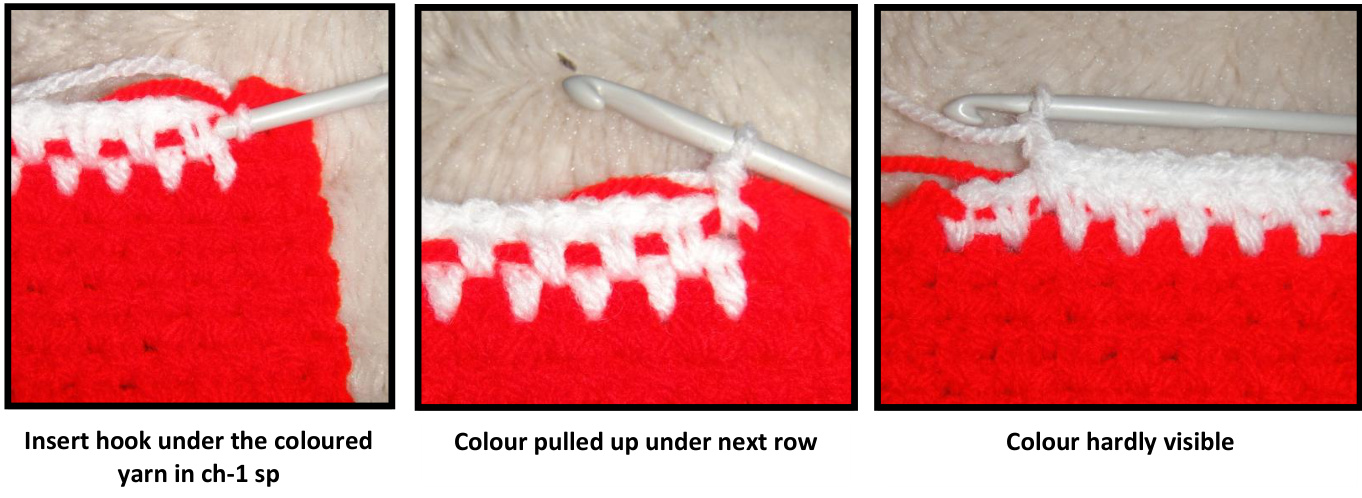
@Dedri Uys 2011 13-18. Repeat row 12. When you get to the end of row 18, DO NOT change back to white for the last ch as the next row wilbe done in MC only. 19. In MC: \*sc, ch\* x 9. Finish off.
Front and back
Make 2 1.Chain 22 in MC. 2. Sc into one loop only of 4th ch from hook. \*ch,sc\* into one loop only of every second ch until end. Ch 2 and turn. (This should leave you with 11 sc clusters and 2 chain stitches at the end which will count as the first cluster in the next row.) 3. \*Sc, ch\* into each ch-1 space on previous row, finishing with 2 ch at the end of the row. Turn 4-19. Repeat R3 20 - 26. Sc. White: \*ch, sc\* x 7. Colour: \*ch, sc\* x 2. Ch 2 and turn. 27. \*sc, ch\* x10. Finish off.
Roof
Make 1 1.Chain 22 in MC. 2. Sc into one loop only of 4th ch from hook. \*ch,sc\* into one loop only of every second ch until end. Ch 2 and turn. 3. \*Sc, ch\* into each ch-1 space on previous row, finishing with 2 ch at end of the row. Turn. 4 -15. Repeat R3 16. \*Sc, ch\* into each ch-1 space on previous row, finishing with 1 ch at the end of the row. Finish off.
Base of car
Make 1 (as roof, but with 34 rows) 1.Chain 22 in MC. 2. Sc into one loop only of 4th ch from hook. \*ch,sc\* into one loop only of every second ch until end. Ch 2 and turn. 3. \*Sc, ch\* into each ch-1 space on previous row, finishing with 2 ch at end of the row. Turn. 4 -33. Repeat R3 I. \*Sc, ch\* into each ch-1 space on previous row, finishing with 1 ch at the end of the row. Finish off @Dedri Uys 2011
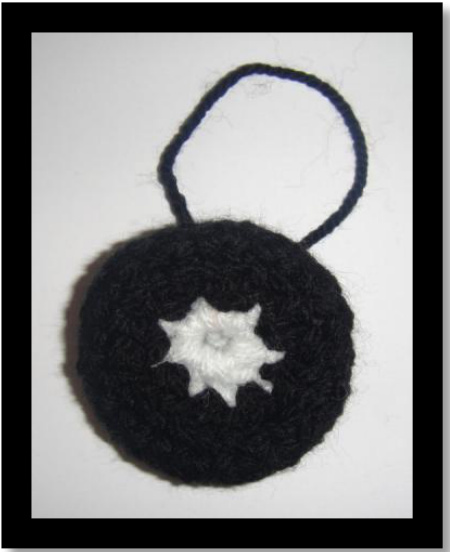
Wheels
Make 8 1. White: ch 4, sl st in 1st ch to form a ring. 2. Ch 2 (counts as first sc and ch-1 space), \*sc,ch\* x 7 into the ring. Join by making a sl st into the 1"t ch-1 space. 3. Change to Black: Ch 2 (counts as first sc and ch-1 space). \*sc, ch\* into the same space. \*Sc,ch\* twice into the remaining 7 ch 1 space. Join by making a sl st into the 1" ch-1 space. 4. Ch2. \*Skip one stitch and sc into back loop only of next stitch. Ch1\* Repeat 14 times. Join by making a sl st into the ch-1 space formed by the first two ch stitches of the round. (You should have 15 sc clusters in this round, first ch-2 included).
Note that you are not working into the ch-1 spaces. You are working into the back loops of the actual stitches on the previous round. This will give your wheels a more defined shape. 5. Ch2. \*Sc, ch\* into every ch-1 space in previous round. Join by making a sl st into the ch-1 space formed by the first two ch stitches. 6 - 8.Repeat Rnd 5. 9.Repeat Rnd 4. 10. Ch2. \*Sc2tog, ch\* x7. Join with a sl st in first ch-1 space. This is a good time to fill your wheel as the hole will be quite small after the next round @ 11. Ch2. \*Sc2tog,ch\* x3. Sc,ch. Join with a sl st in first ch-1 space. Ch and bind off. Make sure you leave a long tail. Finishing off: Using a tapestry needle, weave the tail through the edges of the hole in the wheel and pull tight. Secure yarn and bind off.
Assembly
Sew all the panels together using a blanket stitch and stuff the body. Attach wheels to the base of the car according to your preference. Just make sure that you attach them thoroughly!! I usually attach them underneath the car so that they are sticking out slightly on the sides, but you could also attach them to the sides of the car if you fancied. ?Embroider any optionals (number plate, wipers, door handles, lights) Neaten up any loose ends by working them into the body of the car.
VOILA!!!
Copyright @ 2011 Dedri Uys r: This pattern is for personal use only. You may in no way copy it or put it forward as your own work. You ma sell the items you make from it. The author retains all rights to this pattern. This patern has taken many, many hours of labour and love. Please bear that in mind should you be tempted to disregard this disclaimer.


