Sparkly Shrug
A lacy shrug worked in-the-round By Wanda Pratt
July 12, 2015
Yarn 700-1000 yards of DK yarn Shown using Magic Glitz by Ice (or Creative Yarns in UK)
Needle Size 9 US (5.5 mm or 5 UK) with long cable (if not using magic loop, then also double- pointed needles) Gauge Using 8 rows of Large Vine Lace pattern, 22 stitches = 4.5" Key k1 - Knit one stitch p1 - Purl one stitch yo - Yarn Over ssk - Slip slip knit k2tog - Knit two together kfb - Knit through front & back loop c3b - Put 3 stitches on cable needle and hold in back c3f - Put 3 stitches on cable needle and hold in front
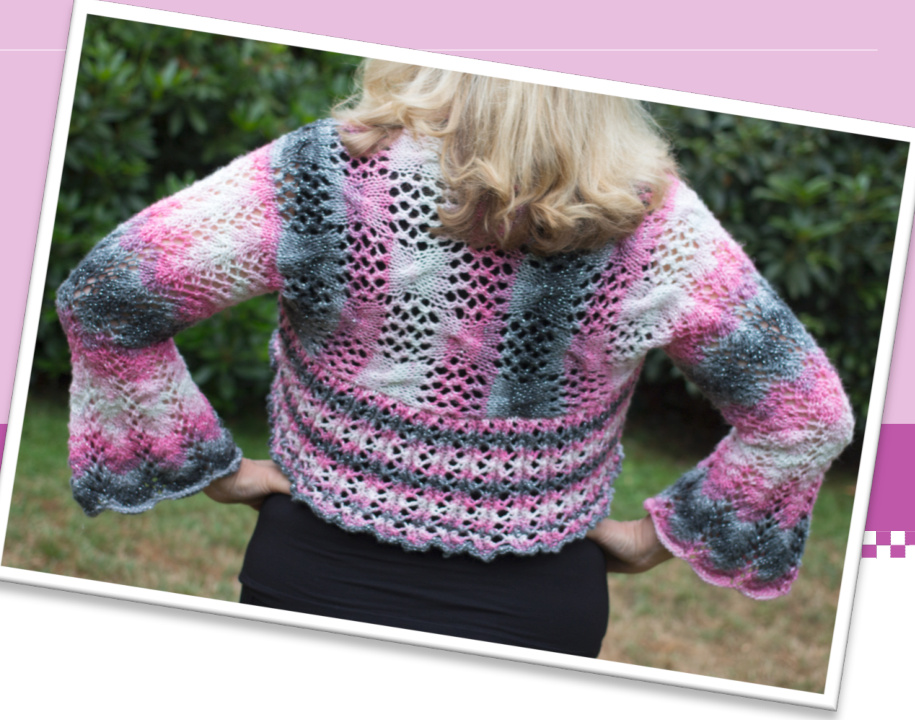
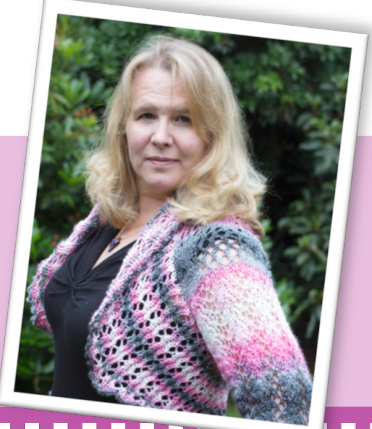
Best for intermediate level knitters. This shrug is a nearly seamless, in-the-round construction that is worked from the end of sleeve, then flat across the back. The other sleeve is worked in the same manner to the underarm. Then the two pieces are attached using the Kitchener stitch. Next stitches are picked up and worked in the round for the lacy rib, finished with a knit picot edging. Shrugs are fairly flexible for sizing, so I've put together just two sizes: small (S) and large (L). If you are a size medium, then either choose whether you prefer a snug or loose sweater or follow my tips for adjustments for fine control over the size. The shrug pictured is for size L.
First Sleeve:
Cast On: 77 stitches (66 for S) (Optional: place marker every 11 stitches to make it easier to keep track of if you get off —- absolutely essential for distractible me!) Connect in the round and prepare to knit in the round using either the magic loop method (see https://www.youtube.com/watch?v=PC7f9fn9wfk for good video instruction) or double-pointed needles. Purl loosely around one row (prevents sleeve edsges from curling).
Start Wide Vine Pattern:
Row 1: \*k1, yo, k3, ssk, k2tog, k3, yo\* repeat to end Row 2 and all even rows: knit all stitches (in round or purl if doing flat for gauge) Row 3: \*yo, k3, ssk, k2tog, k3, yo, k1\* repeat to end Row 5: \*k1, yo, k3, ssk, k2tog, k3, yo\* repeat to end Row 7: \*yo, k3, ssk, k2tog, k3, yo, k1\* repeat to end
Shrink the Vine Pattern
You will follow a similar pattern but start to decrease the width of the sleeve. To make sure you notice which rows have the decrease part, I've started those rows with a \~. \~Row 9: \*k1, yo, k2, ssk3, k2tog, k3, yo\* repeat to end Row 11: \*yo, k2, ssk, k2tog, k3, yo, k1\* repeat to end Row 13: \*k1, yo, k2, ssk, k2tog, k3, yo\* repeat to end Row 15: \*yo, k2, ssk, k2tog, k3, yo\* repeat to end Row 17: \*k1, yo, k2, ssk, k2tog, k3, yo\* repeat to end Row 19: \*yo, k2, ssk, k2tog, k3, yo\* repeat to end Row 21: \*k1, yo, k2, ssk, k2tog, k3, yo\* repeat to end \~Row 23: \*yo, k2, ssk, k3tog, k2, yo\* repeat to end Row 25: \*k1, yo, k2, ssk, k2tog, k2, yo\* repeat to end Row 27: \*yo, k2, ssk, k2tog, k2, yo, k1\* repeat to end \~Row 29: \*k1, yo, k1, ssk3, k2tog, k2, yo\* repeat to end Row 31: \*yo, k1, ssk, k2tog, k2, yo, k1\* repeat to end Row 33: \*k1, yo, k1, ssk, k2tog, k2, yo\* repeat to end \~Row 35: \*yo, k1, ssk, k3tog, k1, yo, k1\* repeat to end
Start Small Vine Pattern
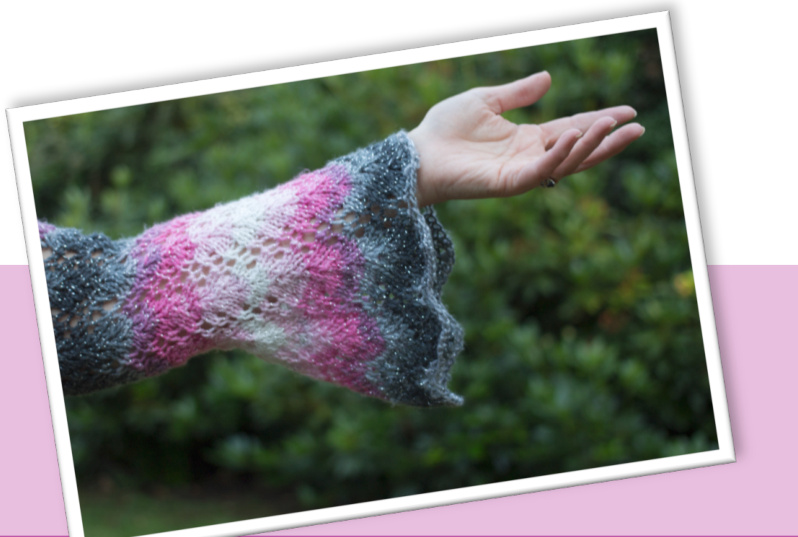
Row 37: \*k1, yo, k1, ssk, k2tog, k1, yo\* repeat to end Even rows: knit all stitches Row 39: \*yo, k1, ssk, k2tog, k1, yo, k1\* repeat to end Repeat this 4-row pattern of small vine once, until sleeve reaches just past the elbow (or hold current work up to arm to exactly match the arm length).
Increase the Vine Pattern
Odd row: \*k1, yo, k1, ssl, k2tog, kfb, yo\* repeat to end Even row: knit all stitches
Start Medium-width Vine Pattern
Row 1: \*yo, k1, ssk, k2tog, k2, yo, k1\* repeat to end Row 2: knit all stitches Row 3: \*k1, yo, k1, ssk, k2tog, k2, yo\* repeat to end Row 4: knit all stitches Repeat these 4 rows until sleeve is at desired length (approximately 2 repeats). On the last even row, kfb at the start and end of the row to increase two stitches.
The Back:
Switch so that you are no longer knitting in the round, but rather back and forth for the Cabled Lace Pattern.
Cabled Lace Pattern:
Row 1: k1, \*k8, k2tog, yo, k2tog, yo, k2tog, yo, k2tog, yo\*, repeat to one stitch before end, k1 Row 2 and all even rows, purl across Row 3: k1, \*k8, yo, ssk, yo, ssk, yo, ssk, yo, ssk\*, repeat to one stitch before end, k1 Row 5: k1,\*k8, k2tog, yo, k2tog, yo, k2tog, yo, k2tog, yo\*, repeat to one stitch before end, k1 Row 7: k1, \*k1, c3f, k3 from cabled needle, k1, yo, ssk, yo, ssk, yo, ssk, yo, ssk\*, repeat to one stitch before end, k1 Row 9: k1, \*k8, k2tog, yo, k2tog, yo, k2tog, yo, k2tog. yo\*, repeat to one stitch before end, k1 Row 11: k1, \*k8, yo, ssk, yo, ssk, yo, ssk, yo, ssk\*, repeat to one stitch before end, k1 Row 13: k1, \*k2tog, yo, k2tog, yo, k2tog, yo, k2tog, yo, k8\*, repeat to one stitch before end, k1 Row 15: k1, \*yo, ssk, yo, ssk, yo, ssk, yo, ssk, k8\* repeat to one stitch before end, k1 Row 17: k1, \*k2tog, yo, k2tog, yo, k2tog, yo, k2tog, yo, k8\*, repeat to one stitch before end, k1 Row 19: k1, \*yo, ssk, yo, ssk, yo, ssk, yo, ssk, k1, c3b, k3, k3 from cabled needle, k1\*, repeat to one stitch before end, k1 Row 21: k1, \*k2tog, yo, k2tog, yo, k2tog, yo, k2tog, yo, k8\*, repeat to one stitch before end, k1 Row 23: k1, \*yo, ssk, yo, ssk, yo, ssk, yo, ssk, k8\*, repeat to one stitch before end, k1 Row 24: purl across Repeat rows 1-24: 3 times for size small, 3.5 times (just do rows 1-12 for the last repeat) for size large. To customize fit measure across your back and compare to length of cabled lace pattern, but it will look best to end on either a 12th row or 24th row. Transfer stitches to holder. You can cut the yarn.
Second Sleeve:
Follow the same instructions as the first sleeve, but stop right after the increase for the back, keeping the stitches on the needle and not cutting the yarn.
Attaching Second Sleeve:
Use the Kitchener stitch to attach this second sleeve to the back. Note that the wrong sides of both the sleeve and the back will be facing each other. If you need help with the Kitchener stitch see a good video demonstration at https://www.youtube.com/watch?v=I7jlzwO5Nv4.
Add Reversible Lacy Rib:
After attaching the sleeve, pick up and knit stitches around the entire garment: starting under one sleeve, going across the back, including under the other sleeve, going across the other side of the back until you reach the start. I picked up about every stitch, which was 180 stitches total for size L and 152 stitches for size S. The exact number isn't critical, except that it must be a multiple of 4. Connect in the round, placing a marker at the start. For the next row, you need to increase a little: \*k3, kfb\* repeatedly around the entire body. This row leaves you with a multiple of 5. Repeat this lacy rib stitch to make the rest of the bodice: Row 1: \*ssk, yo, kl, p2\* repeat to end. Rows 2 and 4: \*k3, p2\* repeat to end. Row 3: \*k1, yo, k2tog, p2\* repeat to end. I did 9 repeats for a size L, and 8 for a size S, but you can choose to make it longer or shorter depending on how long you want the shrug or how far across your body you want it to drape. Note that this version does not reach all the way across my body.
Picot edging
Finish the sweater with a nice knit picot edging. Step 1: Cast on 2 stitches Step 2: Knit 2 Step 3: Pass first stitch over second stitch Step 4: Knit, pass first stitch over second stitch Step 5: Knit, pass first stitch over second stitch Step 6: Knit, pass first stitch over second stitch Step 7: Slip stitch back to main needle Repeat until no stitches remain. This video explains picot edging as well: http://newstitchaday.com/how-to-knit-the-picot-bindOoff/


