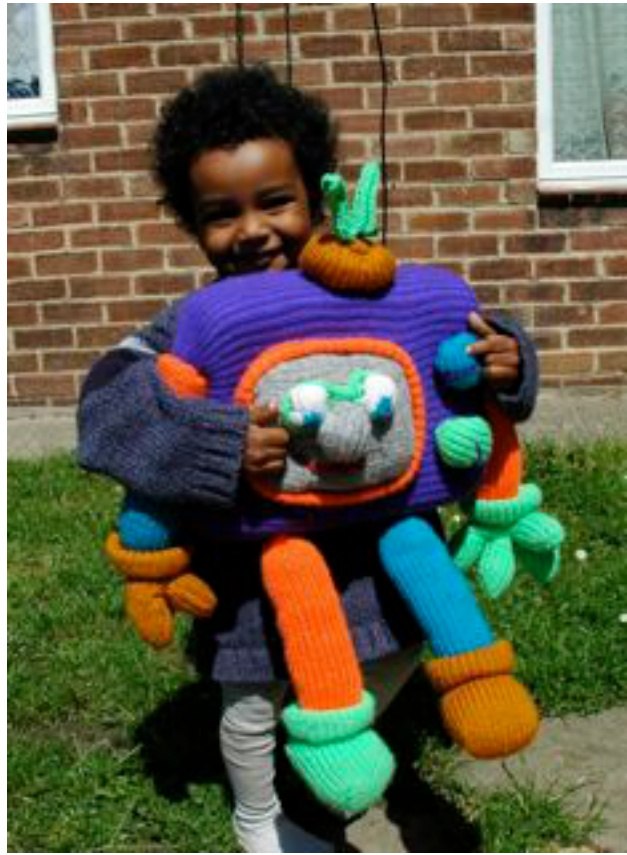
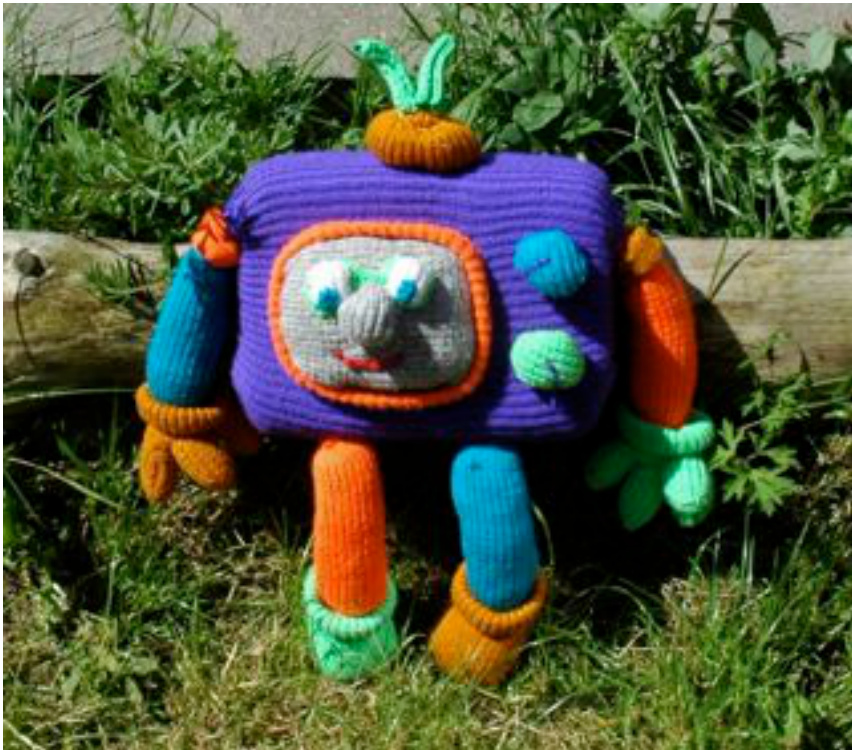
' The Square Eyes Monster ' by HelenJacobs-Grant
Designed and published by Helen Jacobs-Grant @2010 during theVancouver Winter Olympics in February aspart of the2010 RavelympicsforTeamGB all rightsreserved for more info go to http://raverly.com (dont forget to credit the designer when making items from this pattern) email:helen@myheartexposed.co.uk web:http://myheartexposed.co.uk

\*Please read through the Pattern Notes and Instructions before starting your project, guidelines are included throughout, individual stitch instructions are given right at the very end\*
Pattern Notes :
Inspired by the old saying "you shouldn't watch too much television it willgive you square eyes" Sample shown has been loom knitted by hand exclusively using the 1/2 inch gauge knitting looms, designed with cuteness and character. Knit the pieces in any order you like and assemble at the end. 1 : b : television screen shape 1 : c : television knobs and switches 2 : arms 3 : legs 4 : hands 5 :feet 6 : aerial 7 : face
Loom and Yarn :
For the pieces it doesnt really matter what loom you use as long as everything is in proportion with each other, for example, I used two of the round 1/2 inch regular gauge looms, the 29 peg for the feet and hands, 59 peg round one for the body because that is what I had available to me at the time of designing this project. You could use the Knifty Knitter round looms, blue 24 pegs for the smaller pieces, hands and feet, the yellow 42 peg round loom for the body piece which is a huge tube shape with ends. 1/2 inch regular gauge round knitting loom round 29 / 30 pegs for feet and hands 26 pegs flat panel for arms and legs large hat round loom size for tv body piece DK (double knit) or worsted weight acrylic or toy yarn 50g - 1oog each in your chosen colours for each piece listed above use two strands held together as one throughout pattern (Hayfield / Sirdar Bonus DK acrylic yarn was used in the example shown) loom hook large eye sewing needle polyester or fibrefill toy filling block of foam padding for the main tv body (decide how big you want the body of your toy to be, a foam block that fits the diameter of your largest hat loom will do so you can knit the tv body piece in one go without the need for seaming the sides together) (59 peg 1/2 inch round loom and foam block measuring 14 inches wide, 10 inches tall and 5 inches deep was used in example shown)
1a : Television Body Shape
using your large hat loom main tv colour 1 : crochet cast on all the pegs and join in the round so that peg 1 has two stitches on the peg and all the rest have one 2 : knit every row until your tube will cover your block of foam completely, you will need to seam shut the ends after knitting your tube (knit the 2 stitches on peg 1 together as if they were one) 3 : bind off position your foam block piece inside your tube seam shut the ends
1b : Television Screen Shape
basically the screen is a square knitted as a flat panel I used two different grey yarns held together to give more of a 'white noise' effect if your foam block for the whole tv is smaller than adjust accordingly, number of stitches and rows in this part of the pattern fits the $14\times10\times5$ inches piece of foam block that I used 1 :crochet cast on 30 stitches 2 : knit 60 rows 3 : bind off leaving a long yarn tail for sewing 4 : thread one strand of your yarn tail onto your needle and gather around the edge of your screen $5:$ pull slightly to gather the edges 6 : shape into a screen shape with rounded corners 7 : knot the yarn tail and push the end to the wrong side of your screen 8 : with your other yarn tail, seam your screen down on to your television body leaving a gap atoneside 9 : push all yarn tails inside the screen and fill with toy filling so that you have a nicely shaped 3D screen then seam shut the gap. 10 : (optional )using a darker or contrasting colour, make a two stitch icord to go all the way around your screen. 11a and 11b are optional so you can either do one of them or none 11a : sew your icord around your screen to create a border 11b : cast on all the pegs on your large round loom you used for the body piece, knit 15 rows, fold up like you would the brim of a hat by lifting the cast on row back onto the pegs, knit off then bind off all the pegs. Sew around your screen to create a border.
1c : Television Knobs and Switches
(make two the same in different colours) knit as a flat panel 1 : crochet cast on 8 stitches 2 : knit row 3 : increase 1 stitch at start of row, knit to end 4 : increase 1 stitch at start of row, knit to end 5 : knit four rows 6 : increase 1 stitch at start of row, knit to end 7 : increase 1 stitch at start of row, knit to end 8 : knit twelve rows 9 : decrease 1 stitch at start of row, knit to end 10 : decrease 1 stitch at start of row, knit to end 11 : knit four rows 12 : decrease 1 stitch at start of row, knit to end 13 : decrease 1 stitch at start of row, knit to end 14 : knit row 15 : bind off leaving a long yarn tail to use for seaming later 16 : thread one strand of your yarn tail onto your needle and thread the yarn in and out in small intervals going all the way around the outside of your shape 17 : pull on the yarn gently being careful not to break it, you need to gather the edge in just enough to create a nice flat round shaped switch or knob 18 : push some toy filling into your shape and then attach it to your tv body 19 : seam around underneath your switch or knob straight onto the tv body 20 : knot yarn and thread the ends into the tv body piece so that they are hidden away (do the same with your second switch or knob and attach them to your tv body)
2 and 3 : Arms and Legs
(make four the same) 1 : crochet cast on 26 pegs 2 : slip first stitch on each row, knit 50 rows 3 : bind off leaving a long tail to use later seam along the length of your arm or leg pieces
4 : Hands : Pattern Instructions :
(make two the same) wrist cuff 1 : crochet cast on all the pegs and join in the round so that peg 1 has two stitches on the peg and all the rest have one 2 : knit 20 rows, knit the two stitches on peg one together as if they were one 3 : fold up by liting the stitches along your cast on row and placing them back on the pegs, all pegs now have two stitches 4 : knit row, knit both bottom loops together as if they are one 5 : knit tworows
Thumbs and Fingers are knitted in flat panels forward and back on 9 pegs only
6 : knit 5, cast on 2 above the stitches already on the pegs 7 : knit row of 7 stitches, cast on 2 so that you have 9 stitches in total ( ignore the stitches on the pegs below the row you will be working on for the thumb ) 8 : slip 1, knit to end for 10 rows 9 : bind off 1 stitch at start of next six rows 10 : cast on 1 stitch at start of next six rows 11 : slip 1, knit to end for 10 rows 12 : bind off 2 stitches at the start of next 2 rows
left thumb is knitted starting from peg 29 or 30 to 28, 27 etc so that when the hands are finished the thumbs are at opposite sides of each hand
left hand thumb
6 : knit 5, cast on 2 above the stitches already on the pegs 7 : turn, knit row of 7 stitches, cast on 2 so that you have 9 stitches in total ( ignore the stitches on the pegs below the row you will be working on for the thumb ) 8 : slip 1, knit to end for 10 rows 9 : bind off 1 stitch at start of next six rows 10 : cast on 1 stitch at start of next six rows 11 : slip 1, knit to end for 10 rows 12 : bind off 2 stitches at the start of row, knit row, bind off 2 stitches you now have one stitch on each peg going all the way around the loom and your working yarn is ready to knit peg 1 hands are worked in the same direction you used for the wrist and right thumb starting with peg 1, 2, 3 etc.
both hands three fingers
13 : knit all the way around the loom for three rows 14 : bind off 7 stitches, knit 15, bind off 7 stitches, cut working yarn and tie in a knot rejoin yarn at start of row ( 29 peg loom : you should now have 15 stitches on your loom ) ( 30 peg loom bind off an extra stitch so you have 15 stitches remaining ) 15 : knit 5, cast on 2 above the stitches already on the pegs 16 : knit row of 7 stitches, cast on 2 so that you have 9 stitches in total ( ignore the stitches on the pegs below the row you will be working on for the finger ) 17 : slip 1, knit to end for 10 rows ( 12 rows for middle finger ) 18 : bind off 1 stitch at start of next six rows 19 : cast on 1 stitch at start of next six rows 20 : slip 1, knit to end for 10 rows ( 12 rows for middle finger ) 21 : bind off 2 stitches at the start of next 2 rows 22 : bind off 5 stitches 23 : repeat from 16 to 22 twice for next two fingers
finishing hands
1 : turn inside out and seam the sides of the fingers and thumb shut 2 : join hand seam to base of fingers 3 : turn back the right way 4 : fill hand with toy filling pushing up into the fingers and thumb, set aside ready to join on the arm whilst you do the same with the other hand
5 : Feet : Pattern Instructions :
(make two the same)
ankle cuff
1 : crochet cast on all the pegs and join in the round so that peg 1 has two stitches on the peg and all the rest have one 2 : knit 20 rows 3 : fold up by lifting the stitches along your cast on row and placing them back on the pegs, all pegs now have two stitches 4 : knit row, knit both bottom loops together as if they are one 5 :knit row
heel shaping.
decreasing.
6 : knit 14, lift stitch on peg 15 and hold it, wind yarn around the peg and replace the stitch loop you are holding ( peg 15 now has two stitch loops ) 7 : knit from peg 14 to peg 2, lift stitch on peg 1 and hold it, wind yarn around the peg and replace the stitch loop you are holding ( pegs 1 and 15 now have two stitch loops ) 8 : knit from peg 2 to peg 13, lift stitch on peg 14 and hold it, wind yarn around the peg and replace the stitch loop you are holding ( pegs 1, 14 and 15 now have two stitch loops ) 9 : knit from peg 13 to peg 3, lit stitch on peg 2 and hold it, wind yarn around the peg and replace the stitch loop you are holding ( pegs 1, 2, 14 and 15 now have two stitch loops ) 10 : keep reducing on the end of each row now until there are only three stitches left in the center with one loop remaining on each peg
increasing.
11 : knit from peg 7 to 10, knitting both loops off from peg 10 together as if they were one 12 : knit from peg 10 to 6, knitting both loops off from peg 6 together as if they were one 13 : knit from peg 6 to 11, knitting both loops offrom peg 11 together as if they were one 14 : knit from peg 11 to 5, knitting both loops off from peg 5 together as if they were one 15 : knit from peg 5 to 12, knitting both loops off from peg 12 together as if they were one 16 : knit from peg 12 to 4, knitting both loops off from peg 4 together as if they were one 17 : knit from peg 4 to 13, knitting both loops off from peg 13 together as if they were one 18 : knit from peg 13 to 3, knitting both loops off from peg 3 together as if they were one 19 : knit from peg 3 to 14, knitting both loops off from peg 14 together as if they were one 20 : knit from peg 14 to 2, knitting both loops off from peg 2 together as if they were one 21 : knit from peg 2 to 15, knitting both loops off from peg 15 together as if they were one 22 : knit from peg 15 to 1, knitting both loops off from peg 10 together as if they were one
knitting in the round for the foot
23 : knit 15 rows going all the way round your loom 24 : bind off 15 stitches, knit to end of row 25 : knit remaining stitches 5 times 26 : bind off one stitch at start of the next four rows 27 : knit one row 28 : bind off.
finishing feet instructions
1 : turn inside out 2 : seam along the opening all the way around the front and sides 3 : turn back the right way 4 : fill with toy filling and set aside ready to be joined to the leg
joining hands and arms, feet and legs together
1 : seam the edge of an arm or leg to the inside bottom edge of the cuff of your hand or foot 2 : do the same with all four pieces : two arms hands and two legs feet 3 : push all yarn tails inside the arms or legs 4 : fill with toy filling pushing down inside the arms or legs so that the filling goes inside the hands and feet 5 : join to the body
6 : Aerial
antennae make two
1 : cast on 5 stitches 2 : knit until piece is long enough to enclose your pipe cleaner folded in half 3 : bind off 4 : holding your pipe cleaner folded in half inside the piece you just knitted, seam the sides closed.
Base
1 : cast on 10 stitches 2 : knit four rows 3 : increase two stitches at start of next two rows 4 : knit twenty rows 5 : bind off
to make arial
1 : fold in the ends of your base piece and seam down similar to the brim of a hat at each end almost joining in the middle 2 : push the sharp ends of your antennae into the middle and seam closed the base piece aroundthem 3 : fill the base piece with filling and seam to the top of the tv.
7 : The Face
Eyes - make two 1 : cast on 6 stitches 2 : knit 20 rows 3 : bind off 4 : fold in half and join the cast off and bind off ends together 5 : attach to the face along one side 6 : fill with a small ball of toy filling 7 : seam down other side do the same with the other eye then sew in the center colour of the eye with a few stitches using yoursewing needle
Glasses (optional).
make a two stitch icord until it is long enough to go around both eyes like a pair of glasses stitch in place
Nose
knit 6 rows knit row, increase 3 stitches at the end or row knit row, increase 3 stitches at the end or row knit 12 rows decrease 3 stitches at start of next two rows you now have a cross shape piece so fold down the side flaps to make a square nose shape andseamdownthejoins push in a little toy filling and shape with your hands then stitch into place on the face
Mouth
Using some red yarn thread your needle then push it up through the face of the tv in the center of where the mouth will go, then carefully stitch on a mouth. When the mouth is complete, push the needle through the screen and out to one side, cut yarn so that it springs back inside the tv face hidden from view. I hope you have enjoyed making this cute little character as much as I have enjoyed producing this designforyou be sure to take lots of photos and enjoy! This pattern is gifted freely for you to enjoy for your own personal use please do not reproduce the pattern online or attempt to profit from it Items made from this pattern can be sold to raise money for charity only with my blessing if you are not sure about any part of this copyright notice please email me helen@myheartexposed.co.uk 2010HelenJacobs-Grant
Stitch Instructions :
My Own Crochet Type Cast On :
as I cant see to do this with a crochet hook I use this improvised method for all my cast on edges : make a loop in your yarn and form a slip knot, place loop on peg 1 and pull working yarn to secure, with working yarn coming from behind the loop and in towards you from between pegs 1 and 2, catch the working yarn from the side of peg 1 by inserting your hook upwards into the first loop pulling the new loop down through the side of the stitch and back towards you from the side of the peg 1 and place the new loop on to peg 2 pulling the working yarn behind the pegs as you go along. (note that the new loop comes from behind and along the side of the first loop on peg 1 straight on to the next peg without going over peg 1 at all) \*Feel free to use the regular crochet cast on instead if that is easier for you\*
Knit Stitch :
place working yarn across the pegs above the stitches going in the direction you are working in, insert your hook upwards into the first stitch, hook the working yarn and pull it downwards to form a loop sticking out from the stitch that is on the peg, hold this new loop firmly and gently lift everything off the peg replacing it with your new loop you are holding, tug working yarn to secure.
Purl Stitch :
place working yarn across the pegs below the stitches going in the direction you are working in, insert your hook downwards into the first stitch, hook the working yarn and pull it upwards to form a loop sticking out from the stitch that is on the peg, hold this new loop firmly and gently lift everything off the peg replacing it with your new loop you are holding, tug working yarn to secure.
Two Stitch Icord :
1 : make a slip knot and place the loop on peg 1 crochet cast on peg 2, position the working yarn in between the two stitches coming out towardsyou 2 : wrap around peg 2 bringing the working yarn around the peg and into the center again coming out towards you 3 : wrap around peg 1 bringing the working yarn around the peg and into the center again comingouttowardsyou (you have just wrapped in a figure of 8 from peg 2 to peg 1) (your working yarn should be in the center coming out towards you from in between the twopegs) 4 : lift the bottom loop off peg 2 then peg 1 5 : keep working your icord untilit is long enough, every few stitches pull on the bottom to straighten your cord 6 : when your icord is the desired length, place the stitch from peg 2 on to peg 1, knit the bottom loop off, cut working yarn and thread it through your last loop pulling gently to secure as you take your cord off the loom.
Purl Flat Panel Bind Off :
purl first stitch, purl second stitch but whilst holding your new loop, instead of placing it back on the peg, pull it over to the previous stitch and place it on top of it, lift the bottom stitch over the top one and off the peg, move your remaining stitch over one place to the empty peg and repeat this process of purling the next stitch moving the new loop back one place and lifting off the bottom stitch on that peg then moving your new stitch over to the empty peg along the row until all your stitches are bound off, cut working yarn leaving a 4 to 6 inch long tail, pull tail through last stitch lifting the stitch off the peg pulling yarn to secure.


