Sci Fi Bird
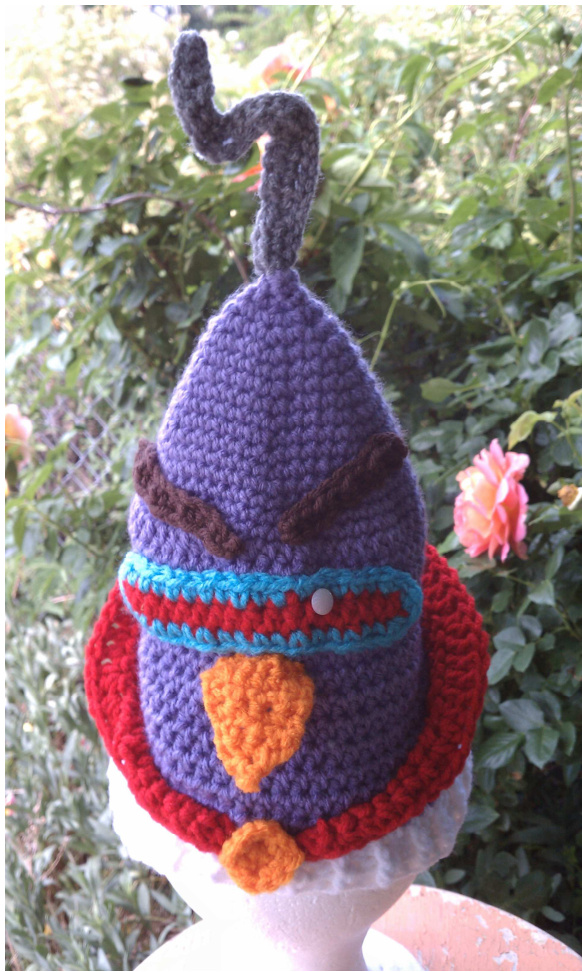
Materials: Worsted weight yarn in purple, grey, turquoise blue, red, white, dark brown, orange Hooks: H, I Yarn needle Small button for "highlight" in eye Pipe Cleaner Gauge: 4" = 13hdc and 9 rounds Sizes: newborn to adult Pattern was written with children to adult in mind. For smaller sizes please use smaller sized hooks for features. Directions for all sizes: Note: Do not join at the end of each round. This hat is worked in a continuous round to avoid a "seam" look. Starting at the top: With purple yarn and I hook, ch 5, join to form ring (or use a magic loop of 5sts). \*sc, 2sc\*, repeat around in a spiral until there are 18 sts. Place a marker (small piece of contrasting yarn works great). ounds: (move marker after each round to keep track of first st of round 1. \*sc 2, 2 sc in next sc\*, repeat to end of round. (24sts) 2. Sc to end of round. 3. \*sc 3, 2 sc in next sc\*, repeat to end of round. (30sts) newborn 4. Sc to end of round. 5. \*sc 4, 2 sc in next sc\*, repeat to end of round. (36sts) 3-6 mths 6. Sc to end of round. 7. \*sc 5, 2 sc in next sc\*, repeat to end of round. (42sts) 6-12 mths 8. Sc to end of round. 9. \*sc 6, 2 sc in next sc\*, repeat to end of round. (48sts) 12-24 mths 10. Sc to end of round. 11. \*sc 7, 2 sc in next sc\*, repeat to end of round. (54sts) Child/preteen 12. Sc to end of round. 13. \*sc 8, 2 sc in next sc\*, repeat to end of round. (60sts) Teen/Adult 14. Sc to end of round. 15. \*sc 9, 2 sc in next sc\*, repeat to end of round. (66sts) Large adult When increase rounds for desired size have been reached, do not join. Remove marker and hdc each stitch until hat is the following length, from top to current row: Newborn: 4"; 3-6 mths: 5": 6-12 mths: 6": 12-24 mths: 6.5": Child/preteen: 7": Adult: 7.5-8" End current row with a sl st and cut yarn, leaving a 2" tail. With white yarn, ch 2. Hdc each stitch to end of round, covering purple tail along the way. Join with sl st. Ch 2, \*FPDC (front post double crochet) in next st then, BPDC (back post double crochet) in next st\*, repeat to end of round. Repeat if larger band is desired, or if hat is too short. If it is too long, simply fold the bottom up. Note: Use an H hook unless noted (for toddler size and smaller, an F or G hook may be used if features are too big). Eye Bar: With red, ch 20, hdc in second ch from hook and in each ch across. Change to blue. 3sc in each of next 2 stitches, sc in each stitch to other end, 3sc in each of next 2 stitches, sc in each stitch to end. Finish off, leaving a long tail for sewing to hat. Brows (make 2): With brown, ch 10, hdc in second ch from hook and in next ch, sc in remaining chs to end. Finish off, leaving a long tail for attaching. Refer to picture for placement of eyebrows and pin in place if necessary. Use remaining yarn to stitch in place. Beak: With orange and I hook, ch 7. Turn and working across chain, sc2tog, sc 2, sc2tog. Turn, ch 1, sc across. Turn, Ch 1, yo, pull up a loop in first st (do not pull yarn through any sts on the hook yet), then again in 2nd and 3rd sts. Now, pull yarn through all loops on the hook. Cut, leaving a long tail for attaching to hat. In the sample, only the top of the nose was sewn. This way the beak sticks out. It could be stitched all the way around if desired. Top Lightning Bolt: With grey, ch 25, hdc in second ch from hook , hdc 10, \*sl st next 2 tog\*, repeat from \* to \* 2 more times. Ch 2, hdc in next st, sl st in each ch to end. Continue around, working in the unused loops of starting chain. Hold the pipe cleaner next to edge and work an sc in each stitch and around the pipe cleaner. This should help hide the pipe cleaner and will help the bolt stand up. Finish off leaving a long tail. Use a yarn needle to stitch the bottom of the bolt to the top of the hat. Pull all ends to inside of hat and tie together in a knot. Collar: With red, ch 52, sc in 2nd ch from hook and in next 6 chs, hdc 37, sc to end, ch 1, turn. Sc in next st, sc 6, hdc 3, dc 31, hdc 3, sc to end, ch 1, turn. Sc in next st, sc 5, 2hdc, hdc 2, \*dc 4, 2dc\*, repeat from \* to \* a total of 6 times, hdc 3, sc to end. Finish off, leaving a long tail for sewing to hat. Using a yarn needle, sew the bottom edge to the hat. Fold front edges down and stitch in place. helping the collar roll out slightly. Refer to photo for placement. Pin the collar in place prior to sewing if desired. Medallion: With orange and I hook, ch 6, join to form ring (or use a magic loop of 6sts). 2sc in each stitch around (12sts). Finish off, leaving a tail for sewing in place. Place medallion on top of front center of collar and stitch in place. With sewing needle and thread, stitch button in place. See photo for placement.
Variations
Basic gnome hat: This is a cute gnome hat without all the features too! Leave off everything and wear plain or add a pompom to the top. A flower on the front is a nice touch for girls.
Button on flower
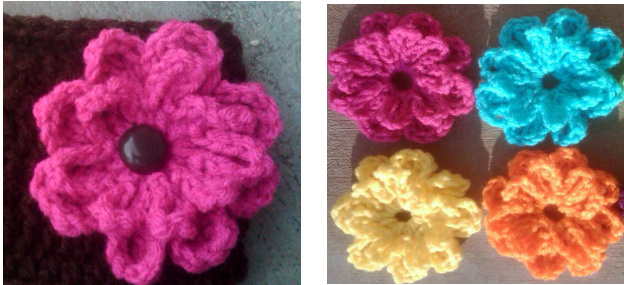
Materials: Small amounts of ww yarn Size H hook Yarn needle Directions for Button-On Flower: 1. Ch 5, join to create a circle. DO NOT pull to close hole. Determine how big your opening needs to be for the button. I leave it how it is for a " button. 2. \*Ch 9, Sc into the loop\*, Repeat, making 8 loops total 3. Pull loops forward and working behind row 2, Ch 3, Sc around the original circle from the beginning, in the middle of each "Ch 9 loop". \*Ch 3, Sc between next loop\*. Repeat, making 8 loops total. Join with a sl st to first ch. \*Ch 3, 3 Tr, Ch 3, Sl st\* in each loop around, making 8 petals. Fasten off
Directions for Flower without opening in center:
1. Ch 5, join to create a circle. Pull taught to close hole. OR I prefer to start with a ch 5 magic loop because you can pull the hole completely closed. 2-4. Repeat as above. If you have any questions, comments or suggestions please email me at snappytots@hotmail.com. This pattern has been tested, but it is very important to me that information is easy to understand and accurate. I would appreciate knowing any errors found so they could be fixed. Thank you in advance. this pattern is copyrighted to snappytots and may not be copied for resale in part or whole Items created from this pattern MAY be sold. Please include a link to snappy-tots.com if selling online


