Amigurumi Appa (crocheted)
Amigurumi Appa Based off Appa in Avatar: The Last Airbender Designed by Rebecca Beam Please do not sell the product of this pattern! I intend no copyright infringment. You will need: US Size “F" Crochet Hook (3.75 mm) Polyfil Plastic Pellets YarnNeedle Wire for Horns 3 Sheets of craft felt in "Cocoa" 1 pair of 15mm Brown Safety Eyes Yarn: 3 skeins of “l Love This Yarn" in Ivory 1 skein of "I Love This Cotton" in Brown 1 skein of Lion Brand “Fun" in Chocolate Brown 1 skein of Patons Classic Wool in Taupe 1 skein of Sugar 'n Cream Cotton in Black 1 skein of Red Heart Soft in Black Techniques and Abbreviations: Rep = Repeat Ch = Chain Sl st = Slip Stitch St = Stitch Sc = Single Crochet Sc inc = Single Crochet Increase Sc dec = Single Crochet Decrease Hdc = Half-Double Crochet Dc = Double Crochet Various Picots: Ch 3, sl st in 3rd chain. Ch 4, hdc in 4th chain. Ch 5, sc in 4th chain, sc in 5th chain.
Amigurumi Appa (crocheted)
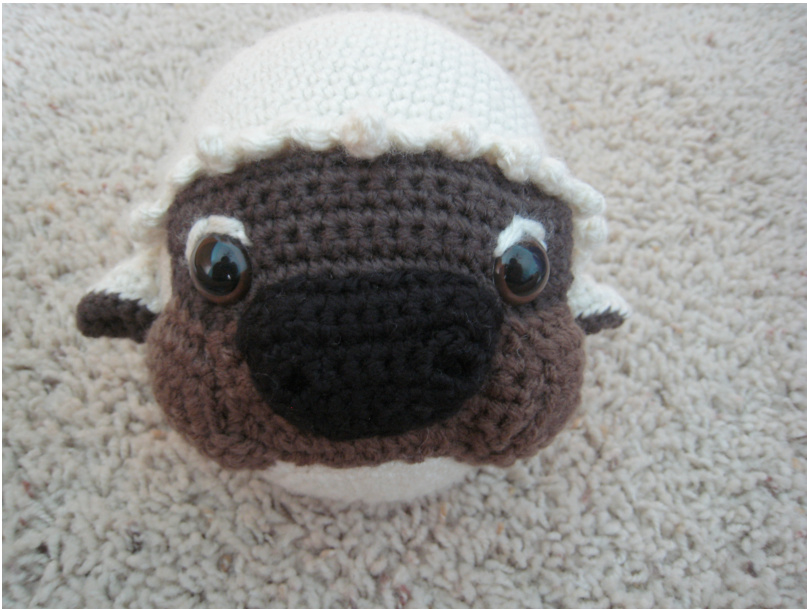
Top of Head: Using “l Love This Yarn" in lvory Ch 2 R1- 6 sc in second chain. Do not turn. R2- 2 sc in each st around. (12) R3- 2 sc in each st around. (24) R4- \*Sc 2, sc inc\* rep around. R5- \*Sc 3, sc inc\* rep around. R6- \*Sc 4, sc inc\* rep around. R7- \*Sc 6, sc inc\* rep around. R8 and 9- Sc around. R10- \*Sc 6, sc inc\* rep around. R11- \*Sc 7, sc inc\* rep around. R12 through 20- Sc around R21- I used different types of picots around the edge, there isn't really a pattern for this bit. There are some examples above. Cut yarn tail about 12" and tie off. Bottom Half of Head: Using “I Love This Yarn" in Ivory Ch 2 R1- 6 sc in second chain. R2- 2 sc in each st around. R3- 2 sc in each st around. R4- \*Sc 2, sc inc\* repeat around. R5- \*Sc 3, sc inc\* repeat around. R6 through 9- Sc around. R10- \*Sc 4, sc inc\* repeat around. R11- \*Sc 5, sc inc\* repeat around. R12- Sc around. R13- \*Sc 6, sc inc\* repeat around. R14 and 15- Sc around. R16- \*Sc 7, sc inc\* repeat around. R17 through 23- Sc around. Cut yarn, leaving 12" tail for sewing. Tie off EyeMask: Using Paton's Classic Wool in Taupe Ch 21 R1- \*Sc inc, sc\* across, ending before last st. Sc inc in last st. Ch 1, turn. R2 through 8- Sc across, ch 1, turn. R9- Sc around edge. Cut yarn with long tail for sewing.
Amigurumi Appa (crocheted)
Ears: Using “I Love This Yarn" in Ivory, and Paton's Classic Wool in Taupe (Make 2 in Ivory, and 2 in Taupe) Ch 9 R1- Sc across, ch 1, turn. R2- Sc dec, sc 4, sc dec. Ch 1, turn. R3- Sc dec, sc 2, sc dec. Ch 1, turn. R4- Sc dec across. Ch 1, turn. R5- Sc dec, ch 1, turn. Sc. Continue sc-ing around ear. Cut yarn with 6" tail for sewing. Tie off. Sew one Ivory ear to one Taupe ear. Fold in half at bottom edge. Sew across. Muzzle Cheeks: Using Lion Brand “Fun" Yarn (Make 2) Ch 2 R1- 6 sc in second chain. R2 and 3- 2 sc in each st around. On 3rd round, sl st to next st. Cut yarn with tail for sewing. Tie off. Muzzle Rectangle: Using Lion Brand “Fun" Yarn Ch 14 R1- Sc across, ch 1, turn. R2 through 4- Sc across, ch 1, turn. R5- Sc across, do not finish off. Add one Muzzle Cheek on short end of Rectangle, and crochet around it, along the bottom of Rectangle. Add next Muzzle Cheek to short end, and crochet around it, and finish off. Sew along the side of each Cheek, attaching it to the short end of Rectangle. Nose: Using Red Heart Soft in Black Ch 5 R1- Sc inc, sc 2, sc inc. Ch 1, turn. R2- Sc inc, Sc 4, sc inc. Ch 5, turn. R3- Sc in 2nd sc from hook. sc 4, ch 4, sc, ch 1. Turn. R4- Sc in 2nd chain of ch 4 from prev row. Sc in each of 3rd and 4th chains. Sc 5, sc into each of 2nd, 3rd, and 4th chains, ch 1, turn. R5- Sc across. Ch 1, turn. R6- Sc across. Continue sc-ing around nose. Cut yarn with tail for sewing. Whip-stitch around the nose holes to make them more pronounced.
Amigurumi Appa (crocheted)
Nostrils: Using Red Heart Soft in Black (Make 2) Ch 2 R1- 6 sc in second chain. Sl st to first sc. Cut yarn with tail for sewing, and tie off. Sew Nostrils to underside of nose holes. Ch 10 R1- Sc across, ch 1, turn. R2 and 3- Sc across, ch 1, turn. R4- Sc dec, sc 5, sc dec, ch 1, turn. R5- Sc across, ch 1, turn. R6- Sc dec, sc 3, sc dec, ch 1, turn. R7 through 11- Sc across, ch 1, turn. 12- Sc dec, sc 1, sc dec, ch 1, turn. 13- Sc dec across 3 sts: Go in, yo, pull up loop. In next st, go in, yo, pull up loop. In next st, go in, yo, pull up loop. Yo, pull through all loops on hook. (1 st) Ch 1, turn. 14- Sc.
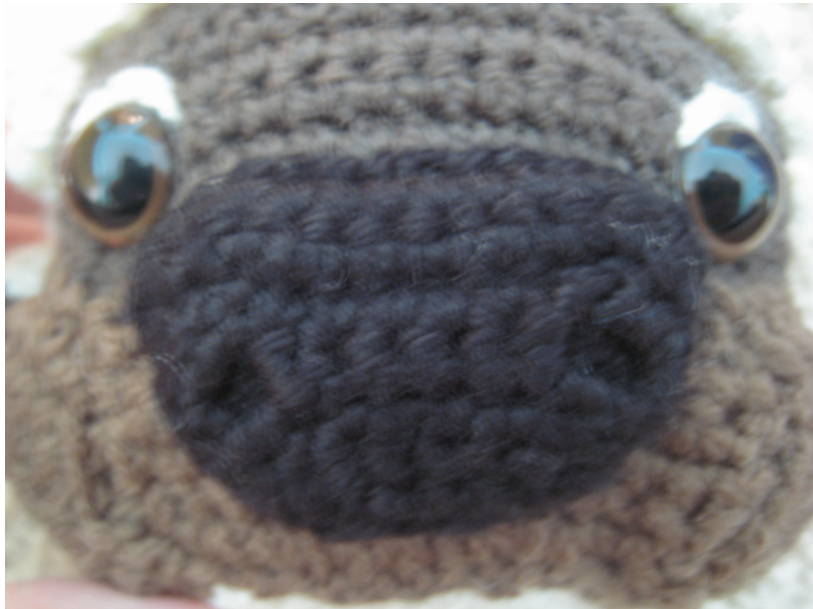
Cut yarn with long tail for sewing. Tie off. Neck: Using “I Love This Yarn" in Ivory Ch 56, join with sl st to first chain. R1 through 3- Sc around. After last round, sl st to next st. Cut yarn with tail for sewing. Tie off. Sewing time! FACE: Sew the Mask onto the face, the top edge of the mask should sit directly on the top of the last row. Sew the Muzzle onto the Bottom Head, overlapping the top edge with the bottom of the Mask. When you sew it on, add a bit of stuffing in the Muzzle Cheeks, and sew around them to make a half-sphere. Sew the Nose to the face, on top of both the Mask and Muzzle. The top of the nose should be placed about two rows above the top edge of the Muzzle. Place eyes through the two layers of Mask and Bottom Head, and fasten the plastic backs. Be careful not to crack, dent, or scratch them! Embroider above the eyes with the Ivory yarn. Sew the ears, with the Taupe facing downward and folded in half like a lamb's ears, about 5-6 stitches behind the Mask.You are done with the face!
Amigurumi Appa (crocheted)
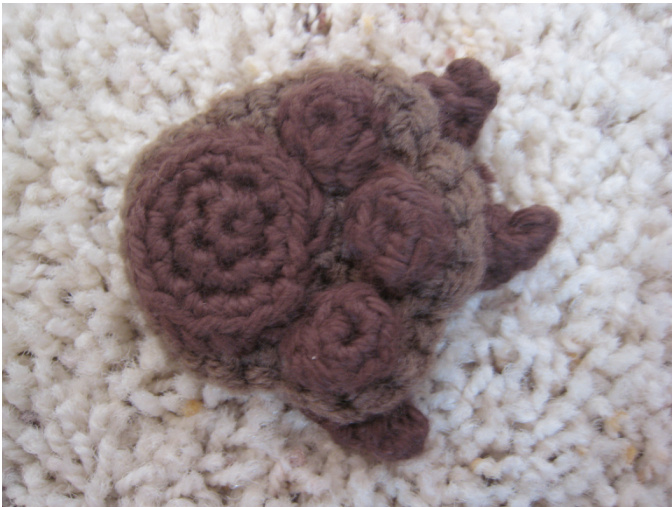
HEAD: Sew the Top Head to the bottom head, and stuff firmly. Sew neck to the back of the head, taking care to keep it circular. HORNS: With wire, weave it through the stitches of the horn. Make a loop at the top of the horn, so that the wire does not come out. Stick the other end of the wire just forward and above the ears on the head. Make a loop so that it cannot come out. Sew the long side of the horn together, to make it circular. Stuff a bit of Polyfil up the inside. Sew the now circular opening to the head. Knot and weave in end. Shape horn by bending it. Small Toe Pads: Using “I Love This Cotton" in Brown (Make 18) Ch 2 R1- 6 sc in second chain, sl st to first sc. Cut yarn about 6"-8" for sewing. Tie off. Large Toe Pads: Using “I Love This Cotton" in Brown (Make 6) Ch 2 R1- 6 sc in second chain R2- 2 sc in each st around. R3- 6 sc inc, sl st in next st. Cut tail 6" for sewing. Under Foot: Using Lion Brand “Fun" in Chocolate Brown (Make 6) Ch 2 R1- 6 sc in second chain. Do not turn R2- 2 sc in each st around. R3- Sc inc twice, ch 1, \*dc inc, hdc, ch 1\* repeat from \*to\* twice more. Do not ch 1 last time. Sc inc in each of next 4 sts. R4- Sc 2, sc inc, sc, \*skip ch1, 2 sc inc, sl st\* reapeat from \*to\* twice more. (2 sc, sc inc) reapeat parentheses twice more. Sl st. Cut yarn 8" for sewing and tie off. Toes: Using "I Love This Cotton" in Brown (Make 18) Ch 3, turn
Amigurumi Appa (crocheted)
R1- Sc across, ch 1, turn. (2 sts) R2- Sc inc across, ch 1, turn. (4sts) R3- Sc inc, 2 sc, sc in, ch 1, turn. (6 sts) R4- Sc across. Cut yarn, leaving 6" end for sewing. Sew the long edges to each other. Before you crochet the legs, you will need to have the feet all sewn together. Sewing: Sew 1 Small Toe Pad to each of the 3 "toe spots" on the Under Foot. Sew one Large Toe Pad on each Underfoot. This is placed directly below the Small Toe Pads. Now take a Toe, and with its long edges sewn together like a claw, sew it to the other side of the Under Foot. So: on one side of the Under Foot, you will have your three Small Toe Pads, and one Large Toe Pad. On the flip side, you need to sew three Toes, directly above the Small Toe Pads. Weave in ends.
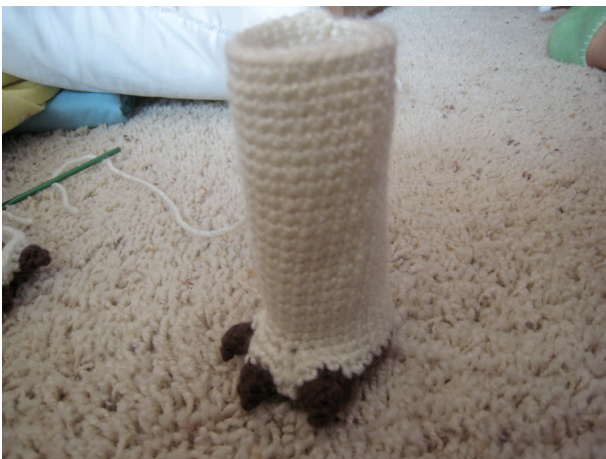
Legs: Using “l Love This Yarn" in Ivory (Make 6) Attach lvory yarn to back of Foot. R1- Sc around the foot, and over toes. End round with about 35 stitches. R2- Sc around, except for a total of two decreases, which are placed between the toes. R3- Sc to where the toes start. In this toe area, you will need to fit around seven decreases. Continue sc-ing to end of round. End with 26 sts. R4 through 17- Sc around. R18- Sc inc, sc, sc inc. Sc around. R19- Sc inc, sc 3, sc inc. Sc around. R20- Sc around. R21- Sc dec, sc 3, sc dec. Sc around. Body: Using “I Love This Yarn" in Ivory Ch 2 R1- 6 sc in second chain. R2- 2 sc in each st around. R3- \*Sc inc, sc 1\* repeat from \* to \* around. R4- \*Sc inc, sc 2\* repeat from \* to \* around. R5- \*Sc inc, sc 3\* repeat from \* to \* around. R6- \*Sc inc, sc 4\* repeat from \* to \* around. R7- \*Sc inc, sc 5\* repeat from \* to \* around. R8- \*Sc inc, sc 6\* repeat from \* to \* around. R9- \*Sc inc, sc 7\* repeat from \* to \* around. R10- \*Sc inc, sc 8\* repeat from \* to \* around. R11- \*Sc inc, sc 9\* repeat from \* to \* around. R12- \*Sc inc, sc 10\* repeat from \* to \* around. R13- \*Sc inc, sc 11\* repeat from \* to \* around. R14- \*Sc inc, sc 12\* repeat from \* to \* around. R15- \*Sc inc, sc 13\* repeat from \* to \* around. R16- \*Sc inc, sc 14\* repeat from \* to \* around. R17 through 23- Sc around. R24- Sc inc, sc 15, sc inc. Sc around. R25- Sc inc, sc 17, sc inc. Sc around. R26- \*Sc inc, sc 4\* repeat \* to \* 4 more times. Sc inc, sc around. R27 and 28- Sc around. R29- Sc 2, sc inc (this sc will count as beg of round) sc 20, sc inc, sc around. R30- Sc around. R31- Sc dec, sc 20, sc dec, sc around. R32- Sc dec, sc 18, sc dec, sc around. R33 and 34- Sc around. R35- Sc dec, sc 16, sc dec, sc around. R36 through 40- Sc dec, sc 14, sc dec, sc around. R41- Sc dec, sc 12, sc dec, sc around. R42- Sc 44, sc dec, sc 14, sc dec, sc 30. R43- Sc dc, sc 10, sc dec, sc 31, sc dec, \*sc 2, sc dec\* repeat \* to \* 3 times. Sc 31. R44 through 54- Sc around. R55- Sc inc, sc 15, sc inc, sc 24, sc inc, sc 16, sc inc, sc 25. R56 through 62- Sc around. R63- Sc dec, \*sc 4, sc dec\* repeat from \* to \* to end. Sc 2. R64- Sc dec, \*Sc 3, sc dec\* to end, sc 1. R65- Sc around. R66- Sc 12, sc dec, \*sc 2, sc dec\* repeat from \* to \* around. R67- Sc 44, ch 1, turn. R68- Sc dec 13, ch 1, turn. R69- \*Sc 2, sc dec\* repeat from \* to \* across, sc dec, ch 1, turn. R70- Sc 1, sc dec 5, sc 1. Ch 1, turn. R71- Sc across. Cut yarn. Tie off and weave in end. Stuff irmly.
Amigurumi Appa (crocheted)
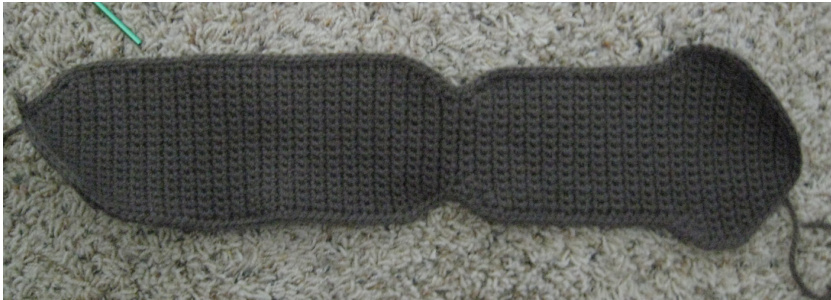
Belly: Using Paton's Classic Wool in Taupe Ch 4 R1- Sc inc across, ch 1, turn. R2- Sc inc, sc 6, sc inc. Ch 1, turn. R3- Sc inc, sc 8, sc inc. Ch 1, turn. R4- Sc inc, sc 10, sc inc. Ch 1, turn. R5- Sc inc, sc 12, sc inc. Ch 1, turn. R6- Sc inc, sc 14, sc inc. Ch 1, turn. R7- Sc inc, sc 16, sc inc. Ch 1, turn. R8- Sc inc, sc 18, sc inc. Ch 1, turn. R9- Sc inc, sc 20, sc inc. Ch 1, turn. R10 through 14- Sc across. Ch 1, turn. R15- Sc dec, sc 16, sc dec. Ch 1 , turn. R16- Sc dec 2, sc 10, sc dec 2. Ch 1, turn. R17 through 39- Sc across, ch 1, turn. R40- Sc dec, sc 10, sc dec. Ch 1, turn. R41- Sc dec, sc 8, sc dec. Ch 1, turn. R42 through 44- Sc across, ch 1, turn. R45- Sc inc, sc 8, sc inc. Ch 1, turn. R46- Sc inc, sc 10, sc inc. Ch 1, turn. R47- Sc inc, sc 12, sc inc. Ch 1, turn. R48 through 89- Sc across R90- Sc dec, sc 12, sc dec. Ch 1, turn. R91- Sc dec, sc 10, sc dec. Ch 1, turn. R92- Sc dec, sc 8, sc dec. Ch 1, turn. R93- Sc dec, sc 6, sc dec. Ch 1, turn. Sc around entire belly. Tail (TOP) Using “I Love This Yarn" in Ivory Ch 4 R1- Sc across, ch 1, turn. R2- Sc inc across, ch 1, turn. R3- Sc inc, sc 6, sc inc. Ch 1, turn. R4- Sc inc, sc 8, sc inc. Ch 1, turn. R5- Sc inc, sc 10, sc inc. Ch 1, turn. R6- Sc inc, sc 12, sc inc. Ch 1, turn. R7- Sc inc, sc 14, sc inc. Ch 1, turn. R8- Sc inc, sc 16, sc inc. Ch 1, turn. R9- Sc inc, sc 18, sc inc. Ch 1, turn. R10- Sc inc, sc 20, sc inc. Ch 1, turn. R11- Sc inc, sc 22, sc inc. Ch 1, turn. R12 through 70- Sc across. Sc around entire tail. Cut yarn with long tail for sewing. Tie off.
Amigurumi Appa (crocheted)
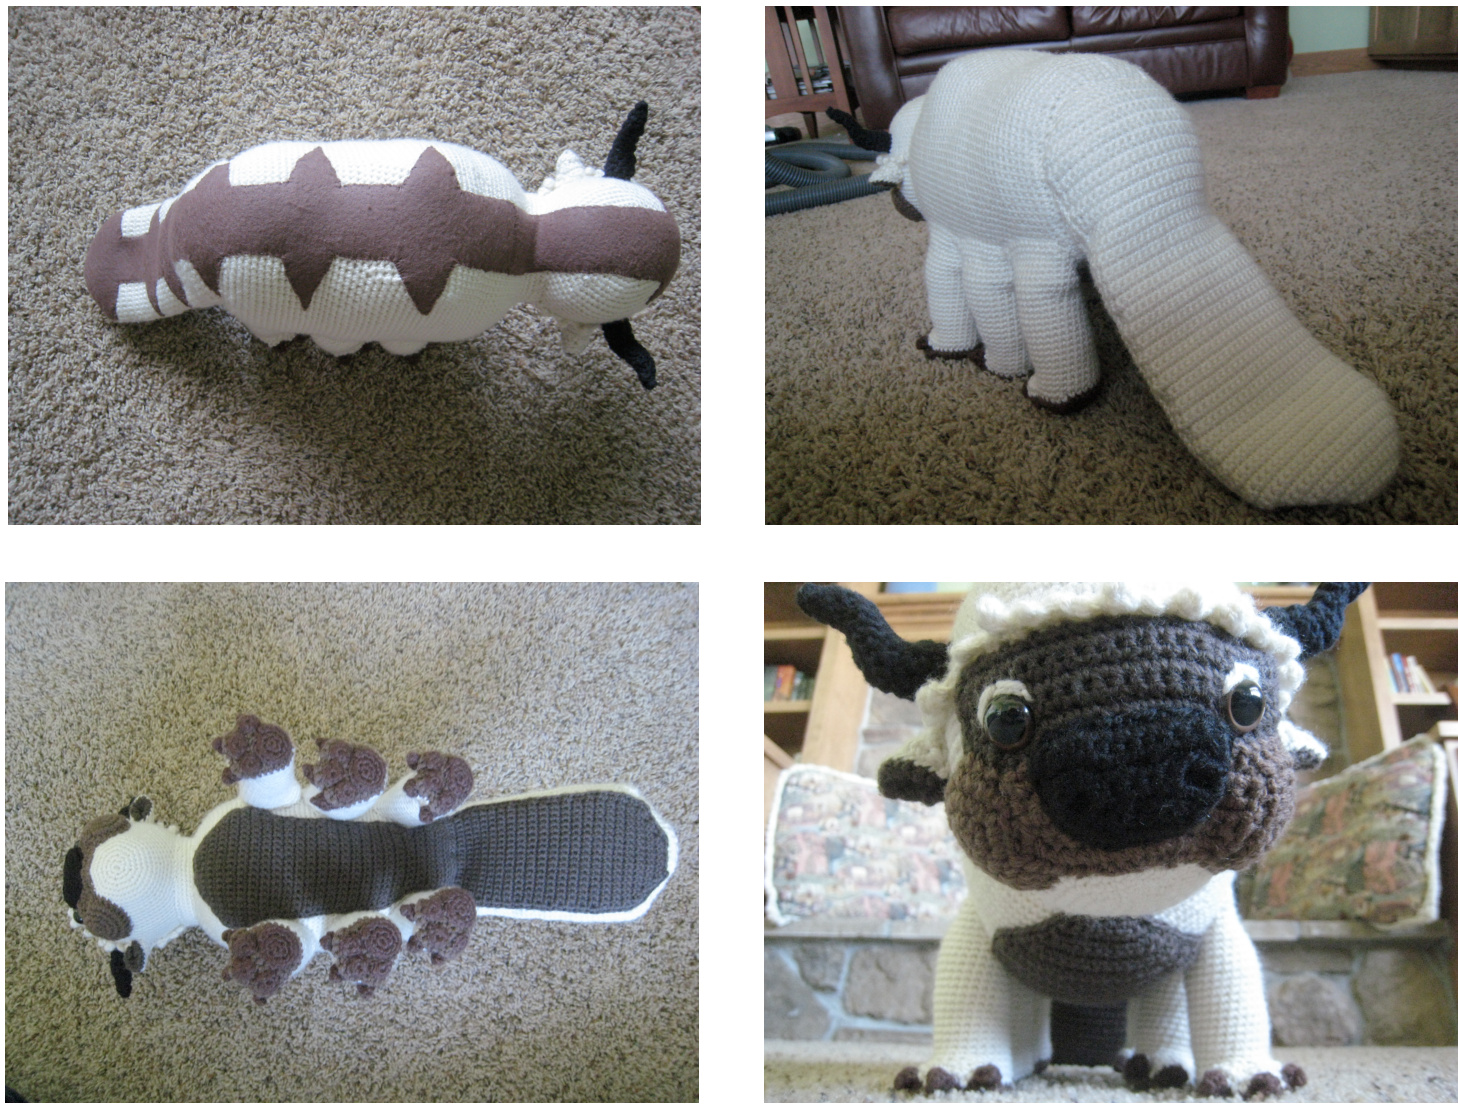
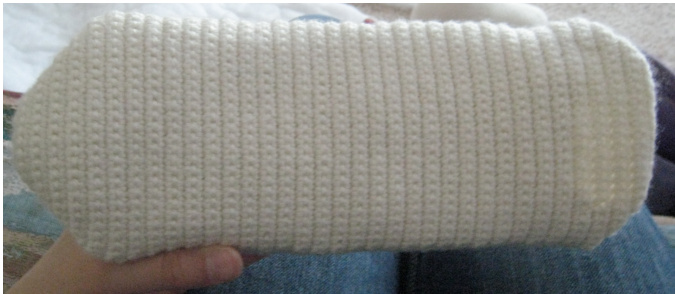
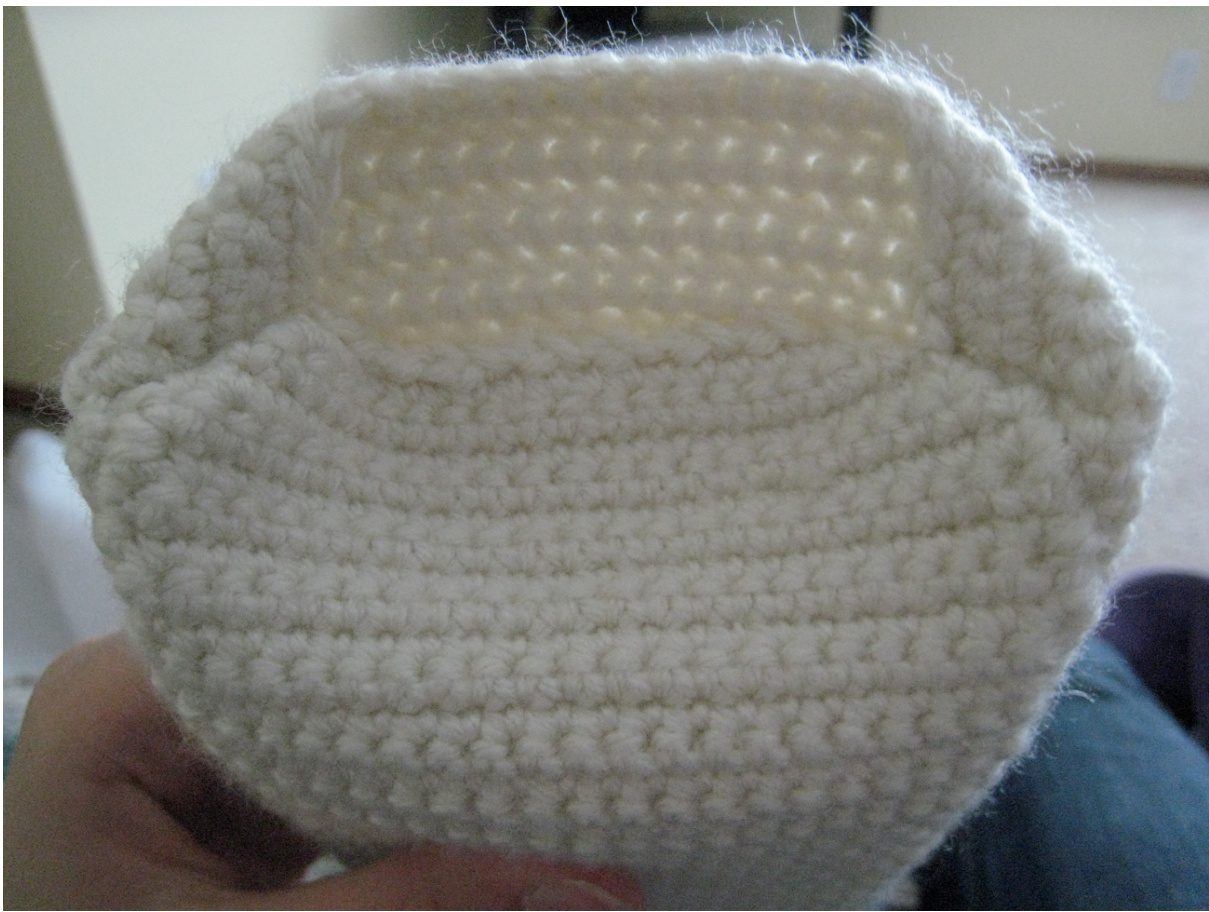
Tail (BOTTOM) Using “I Love This Yarn" in Ivory Ch 4 R1- Sc across, ch 1, turn. R2- Sc inc across, ch 1, turn. R3- Sc inc, sc 6, sc inc. Ch 1, turn. R4- Sc inc, sc 8, sc inc. Ch 1, turn. R5- Sc inc, sc 10, sc inc. Ch 1, turn. R6- Sc inc, sc 12, sc inc. Ch 1, turn. R7- Sc inc, sc 14, sc inc. Ch 1, turn. R8- Sc inc, sc 16, sc inc. Ch 1, turn. R9- Sc inc, sc 18, sc inc. Ch 1, turn. R10 through 70- Sc across, ch 1, turn. Sc around entire tail. Cut yarn with long tail for sewing. Tie off. Whip-stitch the tails together. The Top piece should not lay flat against the Bottom. Cut a doubled piece of Quilt Batting the shape of the tail, and put it in. Now you need to sew the end in a special way so that it fits onto the Body. You sort of fold it like wrapping the end of a box. Please refer to picture for clarity! You do not want to sew the end down! (The one that is sticking up in the photo.) This is what you want it to look like when you are done sewing! It is curved to fit his bum.
More sewing!
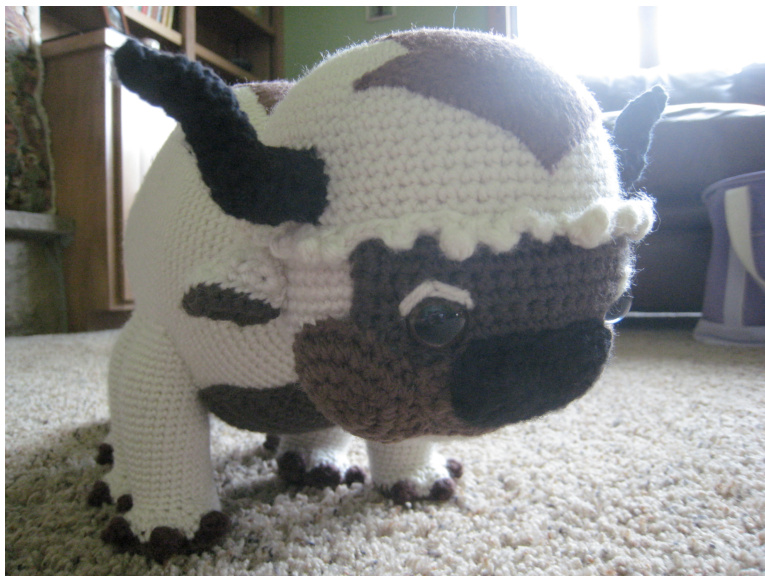
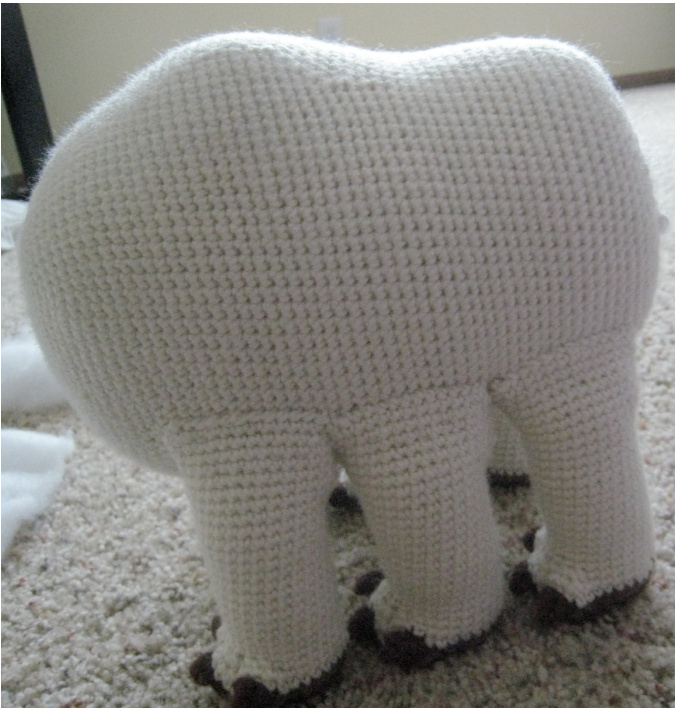
Sew the legs to the body, three on each side! Make sure that the Hump of his body is on the top, and equally space out the legs on either side. I pinned mine on before sewing to make them straight. Place the Belly underneath so that you can line them up with the increases and decreases. Sew the very back legs on each side a little lower down. The tail will push them up in the air if you don't. Sew the tail to the behind of him, and make sure the top is facing up, and it is straight with the rest of the body. Sew it all around, even underneath. Sew the Belly to the underside of Appa. It should fit between his legs with the shaping, and along the tail to the tip. Sew it across where the underside of the tail meets the body, so that it doesn't buckle. Pin the neck (attached to the head) to the body, just above the Belly. Check that it is sitting straight, and that it is where you want it. Sew it on. It shouldn't need any stuffing. You are almost done! Stripe: Pin, don't sew, the pieces of felt together at the short edges. Draw out a stripe pattern, and an arrow at the top that fits his body length. Cut it out. Now sew the edges of the felt together to make one long strip that fits him. Sew it along the length of Appa's body.DONE!!!