Advices
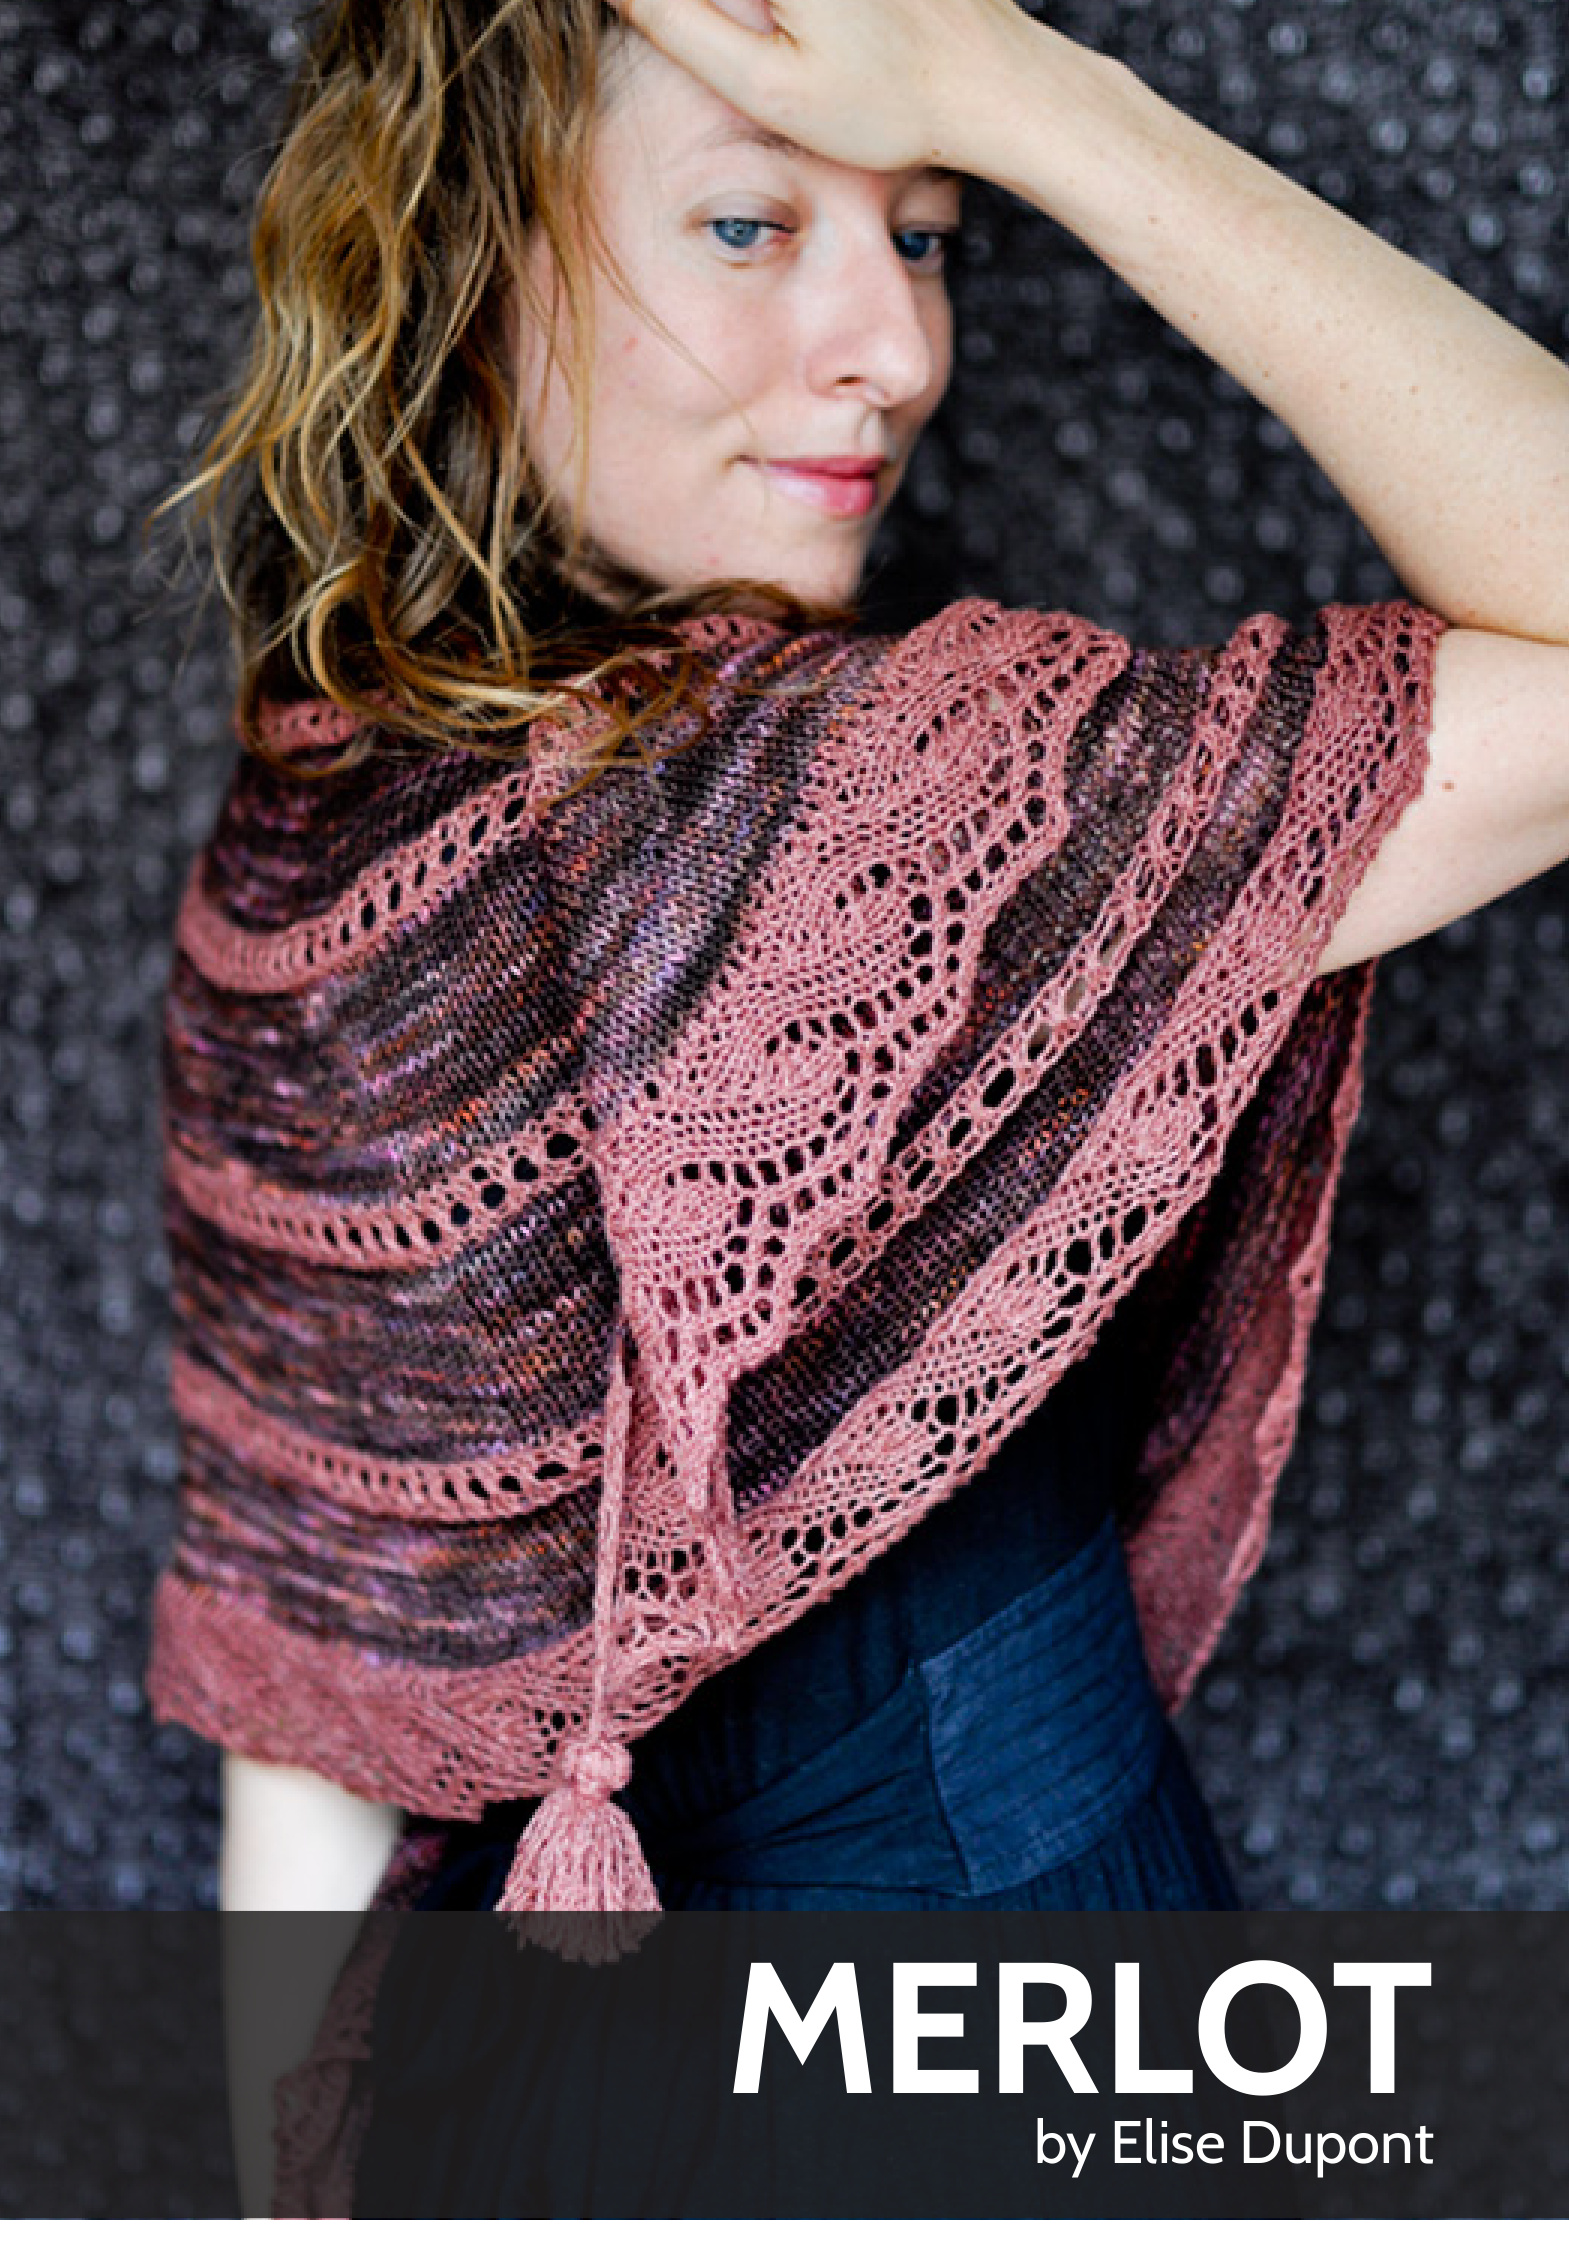
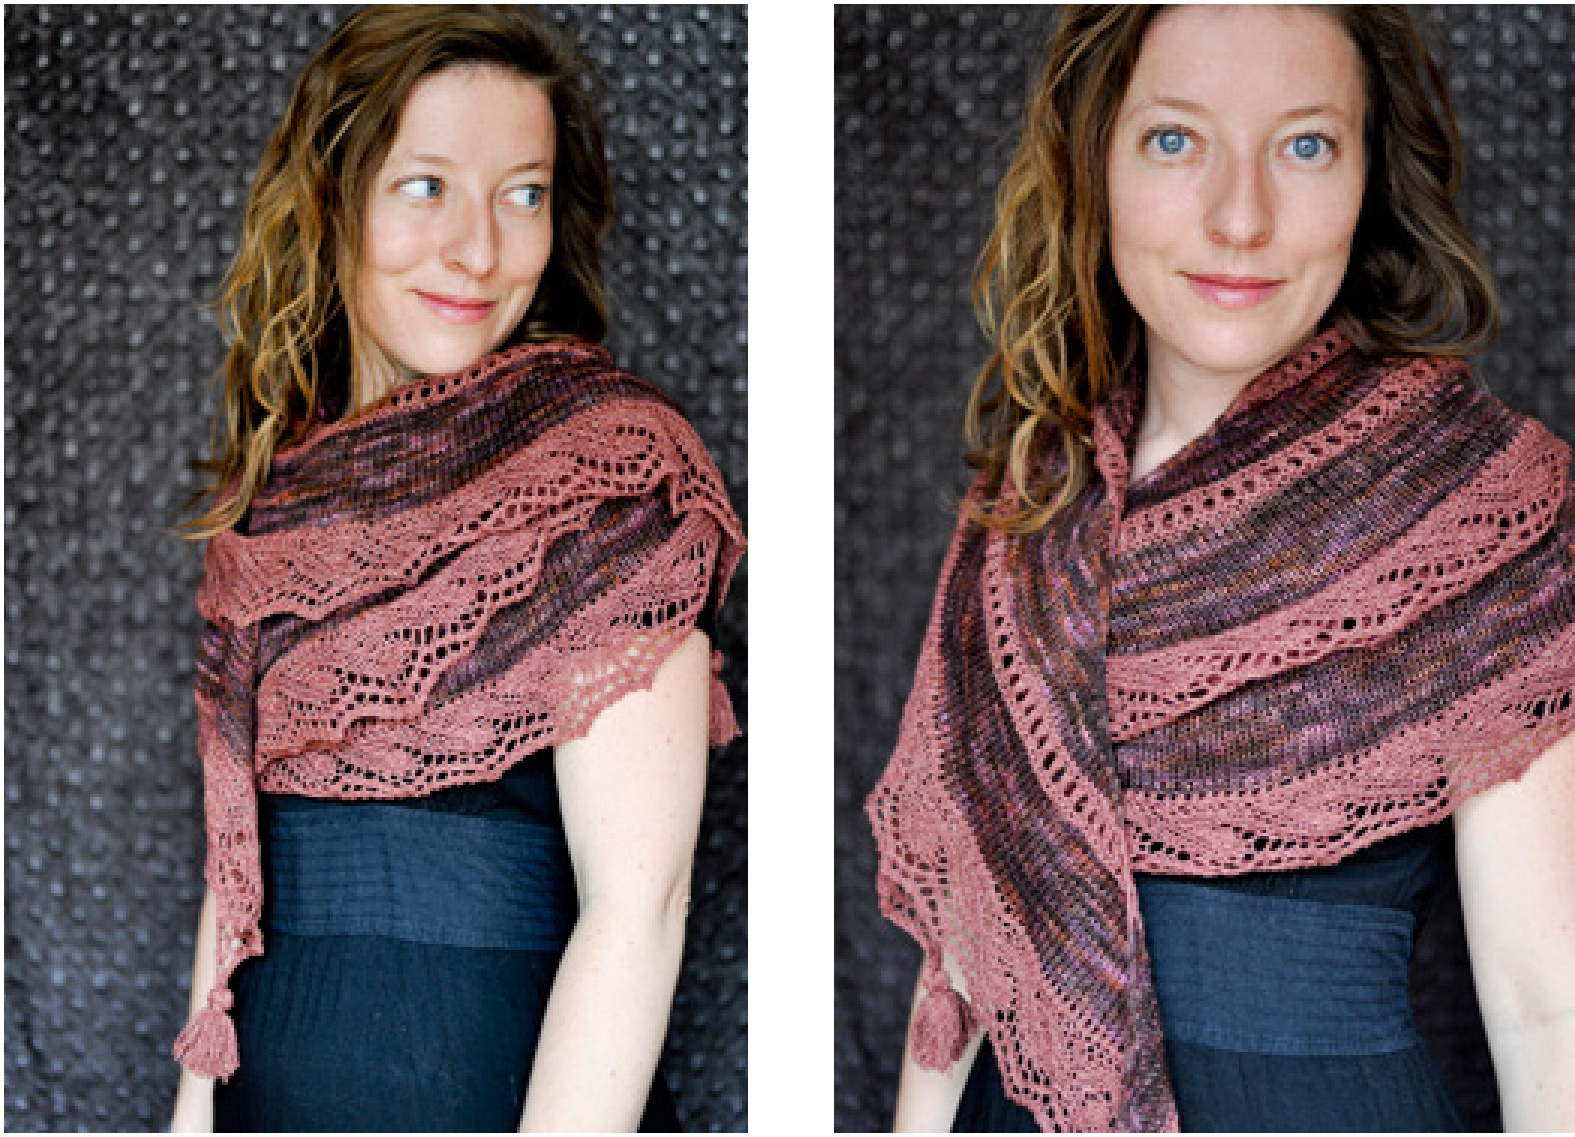
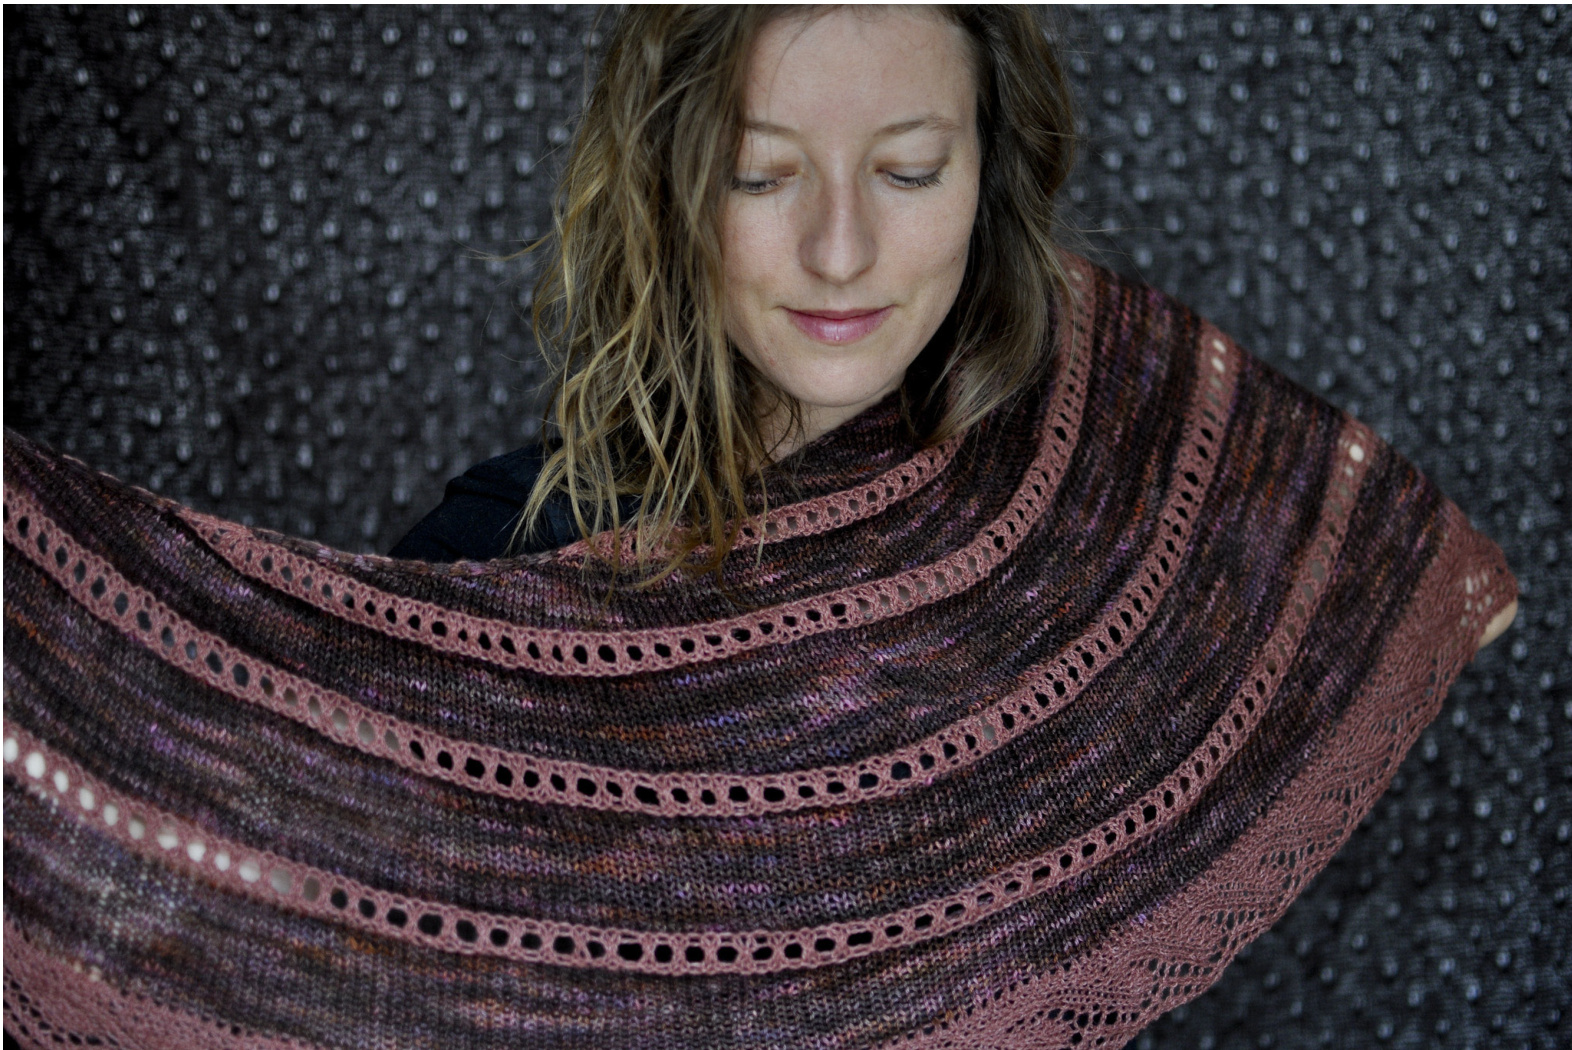
Merlot is a soft and light shawl with a shallow crescent shape that allows you to wraps yourself into it. Variegated yarn will benefit from this design, as the solid stripes sequences highlight them. The shawl is knitted from the top down, with increases ateachrows. Be careful not to work your increases too tightly so the edges of the shawl remain stretchy. Knit very loosely the first 2 sts, and the last 2sts also. The wave edging is knitted after, on 13 stitches, back and forth, including every other row 1 stitch of the shawl. This technique is fully explained with pictures. You do not need to cut the yarn between each sequences : just twist the yarn at the begging of each right side row to keep a neat edge. Protect the earth : To preserve our planet, I recommend that you only print the instructions, from page 4 to page 5. Thank you :)
Blueprint

Materials
. Yarn : 350 metres / 383 yards of Hedgehog fibers Sock or any fingering weight yarn: MC 350 metres / 383 yards of Holst Garn Coast. or any fingering weight yarn: CC The model is shown in Hedgehog Sock Boudoir (MC) and Holst Garn Coast Rosewood (CC)
· Needles :
4.5mm / US 7 circular needles at least 32" [80 cm] long. Adjust needle size if necessary to obtain the correct gauge. ·Other: You can use a 4.5mm / US7 double point needle for the edge (not mandatory)
Gauge
15 sts & 28 rows = 10 cm / 4 " in Stockinette Stitch, washed and blocked. The gauge isn't crucial on this project, but differences willaffect the finished size and yardage.

Shawl
Using circular needle and MC, CO 6 sts. Setup row : K2, M1L, K2, M1R, K2.
Sequence 1 :
· Row 1 (RS) : K2, M1L, K1, M1L, K until you have 3sts left, M1R, K1, M1R, K2. · Row 2 (WS) : K2, M1R on the purl side, P until you have 2sts left, M1L on the purl side, K2. Repeat rows 1 and 2 - 9 more times. You have worked 2O rows in total in MC (excluding the setup row) and have 68 sts on needle.
Change to CC.
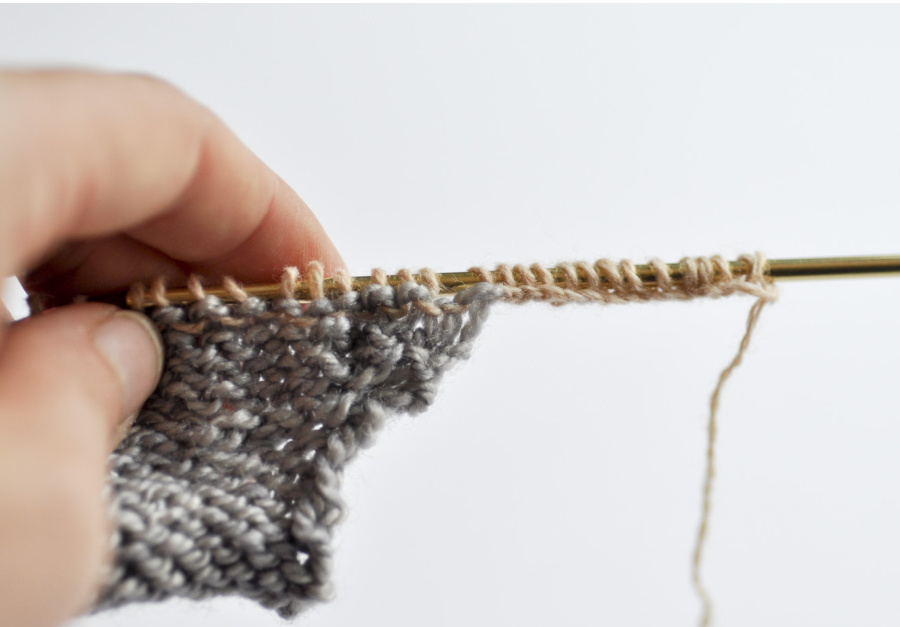
From now, you will have to twist the yarn of the edges, at the beginning of every RS row. See “techniques" section at the end of the pattern for pictures of the steps required. Before every color change, stretch a lot the edge. This way, when you will block the shawl, the twisted yarn will stretch correctly.
Sequence 2 :
· Row 1 (RS) : K2, M1L, K1, M1L, K until you have 3sts left, M1R, K1, M1R, K2. · Row 2 (WS) : K2, M1R, K until you have 2sts left, M1L, K2. · Row 3 (RS) : same as row 1 · Row 4 (WS) : K2, M1R on the purl side, \*YO, K2tog\* (repeat between \* until you have 2sts left), YO, M1L on the purl side, K2. · Row 5 (RS) : K2, M1L, K1, KBF, K until you have 4sts left, KFB, K1, M1R, K2. · Row 6 (wS) : same as 2 You now have 87sts. Change to MC and repeat Sequence 1 (147sts) Change to CC and repeat Sequence 2 (166sts) Change to MC and repeat Sequence 1 (226sts). Change to CC and repeat Sequence 2 (245sts) Change to MC and repeat Sequence 1 (305sts) Change to CC and repeat Sequence 2 (324sts). Change to MC and repeat Sequence 1 for 18 rows only (instead of 20). You now have 378sts, 5 sequences in MC and 4 sequences in CC. If you forgot some increases it's not a problem. You will just need to add some stitches on next row to be sure to end with a number multiple of 7.
Edging
Change to CC. K all sts on the next row. If you have some sts missing, add them on this rows, evenly, until to reach a sts number multiple of 7. At the end of the row, cast on 13 sts (see “techniques" section below for pictures explanations). If you want, you can switch to a double point needle on the right hand, and keep the circular needle on the left hand. The edging is knitted on 13 sts back and forth, incorporating 1 st from the shawl at every WS row. Turn your work at the end of every row. Go to “techniques" section below for detailed step by step pictures of the first rows.
Lace :
· Row 1 (WS) : K2, P9, K1, SSK, turn work. · Row 2 (RS) : Sl 1 as if to purl, K3, YO, K5, YO, K2tog, YO, K2, turn work. · Row 3 (WS) : K2, P11, K1, SSK, turn work. · Row 4 (RS) : Sl1 as if to purl, K4, Sl1 - K2tog - PSSO, K2, (YO, K2tog) twice, K1, turn work. · Row 5 (WS) : K2, P9, K1, SSK, turn work. · Row 6 (RS) : Sl1 as if to purl, K3, SSK, K2, (YO, K2tog) twice, K1, turn work. · Row 7 (WS) : K2, P8, K1, SSK, turn work. · Row 8 (RS) : Sl1 as if to purl, K2, SSK, K2, (YO, K2tog) twice, K1, turn work. · Row 9 (WS) : K2, P7, K1, SSK, turn work. · Row 10 (RS) : Sl1 as if to purl, K1, SSK, K2, (YO, K2tog) twice, K1, turn work. · Row 11 (WS) : K2, P6, K1, SSK, turn work. · Row 12 (RS) : Sl 1 as if to purl, SSK, K2, YO, K1, YO, K2 tog, YO , K2, turn work. · Row 13 (WS) : K2, P7, K1, SSK, turn work. · Row 14 (RS) : Sl 1 as if to purl, (K3, YO) twice, K2tog, YO, K2, turn work. Repeat rows 1 to 14 until you only have 14 sts left on your needles (13 edging sts plus 1 st from the body remaining). You should have 54 repeat of the lace pattern. Next row, work Row 1 again, but binding-off the sts as you work them. For the last 2 sts, make 1 SSK and pull the yarn inside the last loop. With remaining CC yarn, make 2 tassels, of the size you want and attach them to the first and the last YO from the edging. Weave in ends, wash and block the shawl.
Glossary
SSK : Slip 1 st as if to purl, Slip 1 st as if to knit, kit the slipped sts. YO: Yarn Over CO st: see techniques below. M1L: Make one left. See techniques below. M1R: Make one right. See techniques below. M1L on the purl side: Make one left purl. See techniques below. M1R on the purl side: Make one right purl. See techniques below. KFB: Knit front back on the same st. See techniques below.
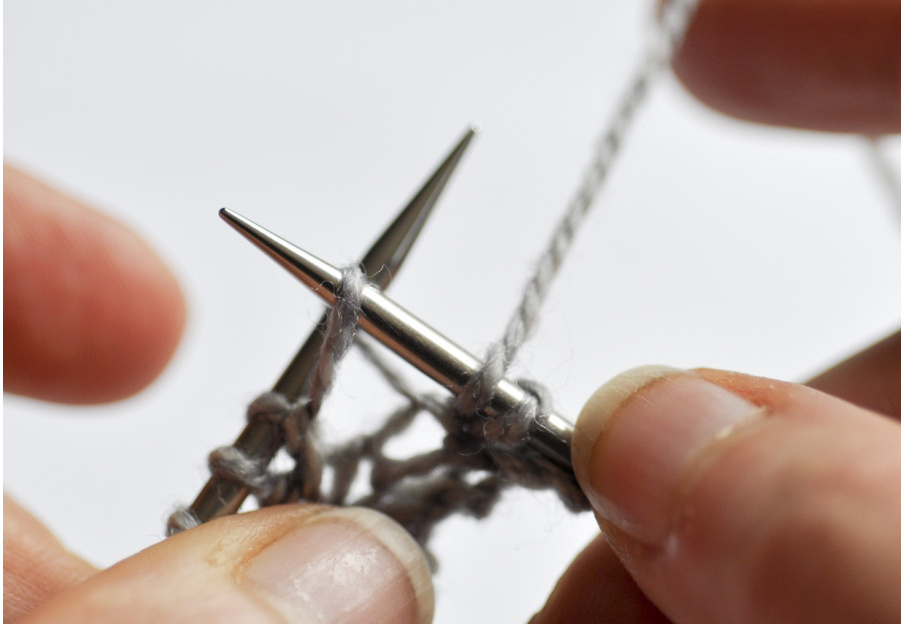
The pattern, pictures and instructions can not be used for commercial use without the author written approval. For any questions contact me at elise.dupont@gmail.com http://elisedupont.fr/ Aside from the classic CO for the beginning of the project, Irecommend that you perform the other CO (underarm, neck, adding many sts at the end of a row ..) like this: Insert the right hand needle into the last st as if to K:
wrap and pull through just like regular knit stitch:
Place the newly created stitch back onto the left hand needle:
You created a new st. Work the same steps, inserting the right hand needle into the last st as many times as required.
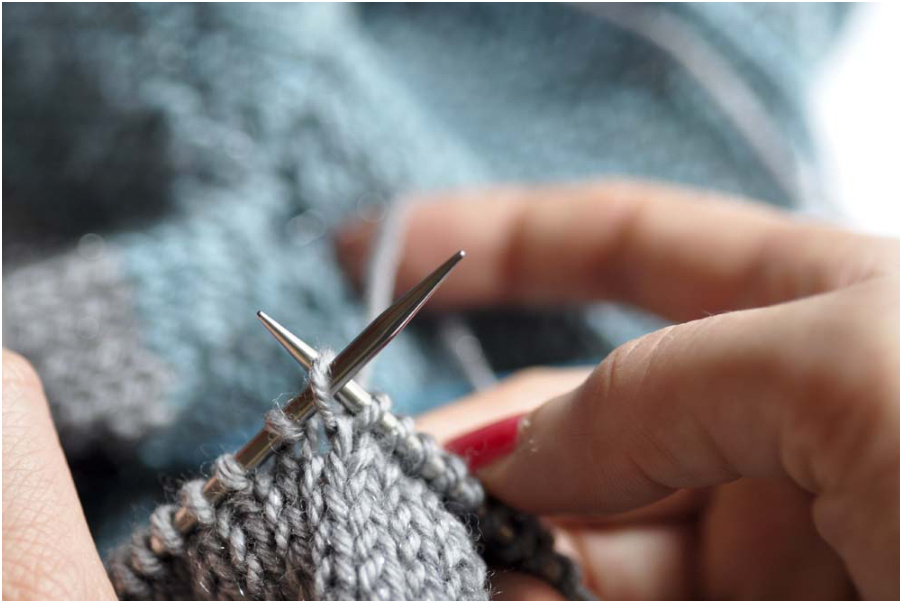
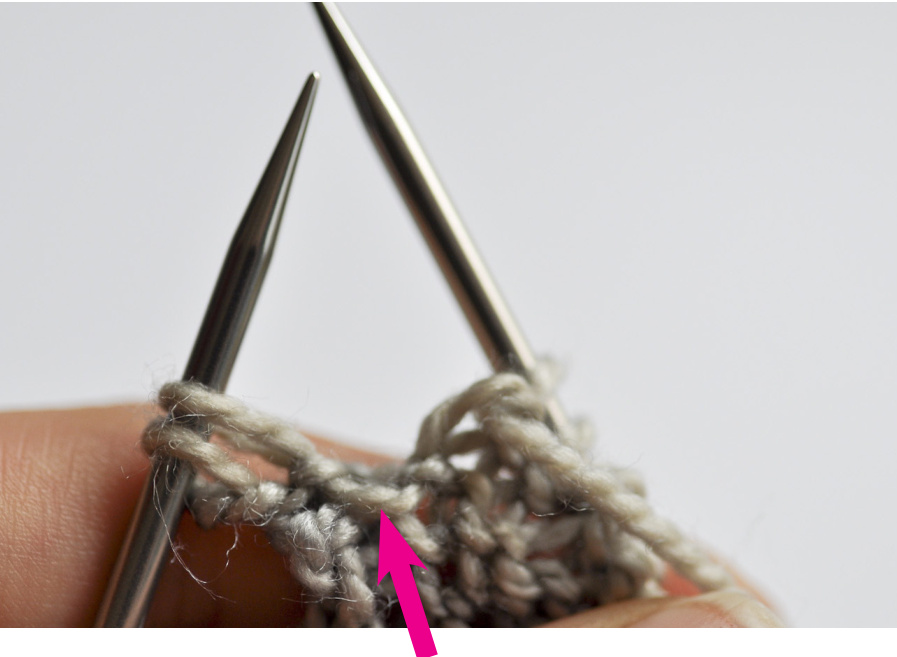
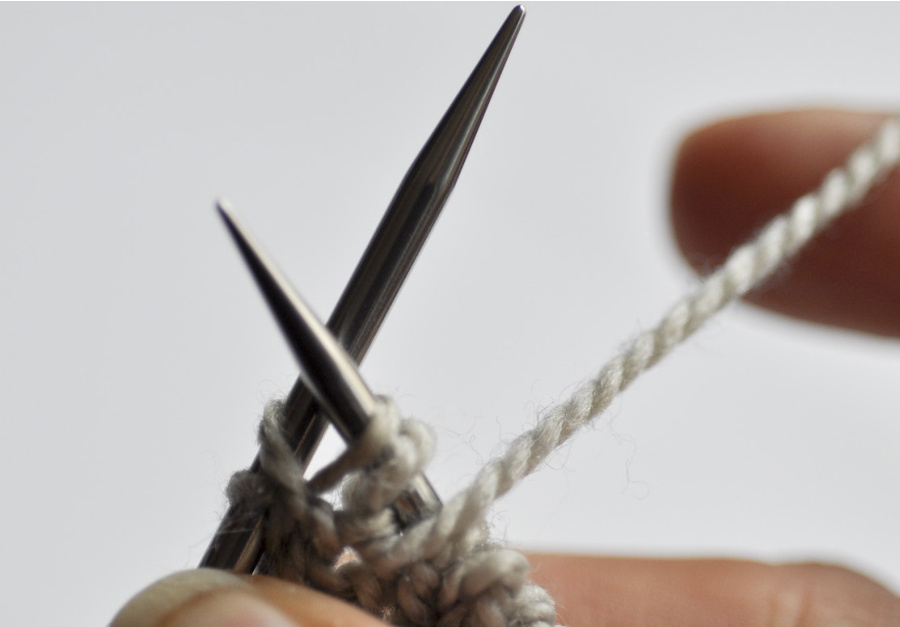
M1L
This increase is worked at the beginning of RS row.Notice the place under the strand of yarn which runs between the stitch just worked and the next stitch
The pattern, pictures and instructions can not be used for commercial use without the author written approval. For any questions contact me at elise.dupont@gmail.com http://elisedupont.fr/ Insert the left hand needle from front to back into the strand:
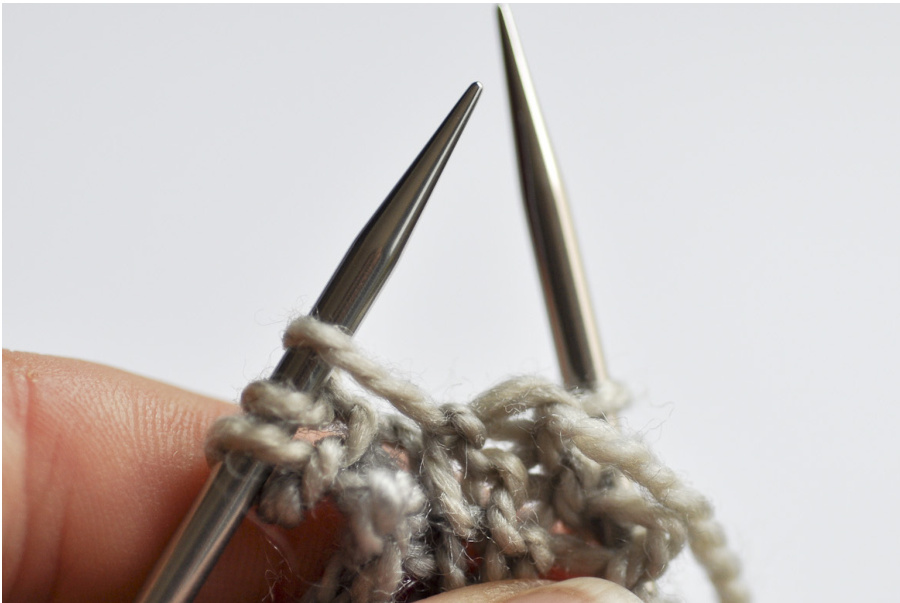
Knit this stitch through the back loop:
You made one left increase:
M1R
This increase isworked at the end of RS rows.Notice the place under the strand of yarn which runs between the stitch just worked and the next stitch on the left-hand needle:
Insert the left hand needle from back to front into the strand:
Knit this stitch through the front loop:
You made one right increase:
M1R on the purl side
This increase is worked at the beginning of WS rows. Notice the place under the strand of yarn which runs between the stitch just worked and the next stitch on the left-hand needle:
Insert the left hand needle from back to front into the strand:
The pattern, pictures and instructions can not be used for commercial use without the author written approval. For any questions contact me at elise.dupont@gmail.com http://elisedupont.fr/
Purl this stitch through the front loop:
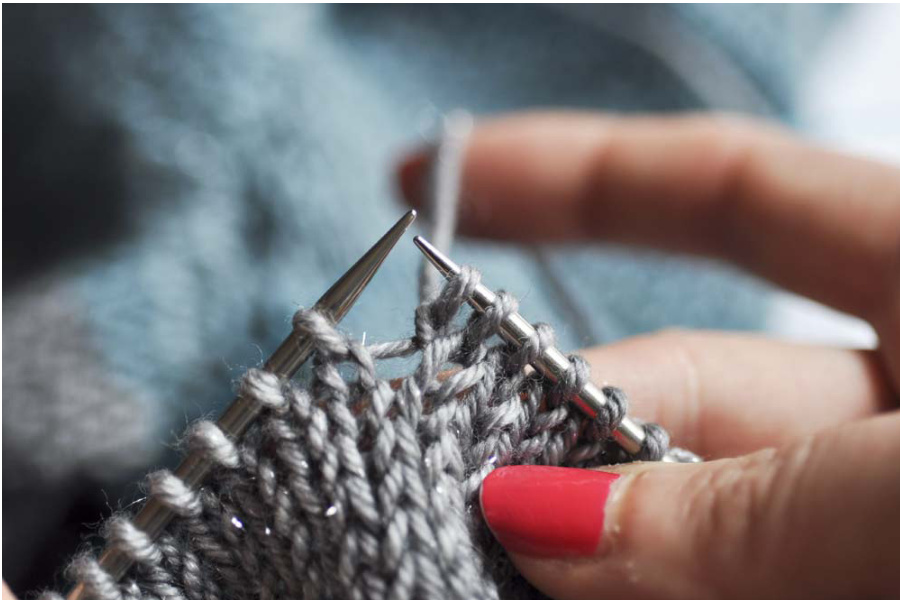
M1L on the purl side
This increase is worked at the end of WS rows. Notice the place under the strand of yarn which runs between the stitch just worked and the next stitch on the left-hand needle:
Insert the left hand needle from front to back into the strand:
Purl this stitch through the back loop:
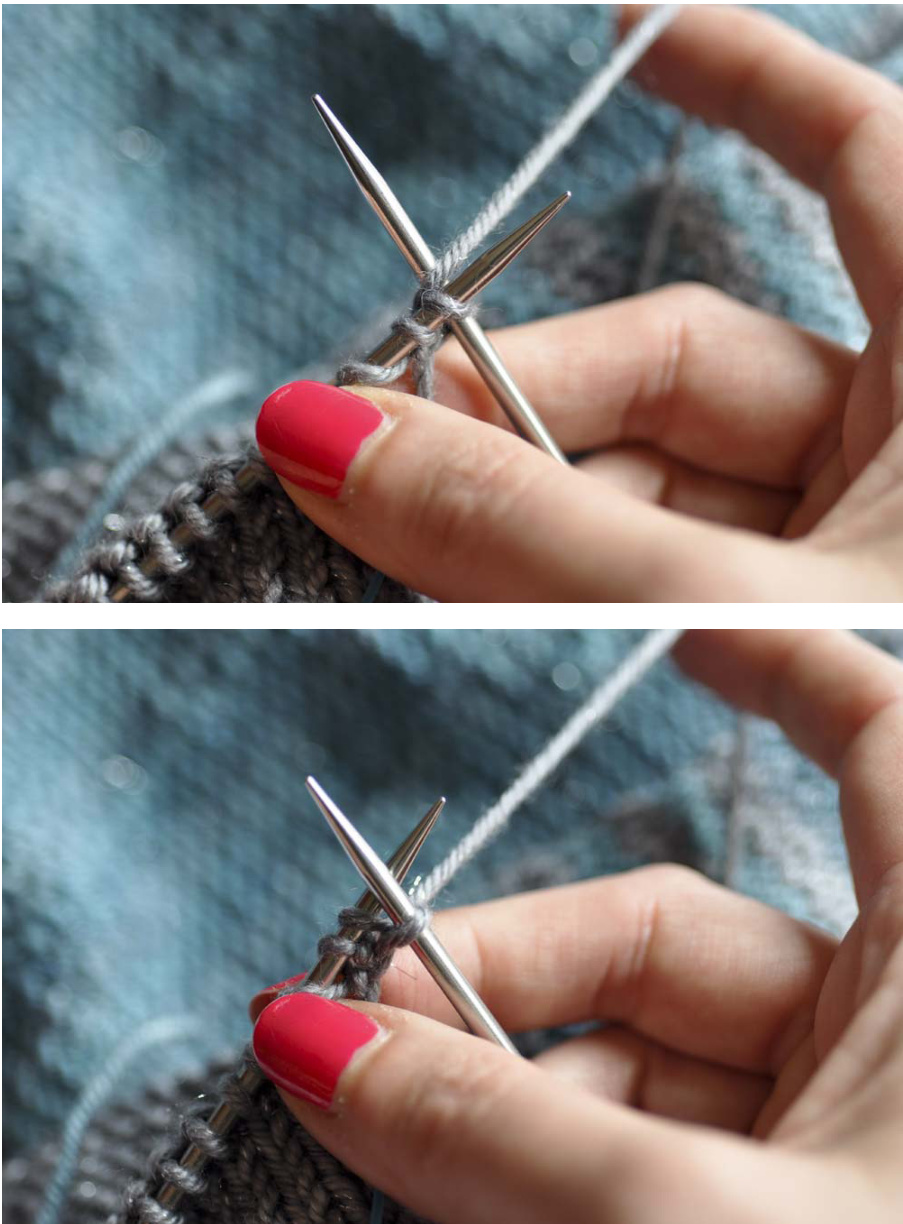
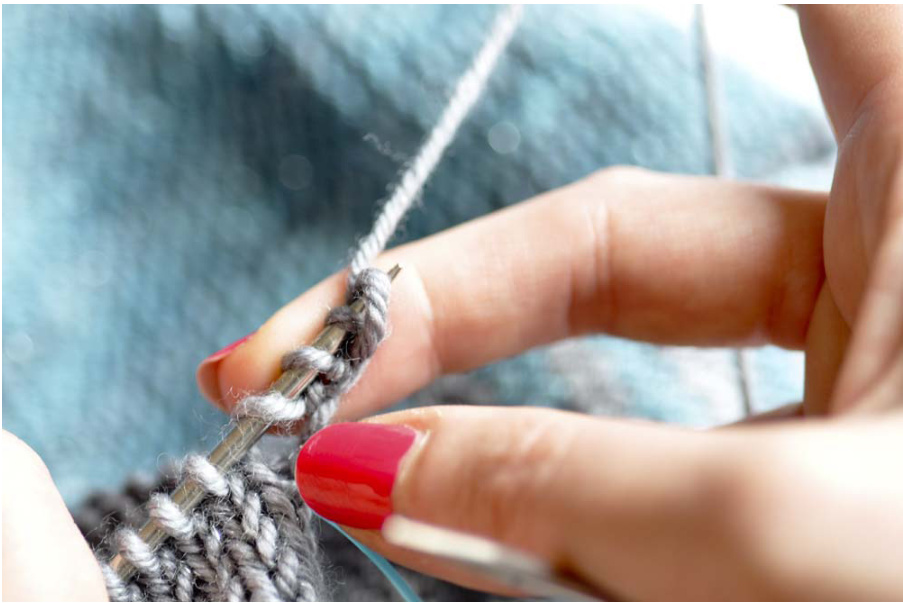
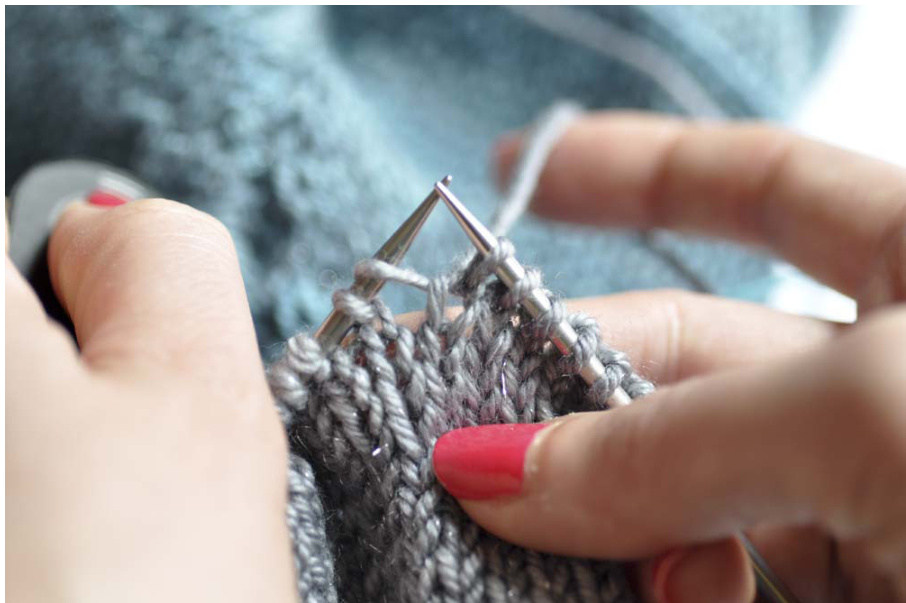
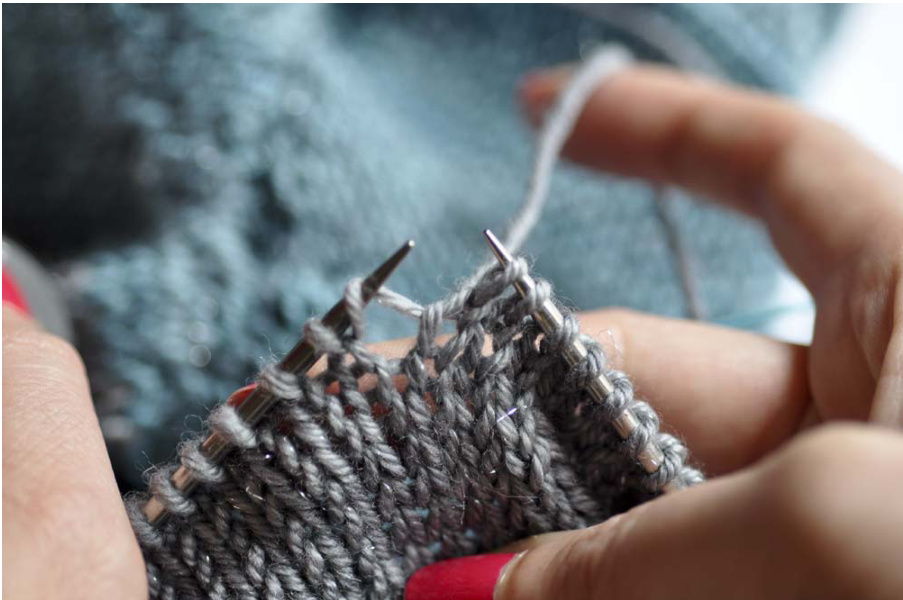
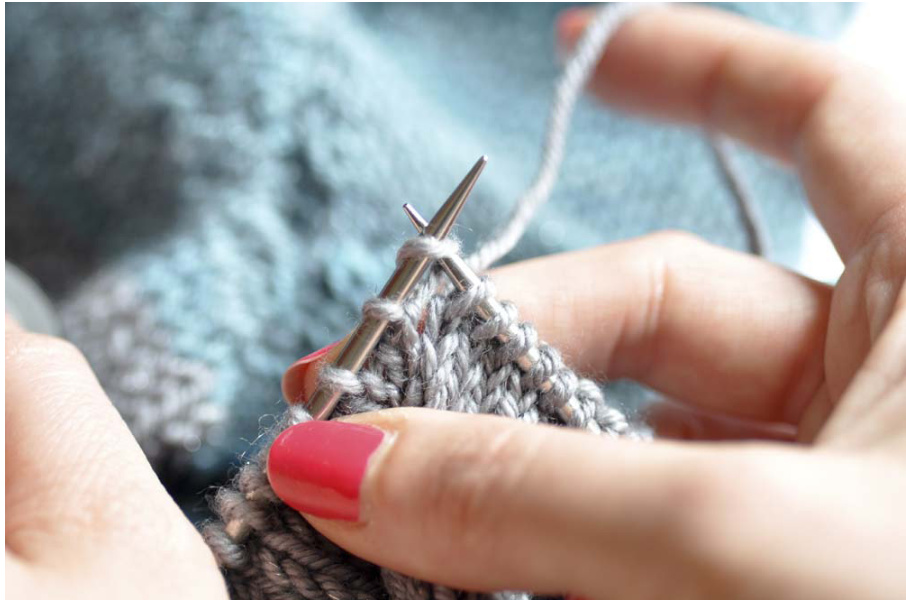
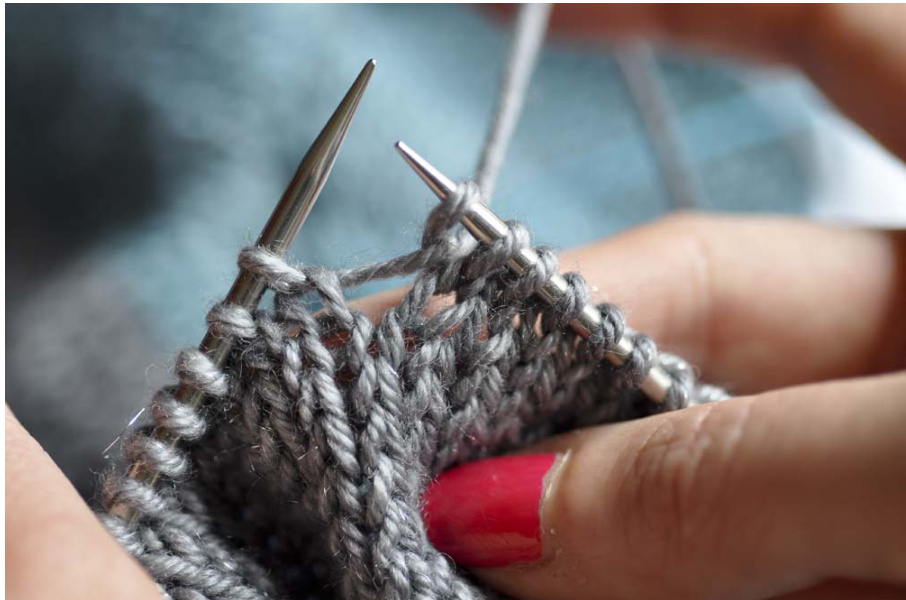
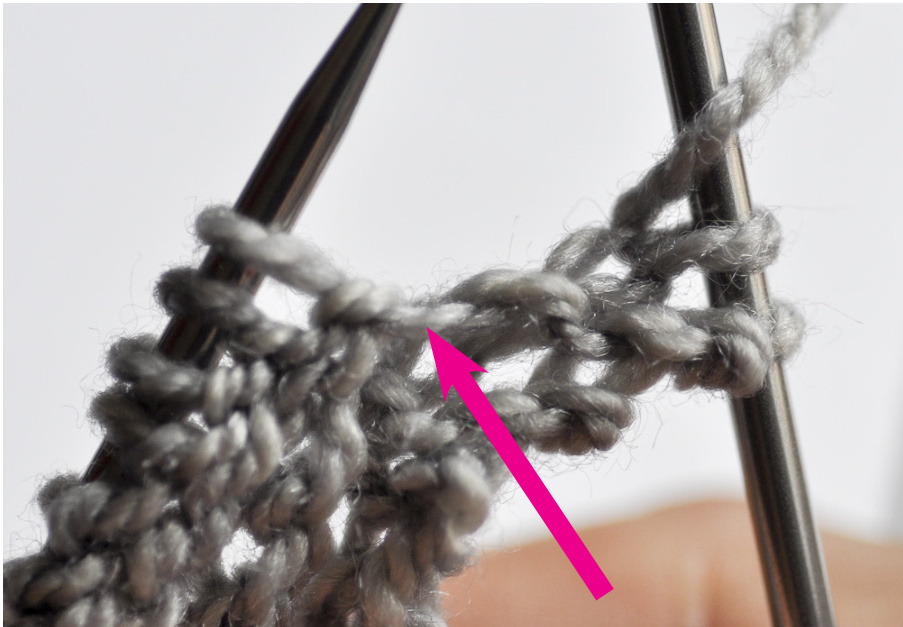
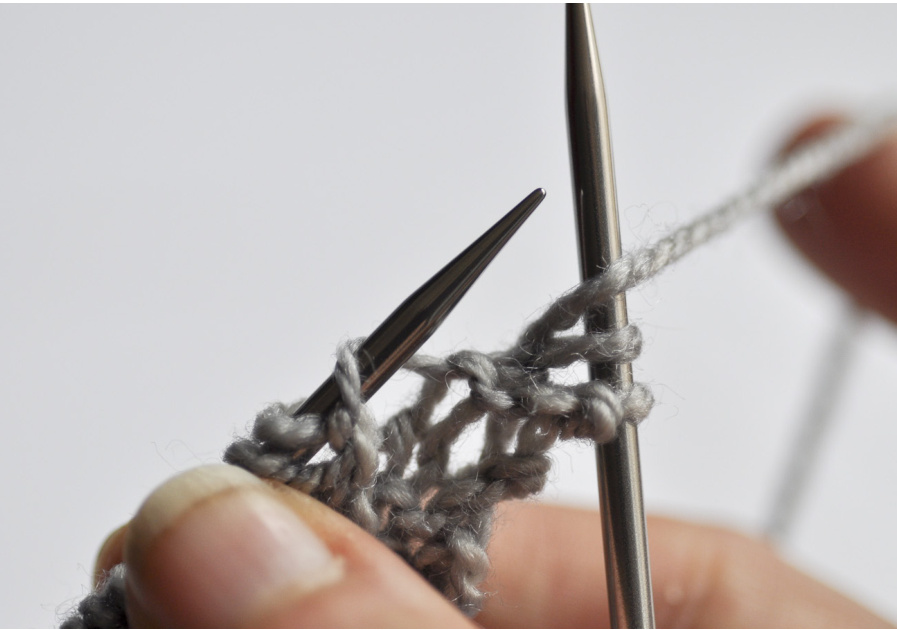
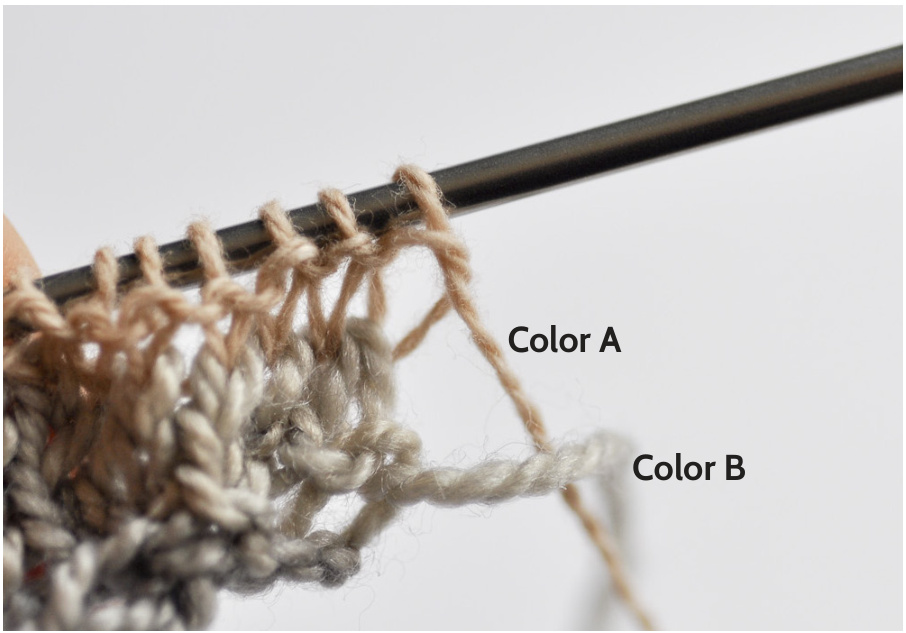
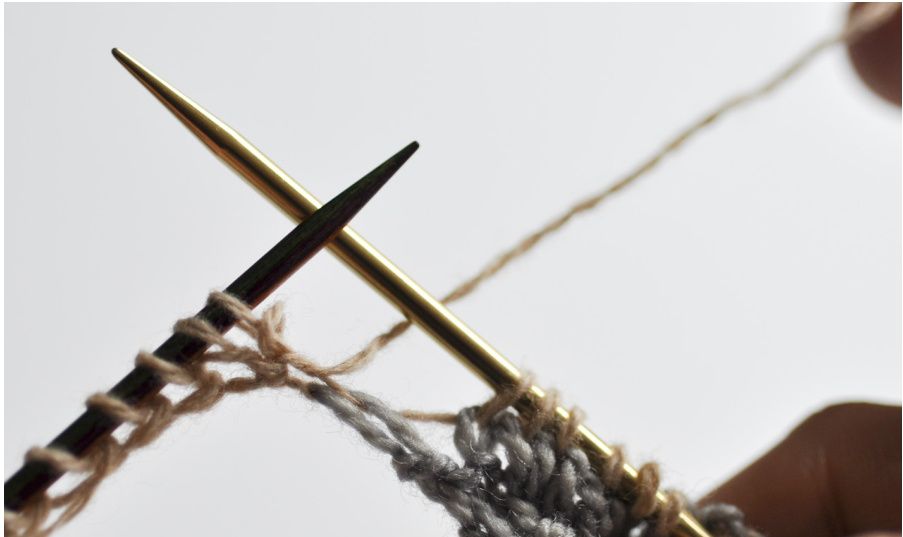
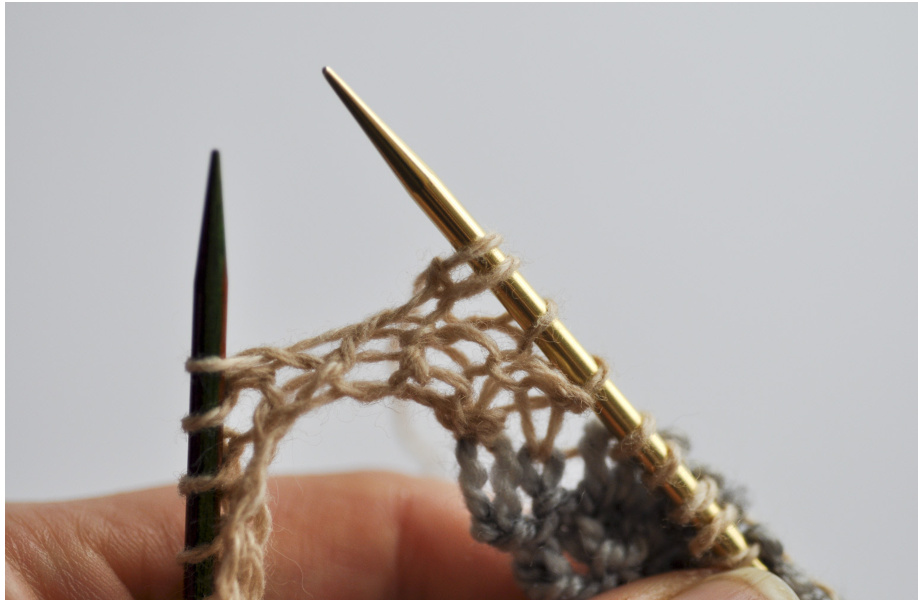
Twisted yarn at the edges
Those stepsmust e doneat thebeginingof every RS row,beforeyouwork thefirst st.Here theyato be worked is the beige one (color A). The grey yarn will be twisted (color B).
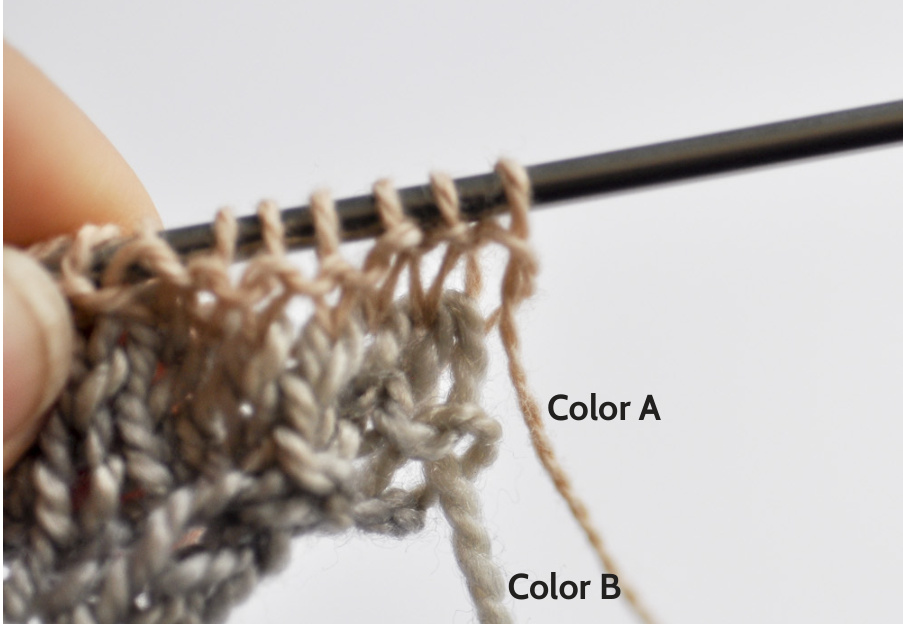
Bring the color B yarn over the color A. Hold gently color B yarn to the back and begin to knit with color A.
The pattern, pictures and instructions can not be used for commercial use without the author written approval. For any questions contact me at elise.dupont@gmail.com http://elisedupont.fr/
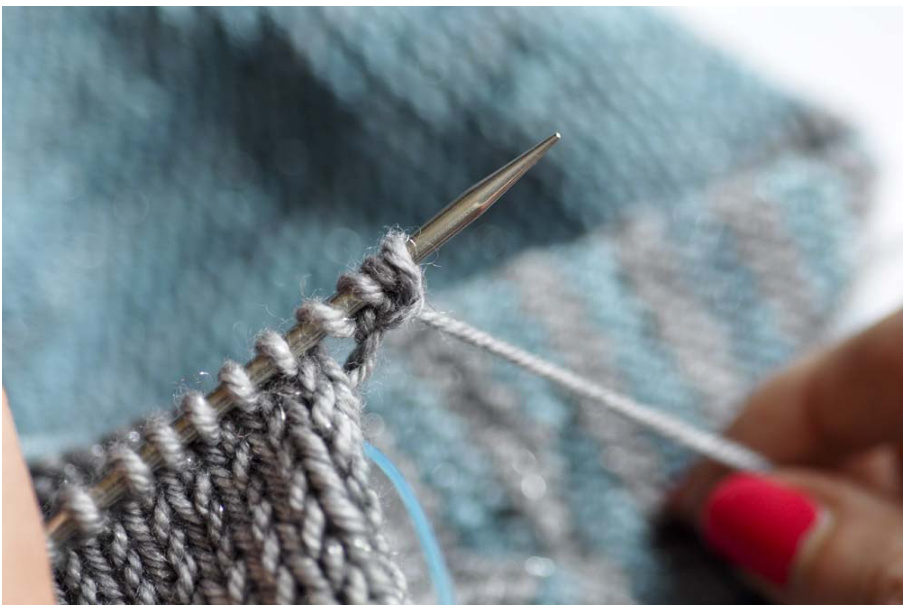
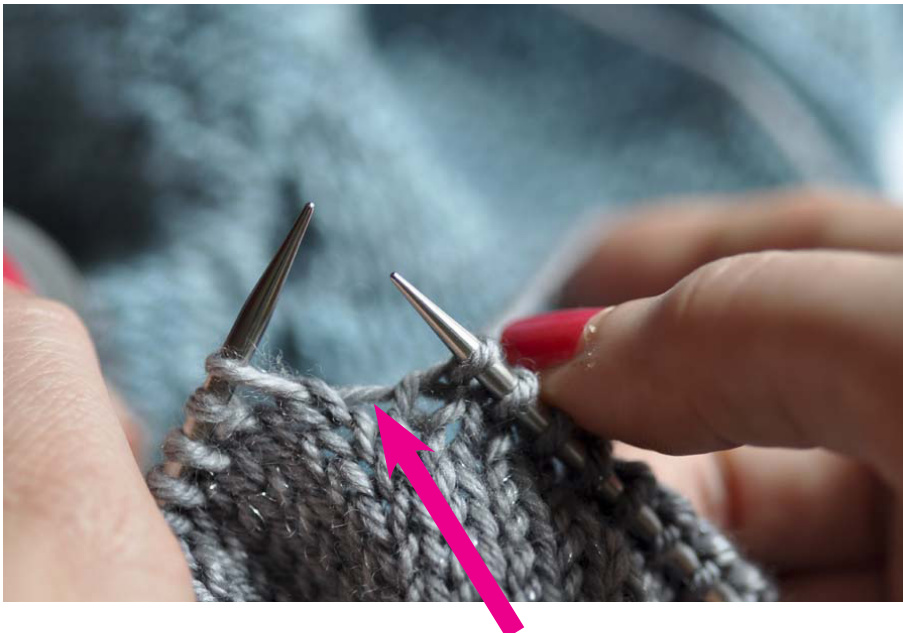
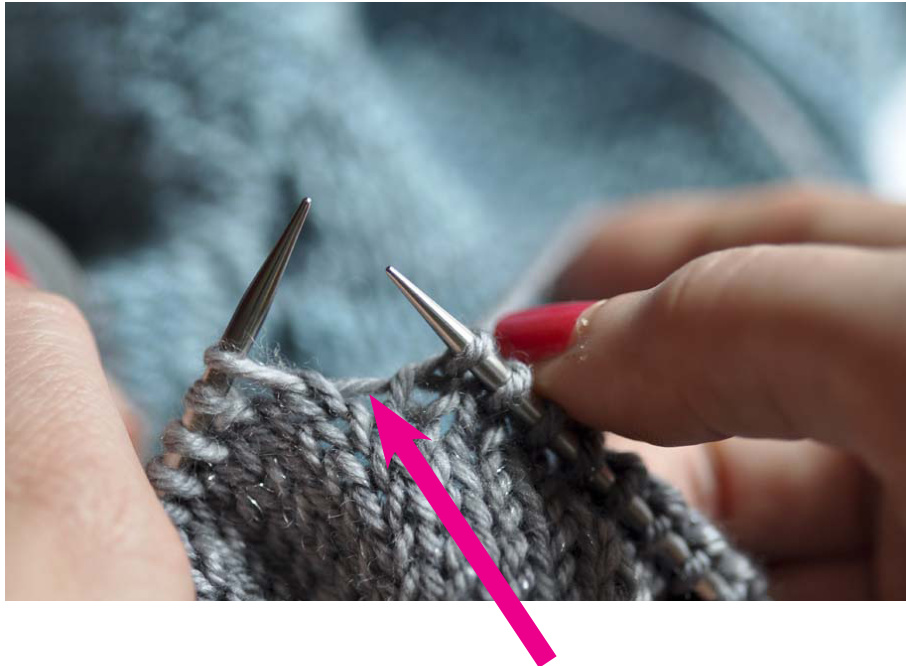
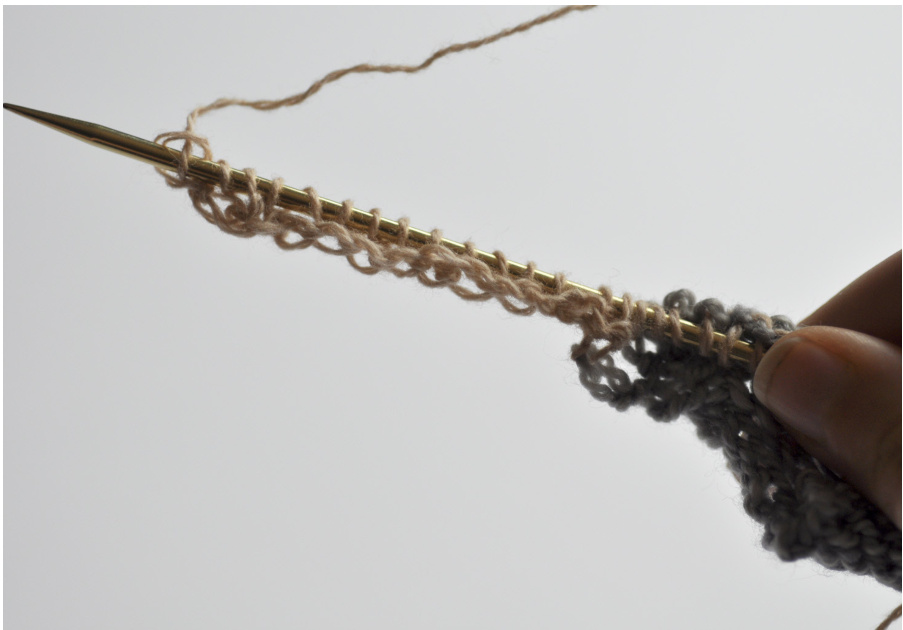
ace edging
The lace is worked on 13 sts, but at the end of every WS row, you make a decrease to include 1st from the shawl. this allows you to attach the edging to the shawl. With WS facing, CO 13 sts:
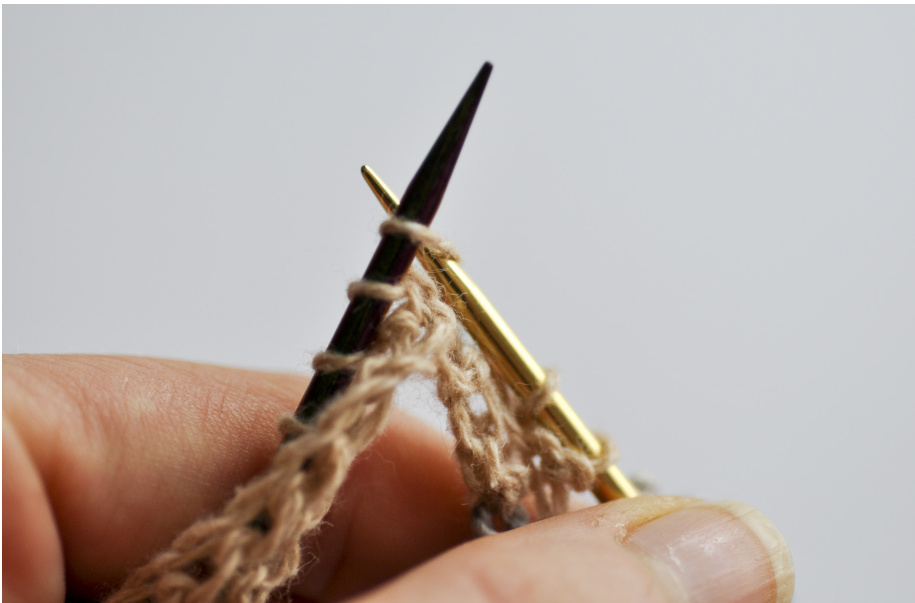
with DPN work the first row of the lace:

Turn work and leave the tail at the back:
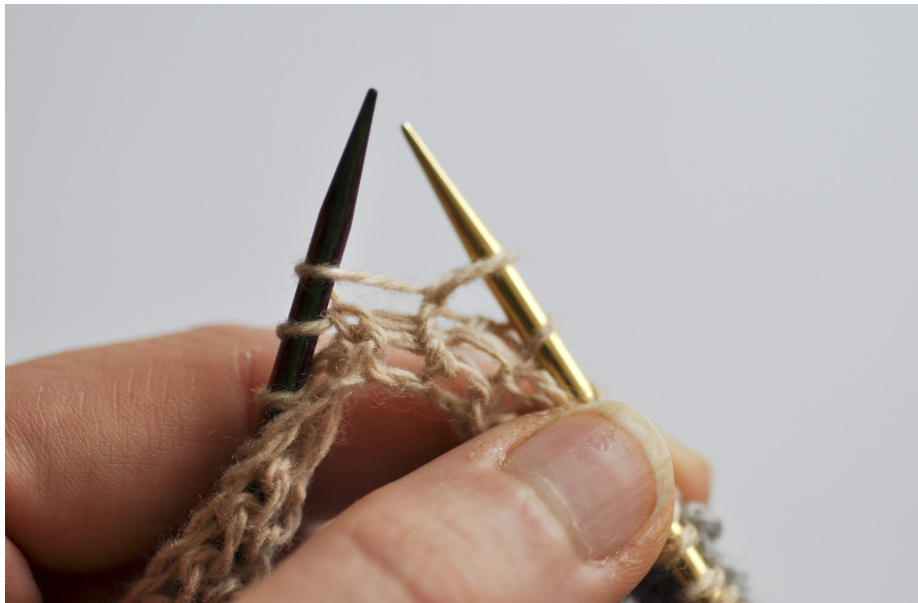
Work row 2 of the lace:
go on for the other lace rows. Step by step, you attach the border to the shawl.

Knit from the front loop:
KFB
Don't pull the stitch over the left needle yet:
ring the right needle around to the back and knit into the back loop of the stitcl

You now have two stitches on the right needle.
The pattern, pictures and instructions can not be used for commercial use without the author written approval. For any questions contact me at elise.dupont@gmail.com http://elisedupont.fr/


